
1. Garlic Butter Shrimp Pasta

Ingredients
For the Pasta:
- 8 oz (225g) linguine or fettuccine pasta
- 1 lb (450g) large shrimp, peeled and deveined
- 4 tablespoons unsalted butter
- 6 cloves garlic, minced
- 1/4 teaspoon red pepper flakes (optional)
- 1/4 cup dry white wine (or chicken broth)
- 2 tablespoons fresh lemon juice
- 1/4 cup fresh parsley, chopped
- 1/4 cup freshly grated Parmesan cheese
- Salt and freshly ground black pepper to taste
Instructions
- Cook the pasta: Bring a large pot of salted water to a boil. Add the pasta and cook according to package instructions until al dente. Reserve 1/2 cup of pasta water before draining.
- Prepare the shrimp: While the pasta is cooking, pat the shrimp dry with paper towels and season with salt and pepper.
- Make the garlic butter sauce: In a large skillet, melt 2 tablespoons of butter over medium-high heat. Add the shrimp and cook for 1-2 minutes per side until pink and just cooked through. Remove the shrimp from the pan and set aside.
- Build the flavor: In the same skillet, add the remaining 2 tablespoons of butter. Once melted, add the minced garlic and red pepper flakes (if using). Cook for about 30 seconds until fragrant, being careful not to burn the garlic.
- Deglaze the pan: Pour in the white wine (or broth) and lemon juice, scraping up any browned bits from the bottom of the pan. Let the sauce simmer for 2-3 minutes to reduce slightly.
- Combine everything: Add the cooked pasta to the skillet along with the shrimp. Toss everything together to coat with the sauce. If the pasta seems dry, add a splash of the reserved pasta water to loosen it up.
- Finish the dish: Remove from heat and stir in the chopped parsley and grated Parmesan cheese. Taste and adjust seasoning with salt and pepper as needed.
- Serve: Divide the pasta among plates and garnish with additional parsley and Parmesan if desired.
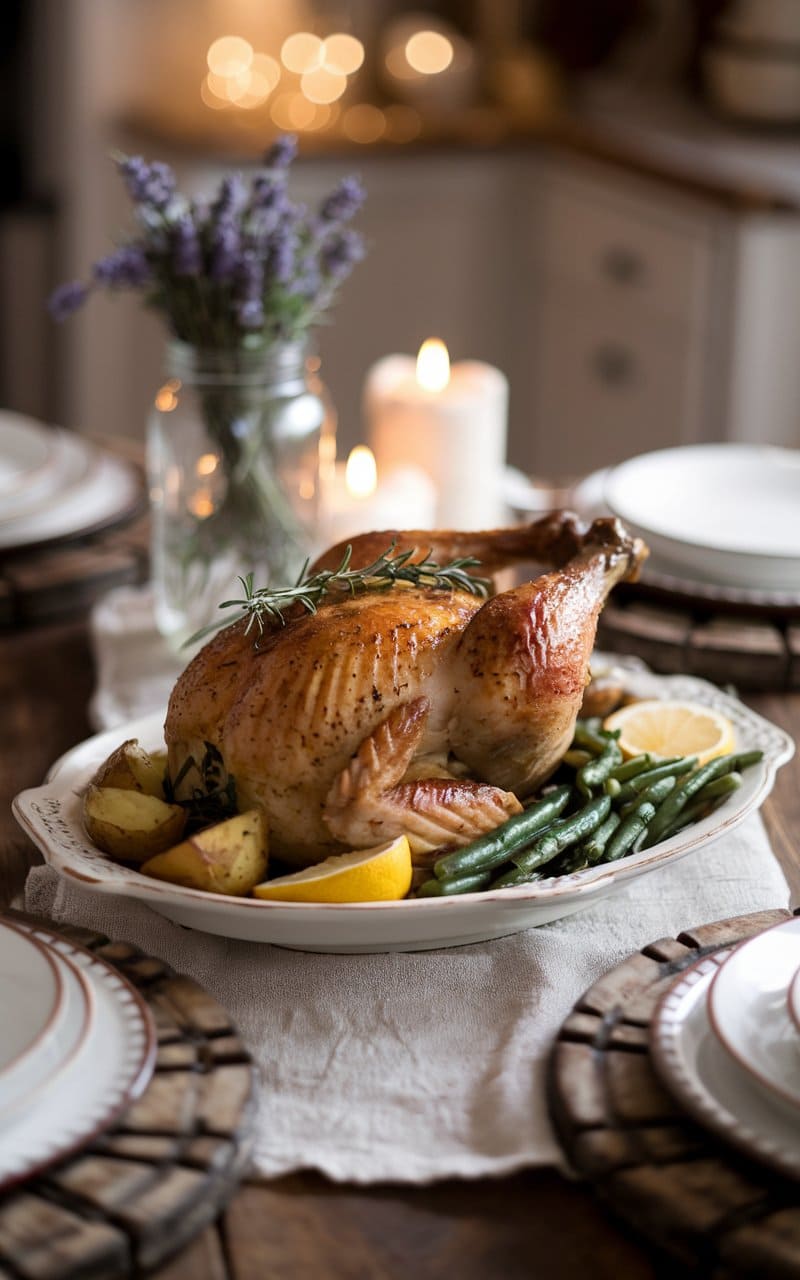
2. Lemon Herb Roast Chicken
Ingredients
For the Chicken:
- 1 whole chicken (4-5 pounds/1.8-2.3 kg)
- 2 tablespoons unsalted butter, softened
- 2 tablespoons olive oil
- 4 cloves garlic, minced
- 2 tablespoons fresh thyme leaves, chopped
- 2 tablespoons fresh rosemary, chopped
- 2 tablespoons fresh parsley, chopped
- 1 tablespoon lemon zest (from about 2 lemons)
- 2 tablespoons fresh lemon juice
- 1 teaspoon kosher salt
- 1/2 teaspoon freshly ground black pepper
For the Cavity:
- 2 lemons, quartered
- 1 head of garlic, halved crosswise
- 4 sprigs fresh thyme
- 4 sprigs fresh rosemary
For the Roasting Pan:
- 2 cups chicken broth
- 1 large onion, cut into wedges
- 2 carrots, roughly chopped
- 2 celery stalks, roughly chopped
Instructions
- Prepare the chicken: Remove the chicken from the refrigerator 30 minutes before cooking to bring it to room temperature. Preheat your oven to 425°F (220°C). Remove giblets from the chicken cavity and pat the chicken dry thoroughly with paper towels, inside and out.
- Make the herb butter mixture: In a small bowl, combine the softened butter, olive oil, minced garlic, chopped thyme, rosemary, parsley, lemon zest, lemon juice, salt, and pepper.
- Season the chicken: Gently loosen the skin from the breast and thighs without tearing it. Spread about two-thirds of the herb butter mixture under the skin, directly onto the meat. Rub the remaining mixture all over the outside of the chicken. Season the cavity with additional salt and pepper.
- Stuff the cavity: Place the quartered lemons, halved garlic head, and fresh herb sprigs inside the chicken cavity.
- Prepare the roasting pan: Place the onion, carrots, and celery in the bottom of a roasting pan. Pour the chicken broth over the vegetables. Place a roasting rack over the vegetables and set the chicken on the rack, breast side up. Tie the legs together with kitchen twine and tuck the wing tips under the body.
- Roast the chicken: Place the roasting pan in the preheated oven. Roast for 20 minutes at 425°F (220°C), then reduce the heat to 375°F (190°C) and continue roasting for about 1 hour to 1 hour and 15 minutes, or until a meat thermometer inserted into the thickest part of the thigh registers 165°F (74°C) and the juices run clear.
- Baste occasionally: Every 20-30 minutes, baste the chicken with the pan juices to keep it moist and help the skin brown evenly.
- Rest before carving: Once done, remove the chicken from the oven and tent loosely with aluminum foil. Let it rest for 15-20 minutes before carving. This allows the juices to redistribute throughout the meat.
- Make a quick gravy (optional): While the chicken is resting, strain the pan juices into a saucepan, pressing on the vegetables to extract maximum flavor. Skim off excess fat, bring to a simmer, and thicken with a slurry of 1 tablespoon cornstarch mixed with 2 tablespoons cold water if desired.
- Carve and serve: Carve the chicken and serve with the pan juices or gravy. Garnish with additional fresh herbs and lemon wedges if desired.
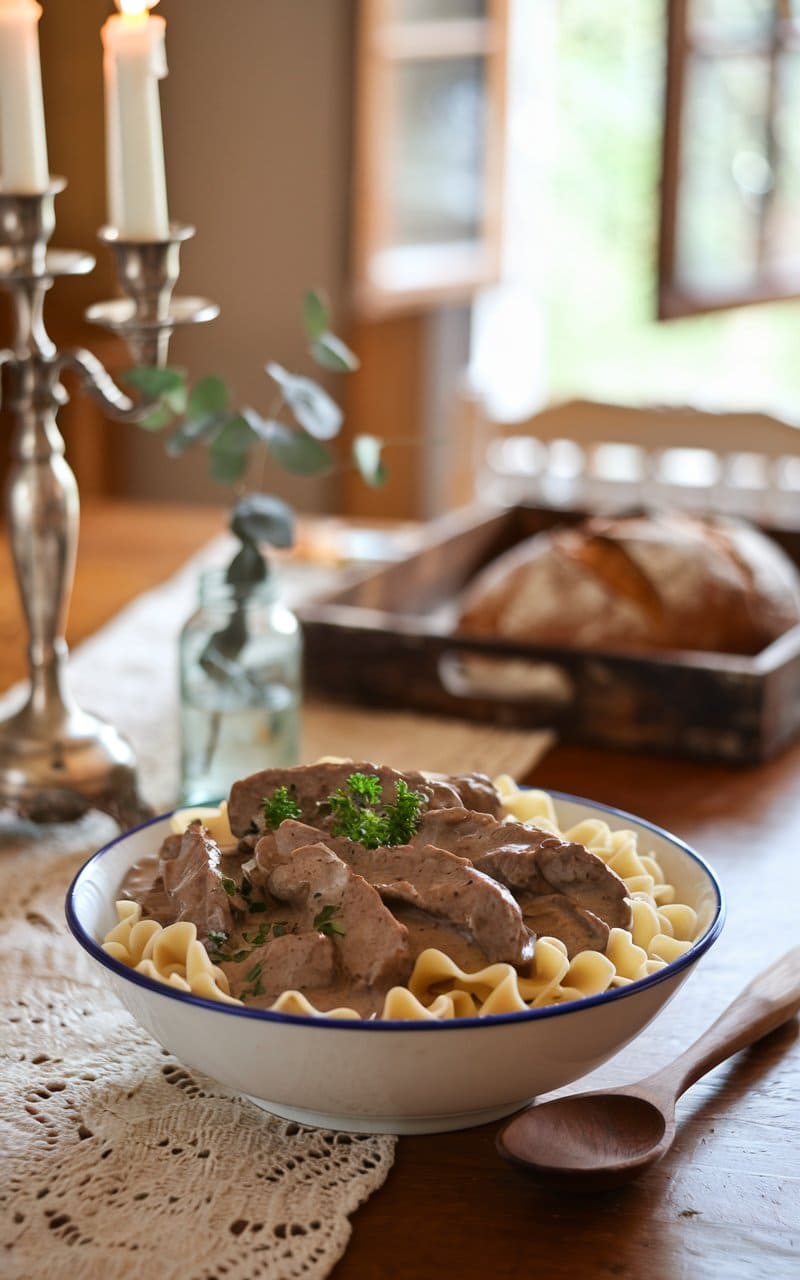
3. Beef Stroganoff
Ingredients
For the Beef:
- 1.5 pounds (680g) beef tenderloin or sirloin, cut into thin strips
- 2 tablespoons all-purpose flour
- 1 teaspoon salt
- 1/2 teaspoon freshly ground black pepper
- 2 tablespoons vegetable oil
- 2 tablespoons unsalted butter
For the Sauce:
- 1 large onion, thinly sliced
- 1 pound (450g) mushrooms (cremini or button), sliced
- 3 cloves garlic, minced
- 2 tablespoons tomato paste
- 1 tablespoon Dijon mustard
- 1/4 cup (60ml) brandy or cognac (optional)
- 1.5 cups (360ml) beef broth
- 1 tablespoon Worcestershire sauce
- 1 cup (240ml) sour cream, at room temperature
- 2 tablespoons fresh parsley, chopped
For Serving:
- 12 ounces (340g) egg noodles or pappardelle pasta
- 1 tablespoon butter
- Additional fresh parsley for garnish
Instructions
- Prepare the beef: Pat the beef strips dry with paper towels. In a bowl, mix flour, salt, and pepper. Toss the beef strips in this mixture to coat lightly.
- Cook the pasta: Bring a large pot of salted water to a boil. Cook the noodles according to package instructions until al dente. Drain, toss with 1 tablespoon butter, and set aside.
- Sear the beef: Heat a large heavy-bottomed skillet or Dutch oven over high heat. Add 1 tablespoon oil. Working in batches to avoid overcrowding, quickly sear the beef strips for about 1 minute per side until browned but still medium-rare inside. Transfer to a plate and set aside.
- Sauté the vegetables: In the same pan, add the remaining oil and butter. Add the onions and cook for 2-3 minutes until they begin to soften. Add the mushrooms and a pinch of salt. Cook for 5-7 minutes, stirring occasionally, until the mushrooms have released their moisture and are golden brown.
- Build the sauce: Add minced garlic and cook for 30 seconds until fragrant. Stir in tomato paste and cook for 1 minute. Add Dijon mustard and stir to combine.
- Deglaze the pan: If using, add the brandy or cognac and let it simmer for 1-2 minutes, scraping up any browned bits from the bottom of the pan.
- Finish the sauce: Pour in the beef broth and Worcestershire sauce. Bring to a simmer and cook for about 5 minutes until the sauce has reduced slightly and thickened. Lower the heat to medium-low.
- Temper the sour cream: In a separate bowl, take about 1/4 cup of the hot sauce and whisk it into the sour cream. This prevents the sour cream from curdling when added to the hot pan.
- Complete the dish: Whisk the tempered sour cream into the pan sauce. Return the beef and any accumulated juices to the pan. Gently stir to combine and heat through for about 1-2 minutes. Be careful not to boil the sauce after adding the sour cream. Season with additional salt and pepper to taste.
- Serve: Stir in the chopped parsley. Serve the beef stroganoff hot over the buttered noodles. Garnish with additional fresh parsley.
Tips:
- For the most tender results, slice the beef against the grain into strips about 1/4 inch thick.
- Partially freezing the beef for about 20 minutes makes it easier to slice thinly.
- Make sure the sour cream is at room temperature to prevent curdling.
- The dish comes together quickly once you start cooking, so have all ingredients prepped and ready.
4. Baked Ziti with Ricotta

Ingredients
For the Pasta:
- 1 pound (454g) ziti pasta (or penne)
- 1 tablespoon salt (for pasta water)
For the Sauce:
- 2 tablespoons olive oil
- 1 large yellow onion, finely diced
- 4 garlic cloves, minced
- 1 pound (454g) ground beef (85% lean)
- 1/2 pound (227g) Italian sausage, casings removed
- 1 teaspoon dried oregano
- 1 teaspoon dried basil
- 1/2 teaspoon red pepper flakes (optional)
- Salt and freshly ground black pepper to taste
- 2 tablespoons tomato paste
- 1 (28-ounce) can crushed tomatoes
- 1 (14-ounce) can tomato sauce
- 2 teaspoons granulated sugar (optional, to balance acidity)
For the Cheese Mixture:
- 15 ounces (425g) whole milk ricotta cheese
- 2 cups (226g) shredded mozzarella cheese, divided
- 1 cup (100g) grated Parmesan cheese, divided
- 2 large eggs
- 1/4 cup fresh parsley, chopped
- 1 teaspoon salt
- 1/2 teaspoon black pepper
- 1/2 teaspoon garlic powder
Instructions
- Preheat the oven: Set your oven to 375°F (190°C) and position the rack in the middle.
- Cook the pasta: Bring a large pot of water to a boil. Add 1 tablespoon of salt and the ziti pasta. Cook until al dente (about 2 minutes less than package instructions). Drain well but do not rinse. Toss with a drizzle of olive oil to prevent sticking.
- Make the meat sauce:
- Heat olive oil in a large skillet or Dutch oven over medium heat.
- Add the diced onion and cook until softened, about 4-5 minutes.
- Add the minced garlic and cook for another 30 seconds until fragrant.
- Add the ground beef and Italian sausage, breaking it up with a wooden spoon. Cook until browned, about 5-7 minutes.
- Drain excess fat if necessary.
- Add dried oregano, dried basil, red pepper flakes (if using), salt, and pepper. Stir to combine.
- Add tomato paste and cook for 1-2 minutes, until it darkens slightly.
- Pour in crushed tomatoes and tomato sauce. Stir to combine.
- Add sugar if using (this helps balance the acidity of the tomatoes).
- Bring to a simmer, then reduce heat to low and cook for 15-20 minutes, stirring occasionally.
- Prepare the cheese mixture:
- In a large bowl, combine the ricotta cheese, 1 cup of mozzarella, 1/2 cup of Parmesan, eggs, parsley, salt, pepper, and garlic powder.
- Mix well until thoroughly combined.
- Assemble the baked ziti:
- Spread about 1 cup of the meat sauce on the bottom of a 9×13 inch baking dish.
- Add half of the cooked pasta and spread evenly.
- Spoon half of the ricotta mixture over the pasta in dollops, then gently spread.
- Pour half of the remaining meat sauce over the ricotta layer.
- Repeat the layers: remaining pasta, remaining ricotta mixture, and remaining meat sauce.
- Top with the remaining 1 cup of mozzarella and 1/2 cup of Parmesan cheese.
- Bake: Cover the baking dish with aluminum foil and bake for 25 minutes. Remove the foil and bake for an additional 15-20 minutes until the cheese is melted, bubbly, and starting to brown in spots.
- Rest: Remove from the oven and let rest for 10-15 minutes before serving. This allows the pasta to absorb more sauce and makes it easier to serve.
- Serve: Garnish with additional chopped fresh parsley if desired.
Tips:
- For extra flavor, add 1/2 teaspoon of fennel seeds when cooking the meat.
- You can substitute ground turkey or plant-based meat for a lighter version.
- The dish can be assembled up to 24 hours ahead and refrigerated before baking.
- Leftovers will keep in the refrigerator for 3-4 days and can be reheated in the microwave or oven.
- For freezing, assemble the dish but don’t bake it. Cover tightly and freeze for up to 3 months. Thaw overnight in the refrigerator before baking.
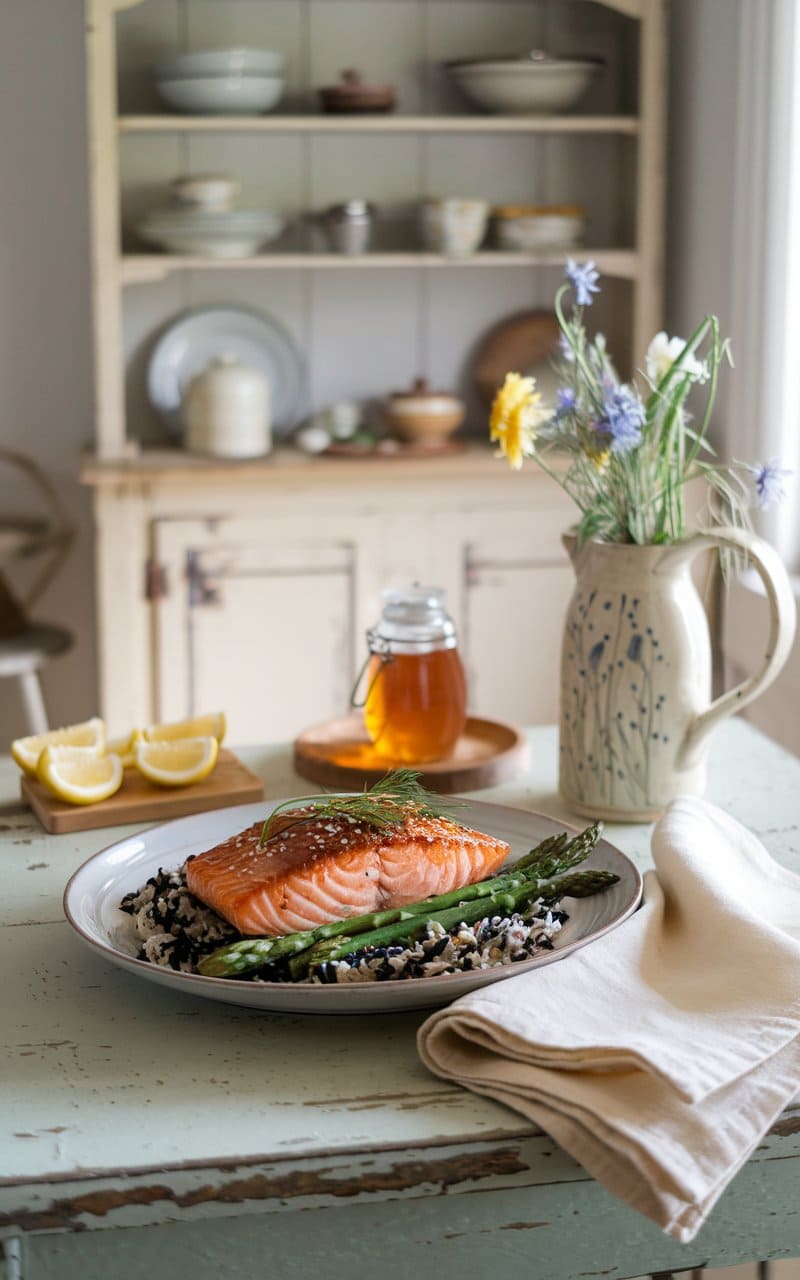
5. Honey Garlic Salmon
Ingredients
For the Salmon:
- 4 salmon fillets (6 oz/170g each), skin-on
- Salt and freshly ground black pepper
- 1 tablespoon olive oil
- 1 tablespoon unsalted butter
For the Honey Garlic Sauce:
- 4 cloves garlic, minced
- 1/3 cup honey
- 1/4 cup low-sodium soy sauce
- 2 tablespoons fresh lemon juice
- 1 tablespoon water
- 2 teaspoons sriracha sauce (optional, for heat)
- 1/2 teaspoon cornstarch (mixed with 1 tablespoon water)
For Garnish:
- 2 green onions, thinly sliced
- 1 tablespoon fresh parsley, chopped
- Lemon wedges
- Sesame seeds (optional)
Instructions
- Prepare the salmon: Pat the salmon fillets dry with paper towels. Season both sides generously with salt and pepper. Let the salmon sit at room temperature for 10-15 minutes before cooking.
- Make the honey garlic sauce: In a small bowl, whisk together the minced garlic, honey, soy sauce, lemon juice, water, and sriracha (if using). In a separate small bowl, mix the cornstarch with 1 tablespoon of water to create a slurry. Set both aside.
- Cook the salmon:
- Heat a large non-stick skillet or cast-iron pan over medium-high heat.
- Add the olive oil and butter. Once the butter is melted and the pan is hot, place the salmon fillets in the pan skin-side down.
- Cook for 4-5 minutes without moving them, until the skin is crispy and golden.
- Carefully flip the salmon and cook for another 2-3 minutes for medium doneness, or until the salmon reaches your desired level of doneness.
- Transfer the salmon to a plate and tent loosely with foil to keep warm.
- Make the sauce in the same pan:
- Reduce the heat to medium and remove excess oil if needed, leaving about 1 tablespoon in the pan.
- Add the honey garlic sauce mixture to the pan, scraping up any browned bits from the bottom.
- Let the sauce come to a simmer for about 1 minute.
- Give the cornstarch slurry a quick stir and pour it into the simmering sauce.
- Cook, stirring constantly, until the sauce thickens slightly, about 1-2 minutes.
- Finish the dish:
- Return the salmon to the pan, skin-side down.
- Spoon the sauce over the salmon and let it cook for another minute to reheat and coat the fillets.
- Remove from heat.
- Serve: Place the salmon fillets on plates, spoon additional sauce over the top, and garnish with sliced green onions, chopped parsley, sesame seeds (if using), and lemon wedges.
Serving Suggestions:
- Serve over steamed rice or cauliflower rice
- Pair with steamed or roasted vegetables like broccoli, bok choy, or asparagus
- For a complete meal, add a side of quinoa or rice pilaf
Tips:
- For the best results, use center-cut salmon fillets of even thickness.
- The internal temperature of properly cooked salmon should reach 125°F (52°C) for medium-rare or 145°F (63°C) for well-done.
- If you prefer a thicker sauce, you can increase the cornstarch to 1 teaspoon.
- This recipe works well with other fish like steelhead trout or arctic char.
- For meal prep, the sauce can be made up to 3 days ahead and stored in the refrigerator.
6. Chicken Alfredo

Ingredients
For the Chicken:
- 2 boneless, skinless chicken breasts (about 1 pound/450g)
- 1 teaspoon Italian seasoning
- 1/2 teaspoon garlic powder
- 1/2 teaspoon salt
- 1/4 teaspoon freshly ground black pepper
- 2 tablespoons olive oil
- 1 tablespoon unsalted butter
For the Pasta:
- 12 ounces (340g) fettuccine pasta
- 1 tablespoon salt (for pasta water)
For the Alfredo Sauce:
- 4 tablespoons unsalted butter
- 4 cloves garlic, minced
- 2 cups (480ml) heavy cream
- 1 cup (240ml) whole milk
- 2 cups (200g) freshly grated Parmesan cheese
- 1/4 teaspoon freshly grated nutmeg
- 1/2 teaspoon salt (or to taste)
- 1/4 teaspoon freshly ground black pepper
- 2 tablespoons fresh parsley, chopped (plus more for garnish)
Instructions
- Prepare the chicken:
- Pat the chicken breasts dry with paper towels.
- If the chicken breasts are very thick, slice them horizontally to create thinner cutlets or pound them to an even thickness (about 1/2 inch).
- In a small bowl, combine Italian seasoning, garlic powder, salt, and pepper.
- Season both sides of the chicken breasts with the spice mixture.
- Cook the chicken:
- Heat olive oil and 1 tablespoon butter in a large skillet over medium-high heat.
- Once hot, add the chicken breasts and cook for 5-6 minutes on each side until golden brown and the internal temperature reaches 165°F (74°C).
- Remove chicken from the skillet and transfer to a cutting board. Tent with foil and let rest for 5 minutes.
- After resting, slice the chicken against the grain into 1/2-inch strips.
- Cook the pasta:
- While the chicken is cooking, bring a large pot of water to a boil.
- Add 1 tablespoon of salt to the boiling water.
- Add the fettuccine and cook according to package instructions until al dente (usually 8-10 minutes).
- Reserve 1 cup of pasta water before draining.
- Drain the pasta but do not rinse.
- Make the Alfredo sauce:
- In the same skillet used for cooking the chicken (no need to clean it), melt 4 tablespoons of butter over medium heat.
- Add the minced garlic and sauté for 30 seconds until fragrant, being careful not to brown it.
- Slowly pour in the heavy cream and milk, whisking constantly.
- Bring the mixture to a gentle simmer (do not boil) and cook for about 3-4 minutes until it starts to thicken slightly.
- Reduce heat to low and gradually whisk in the grated Parmesan cheese until melted and smooth.
- Add the nutmeg, salt, and pepper. Stir to combine.
- If the sauce is too thick, add some of the reserved pasta water, a little at a time, until you reach your desired consistency.
- Combine the dish:
- Add the cooked fettuccine to the sauce and toss well to coat. Use tongs to ensure all pasta is evenly covered.
- Gently fold in the sliced chicken and chopped parsley.
- Allow the pasta to cook in the sauce for 1-2 minutes, letting the flavors meld.
- Serve:
- Transfer the Chicken Alfredo to a large serving dish or individual plates.
- Garnish with additional chopped parsley and freshly grated Parmesan cheese.
- Serve immediately while hot.
Tips:
- For the best flavor, use freshly grated Parmesan cheese rather than pre-grated. The pre-grated cheese often contains anti-caking agents that can make the sauce grainy.
- If you have leftovers, store in an airtight container in the refrigerator for up to 3 days. When reheating, add a splash of milk or cream to restore the creamy texture.
- For extra flavor, you can add 1/4 cup of white wine to the pan after sautéing the garlic, and let it reduce by half before adding the cream.
- If you prefer a lighter version, you can substitute half-and-half for some or all of the heavy cream, though the sauce won’t be quite as rich.
- For added depth, sprinkle some freshly grated lemon zest over the finished dish.
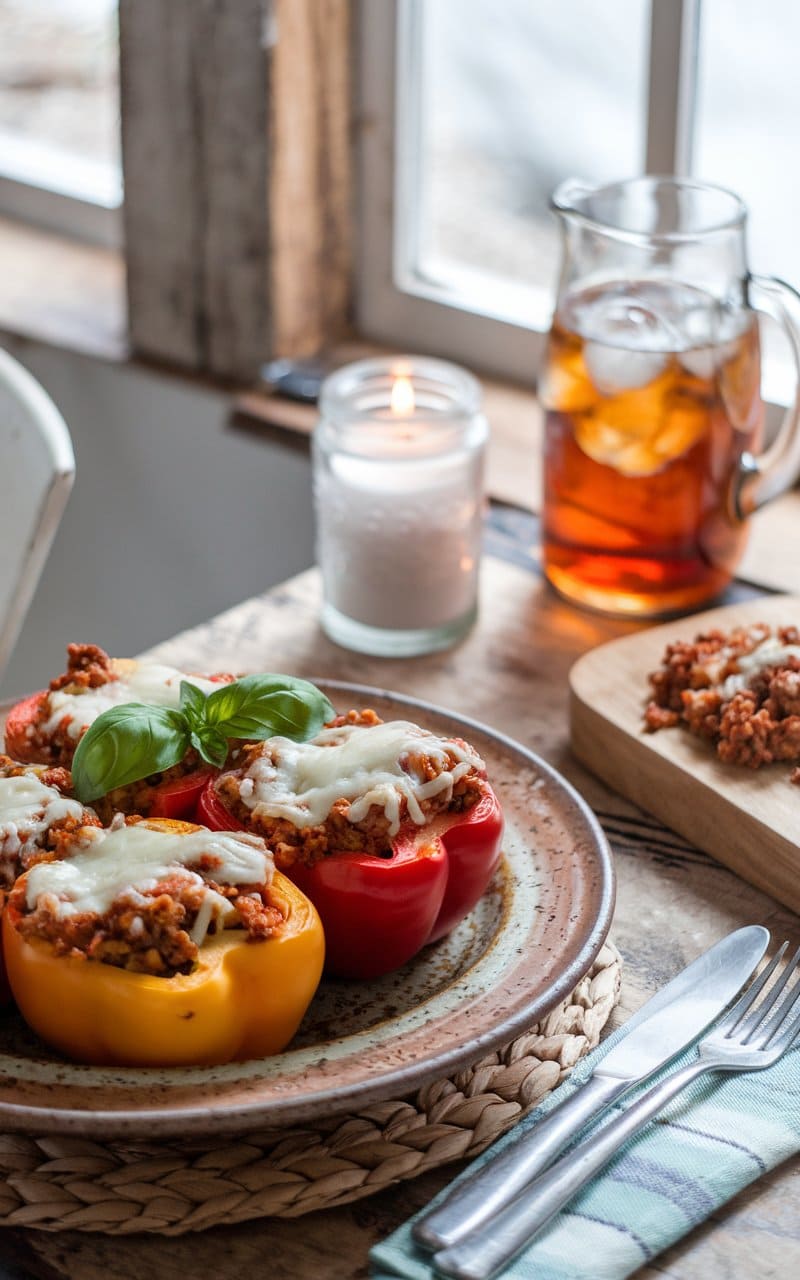
7. Stuffed Bell Peppers
Ingredients
For the Peppers:
- 6 large bell peppers (any color)
- 1 tablespoon olive oil
- 1 pound (450g) ground beef (85% lean)
- 1 medium onion, finely diced
- 3 cloves garlic, minced
- 1 cup long-grain white rice, uncooked
- 1 can (14.5 oz) diced tomatoes, undrained
- 1 can (8 oz) tomato sauce
- 1 tablespoon Worcestershire sauce
- 1 teaspoon Italian seasoning
- 1/2 teaspoon dried oregano
- 1/2 teaspoon paprika
- 1/4 teaspoon red pepper flakes (optional)
- 1 teaspoon salt
- 1/2 teaspoon freshly ground black pepper
- 2 cups beef broth (or chicken broth)
- 1 cup frozen corn kernels (optional)
- 1/2 cup frozen peas (optional)
- 1/4 cup fresh parsley, chopped
- 1 1/2 cups shredded cheese (cheddar, monterey jack, or Mexican blend), divided
For the Topping:
- 1/2 cup shredded cheese (from the 1 1/2 cups listed above)
- 2 tablespoons fresh parsley, chopped (for garnish)
Instructions
- Prepare the rice: Cook the rice according to package instructions, but use beef broth instead of water for extra flavor. Set aside when done.
- Prepare the bell peppers:
- Preheat the oven to 350°F (175°C).
- Cut the tops off the bell peppers and remove the seeds and membranes. Save the pepper tops and finely dice the flesh around the stems.
- If needed, slice a thin piece from the bottom of each pepper to help them stand upright.
- Place the hollowed peppers in a baking dish that fits them snugly.
- Lightly brush the outside of the peppers with olive oil.
- Par-cook the peppers:
- Bring a large pot of water to a boil.
- Carefully place the hollowed peppers in the boiling water for 3-5 minutes to soften slightly.
- Remove with tongs and place them upside down on paper towels to drain.
- Make the filling:
- Heat olive oil in a large skillet over medium heat.
- Add the diced onion and the diced pepper tops. Sauté for 4-5 minutes until softened.
- Add the minced garlic and cook for another 30 seconds until fragrant.
- Add the ground beef, breaking it up with a wooden spoon. Cook until browned, about 5-7 minutes.
- Drain excess fat if necessary.
- Add Italian seasoning, oregano, paprika, red pepper flakes (if using), salt, and pepper. Stir to combine.
- Add diced tomatoes with their juice, tomato sauce, and Worcestershire sauce. Stir and simmer for 5 minutes.
- Fold in the cooked rice, corn and peas (if using), chopped parsley, and 1 cup of shredded cheese. Mix well.
- Stuff the peppers:
- Fill each pepper with the meat and rice mixture, pressing down gently and mounding the tops.
- Pour 1/4 cup of water or beef broth into the bottom of the baking dish.
- Bake:
- Cover the dish with aluminum foil and bake for 35 minutes.
- Remove the foil, sprinkle the remaining 1/2 cup of cheese over the tops of the peppers.
- Return to the oven, uncovered, for an additional 10-15 minutes until the cheese is melted and bubbly and the peppers are tender.
- Rest and serve:
- Let the stuffed peppers rest for 5 minutes before serving.
- Garnish with additional chopped parsley.
- Serve hot, with the cooking liquid spooned over the peppers if desired.
Variations:
- Mexican Style: Add 1 tablespoon of taco seasoning to the meat mixture, use Mexican cheese blend, and top with sliced avocado and sour cream when serving.
- Mediterranean Style: Use ground lamb instead of beef, add 1/2 cup crumbled feta cheese, 1/4 cup chopped olives, and 1 teaspoon dried mint to the filling.
- Vegetarian Option: Replace the ground beef with 2 cups of cooked lentils or a 15 oz can of black beans (drained and rinsed) plus 1 cup of finely chopped mushrooms.
- Low-Carb Version: Replace the rice with 2 cups of cauliflower rice.
Make-Ahead Tips:
- The peppers can be stuffed and refrigerated up to 24 hours before baking.
- Fully cooked stuffed peppers freeze well for up to 3 months. Thaw overnight in the refrigerator before reheating.
- Reheat covered in a 350°F oven for about 20-30 minutes until heated through.
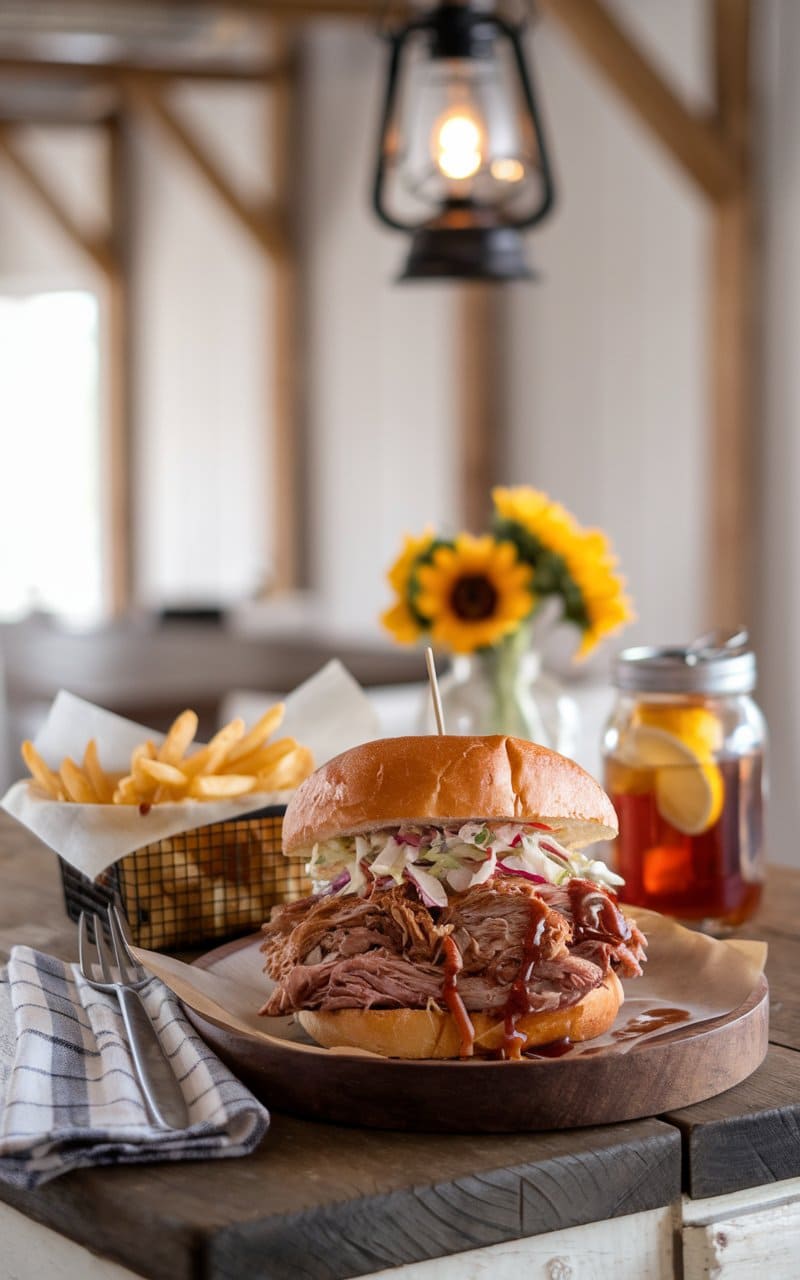
8. BBQ Pulled Pork Sandwiches
Ingredients
For the Pork:
- 4-5 pound (1.8-2.3 kg) pork shoulder/pork butt
- 3 tablespoons brown sugar
- 2 tablespoons paprika
- 1 tablespoon kosher salt
- 1 tablespoon garlic powder
- 1 tablespoon onion powder
- 2 teaspoons ground cumin
- 2 teaspoons dried oregano
- 1 teaspoon cayenne pepper (adjust to taste)
- 1 teaspoon black pepper
- 2 tablespoons vegetable oil
- 1 large onion, sliced
- 4 cloves garlic, minced
- 1 cup chicken broth
- 1/4 cup apple cider vinegar
- 2 tablespoons Worcestershire sauce
For the BBQ Sauce:
- 1 1/2 cups ketchup
- 1/2 cup apple cider vinegar
- 1/3 cup brown sugar
- 2 tablespoons molasses
- 2 tablespoons Worcestershire sauce
- 1 tablespoon Dijon mustard
- 1 tablespoon liquid smoke (optional)
- 2 teaspoons garlic powder
- 1 teaspoon onion powder
- 1 teaspoon smoked paprika
- 1/2 teaspoon cayenne pepper (adjust to taste)
- 1/2 teaspoon black pepper
- Salt to taste
For the Sandwiches:
- 8-10 hamburger buns or brioche rolls
- Butter for toasting buns
- 2 cups coleslaw (store-bought or homemade)
- Sliced pickles
- Sliced red onions (optional)
- Extra BBQ sauce for serving
Instructions
Preparing the Pork:
- Make the dry rub: Combine brown sugar, paprika, salt, garlic powder, onion powder, cumin, oregano, cayenne pepper, and black pepper in a small bowl.
- Prepare the pork: Trim excess fat from the pork shoulder if desired (leave some fat for flavor). Pat the pork dry with paper towels and rub all over with the dry rub mixture. Make sure to work the rub into all crevices and cover the entire surface.
- Rest the pork: If time allows, wrap the seasoned pork in plastic wrap and refrigerate for 8-24 hours for maximum flavor.
Cooking Method 1: Slow Cooker
- Sear the pork (optional but recommended): Heat vegetable oil in a large skillet over medium-high heat. Sear the pork on all sides until browned, about 2-3 minutes per side.
- Add to slow cooker: Place sliced onions on the bottom of the slow cooker. Add the seared pork, minced garlic, chicken broth, apple cider vinegar, and Worcestershire sauce.
- Cook: Cover and cook on low for 8-10 hours or on high for 5-6 hours, until the pork is very tender and easily shreds with a fork.
Cooking Method 2: Dutch Oven
- Preheat oven: Set to 300°F (150°C).
- Sear the pork: Heat vegetable oil in a large Dutch oven over medium-high heat. Sear the pork on all sides until browned, about 2-3 minutes per side.
- Add aromatics and liquid: Add sliced onions to the pot, followed by minced garlic, chicken broth, apple cider vinegar, and Worcestershire sauce.
- Cook: Cover and transfer to the preheated oven. Cook for 3-4 hours, until the pork is very tender and easily shreds with a fork.
Cooking Method 3: Pressure Cooker/Instant Pot
- Sear the pork: Using the Sauté function, heat vegetable oil and sear the pork on all sides until browned, about 2-3 minutes per side.
- Add ingredients: Add sliced onions, minced garlic, chicken broth, apple cider vinegar, and Worcestershire sauce.
- Cook: Secure the lid, set to High Pressure, and cook for 60-70 minutes (depending on the size of your pork shoulder). Allow for natural pressure release for 15 minutes, then carefully release any remaining pressure.
Making the BBQ Sauce:
- Combine ingredients: In a medium saucepan, combine ketchup, apple cider vinegar, brown sugar, molasses, Worcestershire sauce, Dijon mustard, liquid smoke (if using), garlic powder, onion powder, smoked paprika, cayenne pepper, and black pepper.
- Simmer: Bring to a simmer over medium heat, stirring occasionally. Reduce heat to low and simmer for 15-20 minutes until slightly thickened. Taste and adjust seasonings as needed.
Finishing the Pork:
- Shred the pork: Remove the pork from the cooking liquid and place on a cutting board. Shred the meat using two forks, discarding any large pieces of fat.
- Strain the cooking liquid: Optional but recommended: Skim off excess fat from the cooking liquid and strain out the solids. Return about 1 cup of the strained liquid to the pot.
- Combine with BBQ sauce: Return the shredded pork to the pot with the reserved cooking liquid. Add 1 cup of the homemade BBQ sauce and mix well to combine. Keep warm until ready to serve.
Assembling the Sandwiches:
- Toast the buns: Spread butter on the cut sides of each bun and toast in a skillet or under the broiler until golden brown.
- Build the sandwiches: Place a generous portion of pulled pork on the bottom half of each bun. Top with coleslaw, sliced pickles, and red onions if desired. Drizzle with additional BBQ sauce.
- Serve: Add the top bun and serve immediately while hot.
Tips:
- For an authentic barbecue flavor, add a tablespoon of liquid smoke to the cooking liquid.
- Save any leftover cooking liquid to moisten the pulled pork when reheating.
- The pork can be made up to 3 days ahead and refrigerated. Reheat with a little extra cooking liquid or BBQ sauce.
- For a spicier version, increase the cayenne pepper in the dry rub or add hot sauce to the BBQ sauce.
- Leftover pulled pork freezes well for up to 3 months. Thaw overnight in the refrigerator before reheating.
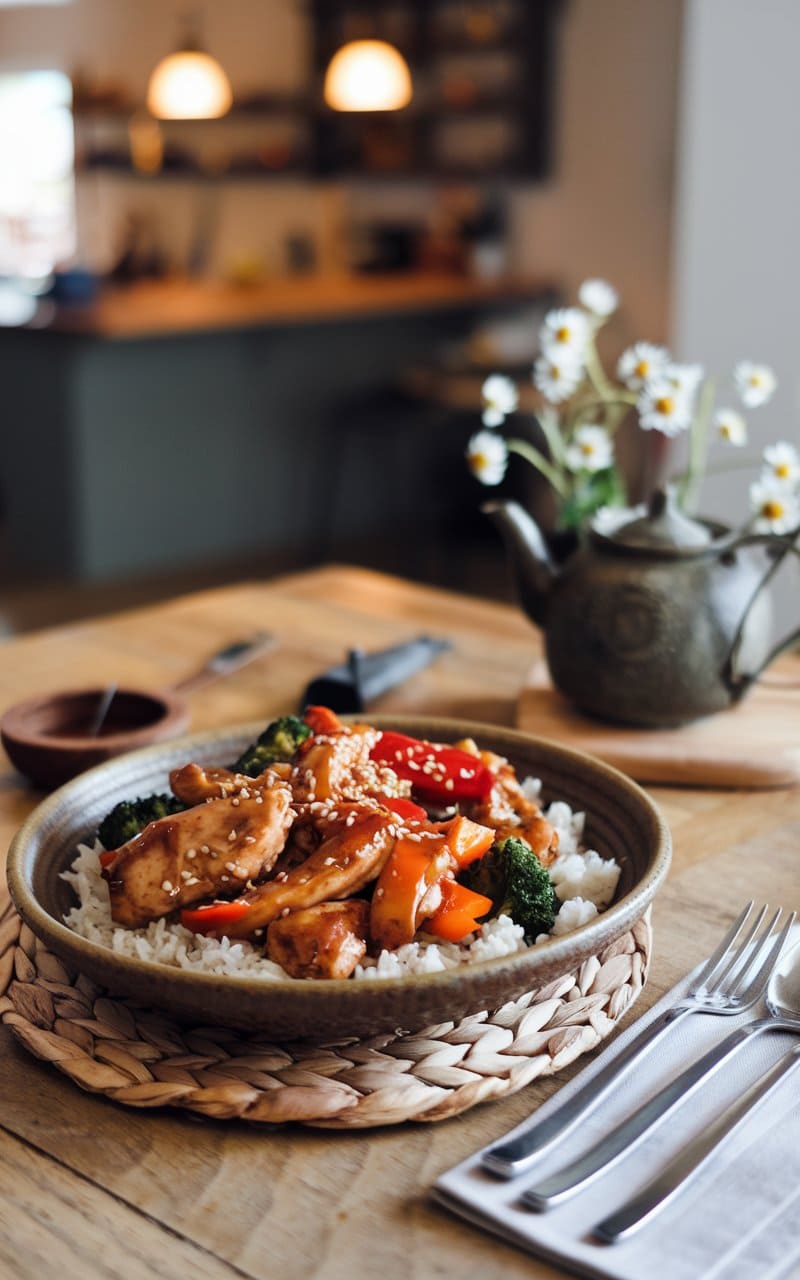
9. Teriyaki Chicken Stir-Fry
Ingredients
For the Teriyaki Sauce:
- 1/2 cup low-sodium soy sauce
- 1/4 cup mirin (Japanese sweet rice wine)
- 3 tablespoons brown sugar
- 2 tablespoons honey
- 2 cloves garlic, minced
- 1 tablespoon fresh ginger, grated
- 2 teaspoons sesame oil
- 2 tablespoons cornstarch
- 1/4 cup cold water (to mix with cornstarch)
For the Chicken:
- 1.5 pounds (680g) boneless, skinless chicken thighs (or breasts), cut into 1-inch pieces
- 2 tablespoons vegetable oil, divided
- Salt and pepper to taste
- 1 tablespoon cornstarch
For the Vegetables:
- 1 large onion, sliced
- 2 bell peppers (red and green), sliced into strips
- 2 medium carrots, julienned or thinly sliced diagonally
- 2 cups broccoli florets
- 8 oz (225g) mushrooms, sliced
- 3 cloves garlic, minced
- 1 tablespoon fresh ginger, minced
- 1 cup snap peas or snow peas, strings removed
For Garnish:
- 3 green onions, thinly sliced
- 1 tablespoon toasted sesame seeds
- Red pepper flakes (optional, for heat)
For Serving:
- Steamed white rice or brown rice
- Steamed cauliflower rice (low-carb option)
Instructions
Make the Teriyaki Sauce:
- In a medium saucepan, combine soy sauce, mirin, brown sugar, honey, minced garlic, grated ginger, and sesame oil.
- Bring the mixture to a simmer over medium heat, stirring occasionally until sugar dissolves, about 3 minutes.
- In a small bowl, whisk together cornstarch and cold water until smooth.
- Slowly pour the cornstarch mixture into the simmering sauce, whisking constantly.
- Continue to cook, stirring frequently, until the sauce thickens enough to coat the back of a spoon, about 3-4 minutes.
- Remove from heat and set aside.
Prepare the Chicken:
- Pat the chicken pieces dry with paper towels. Place in a bowl and season with salt and pepper.
- Sprinkle 1 tablespoon cornstarch over the chicken and toss to coat evenly. This will help create a nice crust and thicken the sauce.
- Heat 1 tablespoon of vegetable oil in a large wok or deep skillet over medium-high heat until shimmering.
- Add the chicken in a single layer (work in batches if needed to avoid overcrowding). Let it cook undisturbed for 2 minutes to develop a good sear.
- Stir-fry until the chicken is golden brown and cooked through, about 5-6 minutes total. Transfer to a clean plate and set aside.
Stir-Fry the Vegetables:
- In the same wok or skillet, add the remaining 1 tablespoon of oil.
- Add minced garlic and ginger, stir-frying for about 30 seconds until fragrant.
- Add onions and carrots first, stir-frying for about 2 minutes.
- Add bell peppers and mushrooms, cooking for another 2 minutes.
- Add broccoli florets and snap peas, stir-frying for 2-3 minutes until vegetables are crisp-tender. The vegetables should be colorful and still have a slight crunch.
Combine Everything:
- Return the cooked chicken to the wok with the vegetables.
- Pour about 2/3 of the teriyaki sauce over the chicken and vegetables, tossing to coat evenly. Start with less sauce and add more as needed – you can always serve extra sauce on the side.
- Cook for 1-2 minutes, stirring frequently, until everything is well-coated and heated through.
Serve:
- Transfer the teriyaki chicken stir-fry to a large serving platter or individual bowls over steamed rice.
- Garnish with sliced green onions and toasted sesame seeds.
- Sprinkle with red pepper flakes if you’d like to add some heat.
- Serve with remaining teriyaki sauce on the side.
Tips:
- Prep ahead: Stir-frying moves quickly, so have all ingredients prepped and ready before you start cooking.
- Hot wok: Make sure your wok or skillet is very hot before adding ingredients. This ensures quick cooking and prevents vegetables from becoming soggy.
- Order matters: Cook denser vegetables like carrots first, followed by quicker-cooking ones like bell peppers and broccoli.
- Customize: Feel free to substitute vegetables based on what you have available. Bok choy, zucchini, bean sprouts, and water chestnuts work well too.
- Make it spicy: Add sriracha or red pepper flakes to the sauce if you prefer a spicier dish.
- Make ahead: The teriyaki sauce can be made up to 1 week ahead and stored in the refrigerator in an airtight container.
- Leftovers: Store leftovers in an airtight container in the refrigerator for up to 3 days. Reheat in a skillet or microwave with a splash of water to refresh the sauce.
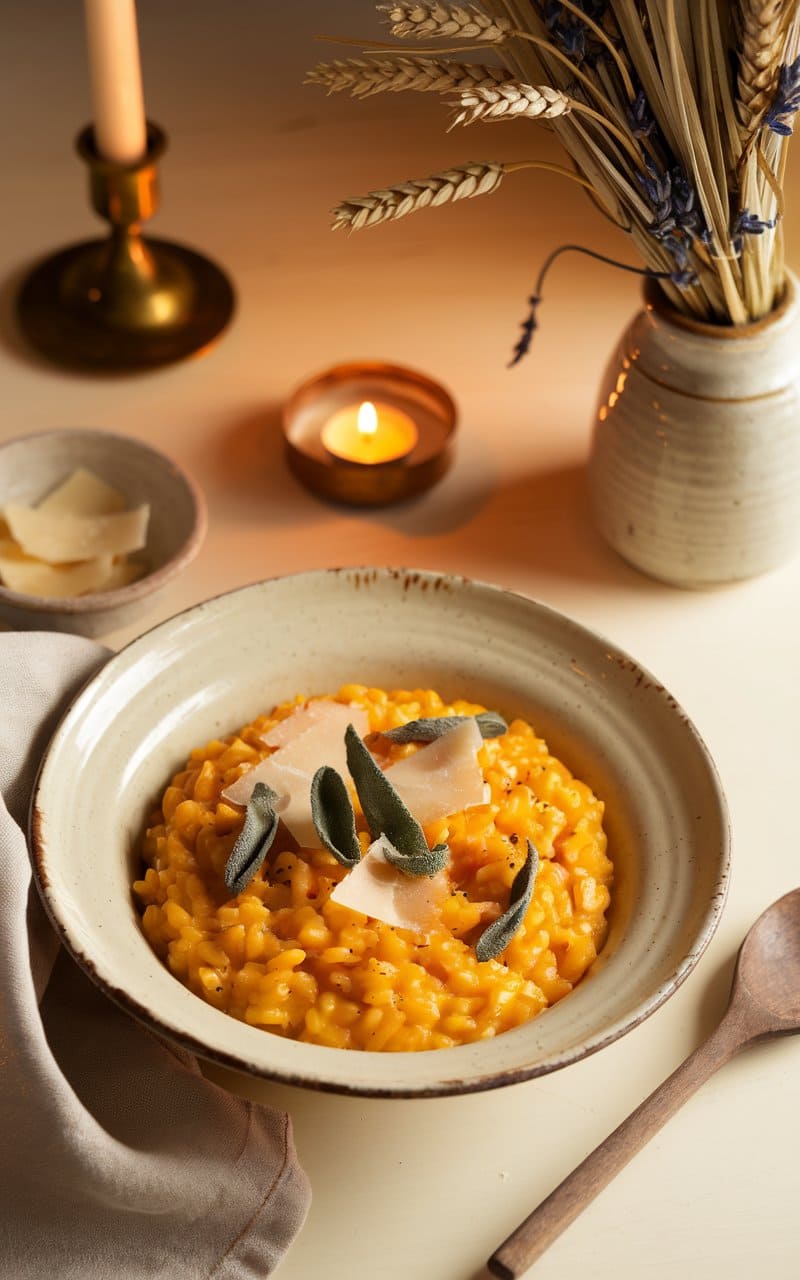
10. Butternut Squash Risotto
Ingredients
For the risotto:
- 2 cups Arborio rice
- 1 medium butternut squash (about 2-3 pounds), peeled, seeded, and cut into 1/2-inch cubes
- 1 medium onion, finely diced
- 3 cloves garlic, minced
- 6-7 cups vegetable or chicken broth, kept warm
- 1 cup dry white wine (such as Pinot Grigio or Sauvignon Blanc)
- 3 tablespoons olive oil
- 3 tablespoons butter, divided
- 1/2 cup freshly grated Parmesan cheese, plus more for serving
- 2 tablespoons fresh sage leaves, chopped (plus a few whole leaves for garnish)
- 1 teaspoon fresh thyme leaves
- Salt and freshly ground black pepper to taste
Optional garnishes:
- Toasted pine nuts or walnuts
- Fried sage leaves
- Extra Parmesan cheese
- Drizzle of high-quality olive oil
Instructions
- Roast the butternut squash:
- Preheat oven to 400°F (200°C).
- Toss half of the cubed butternut squash with 1 tablespoon olive oil, salt, and pepper.
- Spread on a baking sheet and roast for 25-30 minutes until tender and slightly caramelized. Set aside.
- Prepare the squash puree:
- In a medium saucepan, heat 1 tablespoon olive oil over medium heat.
- Add the remaining butternut squash cubes and cook for 5 minutes.
- Add 1/2 cup of the warm broth, cover, and simmer for 15 minutes until very soft.
- Transfer to a blender or food processor and puree until smooth. Set aside.
- Prepare the broth:
- In a saucepan, keep the remaining broth warm over low heat.
- Start the risotto:
- In a large, heavy-bottomed pot or Dutch oven, heat the remaining tablespoon of olive oil and 1 tablespoon of butter over medium heat.
- Add the diced onion and cook until translucent, about 5 minutes.
- Add the garlic and cook for another minute until fragrant.
- Add the Arborio rice and stir for 2-3 minutes until the grains are coated with oil and slightly translucent around the edges.
- Cook the risotto:
- Add the white wine and stir constantly until it’s almost completely absorbed.
- Begin adding the warm broth, one ladleful (about 1/2 cup) at a time, stirring frequently.
- Wait until each addition is almost completely absorbed before adding the next.
- Continue this process for about 18-20 minutes.
- Finish the risotto:
- When the rice is almost done (al dente with a slight bite), stir in the butternut squash puree.
- Add the roasted butternut squash cubes, chopped sage, and thyme.
- Stir in the remaining 2 tablespoons of butter and the Parmesan cheese.
- Season with salt and freshly ground black pepper to taste.
- If the risotto seems too thick, add a little more warm broth to achieve a creamy consistency.
- Serve:
- Remove from heat and let the risotto rest for 2 minutes.
- Serve immediately in warmed bowls.
- Garnish with additional Parmesan cheese, fried sage leaves, and toasted nuts if desired.
- Finish with a light drizzle of high-quality olive oil.
Tips
- Keep stirring! Regular stirring helps release the starch from the rice, creating the creamy texture risotto is known for.
- The risotto should be creamy but not runny, and the rice should be tender but still have a slight bite.
- For a more luxurious version, add a splash of heavy cream at the end.
- If you have leftover risotto, it can be formed into balls, breaded, and fried the next day to make arancini.
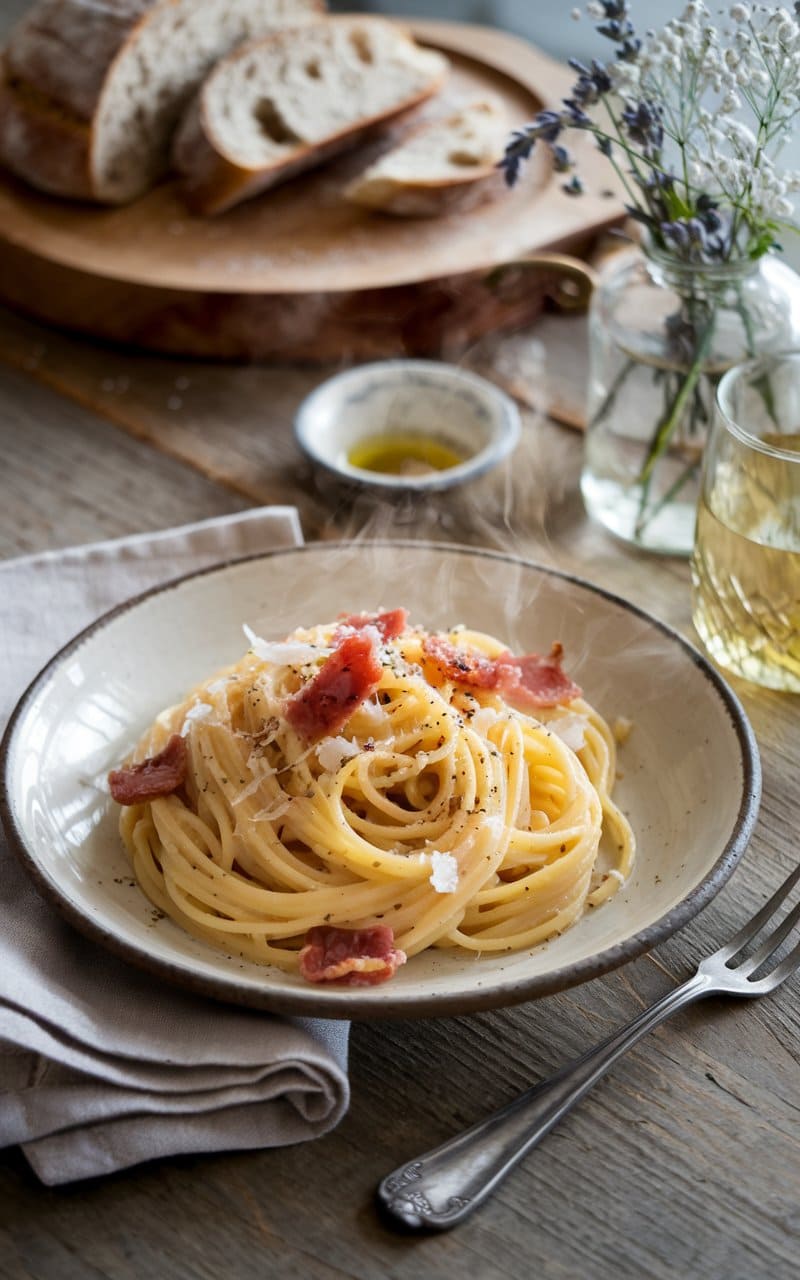
11. Spaghetti Carbonara
Ingredients
Main ingredients:
- 1 pound (450g) spaghetti
- 8 ounces (225g) guanciale or pancetta, diced into small cubes (bacon can substitute in a pinch)
- 4 large eggs, room temperature
- 1½ cups (150g) freshly grated Pecorino Romano cheese (Parmigiano-Reggiano can be used as a partial substitute)
- 4-5 cloves garlic, minced (optional, for a non-traditional but flavorful addition)
- 2 tablespoons extra virgin olive oil
- Freshly ground black pepper (abundant amount, approximately 2 teaspoons)
- Salt for pasta water
- ¼ cup pasta cooking water, reserved
For garnish:
- Additional grated Pecorino Romano
- Freshly ground black pepper
- Chopped fresh flat-leaf parsley (optional)
Instructions
- Prepare ingredients:
- Bring ingredients to room temperature, especially the eggs
- Grate the cheese finely
- Dice the guanciale/pancetta into small cubes about ¼ inch (6mm) thick
- Prepare the egg mixture:
- In a medium bowl, whisk together the eggs
- Add 1 cup of the grated Pecorino Romano cheese to the eggs
- Add plenty of freshly ground black pepper (about 1-1½ teaspoons)
- Whisk together until well combined
- Set aside at room temperature
- Cook the pasta:
- Bring a large pot of water to a rolling boil
- Add salt generously (about 1-1½ tablespoons)
- Add the spaghetti and cook until al dente according to package instructions, typically 8-10 minutes
- Important: Reserve at least ¼ cup of the pasta cooking water before draining
- Cook the guanciale/pancetta:
- While the pasta cooks, heat the olive oil in a large skillet over medium heat
- Add the diced guanciale/pancetta and cook until crispy but not burnt, about 5-7 minutes
- If using garlic, add it to the pan during the last minute of cooking and sauté until fragrant
- Turn off the heat but keep the rendered fat and meat in the pan
- Combine and create the sauce:
- When the pasta is al dente, drain it quickly, reserving some cooking water
- Immediately add the hot pasta to the skillet with the guanciale/pancetta
- Toss quickly to coat the pasta in the fat
- Remove the pan from heat completely and let cool for 30 seconds (to prevent scrambling the eggs)
- Pour the egg and cheese mixture over the pasta
- Toss vigorously and continuously with tongs to create a creamy sauce
- If the sauce is too thick, add a tablespoon of the reserved pasta water at a time until reaching the desired creamy consistency
- The residual heat will cook the eggs gently to create a silky, smooth sauce
- Finish the dish:
- Add the remaining grated cheese and another generous sprinkle of freshly ground black pepper
- Toss once more to incorporate
- Serve:
- Plate immediately while still hot
- Garnish with additional grated Pecorino Romano, black pepper, and chopped parsley if desired
Tips for Perfect Carbonara
- Temperature control: The key to a successful carbonara is managing heat to avoid scrambling the eggs
- Work quickly: Have everything ready before the pasta is done cooking
- Quality ingredients: Use the best guanciale/pancetta and cheese you can find
- No cream needed: Authentic carbonara doesn’t use cream; the creaminess comes from the emulsion of eggs, cheese, and starchy pasta water
- Room temperature eggs: This helps prevent them from seizing up when they hit the hot pasta
- Continuous tossing: Keep the pasta moving when adding the egg mixture to ensure even coating
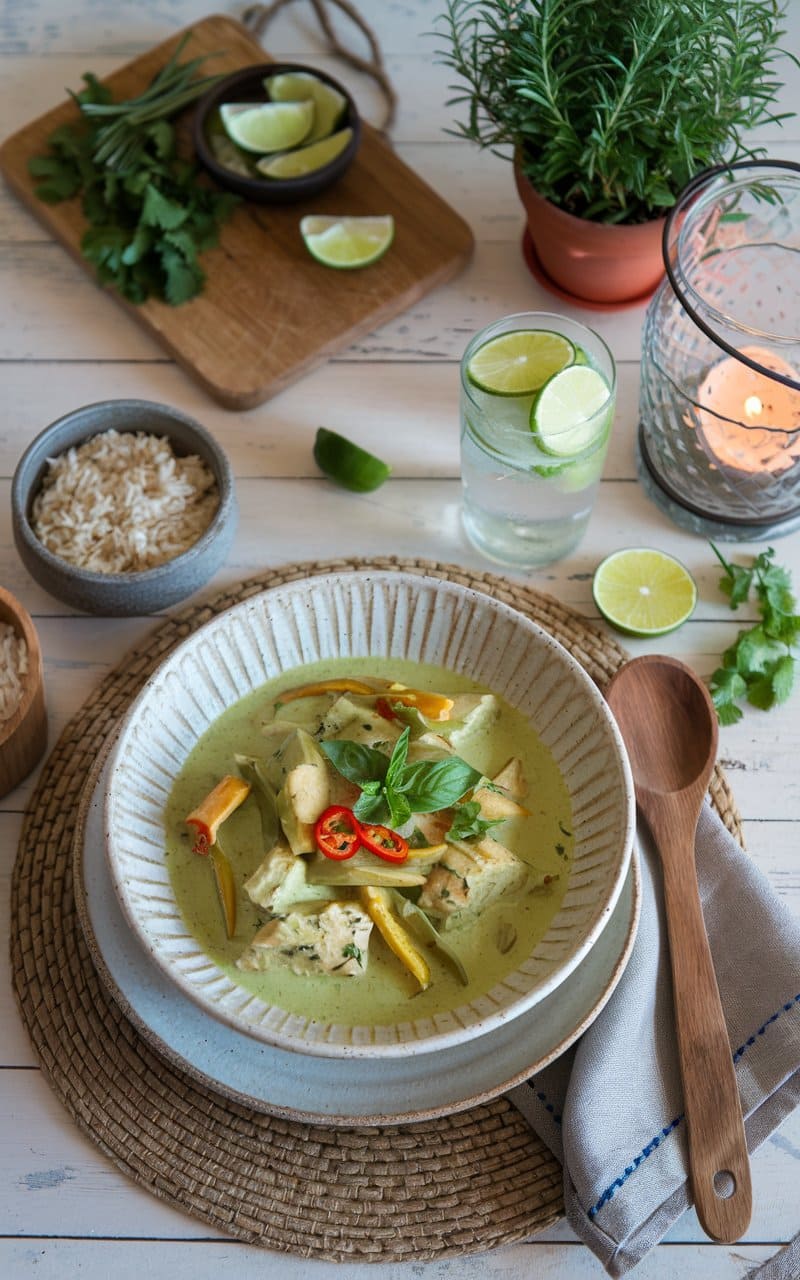
12. Thai Green Curry with Chicken
Ingredients
For the curry:
- 1.5 pounds (700g) boneless, skinless chicken thighs, cut into 1-inch pieces
- 2-3 tablespoons Thai green curry paste (store-bought or homemade)
- 2 cans (13.5 oz each) coconut milk, preferably full-fat
- 2 tablespoons vegetable or coconut oil
- 1 medium onion, sliced
- 3 cloves garlic, minced
- 1 tablespoon fresh ginger, grated
- 1 red bell pepper, sliced into thin strips
- 1 zucchini, halved lengthwise and sliced into half-moons
- 1 cup snow peas or sugar snap peas, ends trimmed
- 1 small eggplant, cut into 1-inch cubes (optional)
- 2-3 Thai bird’s eye chilies, sliced (adjust to taste for spice level)
- 2 tablespoons fish sauce
- 1 tablespoon palm sugar or brown sugar
- 2-3 kaffir lime leaves, torn (or 1 teaspoon lime zest if unavailable)
- 1 tablespoon lime juice, freshly squeezed
- 1/2 cup Thai basil leaves (or regular basil if unavailable)
- Salt to taste
For serving:
- Steamed jasmine rice
- Lime wedges
- Fresh cilantro leaves
- Sliced red chili for garnish (optional)
For homemade green curry paste (optional):
- 10-12 green Thai chilies, stems removed
- 2 stalks lemongrass, tough outer leaves removed, inner part sliced
- 3-4 cloves garlic
- 1 shallot, roughly chopped
- 1 thumb-sized piece galangal or ginger, peeled and chopped
- 2 tablespoons cilantro roots or stems
- 1 teaspoon ground coriander
- 1/2 teaspoon ground cumin
- 1/2 teaspoon white pepper
- 1 teaspoon shrimp paste (or miso paste for vegetarian option)
- Zest of 1 kaffir lime or regular lime
- 1 tablespoon vegetable oil to help blending
Instructions
If making homemade curry paste:
- In a food processor or mortar and pestle, combine all curry paste ingredients.
- Blend or pound until a smooth paste forms. This may take 10-15 minutes if using a mortar and pestle.
- Set aside or store in an airtight container in the refrigerator for up to 1 week.
For the curry:
- Prepare the chicken and vegetables:
- Cut chicken thighs into 1-inch pieces and season lightly with salt.
- Prepare all vegetables as directed in the ingredients list.
- Begin the curry base:
- Heat oil in a large, deep skillet or wok over medium heat.
- Add the onion and sauté for 2-3 minutes until translucent.
- Add minced garlic and grated ginger, cooking for another minute until fragrant.
- Cook the curry paste:
- Add the green curry paste to the pan and stir continuously for 1-2 minutes to release the aromatics.
- If the paste starts to stick, add a tablespoon of coconut milk.
- Add the chicken:
- Add the chicken pieces to the pan and stir to coat with the curry paste.
- Cook for 3-4 minutes, stirring occasionally, until the chicken begins to turn opaque on the outside.
- Create the curry sauce:
- Shake the coconut milk cans well before opening.
- Add about 3/4 of the coconut milk to the pan, stirring to combine with the curry paste.
- Add the torn kaffir lime leaves, fish sauce, and palm sugar.
- Bring to a gentle simmer and cook for about 5 minutes.
- Cook the vegetables:
- Add the eggplant (if using) and bell pepper, as they take longer to cook, and simmer for 3-4 minutes.
- Add the zucchini and cook for another 2-3 minutes.
- Finally, add the snow peas/sugar snap peas and the remaining coconut milk.
- Simmer for 2-3 more minutes until all vegetables are tender-crisp and the chicken is cooked through.
- Finish the curry:
- Remove from heat and stir in the lime juice.
- Add the Thai basil leaves, allowing them to wilt in the residual heat.
- Taste and adjust seasonings if needed, adding more fish sauce for saltiness, sugar for sweetness, or lime juice for acidity.
- Serve:
- Ladle the curry over steamed jasmine rice.
- Garnish with fresh cilantro leaves, sliced red chili (if using), and serve with lime wedges on the side.
Tips
- For a thinner curry, add a little chicken broth or water.
- For a thicker curry, let it simmer longer to reduce.
- The curry will taste even better the next day after the flavors have melded.
- Feel free to substitute the vegetables with others like bamboo shoots, baby corn, or green beans.
- If using store-bought curry paste, start with less and add more to taste as brands vary in intensity.
- For a vegetarian version, substitute the chicken with firm tofu and the fish sauce with soy sauce or salt.
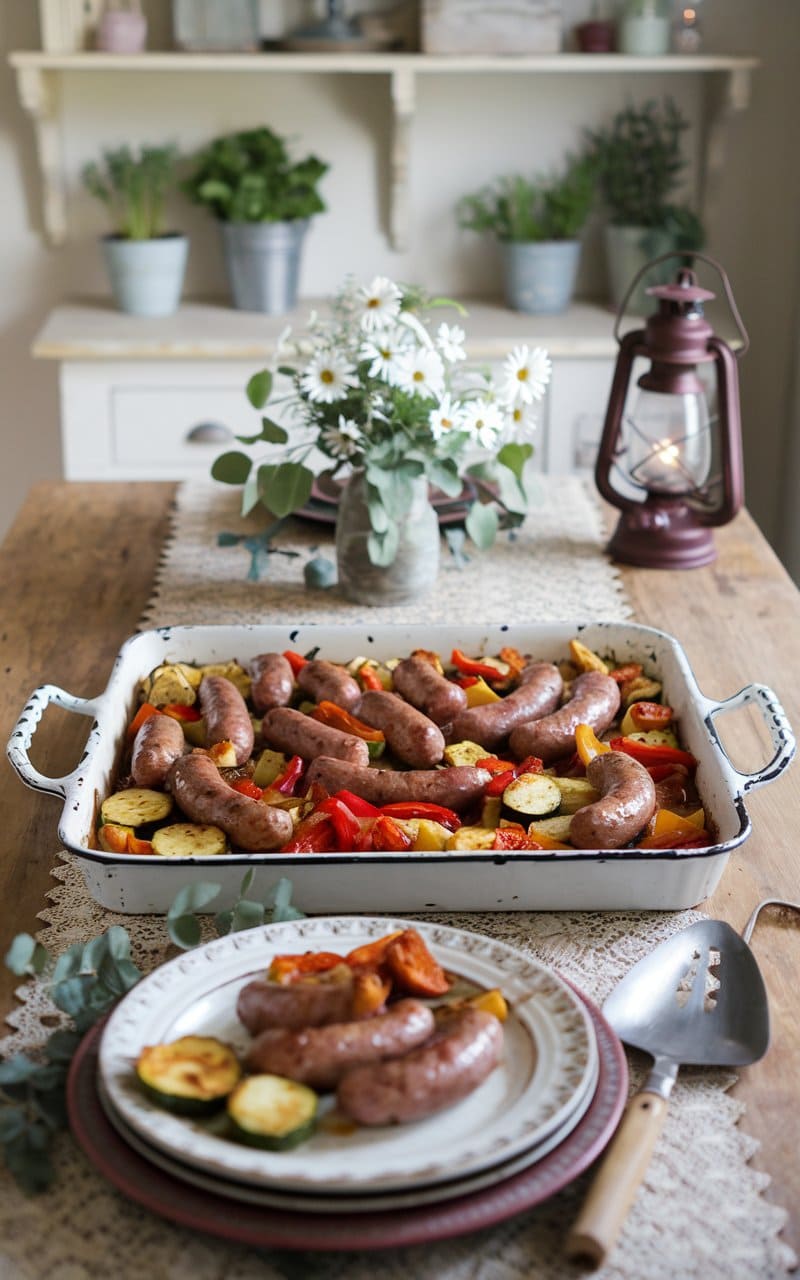
13. Sheet Pan Sausage and Veggies
Ingredients
Main ingredients:
- 1 pound (about 4-5 links) Italian sausage (sweet or spicy, based on preference)
- 1 medium red bell pepper, cut into 1-inch pieces
- 1 medium yellow bell pepper, cut into 1-inch pieces
- 1 medium zucchini, halved lengthwise and sliced into 1/2-inch pieces
- 1 medium yellow squash, halved lengthwise and sliced into 1/2-inch pieces
- 1 small red onion, cut into 1-inch chunks
- 1 pint cherry or grape tomatoes
- 8 ounces baby potatoes, halved (or quartered if large)
- 3-4 cloves garlic, minced or thinly sliced
- 2-3 tablespoons olive oil
Seasonings:
- 1 teaspoon dried oregano
- 1 teaspoon dried basil
- 1/2 teaspoon dried thyme
- 1/2 teaspoon garlic powder
- 1/2 teaspoon onion powder
- 1/2 teaspoon paprika (regular or smoked)
- 1/4 teaspoon red pepper flakes (optional)
- Salt and freshly ground black pepper to taste
For garnish (optional):
- 2 tablespoons fresh parsley, chopped
- 1 tablespoon fresh basil, chopped
- Grated Parmesan cheese
- Lemon wedges for serving
Instructions
- Prep the oven and pan:
- Preheat your oven to 425°F (220°C).
- Line a large rimmed baking sheet with parchment paper or aluminum foil for easier cleanup.
- Prepare the sausage:
- If using sausage links, slice them into 1-inch pieces. Alternatively, you can leave them whole and slice after cooking.
- For raw sausage, you can partially pre-cook it in a skillet for 5 minutes to render some fat and ensure it’ll be fully cooked with the vegetables.
- Prepare the vegetables:
- Place the potatoes in a microwave-safe bowl with 1 tablespoon of water, cover, and microwave for 2-3 minutes to partially cook (this ensures they’ll finish cooking at the same time as the other vegetables).
- In a large mixing bowl, combine all the cut vegetables (bell peppers, zucchini, yellow squash, red onion, cherry tomatoes, and parboiled potatoes).
- Add the minced garlic to the vegetables.
- Season everything:
- Drizzle the olive oil over the vegetables.
- Add all the dried herbs and spices (oregano, basil, thyme, garlic powder, onion powder, paprika, red pepper flakes if using).
- Season generously with salt and black pepper.
- Toss everything together until the vegetables are evenly coated with oil and seasonings.
- Arrange on sheet pan:
- Spread the seasoned vegetables in a single layer on the prepared baking sheet.
- Nestle the sausage pieces among the vegetables, ensuring everything is spread out and not overcrowded (use two pans if necessary).
- Bake:
- Place the sheet pan in the preheated oven and bake for 20 minutes.
- Remove from oven, stir everything to ensure even cooking, and rotate the pan.
- Return to the oven and bake for an additional 10-15 minutes, or until the sausage is cooked through (internal temperature of 160°F/71°C) and the vegetables are tender and starting to caramelize at the edges.
- Finish and serve:
- Remove from the oven and let rest for 5 minutes.
- Sprinkle with fresh herbs if using.
- Serve hot, either on its own or with any of these options:
- Over cooked pasta or rice
- With crusty bread on the side
- Sprinkled with grated Parmesan cheese
- With lemon wedges to squeeze over for brightness
Tips
- For even cooking, try to cut all vegetables to similar sizes.
- If you prefer crispier vegetables, you can add more delicate vegetables (like zucchini and tomatoes) halfway through the cooking time.
- Feel free to customize with other vegetables like broccoli, cauliflower, Brussels sprouts, or carrots. Just adjust cooking times accordingly (root vegetables may need to be added earlier).
- For a different flavor profile, try using chicken sausage, chorizo, or andouille sausage.
- Leftovers store well in the refrigerator for up to 3 days and make excellent additions to frittatas, pasta dishes, or grain bowls.
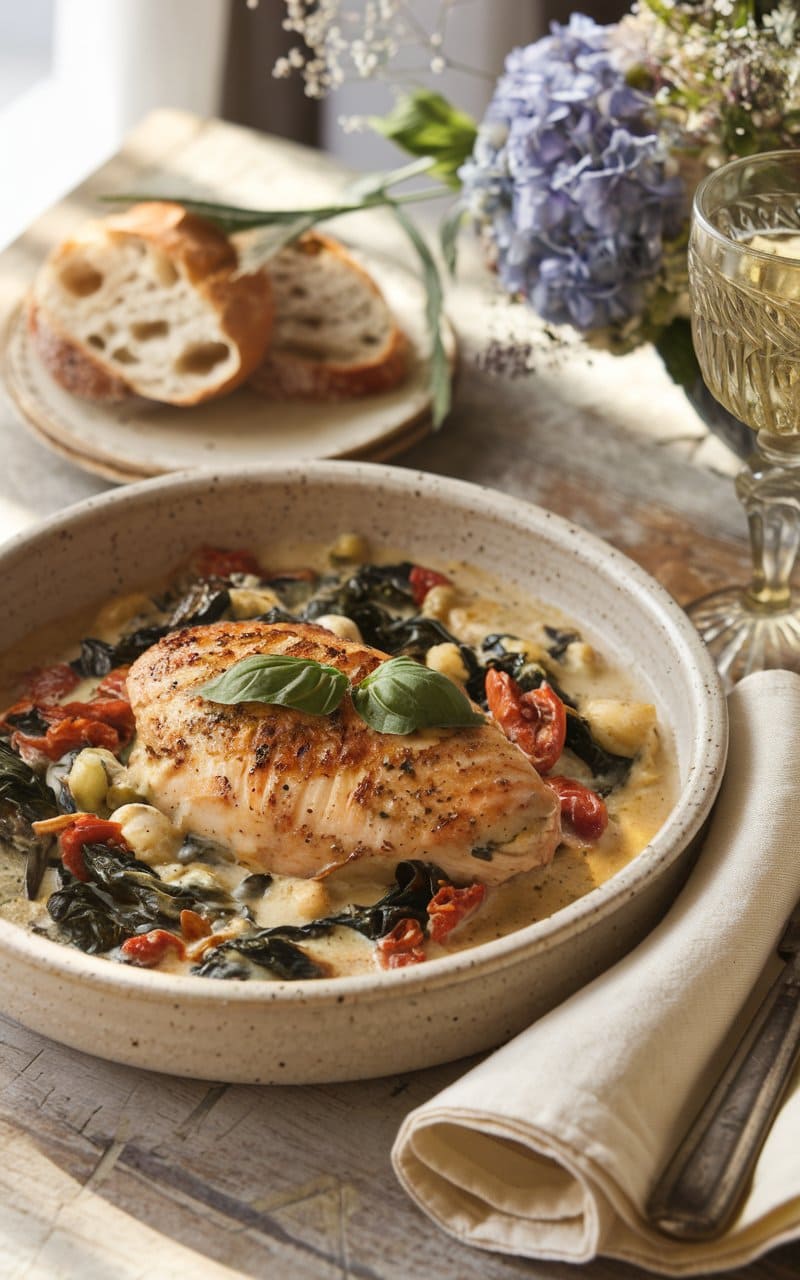
14. Creamy Tuscan Chicken
Ingredients
For the chicken:
- 4 boneless, skinless chicken breasts (about 1.5-2 pounds total)
- 1 teaspoon dried Italian seasoning
- 1 teaspoon garlic powder
- 1/2 teaspoon paprika
- 1/2 teaspoon salt
- 1/4 teaspoon freshly ground black pepper
- 2 tablespoons olive oil
- 2 tablespoons butter
For the creamy sauce:
- 4 cloves garlic, minced
- 1 small onion, finely diced
- 1/3 cup sun-dried tomatoes in oil, drained and chopped
- 1 cup heavy cream
- 1/2 cup chicken broth
- 1/2 cup freshly grated Parmesan cheese
- 1 teaspoon cornstarch mixed with 1 tablespoon water (optional, to thicken)
- 1/2 teaspoon dried oregano
- 1/4 teaspoon red pepper flakes (optional)
- 4 cups fresh spinach leaves
- 1/4 cup fresh basil leaves, julienned
- Salt and pepper to taste
For serving (optional):
- Cooked pasta, mashed potatoes, or crusty bread
- Additional grated Parmesan cheese
- Fresh basil leaves
- Lemon wedges
Instructions
- Prepare the chicken:
- Pat the chicken breasts dry with paper towels.
- If the chicken breasts are very thick, butterfly them or pound to an even thickness of about 1/2 inch for more even cooking.
- In a small bowl, mix together the Italian seasoning, garlic powder, paprika, salt, and black pepper.
- Season both sides of the chicken breasts evenly with the spice mixture.
- Cook the chicken:
- Heat olive oil and 1 tablespoon of butter in a large skillet over medium-high heat.
- When the pan is hot, add the chicken breasts and cook for 5-6 minutes on each side until golden brown and cooked through (internal temperature of 165°F/74°C).
- Remove the chicken from the skillet and set aside on a plate. Tent loosely with foil to keep warm.
- Start the sauce:
- In the same skillet (do not clean it), add the remaining tablespoon of butter.
- Add the diced onion and cook for 2-3 minutes until softened.
- Add the minced garlic and cook for another 30 seconds until fragrant, being careful not to burn it.
- Add the chopped sun-dried tomatoes and cook for 1 minute.
- Make the creamy sauce:
- Pour in the chicken broth and use a wooden spoon to scrape up any browned bits from the bottom of the pan.
- Add the heavy cream, dried oregano, and red pepper flakes (if using).
- Bring to a gentle simmer (do not boil) and cook for 3-4 minutes, stirring occasionally.
- Stir in the grated Parmesan cheese until melted and smooth.
- If you prefer a thicker sauce, add the cornstarch slurry now and stir until the sauce thickens.
- Add the spinach:
- Reduce heat to low and add the fresh spinach to the sauce in batches, stirring until wilted.
- Taste the sauce and adjust seasoning with salt and pepper as needed.
- Finish the dish:
- Return the chicken breasts to the skillet, nestling them into the sauce.
- Spoon some of the sauce over the chicken.
- Simmer gently for 2-3 minutes until the chicken is warmed through and coated with the sauce.
- Stir in most of the fresh basil, reserving some for garnish.
- Serve:
- Transfer the chicken to plates or a serving platter.
- Spoon the creamy sauce with spinach and sun-dried tomatoes over and around the chicken.
- Garnish with the remaining fresh basil leaves.
- Serve immediately with your choice of pasta, mashed potatoes, or crusty bread to soak up the delicious sauce.
Tips
- Chicken options: You can substitute chicken thighs for breasts if you prefer darker meat.
- Make ahead: The dish reheats well. If making ahead, slightly undercook the chicken as it will continue cooking when reheated.
- Sun-dried tomatoes: If using dry-packed sun-dried tomatoes instead of oil-packed, rehydrate them in hot water for 10 minutes before using.
- Spinach alternatives: You can substitute kale (remove stems and cook a bit longer) or arugula (add at the very end as it wilts quickly).
- Lighter option: For a lighter version, substitute half of the heavy cream with additional chicken broth and use half-and-half instead of heavy cream.
- Wine addition: For extra flavor, add 1/4 cup of dry white wine after cooking the garlic and onions, and let it reduce before adding the cream.
- Storage: Leftovers can be stored in an airtight container in the refrigerator for up to 3 days. Reheat gently on the stove or in the microwave.
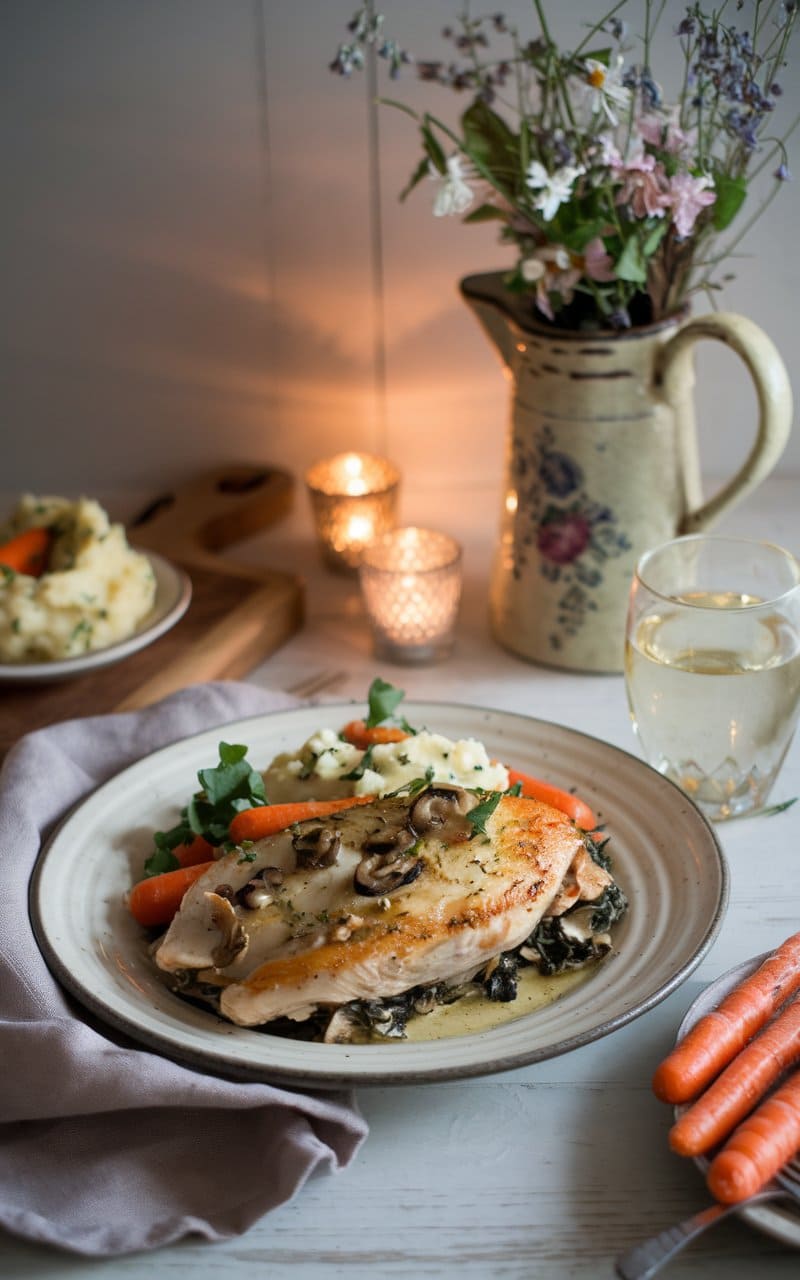
15. Mushroom and Spinach Stuffed Chicken Breast
Ingredients
For the chicken:
- 4 boneless, skinless chicken breasts (about 2 pounds total)
- 2 tablespoons olive oil
- 1 teaspoon garlic powder
- 1 teaspoon dried Italian herbs
- 1/2 teaspoon paprika
- Salt and freshly ground black pepper to taste
- Kitchen twine or toothpicks for securing
For the stuffing:
- 2 tablespoons butter
- 1 tablespoon olive oil
- 8 ounces mushrooms (cremini, white button, or a mix), finely chopped
- 3 cloves garlic, minced
- 1 small shallot or 1/4 red onion, finely diced
- 4 cups fresh spinach, roughly chopped
- 4 ounces cream cheese, softened
- 1/2 cup shredded mozzarella cheese
- 1/4 cup grated Parmesan cheese
- 2 tablespoons fresh herbs (such as thyme, parsley, or basil), chopped
- 1/4 teaspoon red pepper flakes (optional)
- Salt and freshly ground black pepper to taste
For the optional sauce:
- 1/2 cup chicken broth
- 1/4 cup heavy cream
- 2 tablespoons butter
- 1 teaspoon Dijon mustard
- 1 tablespoon fresh lemon juice
- Salt and pepper to taste
Instructions
- Prepare the chicken:
- Preheat oven to 375°F (190°C).
- Pat the chicken breasts dry with paper towels.
- Place one chicken breast on a cutting board, and with your hand flat on top, use a sharp knife to slice into the thicker side of the breast horizontally, creating a pocket. Be careful not to cut all the way through.
- Repeat with remaining chicken breasts.
- Season the outside and inside of each chicken breast with salt, pepper, garlic powder, dried Italian herbs, and paprika.
- Make the stuffing:
- In a large skillet, heat butter and olive oil over medium heat.
- Add the shallot or onion and sauté for 2 minutes until softened.
- Add the chopped mushrooms and cook for 5-7 minutes until they release their moisture and begin to brown.
- Add the minced garlic and cook for another minute until fragrant.
- Add the chopped spinach in batches, stirring until wilted, about 2 minutes.
- Remove the pan from heat and let cool for 5 minutes.
- In a mixing bowl, combine the softened cream cheese, mozzarella, Parmesan, chopped fresh herbs, and red pepper flakes (if using).
- Add the cooled mushroom and spinach mixture, stirring until well combined.
- Season with salt and pepper to taste.
- Stuff the chicken:
- Divide the stuffing mixture evenly among the chicken breasts, filling each pocket.
- Secure the openings with kitchen twine or toothpicks to prevent the filling from leaking out during cooking.
- Cook the chicken:
- Heat 2 tablespoons olive oil in a large oven-safe skillet over medium-high heat.
- Place the stuffed chicken breasts in the skillet and sear for 3-4 minutes on each side until golden brown.
- Transfer the skillet to the preheated oven and bake for 15-20 minutes, or until the chicken reaches an internal temperature of 165°F (74°C).
- If you don’t have an oven-safe skillet, transfer the seared chicken to a baking dish before placing in the oven.
- Make the optional sauce:
- After removing the chicken from the skillet, place the skillet back on the stove over medium heat.
- Add chicken broth to deglaze the pan, scraping up any browned bits.
- Stir in heavy cream, butter, and Dijon mustard.
- Bring to a simmer and cook for 3-5 minutes until slightly thickened.
- Remove from heat and stir in fresh lemon juice.
- Season with salt and pepper to taste.
- Serve:
- Remove the kitchen twine or toothpicks from the chicken breasts.
- Let the chicken rest for 5 minutes before slicing.
- Spoon the sauce over the chicken if desired.
- Garnish with additional fresh herbs if desired.
Tips
- Chicken preparation: For even cooking, pound the chicken breasts to an even thickness before creating the pocket.
- Stuffing variations: Feel free to add sun-dried tomatoes, artichoke hearts, or different cheese varieties like goat cheese or feta.
- Make ahead: The stuffing can be prepared up to 24 hours in advance and refrigerated until ready to use.
- Serving suggestions: Serve with roasted potatoes, steamed vegetables, rice pilaf, or a simple green salad.
- Testing for doneness: Use a meat thermometer inserted into the thickest part of the chicken (not the stuffing) to ensure it reaches 165°F (74°C).
- Dietary adjustments: For a lighter version, use light cream cheese and reduce the amount of mozzarella.
- Slicing tip: For a beautiful presentation, slice the stuffed chicken breast on a slight diagonal to showcase the colorful filling.
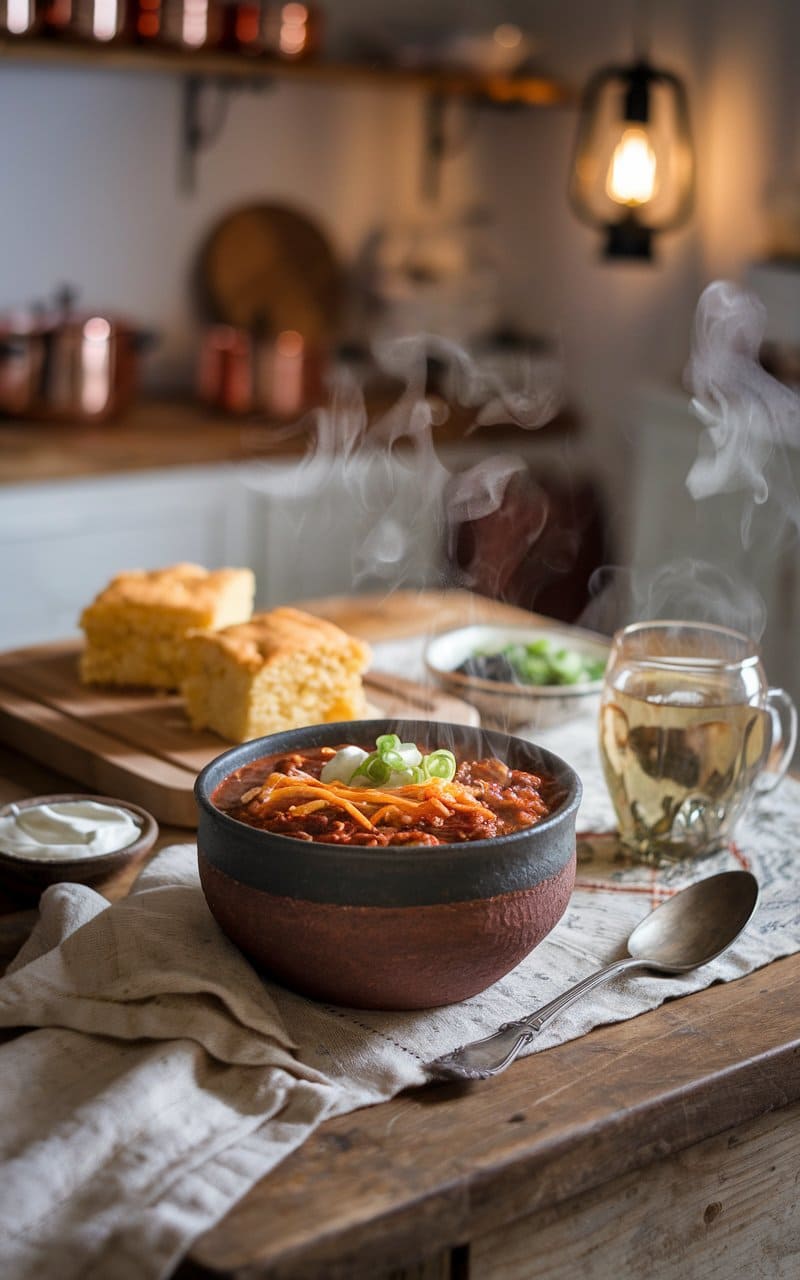
16. Slow Cooker Beef Chili
Ingredients
For the chili base:
- 2 pounds ground beef (80/20 or 85/15 lean-to-fat ratio)
- 1 large yellow onion, diced
- 1 red bell pepper, diced
- 1 green bell pepper, diced
- 4 cloves garlic, minced
- 2 tablespoons olive oil (if needed for browning)
Beans and tomatoes:
- 2 cans (15 oz each) kidney beans, drained and rinsed
- 1 can (15 oz) black beans, drained and rinsed
- 1 can (15 oz) pinto beans, drained and rinsed (optional)
- 2 cans (14.5 oz each) diced tomatoes
- 1 can (6 oz) tomato paste
- 1 can (4 oz) diced green chilies (mild or hot, depending on preference)
Spices and seasonings:
- 3 tablespoons chili powder
- 2 teaspoons ground cumin
- 1 tablespoon dried oregano
- 1 teaspoon smoked paprika
- 1 teaspoon ground coriander
- 1/2 teaspoon cayenne pepper (adjust to taste)
- 1 tablespoon brown sugar
- 2 teaspoons salt (adjust to taste)
- 1 teaspoon black pepper
- 2 bay leaves
Liquids:
- 1 cup beef broth
- 1 bottle (12 oz) dark beer (optional, can substitute with additional beef broth)
- 1 tablespoon Worcestershire sauce
- 1 tablespoon apple cider vinegar
For serving (optional):
- Shredded cheddar cheese
- Sour cream
- Sliced green onions
- Chopped fresh cilantro
- Diced avocado
- Lime wedges
- Corn chips or cornbread
Instructions
- Brown the beef:
- Heat a large skillet over medium-high heat.
- Add the ground beef and cook until browned, about 7-8 minutes, breaking it up with a wooden spoon as it cooks.
- If your beef is lean, you may need to add a tablespoon of olive oil before browning.
- Using a slotted spoon, transfer the browned beef to the slow cooker, leaving most of the fat in the skillet.
- Sauté the vegetables:
- In the same skillet with the remaining beef fat (add olive oil if needed), add the diced onions and bell peppers.
- Sauté until the vegetables are softened, about 5 minutes.
- Add the minced garlic and cook for another 30 seconds until fragrant.
- Transfer the vegetable mixture to the slow cooker.
- Add remaining ingredients:
- To the slow cooker, add the drained and rinsed beans, diced tomatoes with their juice, tomato paste, and green chilies.
- Add all the spices and seasonings: chili powder, cumin, oregano, smoked paprika, coriander, cayenne, brown sugar, salt, and pepper.
- Add the bay leaves, beef broth, beer (if using), Worcestershire sauce, and apple cider vinegar.
- Stir everything together until well combined.
- Cook the chili:
- Cover the slow cooker and cook on low for 6-8 hours or on high for 3-4 hours.
- Stir occasionally if possible, but it’s not necessary.
- The longer it cooks, the more the flavors will develop.
- Final adjustments:
- About 30 minutes before serving, taste the chili and adjust seasonings if needed.
- If the chili is too thin, you can leave the lid off for the last 30 minutes of cooking to allow some liquid to evaporate.
- If it’s too thick, add a little more beef broth or water.
- Remove the bay leaves before serving.
- Serve:
- Ladle the hot chili into bowls.
- Set out bowls of optional toppings for everyone to customize their own serving.
- Serve with cornbread or corn chips on the side if desired.
Tips
- Meat options: For a richer flavor, substitute 1 pound of the ground beef with 1 pound of ground pork or Italian sausage.
- Beans: Feel free to use any combination of beans you prefer, or reduce the amount if you like a meatier chili.
- Heat level: Adjust the cayenne pepper and consider adding a diced jalapeño with the bell peppers for extra heat.
- Make ahead: This chili tastes even better the next day, so consider making it a day ahead and reheating.
- Freezing: This chili freezes well for up to 3 months. Cool completely before transferring to freezer-safe containers.
- Umami boost: For deeper flavor, add 1-2 tablespoons of cocoa powder or a square of dark chocolate.
- Slow cooker tip: Don’t open the lid too frequently while cooking, as this releases heat and extends cooking time.
- Stovetop alternative: If you don’t have a slow cooker, this can be made in a large pot on the stovetop. Simmer covered on low for 2-3 hours, stirring occasionally.
17. Balsamic Glazed Pork Chops
Ingredients
For the pork chops:
- 4 bone-in pork chops, about 1-inch thick (approximately 2 pounds total)
- 1 tablespoon olive oil
- 1 teaspoon garlic powder
- 1 teaspoon dried thyme
- 1 teaspoon dried rosemary
- 1/2 teaspoon smoked paprika
- Salt and freshly ground black pepper to taste
For the balsamic glaze:
- 1/2 cup balsamic vinegar
- 3 tablespoons honey
- 2 tablespoons brown sugar
- 3 cloves garlic, minced
- 1 tablespoon Dijon mustard
- 1 tablespoon soy sauce
- 1 teaspoon red pepper flakes (optional, adjust to taste)
- 2 sprigs fresh rosemary
- 2 tablespoons butter
For serving (optional):
- Fresh thyme or rosemary sprigs for garnish
- Cooked rice, mashed potatoes, or roasted vegetables
Instructions
- Prepare the pork chops:
- Remove the pork chops from the refrigerator 30 minutes before cooking to bring them to room temperature.
- Pat the pork chops dry with paper towels. This helps achieve a better sear.
- In a small bowl, mix together the garlic powder, dried thyme, dried rosemary, smoked paprika, salt, and pepper.
- Rub the spice mixture evenly over both sides of the pork chops.
- Prepare the balsamic glaze:
- In a small saucepan, combine the balsamic vinegar, honey, brown sugar, minced garlic, Dijon mustard, soy sauce, and red pepper flakes (if using).
- Add the rosemary sprigs to the saucepan.
- Bring the mixture to a boil over medium-high heat, then reduce to a simmer.
- Simmer for 10-15 minutes, stirring occasionally, until the mixture has reduced by about half and has a syrupy consistency.
- Remove from heat and discard the rosemary sprigs.
- Whisk in the butter until melted and fully incorporated.
- Set aside, keeping warm.
- Cook the pork chops:
- Heat olive oil in a large, heavy-bottomed skillet (preferably cast iron) over medium-high heat until it’s shimmering but not smoking.
- Add the pork chops to the skillet, being careful not to overcrowd the pan. Cook in batches if necessary.
- Sear for 4-5 minutes on each side without moving them, until they develop a golden-brown crust.
- Reduce heat to medium and continue cooking until the internal temperature reaches 145°F (63°C) for medium-rare or 160°F (71°C) for medium, about 2-3 more minutes per side depending on thickness.
- Use a meat thermometer for accuracy.
- Glaze the pork chops:
- During the last 2 minutes of cooking, brush the pork chops generously with the balsamic glaze.
- Turn the chops and brush the other side with the glaze as well.
- Allow the glaze to caramelize slightly on the pork chops.
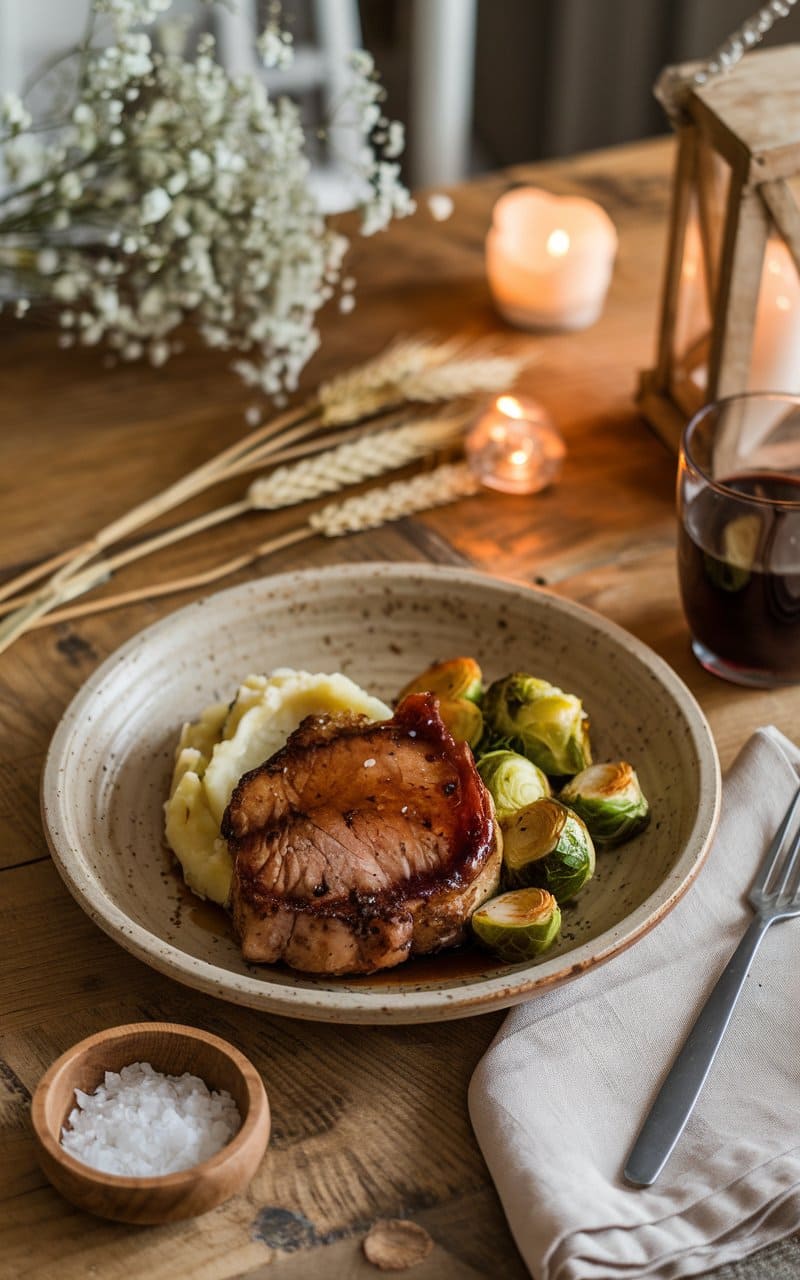
- Rest and serve:
- Transfer the pork chops to a plate and tent loosely with aluminum foil.
- Let them rest for 5 minutes to allow the juices to redistribute throughout the meat.
- Drizzle the remaining balsamic glaze over the pork chops before serving.
- Garnish with fresh herb sprigs if desired.
Tips
- Choosing pork chops: Bone-in pork chops are recommended for this recipe as they tend to be more flavorful and less likely to dry out. However, boneless chops can also be used with a slight reduction in cooking time.
- Thickness matters: The 1-inch thickness is ideal for this recipe. If your chops are thinner, reduce cooking time. If thicker, increase cooking time accordingly.
- Don’t overcook: Pork chops can dry out quickly if overcooked. Using a meat thermometer is the best way to ensure they’re cooked to the perfect temperature.
- Glaze consistency: If your glaze becomes too thick, you can thin it with a little water or chicken broth.
- Make ahead: The balsamic glaze can be made up to 3 days ahead and stored in the refrigerator. Reheat gently before using.
- Leftover glaze: Any extra glaze can be stored in an airtight container in the refrigerator for up to a week and used on other meats or as a salad dressing.
- Serving suggestions: These pork chops pair well with creamy mashed potatoes, roasted root vegetables, or a crisp green salad.
18. Chicken Parmesan
Ingredients
For the chicken:
- 4 boneless, skinless chicken breasts (about 2 pounds total)
- 1 cup all-purpose flour
- 3 large eggs
- 2 tablespoons milk
- 2 cups Italian seasoned breadcrumbs
- 1 cup grated Parmesan cheese, divided
- 1 tablespoon dried Italian seasoning
- 1 teaspoon garlic powder
- 1/2 teaspoon salt
- 1/2 teaspoon black pepper
- 1/2 cup vegetable or canola oil for frying
For the sauce:
- 2 tablespoons olive oil
- 4 cloves garlic, minced
- 1 small onion, finely diced
- 1 can (28 oz) crushed tomatoes
- 1 can (14.5 oz) diced tomatoes, drained
- 2 tablespoons tomato paste
- 1/4 cup fresh basil leaves, torn or chopped (plus extra for garnish)
- 1 teaspoon dried oregano
- 1 teaspoon sugar
- Salt and pepper to taste
- 1/4 teaspoon red pepper flakes (optional)
For topping:
- 2 cups shredded mozzarella cheese
- 1/2 cup grated Parmesan cheese
- Fresh basil for garnish
For serving (optional):
- 1 pound spaghetti or fettuccine pasta
- Extra Parmesan cheese
- Garlic bread
Instructions
- Prepare the chicken:
- Place chicken breasts between sheets of plastic wrap or parchment paper.
- Using a meat mallet or heavy pan, pound the chicken to an even thickness of about 1/2 inch.
- Season both sides of each chicken breast with salt and pepper.
- Set up the breading station:
- In a shallow dish, combine the flour with a pinch of salt and pepper.
- In a second shallow dish, beat the eggs with milk until well blended.
- In a third shallow dish, mix the breadcrumbs, 1/2 cup of Parmesan cheese, Italian seasoning, and garlic powder.
- Bread the chicken:
- Dredge each chicken breast in flour, shaking off excess.
- Dip into egg mixture, allowing excess to drip off.
- Coat thoroughly with breadcrumb mixture, pressing gently to adhere.
- Place breaded chicken on a plate and let sit for 10 minutes to help the coating set.
- Prepare the sauce:
- While chicken is resting, heat olive oil in a medium saucepan over medium heat.
- Add onion and cook until softened, about 4-5 minutes.
- Add garlic and cook for another 30 seconds until fragrant.
- Add crushed tomatoes, diced tomatoes, tomato paste, dried oregano, sugar, salt, pepper, and red pepper flakes (if using).
- Bring to a simmer, then reduce heat to low and cook for 15-20 minutes, stirring occasionally.
- Stir in fresh basil during the last 5 minutes of cooking. Keep warm.
- Preheat the oven:
- Preheat oven to 425°F (220°C).
- Cook the chicken:
- Heat vegetable oil in a large skillet over medium-high heat until shimmering.
- Working in batches if necessary to avoid overcrowding, add the breaded chicken breasts.
- Cook until golden brown, about 4-5 minutes per side.
- Transfer to a paper towel-lined plate to drain excess oil.
- Assemble for baking:
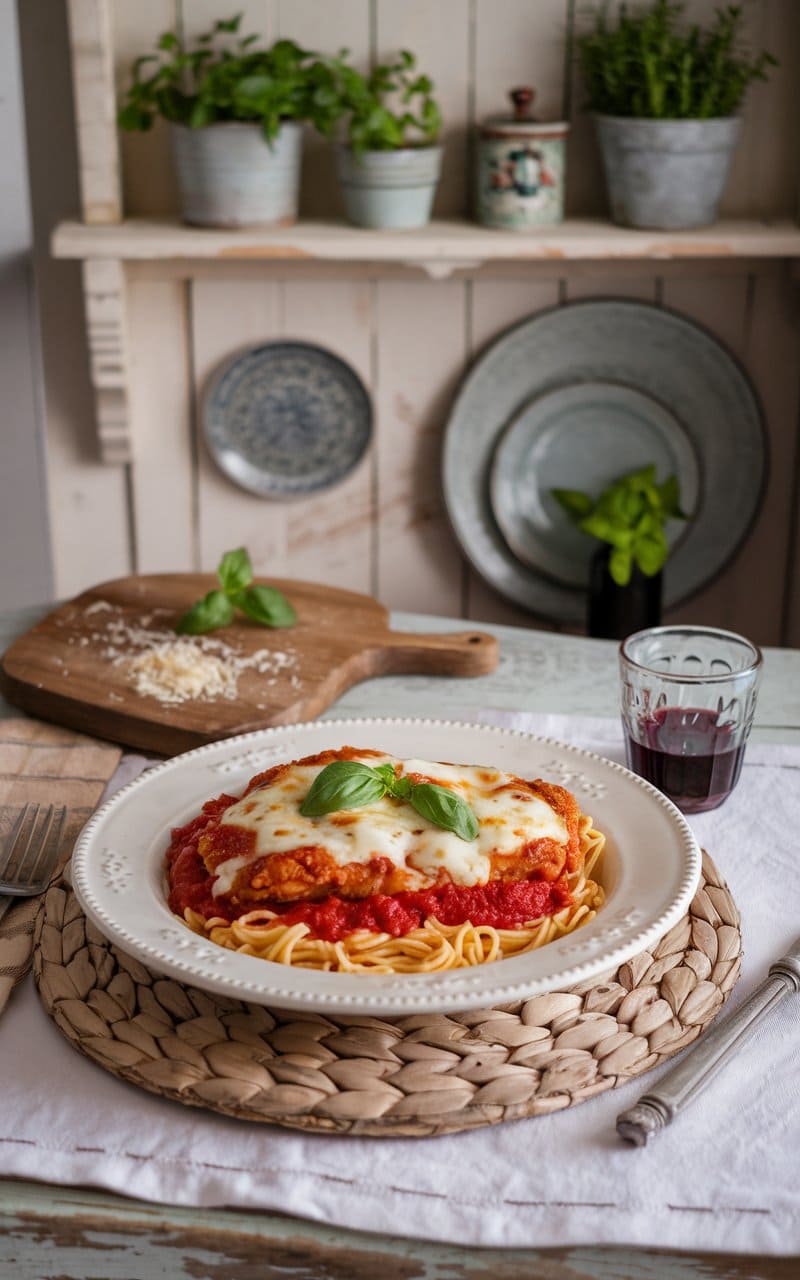
- Spread a thin layer of sauce on the bottom of a 9×13 inch baking dish.
- Place the fried chicken breasts on top of the sauce, spacing them evenly.
- Spoon additional sauce over each chicken breast, leaving some edges exposed for crispiness.
- Sprinkle each chicken breast with mozzarella cheese and remaining Parmesan cheese.
- Bake:
- Bake in the preheated oven for 15-20 minutes, until the cheese is melted and bubbly and beginning to brown.
- If desired, you can broil for the last 1-2 minutes to get the cheese extra golden (watch carefully to prevent burning).
- Prepare pasta (optional):
- While the chicken is baking, cook pasta according to package instructions.
- Drain and toss with a portion of the reserved sauce.
- Serve:
- Garnish the chicken with fresh basil leaves.
- Serve over pasta with additional sauce if desired.
- Offer extra grated Parmesan cheese at the table.
Tips
- Chicken thickness: Pounding the chicken to an even thickness ensures it cooks evenly and remains tender.
- Make ahead: The sauce can be made up to 3 days ahead and stored in the refrigerator.
- Oil temperature: For best results, make sure your oil is hot enough before adding the chicken (around 350°F/175°C). If it’s too cool, the breading will absorb too much oil and become soggy.
- Draining properly: Don’t skip the step of draining the fried chicken on paper towels to remove excess oil.
- Sauce consistency: If your sauce is too thick, add a little pasta water or chicken broth to thin it.
- Breading tip: Use one hand for wet ingredients and one for dry to avoid creating a mess on your hands.
- Freezing: Chicken Parmesan freezes well after baking. Cool completely, wrap tightly, and freeze for up to 3 months. Reheat in a 350°F (175°C) oven until heated through.
19. Miso Glazed Cod
Ingredients
For the fish:
- 4 cod fillets (about 6 ounces each), about 1-inch thick
- 1 tablespoon vegetable or canola oil
- Salt and freshly ground black pepper
- 1 tablespoon sesame seeds, for garnish
- 2 green onions, thinly sliced, for garnish
For the miso glaze:
- 1/4 cup white miso paste
- 2 tablespoons mirin (Japanese sweet rice wine)
- 2 tablespoons sake (can substitute dry white wine)
- 2 tablespoons rice vinegar
- 3 tablespoons brown sugar
- 1 tablespoon soy sauce
- 2 teaspoons freshly grated ginger
- 2 cloves garlic, minced
- 1 teaspoon sesame oil
For serving (optional):
- Steamed white or brown rice
- Steamed or stir-fried bok choy or other Asian greens
- Pickled ginger
- Lemon or lime wedges
Instructions
- Prepare the cod:
- Remove the cod fillets from the refrigerator about 20 minutes before cooking to bring them closer to room temperature.
- Pat the cod fillets dry with paper towels.
- Season lightly with salt and pepper on both sides.
- Check for any remaining bones and remove them with fish tweezers if found.
- Make the miso glaze:
- In a medium bowl, whisk together the white miso paste, mirin, sake, rice vinegar, brown sugar, soy sauce, grated ginger, minced garlic, and sesame oil until smooth and well combined.
- Divide the glaze into two portions – one for marinating and one for serving.
- Marinate the fish:
- Place the cod fillets in a shallow dish or a resealable plastic bag.
- Pour half of the miso glaze over the fish, turning to coat all sides.
- Cover (or seal) and refrigerate for 30 minutes to 2 hours. For the best flavor, don’t marinate longer than 2 hours, as the fish can become too salty.
- Preheat the oven:
- Preheat your oven to 400°F (200°C).
- Line a baking sheet with parchment paper or aluminum foil and lightly oil it.
- Cook the fish:
- Remove the cod from the marinade, gently wiping off excess marinade (but not all of it).
- Heat the vegetable oil in a large oven-safe skillet over medium-high heat.
- Place the cod fillets in the hot skillet, skin side up if there’s skin, or presentation side down if skinless.
- Sear for 2-3 minutes until golden brown on the bottom.
- Flip the fillets and transfer the skillet to the preheated oven.
- Alternatively, you can transfer the seared fillets to the prepared baking sheet.
- Bake for 7-10 minutes, depending on thickness, until the fish is opaque and flakes easily with a fork. The internal temperature should reach 145°F (63°C).
- Prepare the serving glaze:
- While the fish is baking, place the reserved miso glaze in a small saucepan.
- Heat over medium-low heat, stirring frequently, until slightly thickened, about 3-4 minutes.
- Keep warm until ready to serve.
- Finish and serve:
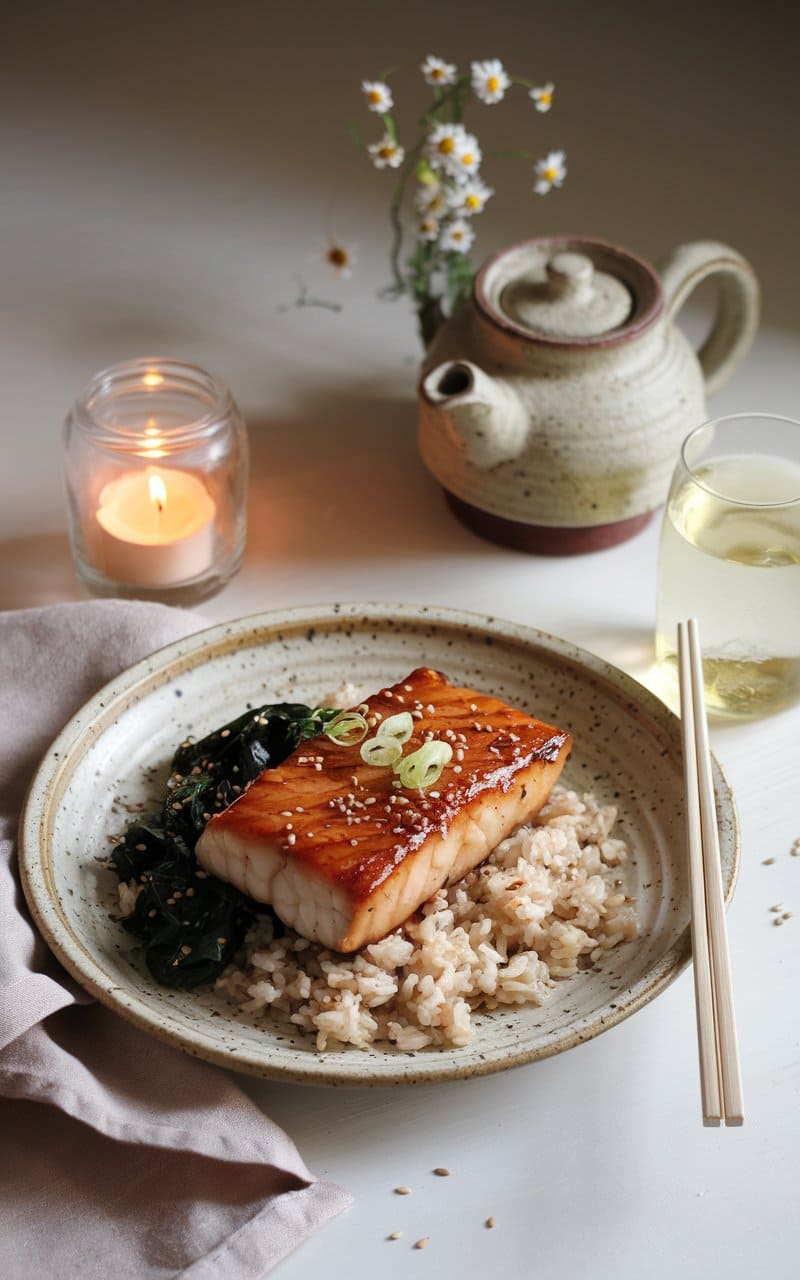
- Remove the cod from the oven and transfer to serving plates.
- Brush or drizzle each fillet with the warmed miso glaze.
- Sprinkle with sesame seeds and sliced green onions.
- Serve immediately with steamed rice and vegetables if desired.
- Offer lemon or lime wedges on the side.
Tips
- Choosing cod: Look for thick fillets that are firm and white with minimal aroma. Black cod (sablefish) can be substituted for a more buttery texture.
- Miso varieties: White miso (shiro miso) is recommended for its milder, sweeter flavor, but you can use yellow or red miso for a stronger taste.
- Alternative cooking method: If you prefer not to use the oven, you can continue cooking the fish on the stovetop after searing. Simply cover the skillet and reduce heat to medium-low until the fish is cooked through.
- Mirin substitute: If you can’t find mirin, substitute with 2 tablespoons of white wine or rice vinegar mixed with 1 teaspoon of sugar.
- Doneness test: The fish is done when it flakes easily with a fork and is opaque throughout.
- Make ahead: The miso glaze can be prepared up to 5 days in advance and stored in an airtight container in the refrigerator.
- Alternative fish: This glaze works well with other firm white fish like halibut, sea bass, or even salmon.
- Broiling option: For a caramelized finish, you can briefly broil the glazed fish for 1-2 minutes before serving, watching carefully to prevent burning.
20. Sweet Potato and Black Bean Tacos
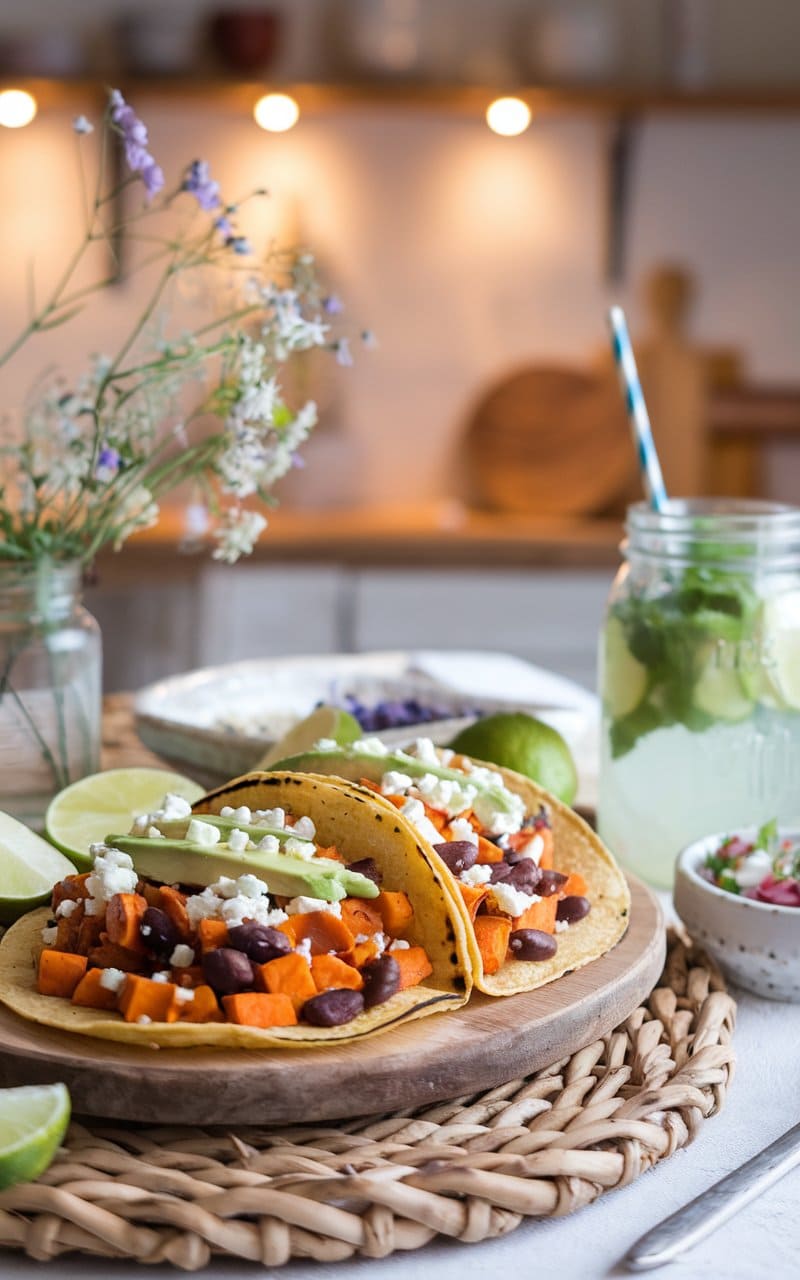
Ingredients
For the filling:
- 2 medium sweet potatoes, peeled and diced into 1/2-inch cubes
- 1 tablespoon olive oil
- 1 teaspoon ground cumin
- 1 teaspoon chili powder
- 1/2 teaspoon smoked paprika
- 1/4 teaspoon cayenne pepper (optional)
- Salt and pepper to taste
- 1 can (15 oz) black beans, drained and rinsed
- 1 small red onion, finely diced
- 2 cloves garlic, minced
- 1 tablespoon lime juice
For serving:
- 8-10 corn or flour tortillas (6-inch)
- 1 avocado, sliced
- 1/2 cup crumbled queso fresco or feta cheese
- 1/4 cup chopped fresh cilantro
- Lime wedges
- Hot sauce (optional)
- Sour cream or Greek yogurt (optional)
Instructions
- Preheat the oven to 425°F (220°C).
- Prepare the sweet potatoes: In a large bowl, toss the diced sweet potatoes with olive oil, cumin, chili powder, smoked paprika, cayenne (if using), salt, and pepper until evenly coated.
- Roast the sweet potatoes: Spread the seasoned sweet potatoes in a single layer on a baking sheet. Roast for 20-25 minutes, stirring halfway through, until tender and slightly caramelized at the edges.
- Prepare the black bean mixture: While the sweet potatoes are roasting, heat 1 tablespoon of olive oil in a skillet over medium heat. Add the diced red onion and sauté for 3-4 minutes until softened. Add the minced garlic and cook for another 30 seconds until fragrant.
- Add the black beans: Add the drained and rinsed black beans to the skillet. Season with a pinch of salt, pepper, and 1/2 teaspoon of cumin. Cook for 3-4 minutes, stirring occasionally. Remove from heat and stir in the lime juice.
- Combine the filling: When the sweet potatoes are done, add them to the black bean mixture and gently stir to combine. Keep warm.
- Warm the tortillas: Heat the tortillas in a dry skillet for about 30 seconds on each side, or wrap them in a damp paper towel and microwave for 30 seconds.
- Assemble the tacos: Fill each tortilla with the sweet potato and black bean mixture. Top with sliced avocado, crumbled cheese, and chopped cilantro.
- Serve: Offer lime wedges, hot sauce, and sour cream on the side for everyone to customize their tacos.
21. Classic Meatloaf
Ingredients
For the meatloaf:
- 2 pounds ground beef (80/20 lean-to-fat ratio)
- 1 medium onion, finely diced
- 2 cloves garlic, minced
- 2 large eggs, lightly beaten
- 3/4 cup breadcrumbs (plain or Italian-seasoned)
- 1/3 cup milk
- 1/4 cup ketchup
- 1 tablespoon Worcestershire sauce
- 1 teaspoon dried thyme
- 1 teaspoon dried oregano
- 1 tablespoon fresh parsley, chopped
- 1 teaspoon salt
- 1/2 teaspoon black pepper
- 1/2 teaspoon paprika
For the glaze:
- 1/2 cup ketchup
- 2 tablespoons brown sugar
- 1 tablespoon apple cider vinegar
- 1 teaspoon Worcestershire sauce
- 1/4 teaspoon garlic powder
Instructions
- Preheat the oven to 350°F (175°C). Line a baking sheet with foil or parchment paper, or prepare a 9×5-inch loaf pan.
- Prepare the breadcrumbs: In a small bowl, combine the breadcrumbs and milk. Let sit for 5 minutes to allow the breadcrumbs to absorb the milk.
- Mix the meatloaf ingredients: In a large mixing bowl, combine the ground beef, soaked breadcrumbs, diced onion, minced garlic, beaten eggs, ketchup, Worcestershire sauce, thyme, oregano, parsley, salt, pepper, and paprika. Mix gently with your hands until just combined (overmixing can make the meatloaf tough).
- Form the loaf: Transfer the meat mixture to your prepared baking sheet or loaf pan. If using a baking sheet, shape the mixture into a loaf about 9 inches long and 5 inches wide.
- Make the glaze: In a small bowl, whisk together the glaze ingredients until smooth.
- Apply the glaze: Spread about 2/3 of the glaze evenly over the top and sides of the meatloaf, reserving the rest for later.
- Bake the meatloaf: Place in the preheated oven and bake for 45 minutes.
- Add remaining glaze: After 45 minutes, remove the meatloaf from the oven and brush with the remaining glaze. Return to the oven and bake for an additional 15-20 minutes, or until the internal temperature reaches 160°F (71°C) when measured with a meat thermometer.
- Rest before serving: Remove the meatloaf from the oven and let it rest for 10 minutes before slicing. This helps the juices redistribute throughout the meat.
- Slice and serve: Cut into thick slices and serve hot. Classic sides include mashed potatoes, green beans, or a simple garden salad.
Storage: Leftover meatloaf can be refrigerated for up to 3-4 days or frozen for up to 3 months. Sliced meatloaf makes excellent sandwiches the next day!
22. Mediterranean Quinoa Salad with Grilled Chicken
Ingredients
For the chicken marinade:
- 1½ pounds boneless, skinless chicken breasts
- 3 tablespoons olive oil
- 2 tablespoons lemon juice
- 2 cloves garlic, minced
- 1 teaspoon dried oregano
- 1 teaspoon dried thyme
- ½ teaspoon salt
- ¼ teaspoon black pepper
For the quinoa:
- 1 cup uncooked quinoa, rinsed
- 2 cups chicken or vegetable broth
- ¼ teaspoon salt
For the salad:
- 1 English cucumber, diced
- 1 pint cherry tomatoes, halved
- 1 red bell pepper, diced
- ½ red onion, finely diced
- ¾ cup kalamata olives, pitted and halved
- ¾ cup crumbled feta cheese
- ¼ cup fresh parsley, chopped
- 3 tablespoons fresh mint, chopped
For the dressing:
- ⅓ cup extra virgin olive oil
- 3 tablespoons fresh lemon juice
- 1 tablespoon red wine vinegar
- 1 clove garlic, minced
- 1 teaspoon Dijon mustard
- 1 teaspoon honey
- 1 teaspoon dried oregano
- Salt and pepper to taste
Instructions
- Marinate the chicken: In a large bowl or ziplock bag, combine olive oil, lemon juice, minced garlic, oregano, thyme, salt, and pepper. Add chicken breasts, ensuring they’re well coated. Marinate for at least 30 minutes or up to 4 hours in the refrigerator.
- Cook the quinoa: Rinse quinoa thoroughly under cold water using a fine mesh strainer. In a medium saucepan, combine quinoa, broth, and salt. Bring to a boil, then reduce heat to low, cover, and simmer for about 15 minutes until the liquid is absorbed and quinoa is tender. Remove from heat, fluff with a fork, and let cool to room temperature.
- Grill the chicken: Preheat grill to medium-high heat (about 375-400°F). Remove chicken from marinade and grill for 6-7 minutes per side, or until internal temperature reaches 165°F. Let rest for 5-10 minutes before slicing into bite-sized pieces or strips.
- Make the dressing: In a small bowl, whisk together olive oil, lemon juice, red wine vinegar, minced garlic, Dijon mustard, honey, oregano, salt, and pepper until well combined.
- Assemble the salad: In a large bowl, combine the cooled quinoa, cucumber, cherry tomatoes, red bell pepper, red onion, kalamata olives, and grilled chicken. Drizzle with the dressing and toss gently to combine.
- Finish and serve: Add the crumbled feta cheese, parsley, and mint. Toss lightly to incorporate. Taste and adjust seasoning if needed.
- Chill or serve: You can serve immediately or refrigerate for 30 minutes to allow the flavors to meld together.
This Mediterranean quinoa salad can be stored in an airtight container in the refrigerator for up to 3 days, making it perfect for meal prep. For best flavor, let it come to room temperature before serving if it’s been refrigerated.
23. Shrimp and Grits

Ingredients
For the grits:
- 1 cup stone-ground grits (not instant)
- 4 cups chicken broth or water
- 1 cup heavy cream
- 4 tablespoons unsalted butter
- 1 cup sharp cheddar cheese, shredded
- Salt and pepper to taste
For the shrimp:
- 1½ pounds large shrimp (16-20 count), peeled and deveined
- 8 slices bacon, diced
- 1 medium onion, finely diced
- 1 bell pepper (green or red), diced
- 2 cloves garlic, minced
- 2 tablespoons all-purpose flour
- 1 cup chicken broth
- 2 tablespoons fresh lemon juice
- 1 tablespoon Worcestershire sauce
- 1 teaspoon hot sauce (such as Tabasco), or to taste
- 2 tablespoons fresh parsley, chopped
- 4 green onions, thinly sliced
- Salt and pepper to taste
Instructions
For the Grits:
- Prepare the grits: In a medium saucepan, bring the chicken broth or water to a boil over medium-high heat.
- Cook the grits: Slowly whisk in the grits to prevent lumps. Reduce heat to low and simmer, stirring frequently, for about 30-40 minutes until thick and creamy. (Stone-ground grits take longer to cook than quick grits but provide better texture and flavor.)
- Finish the grits: Once the grits are tender, stir in the heavy cream, butter, and shredded cheese. Continue stirring until the cheese is completely melted. Season with salt and pepper to taste. Keep warm over very low heat, stirring occasionally.
For the Shrimp:
- Cook the bacon: In a large skillet over medium heat, cook the diced bacon until crisp, about 8-10 minutes. Remove bacon with a slotted spoon and set aside, leaving the bacon fat in the pan.
- Sauté the vegetables: Add the diced onion and bell pepper to the bacon fat and cook for 5-6 minutes until softened. Add the minced garlic and cook for another 30 seconds until fragrant.
- Make the sauce base: Sprinkle the flour over the vegetables and stir continuously for about 1 minute to make a light roux.
- Create the sauce: Slowly whisk in the chicken broth, then add the lemon juice, Worcestershire sauce, and hot sauce. Bring to a simmer and cook for 2-3 minutes until slightly thickened.
- Cook the shrimp: Season shrimp with salt and pepper, then add to the skillet. Cook for about 2-3 minutes, just until the shrimp turn pink and opaque. Be careful not to overcook. Remove from heat immediately.
- Finish the dish: Stir in the cooked bacon pieces, chopped parsley, and most of the green onions, reserving some for garnish.
To Serve:
- Plate the dish: Spoon the warm grits into shallow bowls or plates. Top with the shrimp mixture and its sauce.
- Garnish: Sprinkle with the remaining green onions.
- Serve immediately while hot.
This classic Southern dish serves 4-6 people and combines creamy, cheesy grits with flavorful shrimp in a rich sauce. The contrast between the smooth grits and the savory shrimp makes for a satisfying and impressive meal.
24. Korean Beef Bulgogi
Ingredients
For the marinade:
- 1/4 cup soy sauce
- 2 tablespoons brown sugar
- 2 tablespoons Asian pear, grated (or substitute apple)
- 1 tablespoon sesame oil
- 1 tablespoon mirin (rice wine)
- 3 cloves garlic, minced
- 1 tablespoon fresh ginger, grated
- 2 tablespoons green onions, finely chopped
- 1 tablespoon toasted sesame seeds
- 1/2 teaspoon black pepper
For the beef:
- 1.5 pounds beef ribeye or sirloin, thinly sliced (about 1/8 inch thick)
- 2 tablespoons vegetable oil, for cooking
For serving:
- 2 cups cooked short-grain rice
- 1 tablespoon toasted sesame seeds, for garnish
- 4 green onions, sliced diagonally
- 1 tablespoon vegetable oil
- 1 medium yellow onion, sliced into half-moons
- 1 medium carrot, julienned
- Optional: lettuce leaves for wrapping
- Optional: kimchi
- Optional: gochujang (Korean chili paste)
Instructions
- Prepare the beef: If you’re slicing the beef yourself, place it in the freezer for about 30 minutes before slicing to make it easier to cut into thin slices. Slice the beef against the grain into approximately 1/8-inch thick pieces.
- Make the marinade: In a medium bowl, combine soy sauce, brown sugar, grated Asian pear, sesame oil, mirin, minced garlic, grated ginger, chopped green onions, sesame seeds, and black pepper. Whisk until the sugar is dissolved.
- Marinate the beef: Place the sliced beef in a large ziplock bag or a shallow dish and pour the marinade over the meat. Mix well to ensure all the meat is coated. Seal the bag or cover the dish and refrigerate for at least 1 hour, or preferably 4-6 hours (overnight is even better for maximum flavor).
- Prepare for cooking: Remove the marinated beef from the refrigerator about 30 minutes before cooking to bring it to room temperature. If you’re using vegetables, prepare them during this time.
- Cook the vegetables: Heat 1 tablespoon of vegetable oil in a large skillet or wok over medium-high heat. Add the sliced onions and julienned carrots. Stir-fry for about 3-4 minutes until the vegetables are slightly softened but still crisp. Remove from the skillet and set aside.
- Cook the beef: In the same skillet, heat the remaining tablespoon of oil over high heat until it’s very hot. Working in batches to avoid overcrowding (which would steam rather than sear the meat), add a single layer of beef slices. Cook for about 1-2 minutes per side until the edges are caramelized and the beef is cooked through. Transfer to a plate and continue with the remaining beef.
- Combine and finish: Return all the cooked beef and vegetables to the skillet. Pour in any remaining marinade and bring to a quick boil for about 30 seconds. Remove from heat.
- Serve: Transfer the bulgogi to a serving platter. Sprinkle with additional toasted sesame seeds and sliced green onions. Serve with warm rice and optional sides like kimchi, lettuce leaves for wrapping, and gochujang for extra heat.
Traditional serving suggestion: To eat bulgogi the traditional Korean way, take a lettuce leaf, add a small spoonful of rice, a few pieces of the bulgogi, and a small amount of gochujang if desired. Fold into a small wrap and enjoy in one bite.
This recipe serves 4 people and can be easily scaled up for larger gatherings. The beef can also be grilled over charcoal for an authentic smoky flavor if preferred.
25. Pesto Chicken with Roasted Tomatoes
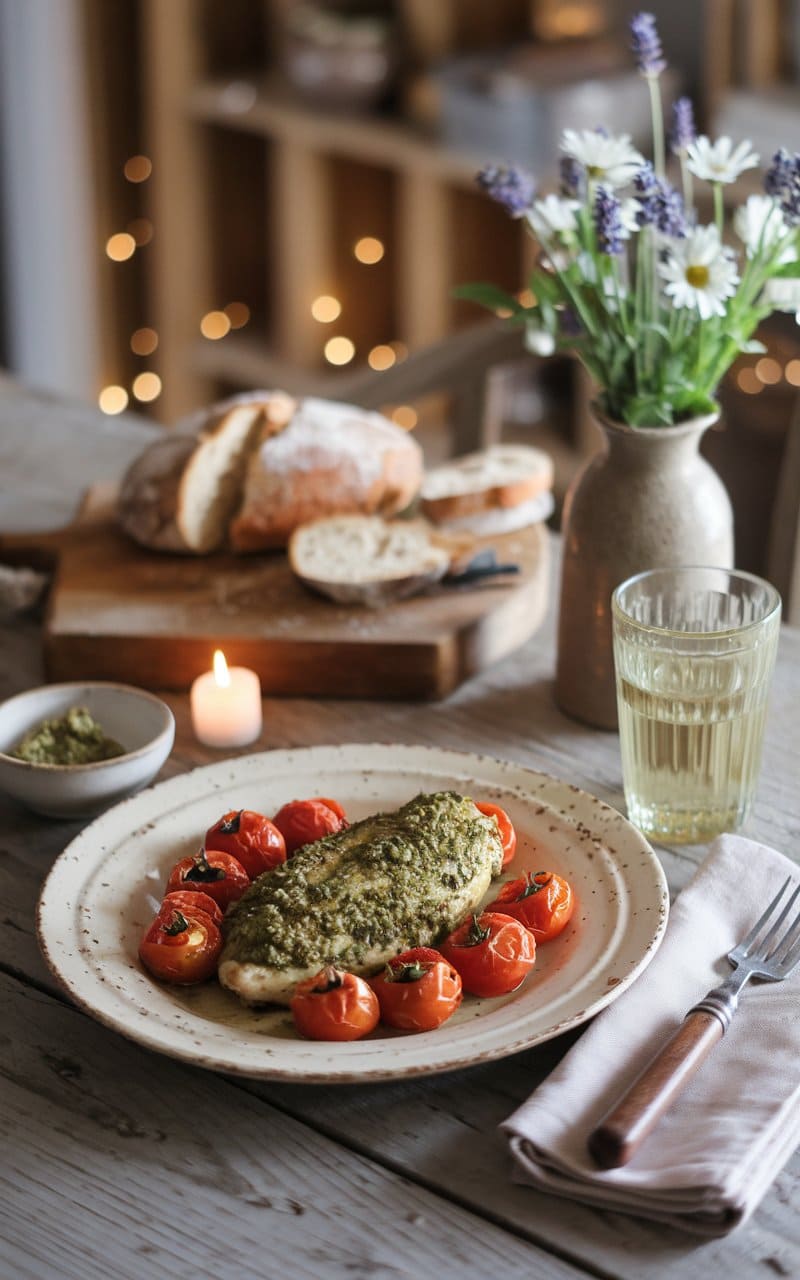
Ingredients
For the pesto:
- 2 cups fresh basil leaves, packed
- ⅓ cup pine nuts, toasted
- 2 cloves garlic
- ½ cup freshly grated Parmesan cheese
- ½ cup extra virgin olive oil
- ½ teaspoon salt
- ¼ teaspoon black pepper
- 1 tablespoon fresh lemon juice
For the chicken:
- 4 boneless, skinless chicken breasts (about 2 pounds)
- Salt and pepper to taste
- 2 tablespoons olive oil
- ½ cup chicken broth
- ¼ cup heavy cream (optional)
For the roasted tomatoes:
- 2 pints cherry or grape tomatoes
- 3 tablespoons olive oil
- 4 cloves garlic, thinly sliced
- 1 teaspoon dried oregano
- ½ teaspoon red pepper flakes (optional)
- 1 teaspoon salt
- ½ teaspoon black pepper
- Fresh basil leaves for garnish
Instructions
Make the Pesto:
- Toast the pine nuts: In a dry skillet over medium-low heat, toast the pine nuts until lightly golden and fragrant, about 3-4 minutes, stirring frequently to prevent burning. Set aside to cool.
- Prepare the pesto: In a food processor, combine the basil leaves, cooled toasted pine nuts, garlic, and Parmesan cheese. Pulse until coarsely chopped.
- Finish the pesto: With the processor running, slowly drizzle in the olive oil until smooth. Add salt, pepper, and lemon juice. Pulse a few more times to combine. Set aside ⅓ cup for the chicken and refrigerate the rest for later use.
Roast the Tomatoes:
- Preheat the oven to 400°F (200°C).
- Prepare the tomatoes: In a large bowl, toss the tomatoes with olive oil, sliced garlic, oregano, red pepper flakes (if using), salt, and pepper.
- Roast: Spread the tomatoes on a rimmed baking sheet in a single layer. Roast for 15-20 minutes, until the tomatoes are soft and beginning to burst, with some light charring on the edges.
Cook the Chicken:
- Prepare the chicken: Season both sides of the chicken breasts with salt and pepper.
- Sear the chicken: Heat olive oil in a large skillet over medium-high heat. Add the chicken breasts and cook for about 5-6 minutes on each side, until golden brown and cooked through (internal temperature of 165°F/74°C).
- Make the sauce: Remove the chicken to a plate and cover with foil to keep warm. In the same skillet, add the chicken broth and scrape up any browned bits from the bottom of the pan. Add the heavy cream (if using) and ⅓ cup of the prepared pesto. Stir to combine and simmer for 2-3 minutes until slightly thickened.
- Return the chicken: Place the chicken back in the skillet, spooning some of the sauce over the top. Let it warm through for about 1-2 minutes.
Assemble and Serve:
- Plate the dish: Place a chicken breast on each plate. Spoon the roasted tomatoes around or over the chicken.
- Finish and garnish: Drizzle additional pesto sauce over the chicken and tomatoes. Garnish with fresh basil leaves.
- Serve: Enjoy with crusty bread, pasta, or a simple side salad.
This elegant yet simple dish serves 4 people and makes for a beautiful presentation with its vibrant colors. The homemade pesto adds a fresh, herbaceous touch that elevates the tender chicken and sweet roasted tomatoes.
26. Burmese Mohinga (Fish Noodle Soup)
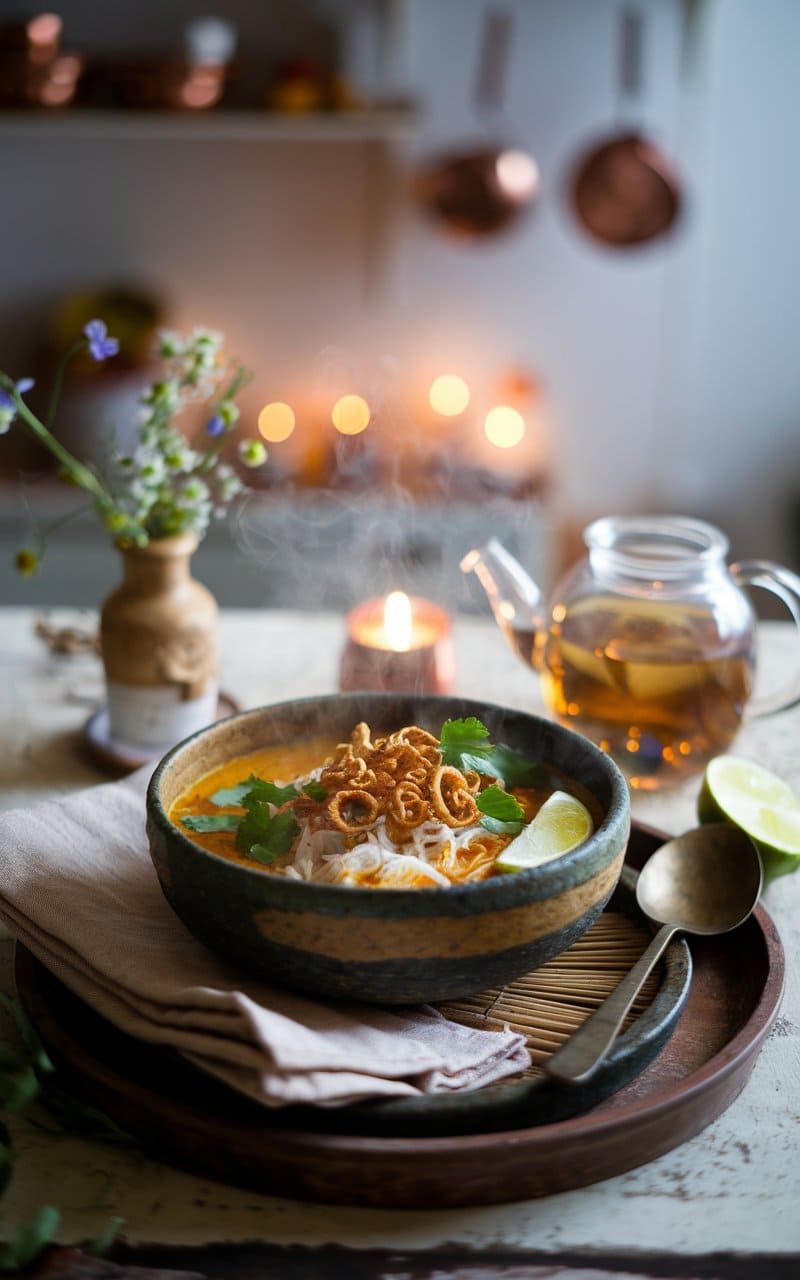
Mohinga is a beloved Burmese dish, often considered Myanmar’s national dish. It is a comforting, flavorful fish noodle soup with a fragrant, spiced broth thickened with toasted rice. Traditionally, it is made with catfish, but you can substitute it with any firm white fish.
Ingredients:
For the Broth:
- 1 lb (450g) catfish or any firm white fish (tilapia, cod, or mackerel)
- 6 cups (1.5L) water
- 2 stalks lemongrass, trimmed and smashed
- 4-5 kaffir lime leaves (optional)
- 2 inches (5 cm) ginger, peeled and minced
- 4 cloves garlic, minced
- 1 medium onion, finely chopped
- 1 teaspoon turmeric powder
- 1 teaspoon paprika (for color)
- 1 teaspoon chili powder (adjust to taste)
- 2 tablespoons fish sauce
- 1 tablespoon shrimp paste (ngapi) or substitute with miso paste
- ½ teaspoon salt (adjust to taste)
- 1 tablespoon vegetable oil
For the Rice Thickener:
- ⅓ cup toasted rice powder (see instructions below)
For the Noodles & Garnishes:
- 1 lb (450g) rice vermicelli noodles, cooked according to package instructions
- 3 boiled eggs, halved
- Handful of chopped cilantro
- ½ cup thinly sliced scallions
- ½ cup crispy fried shallots
- 1 lime, cut into wedges
- ½ cup cooked chickpea fritters (optional)
- Red chili flakes or chili oil (for extra heat)
Instructions:
Step 1: Prepare the Toasted Rice Powder
- In a dry pan, toast ⅓ cup uncooked rice (jasmine or glutinous) over medium heat, stirring frequently until golden brown and fragrant (about 5-7 minutes).
- Let it cool, then grind into a fine powder using a spice grinder or mortar and pestle. Set aside.
Step 2: Cook the Fish and Make the Broth
- In a large pot, heat 1 tablespoon of vegetable oil over medium heat.
- Add the chopped onions, garlic, and ginger. Sauté until fragrant and translucent.
- Stir in the turmeric, paprika, and chili powder. Cook for about 30 seconds.
- Add the fish fillets, breaking them up with a spoon as they cook. Let them cook for 3-4 minutes.
- Pour in the 6 cups of water, then add the lemongrass stalks, kaffir lime leaves (if using), fish sauce, shrimp paste, and salt.
- Bring the broth to a gentle boil, then reduce the heat and simmer for 25-30 minutes, allowing the flavors to develop.
Step 3: Thicken the Broth
- Gradually add the toasted rice powder while stirring continuously to avoid lumps.
- Simmer for another 5-10 minutes until the broth thickens slightly. Adjust seasoning if needed.
Step 4: Assemble the Mohinga
- Divide the cooked rice vermicelli noodles into serving bowls.
- Ladle the hot fish broth over the noodles.
- Garnish with boiled eggs, crispy shallots, scallions, cilantro, and chickpea fritters if using.
- Serve with lime wedges and chili flakes or chili oil on the side.
Tips:
- For a more intense seafood flavor, add a few dried shrimp while simmering the broth.
- If you prefer a smoother broth, strain the soup before serving.
- Chickpea fritters (Pe Kyaw) can be made by mixing chickpea flour, water, turmeric, and salt into a thick batter, then frying small spoonfuls until crispy.
- For extra depth, you can use fish stock instead of water.
27. Georgian Kharcho (Beef and Walnut Soup)
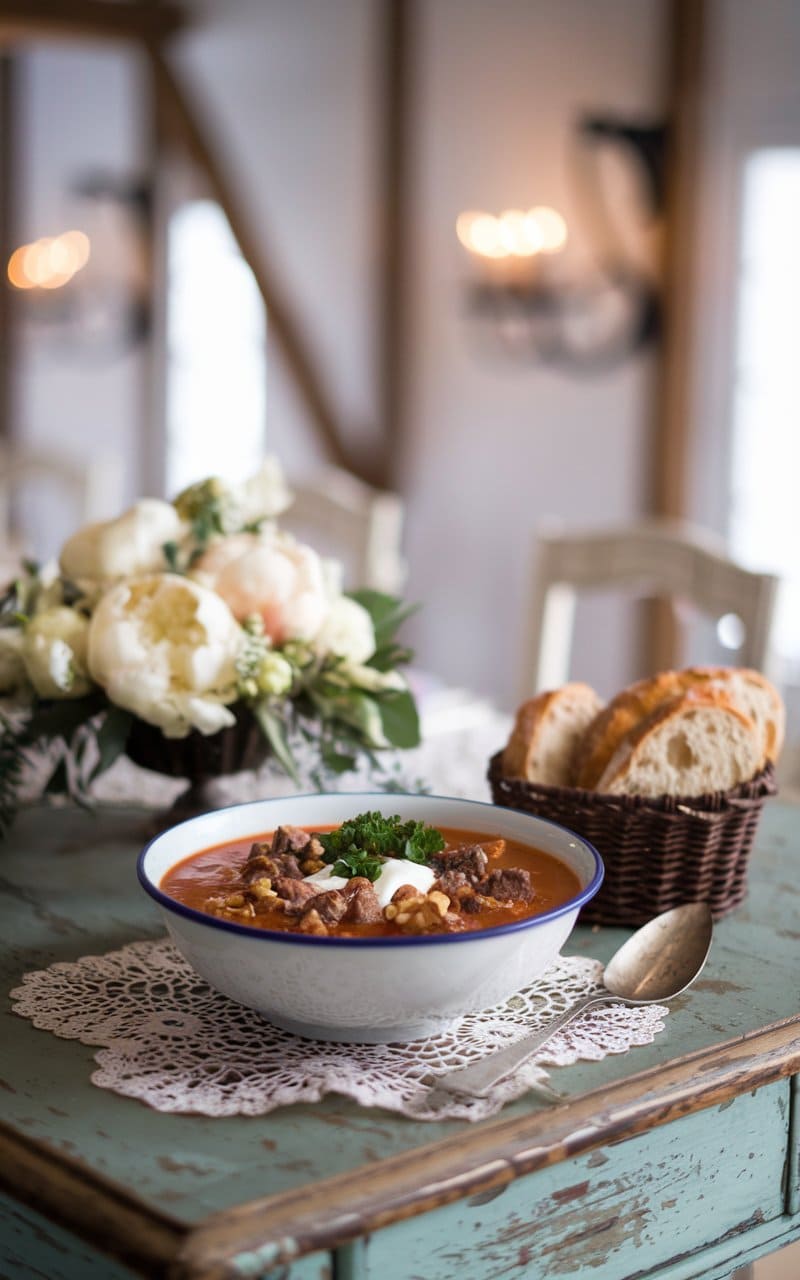
Kharcho is a rich, hearty Georgian soup made with beef, walnuts, tomatoes, and a fragrant blend of spices. It is thickened with ground walnuts and often has a tangy depth from tkemali (sour plum sauce) or pomegranate molasses. Traditionally, it’s served with bread or over rice.
Ingredients:
For the Soup Base:
- 1.5 lbs (700g) beef (chuck, brisket, or short ribs), cut into chunks
- 8 cups (2L) water or beef broth
- 1 large onion, finely chopped
- 3 cloves garlic, minced
- 1 can (14 oz / 400g) crushed tomatoes or 3 fresh tomatoes, finely chopped
- ½ cup walnuts, finely ground
- 1 tablespoon tomato paste
- 1 teaspoon paprika
- 1 teaspoon coriander powder
- 1 teaspoon fenugreek (blue fenugreek if available)
- ½ teaspoon ground black pepper
- ½ teaspoon dried thyme
- ½ teaspoon red chili flakes (adjust to taste)
- 1 teaspoon salt (adjust to taste)
For the Tangy Element:
- 2 tablespoons tkemali (sour plum sauce) OR
- 1 tablespoon pomegranate molasses OR
- 2 tablespoons lemon juice
For the Thickening & Texture:
- ⅓ cup uncooked white rice (jasmine or basmati)
- ½ teaspoon cinnamon (optional, but traditional in some variations)
- 2 bay leaves
For Garnish:
- ¼ cup fresh cilantro, chopped
- ¼ cup fresh parsley, chopped
- Extra crushed walnuts for topping (optional)
Instructions:
Step 1: Cook the Beef
- In a large pot, add the beef chunks and cover with 8 cups of water or beef broth. Bring to a boil, then reduce heat to a gentle simmer.
- Skim off any foam that rises to the surface. Add the bay leaves and cook for 1.5 to 2 hours, or until the beef is very tender.
- Remove the beef and set it aside. Strain the broth if necessary and return it to the pot.
Step 2: Prepare the Soup Base
- In a separate pan, heat a bit of oil over medium heat. Sauté the chopped onions until soft and golden.
- Add the minced garlic, paprika, coriander, fenugreek, black pepper, thyme, and chili flakes. Stir for about 30 seconds until fragrant.
- Stir in the tomato paste and cook for another minute to deepen the flavor.
- Add the crushed tomatoes and cook for 5-7 minutes until slightly thickened.
Step 3: Combine Ingredients
- Add the tomato mixture to the pot with the beef broth. Stir well.
- Return the cooked beef to the pot. Add the ground walnuts, rice, and cinnamon (if using).
- Pour in the tkemali, pomegranate molasses, or lemon juice for the tangy element. Stir and bring the soup to a gentle simmer.
- Cook uncovered for another 20-25 minutes, stirring occasionally, until the rice is tender and the soup thickens slightly.
Step 4: Finish & Serve
- Taste and adjust seasoning with salt or more acidity (tkemali or lemon juice) if needed.
- Stir in the chopped cilantro and parsley just before serving.
- Garnish with extra crushed walnuts if desired.
Serving Suggestions:
- Serve hot with fresh Georgian bread (shotis puri) or rustic country bread.
- Can be enjoyed over rice for an extra hearty meal.
- Pairs well with a dry red wine or Georgian Saperavi wine.
Tips & Variations:
- For a richer broth, use bone-in beef and let it simmer longer.
- If you prefer a nuttier flavor, increase the ground walnuts to ¾ cup.
- Some versions include dried fruit like prunes for an extra layer of sweetness and complexity.
- For a spicier version, add more chili flakes or a diced fresh chili pepper.
28. Filipino Laing (Taro Leaves in Coconut Milk)
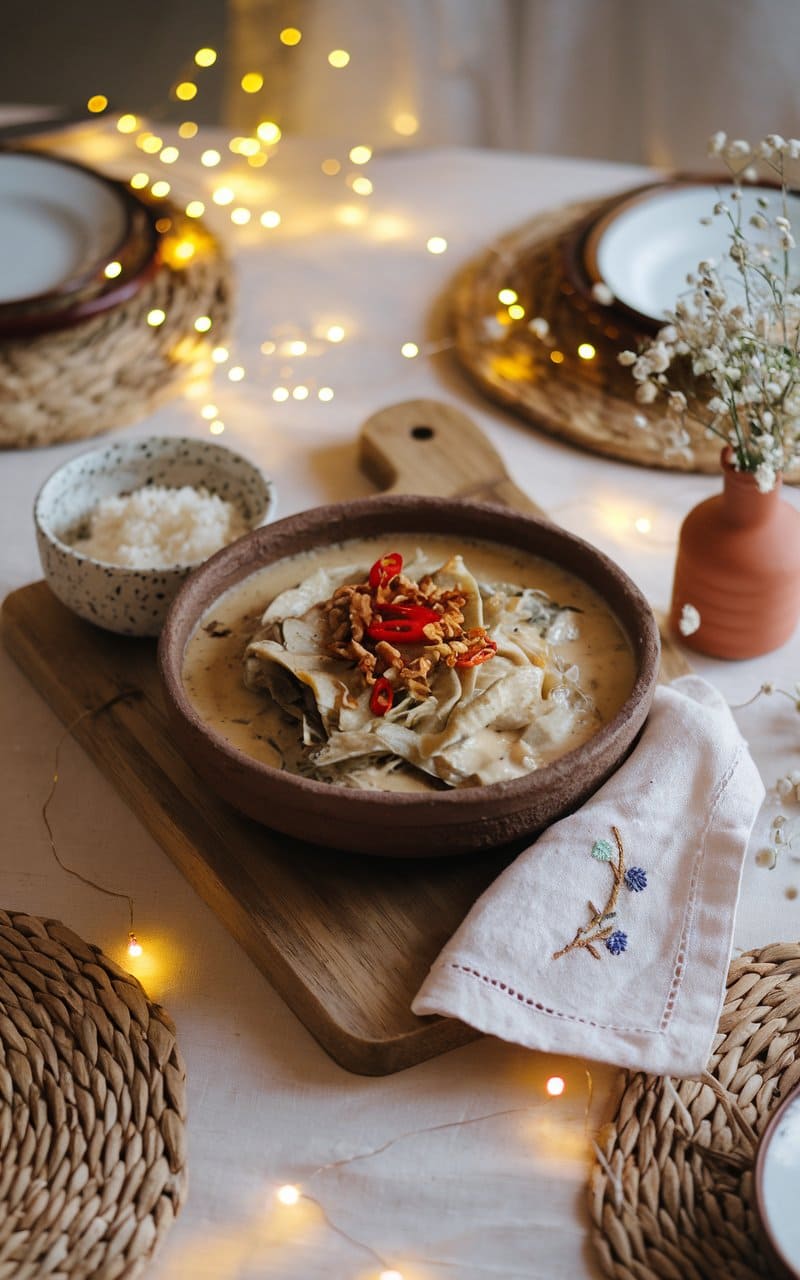
Laing is a traditional Filipino dish from the Bicol region, known for its rich, creamy coconut sauce and mildly spicy, earthy flavors from dried taro leaves and chili. The dish is slow-cooked until the leaves absorb the flavors of coconut milk, shrimp paste, and aromatics.
Ingredients:
Main Ingredients:
- 4 cups dried taro leaves (do not wash to avoid itchiness)
- 2 cans (14 oz / 400ml each) coconut milk
- 1 can (14 oz / 400ml) coconut cream
- 1 lb (450g) pork belly or shrimp (optional, for added flavor)
- 1 tablespoon shrimp paste (bagoong alamang) or 1 teaspoon fish sauce
- 4 cloves garlic, minced
- 1 thumb-sized piece of ginger, sliced thinly
- 1 medium onion, finely chopped
- 3-4 Thai chilies (siling labuyo), chopped (adjust to taste)
- 2 stalks lemongrass, pounded and tied into a knot (optional)
- ½ teaspoon ground black pepper
- ½ teaspoon salt (adjust to taste)
- 1 tablespoon cooking oil
Instructions:
Step 1: Sauté the Aromatics
- In a large pot or pan, heat 1 tablespoon of oil over medium heat.
- Add the chopped onions, garlic, and ginger. Sauté until fragrant and slightly softened.
- If using pork belly, add it now and cook until lightly browned. If using shrimp, set it aside for later.
- Stir in the shrimp paste (bagoong alamang) or fish sauce and cook for another minute to release its umami flavor.
Step 2: Simmer the Coconut Milk
- Pour in the 2 cans of coconut milk and add the lemongrass (if using). Stir well.
- Bring to a gentle simmer and let it cook for about 5 minutes to allow the flavors to blend.
Step 3: Add the Taro Leaves
- Carefully place the dried taro leaves on top of the simmering coconut milk without stirring to prevent the leaves from releasing their itchiness.
- Let the leaves absorb the coconut milk naturally for about 10 minutes before gently pressing them down. Do not stir at this stage.
Step 4: Slow Cooking
- Once the taro leaves have softened and absorbed most of the liquid, gently mix them into the sauce.
- Pour in the coconut cream and add the chopped chilies. Stir gently.
- Reduce heat to low and let it simmer for another 30-40 minutes, stirring occasionally to prevent burning.
- If using shrimp, add it in the last 10 minutes of cooking to avoid overcooking.
Step 5: Adjust Seasoning & Serve
- Taste and adjust seasoning with salt and black pepper. If you prefer it spicier, add more chopped chilies.
- Remove the lemongrass before serving.
- Serve hot with steamed white rice and a side of fried fish or grilled meat.
Tips & Variations:
- Avoid stirring too early when adding taro leaves to prevent itchiness from the raw leaves.
- For a richer taste, you can use all coconut cream instead of coconut milk.
- Vegan option: Omit the pork/shrimp and replace shrimp paste with fermented bean paste.
- For extra smokiness, some regions add dried fish or smoked meat.
29. Brazilian Moqueca (Fish Stew)
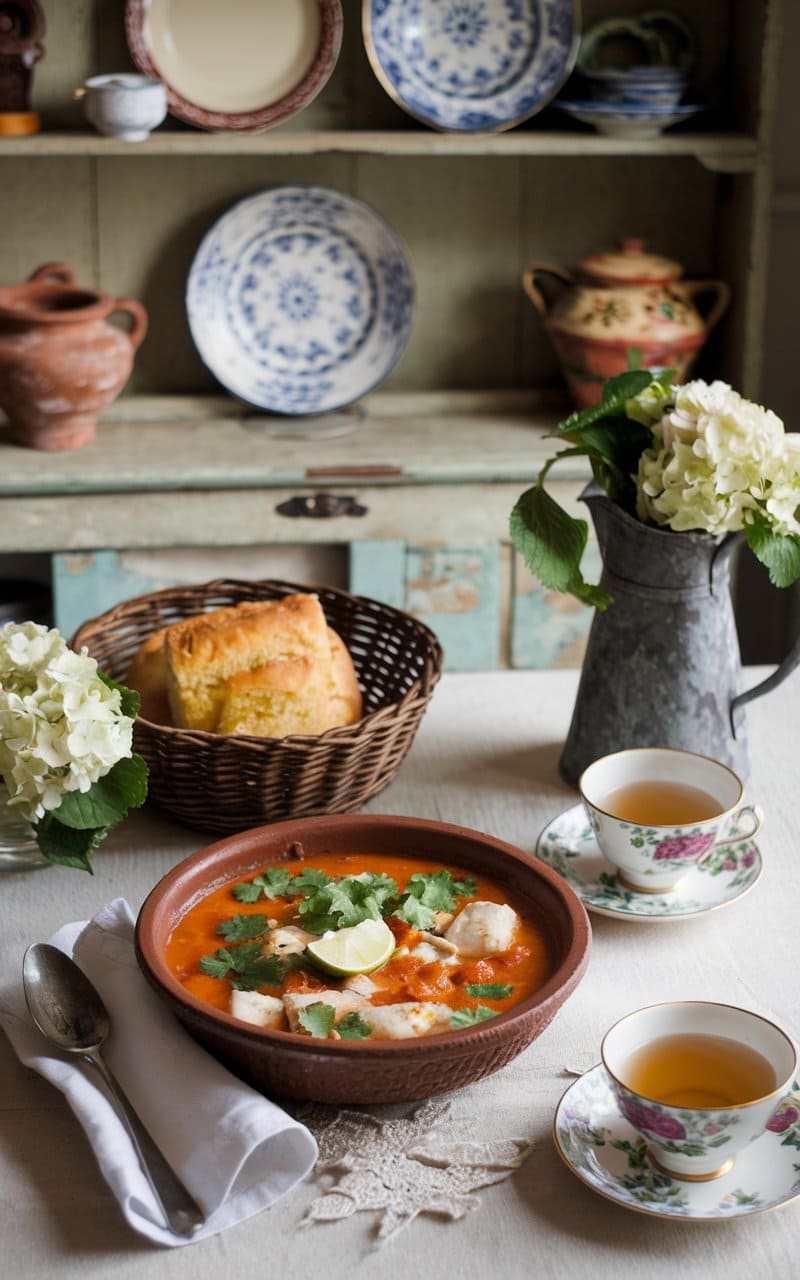
Moqueca is a traditional Brazilian fish stew that originates from the coastal regions of Bahia and Espírito Santo. It is a fragrant, vibrant dish made with fresh fish, coconut milk, tomatoes, peppers, and palm oil (dendê), resulting in a rich and flavorful broth.
Ingredients:
For the Fish Marinade:
- 1.5 lbs (700g) firm white fish (snapper, cod, halibut, or sea bass), cut into chunks
- 2 cloves garlic, minced
- 1 tablespoon lime juice
- 1 teaspoon salt
- ½ teaspoon ground black pepper
For the Stew:
- 2 tablespoons olive oil (or use palm oil for authentic Bahia-style)
- 1 medium onion, thinly sliced
- 1 bell pepper (red or yellow), sliced into strips
- 1 medium tomato, chopped
- 2 tablespoons palm oil (dendê) (optional but authentic)
- ½ teaspoon paprika
- ½ teaspoon ground cumin
- 1 teaspoon chili flakes (adjust to taste)
- 1 cup coconut milk
- ½ cup fish or vegetable broth
- ¼ cup fresh cilantro, chopped
- ¼ cup fresh parsley, chopped
- 1 teaspoon salt (adjust to taste)
For Serving:
- Steamed white rice
- Lime wedges
Instructions:
Step 1: Marinate the Fish
- In a bowl, combine the fish chunks with lime juice, garlic, salt, and black pepper.
- Let it marinate for at least 20-30 minutes in the fridge.
Step 2: Prepare the Stew Base
- In a large pan or clay pot, heat olive oil or palm oil over medium heat.
- Add the onions and bell peppers. Sauté until softened (about 3-4 minutes).
- Stir in the chopped tomatoes, paprika, cumin, and chili flakes. Cook until the tomatoes break down (about 5 minutes).
Step 3: Simmer the Stew
- Pour in the coconut milk and fish broth. Stir well to combine.
- Bring to a gentle simmer and cook for 5 minutes to let the flavors meld.
Step 4: Add the Fish
- Carefully place the marinated fish into the stew.
- Cover and let it simmer for 10-12 minutes, or until the fish is tender and cooked through.
- Drizzle with palm oil (if using) for an authentic Bahian touch.
Step 5: Finish & Serve
- Sprinkle with fresh cilantro and parsley.
- Taste and adjust salt if needed.
- Serve hot with steamed white rice and lime wedges on the side.
Tips & Variations:
- For extra flavor, add shrimp or squid along with the fish.
- For a spicier version, add fresh chili peppers.
- If you don’t have palm oil, you can use extra olive oil, but the dish will lack its signature color and flavor.
- For a traditional touch, cook in a clay pot (panela de barro) for enhanced flavor.
30. Icelandic Plokkfiskur (Fish Stew with Potatoes)
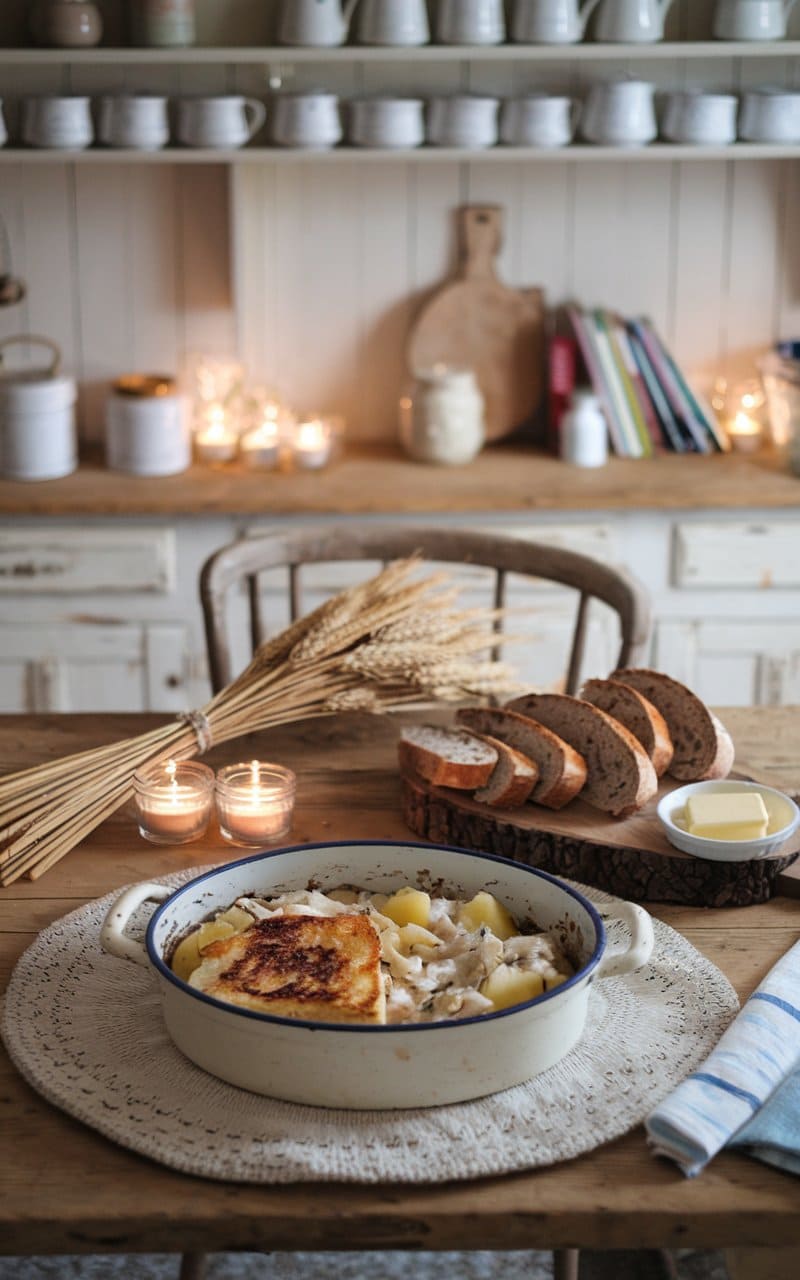
Plokkfiskur is a traditional Icelandic fish stew made with simple, comforting ingredients—flaky white fish, tender potatoes, onions, and a creamy, buttery sauce. It’s a classic home-cooked dish in Iceland, often served with rye bread and butter.
Ingredients:
For the Fish and Potatoes:
- 1.5 lbs (700g) white fish (cod, haddock, or halibut)
- 4 medium potatoes, peeled and diced
- 4 cups (1L) water or fish stock
- 1 teaspoon salt (for boiling water)
For the Creamy Sauce:
- 2 tablespoons butter
- 1 medium onion, finely chopped
- 2 tablespoons all-purpose flour
- 1 cup (250ml) milk or cream
- ½ teaspoon salt (adjust to taste)
- ½ teaspoon ground white pepper
- ½ teaspoon ground nutmeg (optional)
For Serving:
- Fresh parsley, chopped (optional)
- Icelandic rye bread (rúgbrauð) or dark rye bread
- Butter for spreading
Instructions:
Step 1: Cook the Fish and Potatoes
- In a pot, bring 4 cups of water or fish stock to a boil and add 1 teaspoon salt.
- Add the peeled, diced potatoes and cook until fork-tender (about 12-15 minutes).
- Meanwhile, gently poach the fish in the same pot for 5-7 minutes, or until it flakes easily with a fork.
- Remove the fish and potatoes from the pot, draining them well. Flake the fish into bite-sized pieces and set aside.
Step 2: Prepare the Creamy Sauce
- In a separate large saucepan, melt 2 tablespoons of butter over medium heat.
- Add the chopped onion and sauté until soft and translucent (about 3-4 minutes).
- Stir in 2 tablespoons of flour, cooking for 1 minute to remove the raw flour taste.
- Gradually pour in the milk or cream, stirring constantly until the sauce thickens.
- Season with salt, white pepper, and nutmeg (if using).
Step 3: Combine Everything
- Add the cooked potatoes and flaked fish to the sauce. Gently stir everything together, making sure not to mash the potatoes too much.
- Let the stew simmer for 3-5 minutes to meld the flavors. Adjust seasoning if needed.
Step 4: Serve and Enjoy
- Garnish with fresh parsley if desired.
- Serve hot with buttered Icelandic rye bread (rúgbrauð) on the side.
Tips & Variations:
- For a richer texture, use heavy cream instead of milk.
- For extra flavor, add a dash of Dijon mustard or a spoonful of grated cheese.
- If you like a chunky stew, keep the potatoes in larger pieces.
- For a more rustic version, use salted cod (bacalao) instead of fresh fish.
31. Ethiopian Doro Wat (Spicy Chicken Stew)

Doro Wat is Ethiopia’s iconic spicy chicken stew, known for its rich, slow-cooked berbere sauce, caramelized onions, and tender chicken, often served with injera (Ethiopian sourdough flatbread). The depth of flavor comes from berbere spice blend, niter kibbeh (spiced clarified butter), and a long cooking process that brings out the richness of the dish.
Ingredients:
For the Chicken & Marinade:
- 1 whole chicken (cut into 8-10 pieces) or 6-8 bone-in, skinless chicken thighs
- 2 tablespoons lemon juice
- 1 teaspoon salt
For the Stew:
- 4 large onions, finely chopped
- ¼ cup niter kibbeh (Ethiopian spiced butter) or regular butter
- ¼ cup vegetable oil (for cooking the onions)
- 3 tablespoons berbere spice blend (adjust to taste)
- 1 tablespoon paprika (for extra color and mild sweetness)
- 4 cloves garlic, minced
- 1 teaspoon ginger, minced
- 2 tablespoons tomato paste
- 1 ½ – 2 cups chicken broth or water
- 6-8 boiled eggs, peeled
- ½ teaspoon black pepper
- ½ teaspoon ground cardamom (optional, for added depth)
- Salt to taste
For Serving:
- Injera (Ethiopian flatbread) or rice
- Extra berbere spice for garnish (optional)
Instructions:
Step 1: Marinate the Chicken
- Rinse the chicken pieces and pat them dry.
- Place them in a bowl, rub with lemon juice and salt, and let them sit for 30 minutes while preparing the stew base.
Step 2: Caramelize the Onions
- In a large, heavy-bottomed pot, dry cook the chopped onions (without oil) over medium heat for 10-15 minutes, stirring frequently until they become soft and golden brown. This is key to the deep flavor of Doro Wat.
- Add the vegetable oil and niter kibbeh, stirring well. Let the onions cook for another 5-7 minutes until fully caramelized.
Step 3: Build the Flavor
- Stir in the berbere spice and paprika. Cook for 2-3 minutes, stirring continuously to toast the spices and enhance their depth.
- Add the garlic, ginger, and tomato paste, stirring well. Cook for another 2 minutes until fragrant.
- Pour in 1 ½ – 2 cups of chicken broth and mix thoroughly to create a thick sauce.
Step 4: Cook the Chicken
- Add the marinated chicken pieces to the stew. Stir to coat them well in the sauce.
- Cover and let it simmer for 45-60 minutes over low heat, stirring occasionally, until the chicken is tender and deeply flavored. Add more broth if needed.
Step 5: Add the Eggs
- Once the chicken is cooked, add the boiled eggs, making small cuts on their surface so they can absorb the sauce.
- Let the stew simmer for another 10 minutes so the eggs soak in the flavors.
Step 6: Serve and Enjoy
- Taste and adjust salt if necessary.
- Serve hot with injera or over steamed rice.
Tips & Variations:
- For an authentic taste, use niter kibbeh. It adds a warm, spiced butter flavor to the dish.
- Adjust berbere spice depending on your heat preference. Ethiopian Doro Wat is typically quite spicy!
- For a richer sauce, let the stew cook low and slow—don’t rush the onion caramelization.
- For a vegetarian alternative, try Shiro Wat (chickpea stew) using the same spice base.
32. Laotian Or Lam (Spicy Stew with Meat and Herbs)
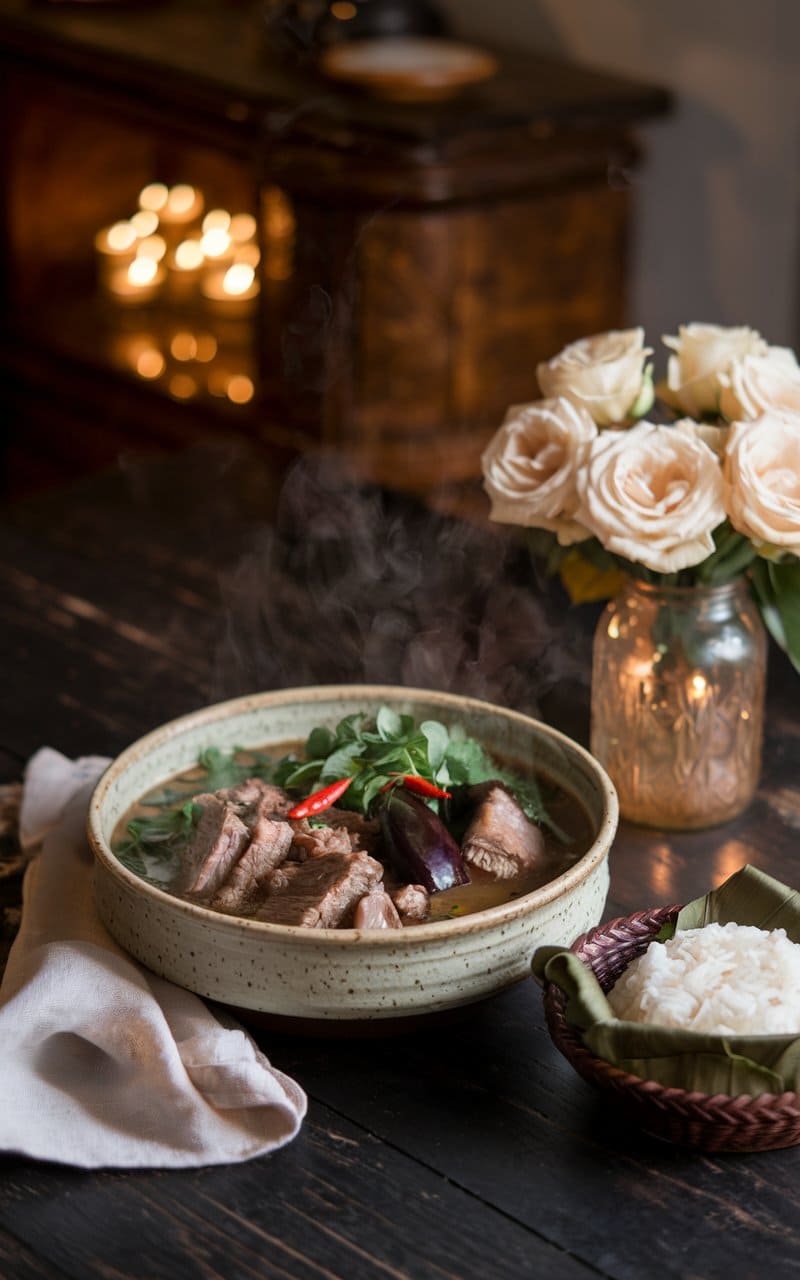
Or Lam is a rich and hearty Laotian stew known for its deep umami flavor, spicy kick, and fragrant herbs. Traditionally made with buffalo meat, pork, or chicken, it features sa-khan (Lao spicy wood), eggplants, mushrooms, and fresh herbs for a complex, earthy taste.
Ingredients:
For the Meat & Broth:
- 1.5 lbs (700g) buffalo meat, beef, pork, or chicken (cut into bite-sized pieces)
- 5 cups water or beef/chicken broth
- 1 tablespoon fish sauce
- 1 teaspoon salt
- 1 teaspoon black pepper
For the Stew:
- 2 tablespoons vegetable oil
- 3 cloves garlic, minced
- 1 small onion, chopped
- 2-3 dried chilies (adjust to taste)
- 2 medium eggplants, cut into chunks (Thai eggplants or regular eggplant)
- 1 cup oyster mushrooms (or any wild mushrooms)
- ½ cup green beans or yard-long beans, cut into pieces
- 2 stalks lemongrass, pounded and tied in a knot
- 1-2 pieces sa-khan (Lao spicy wood, optional but authentic)
- 1 teaspoon toasted ground sticky rice powder (optional, for thickening)
- 2-3 cups pumpkin or squash, cubed
- 1-2 tablespoons padaek (fermented fish sauce, optional for an authentic umami taste)
For Garnish & Flavoring:
- 1 cup fresh Lao basil or Thai basil
- 1 handful fresh dill (optional)
- 1 handful fresh culantro (or cilantro)
- Extra chilies (optional for more heat)
Instructions:
Step 1: Prepare the Broth
- In a large pot, bring water or broth to a boil.
- Add the meat, fish sauce, salt, and black pepper. Simmer over low heat for 30-40 minutes (or until meat is tender). Skim off any impurities.
Step 2: Sauté the Aromatics
- In a separate pan, heat vegetable oil over medium heat.
- Add garlic, onion, and dried chilies. Sauté until fragrant (about 3 minutes).
- Transfer this mixture into the simmering broth.
Step 3: Add the Vegetables & Herbs
- Add the eggplant, mushrooms, green beans, lemongrass, sa-khan (if using), and pumpkin.
- Pour in padaek (fermented fish sauce) and stir well.
- Let the stew simmer for 15-20 minutes until the vegetables are soft.
Step 4: Thicken the Stew
- If using toasted sticky rice powder, sprinkle it in now and stir well. This adds a slightly nutty flavor and thickens the broth.
Step 5: Final Seasoning & Garnish
- Taste and adjust seasoning with more fish sauce or salt if needed.
- Stir in fresh basil, culantro, and dill. Turn off the heat and let it sit for a few minutes to allow the flavors to meld.
Step 6: Serve & Enjoy
- Serve hot with steamed sticky rice or jasmine rice.
- Garnish with extra herbs and chilies for a spicier kick.
Tips & Variations:
- For a richer taste, use homemade broth instead of water.
- If you can’t find sa-khan, substitute with more lemongrass for a citrusy note.
- For a vegetarian version, replace meat with tofu and use soy sauce instead of fish sauce.
- For an extra smoky taste, roast the dried chilies before adding them.
33. Persian Fesenjan (Pomegranate Walnut Chicken)
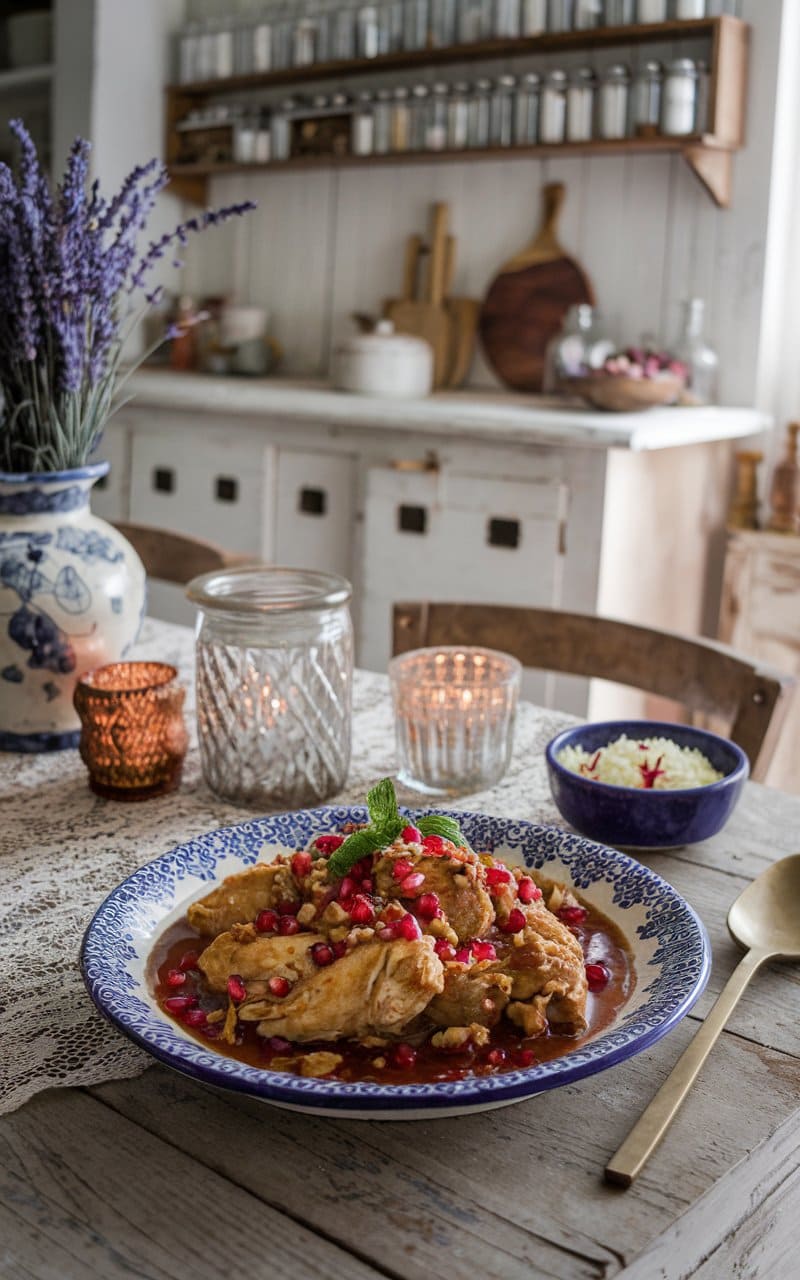
Fesenjan (Fesenjoon) is a luxurious Persian stew known for its rich, nutty, and slightly sweet-tart flavor, thanks to ground walnuts and pomegranate molasses. This slow-cooked dish is traditionally served over steamed Persian rice (chelow) and is a staple at Persian feasts.
Ingredients:
For the Stew:
- 2 lbs (900g) bone-in, skinless chicken thighs or drumsticks (or boneless chicken breast)
- 2 cups walnuts, finely ground
- 1 large onion, finely chopped
- 2 tablespoons butter or vegetable oil
- 1 ½ cups chicken broth or water
- 1 cup pomegranate molasses (adjust to taste)
- 1 tablespoon honey or sugar (optional, to balance tartness)
- ½ teaspoon turmeric
- ½ teaspoon cinnamon
- ¼ teaspoon ground cardamom (optional)
- ¼ teaspoon saffron threads (optional, steeped in 2 tablespoons hot water)
- Salt and black pepper to taste
For Garnish & Serving:
- Pomegranate seeds (for garnish)
- Chopped fresh parsley or cilantro (optional)
- Persian steamed rice (chelow)
Instructions:
Step 1: Toast and Grind the Walnuts
- Place walnuts in a dry pan over medium heat and toast for 3-5 minutes, stirring frequently until fragrant.
- Once cooled, finely grind the walnuts using a food processor or mortar and pestle until they resemble a coarse paste. Set aside.
Step 2: Sauté the Onions and Chicken
- Heat butter or oil in a large pot over medium heat.
- Add chopped onions and sauté until soft and golden brown (about 8-10 minutes).
- Stir in turmeric, cinnamon, and cardamom and cook for 1 minute until fragrant.
- Add the chicken pieces, season with salt and black pepper, and brown them on both sides (about 5 minutes per side).
Step 3: Cook the Walnuts and Pomegranate Sauce
- Add the ground walnuts to the pot and stir well to coat the chicken.
- Pour in chicken broth or water and bring to a gentle simmer.
- Stir in the pomegranate molasses and honey or sugar (if using). Mix well.
Step 4: Simmer the Stew
- Reduce the heat to low, cover, and let the stew simmer for 1.5 to 2 hours, stirring occasionally.
- The sauce should thicken into a deep, rich brown color. Add more water if needed to maintain the desired consistency.
- If using saffron, stir it in during the last 15 minutes of cooking for extra aroma and color.
Step 5: Serve and Garnish
- Taste and adjust seasoning as needed (add more pomegranate molasses for tanginess or honey for sweetness).
- Serve hot over steamed Persian rice (chelow).
- Garnish with pomegranate seeds and fresh herbs for a pop of color and flavor.
Tips & Variations:
- For a vegetarian version, substitute chicken with roasted eggplant, mushrooms, or lentils.
- For a deeper flavor, let the stew rest overnight and reheat before serving—it gets even better with time!
- If the sauce is too thick, add more broth; if too thin, let it simmer uncovered to reduce.
- For a richer texture, use boneless chicken thighs, which break down beautifully in the sauce.
34. Indonesian Rawon (Black Beef Soup)

Rawon is a traditional Indonesian beef soup known for its deep black color and rich, earthy flavor, which comes from keluwak (black nuts). This East Javanese specialty is slow-cooked with tender beef, aromatic spices, and served with rice, bean sprouts, and sambal for a complete meal.
Ingredients:
For the Soup:
- 1.5 lbs (700g) beef shank or brisket, cut into chunks
- 8 cups (2L) water
- 3 tablespoons vegetable oil
- 4 kaffir lime leaves
- 2 lemongrass stalks, bruised and tied
- 2 bay leaves
- 1 teaspoon salt (adjust to taste)
- ½ teaspoon sugar
- ½ teaspoon white pepper
For the Spice Paste (Bumbu Halus):
- 6 shallots, peeled
- 4 cloves garlic
- 3 candlenuts (or macadamia nuts)
- 4 large keluwak (black nuts), cracked open and soaked in warm water for 30 minutes
- 1-inch galangal, chopped
- 1-inch ginger, chopped
- 1 teaspoon ground coriander
- 1 teaspoon turmeric powder
- 1 teaspoon shrimp paste (terasi), toasted (optional for extra umami)
For Garnish & Serving:
- 2 cups bean sprouts, blanched
- 2 hard-boiled eggs, halved
- 1 green onion, thinly sliced
- 1 tablespoon fried shallots
- 1 lime, cut into wedges
- Sambal terasi (spicy shrimp paste chili sauce)
- Steamed white rice
Instructions:
Step 1: Prepare the Broth
- In a large pot, bring 8 cups of water to a boil.
- Add the beef chunks and boil for 5 minutes, skimming off impurities.
- Remove the beef, discard the water, and refill with fresh water (this keeps the broth clear).
- Add the beef back in and bring to a gentle simmer.
Step 2: Make the Spice Paste (Bumbu Halus)
- In a mortar and pestle (or blender), grind the shallots, garlic, candlenuts, soaked keluwak, galangal, ginger, coriander, turmeric, and shrimp paste into a smooth paste.
- Heat 3 tablespoons of oil in a pan over medium heat.
- Sauté the spice paste for 5-7 minutes, stirring frequently until fragrant and the oil separates from the paste.
Step 3: Build the Soup
- Add the sautéed spice paste to the simmering beef broth.
- Add kaffir lime leaves, lemongrass, and bay leaves.
- Season with salt, sugar, and white pepper. Stir well.
- Simmer over low heat for 1.5 to 2 hours, or until the beef is tender and the soup is dark and flavorful.
Step 4: Serve and Garnish
- Remove the lemongrass and bay leaves before serving.
- Ladle the hot soup with beef into bowls.
- Garnish with blanched bean sprouts, boiled eggs, fried shallots, and green onions.
- Serve with steamed rice, sambal terasi, and lime wedges on the side.
Tips & Variations:
- Keluwak is key—without it, the soup won’t get its signature black color and deep flavor.
- For a richer taste, use beef bones or oxtail along with the meat.
- Adjust spice levels by adding more or fewer chilies to the sambal.
- Let it sit overnight—Rawon tastes even better the next day as the flavors develop.
35. South African Bobotie (Spiced Minced Meat with Egg Topping)

Bobotie is a traditional South African dish made with spiced minced meat, dried fruits, and a creamy, golden egg custard topping. This Cape Malay-inspired dish is known for its rich, slightly sweet-savory flavors, often served with yellow rice and chutney.
Ingredients:
For the Meat Filling:
- 2 tablespoons vegetable oil or butter
- 1 large onion, finely chopped
- 2 cloves garlic, minced
- 1 teaspoon ground turmeric
- 1 teaspoon ground cumin
- 1 teaspoon ground coriander
- 1 teaspoon mild curry powder
- ½ teaspoon cinnamon
- 1 lb (450g) ground beef or lamb
- 1 tablespoon white vinegar or lemon juice
- 1 slice white bread, soaked in ¼ cup milk and mashed
- ½ cup raisins or dried apricots, chopped
- ¼ cup slivered almonds (optional)
- 2 tablespoons fruit chutney (such as Mrs. Ball’s chutney)
- 1 teaspoon salt
- ½ teaspoon black pepper
For the Egg Custard Topping:
- 2 large eggs
- ½ cup milk
- ½ teaspoon salt
- 2 bay leaves
For Serving:
- Yellow rice (turmeric rice)
- Extra fruit chutney
- Toasted coconut (optional)
Instructions:
Step 1: Prepare the Meat Filling
- Preheat oven to 350°F (180°C).
- Heat oil or butter in a large skillet over medium heat.
- Add onion and sauté until soft and translucent (about 5 minutes).
- Stir in garlic, turmeric, cumin, coriander, curry powder, and cinnamon. Cook for 1-2 minutes until fragrant.
- Add ground beef or lamb and brown it, breaking it apart with a spoon. Cook for 5-7 minutes until no longer pink.
- Stir in vinegar or lemon juice, mashed soaked bread, raisins or apricots, almonds, chutney, salt, and black pepper.
- Cook for another 5 minutes, stirring well to combine all flavors. Remove from heat.
Step 2: Bake the Bobotie
- Transfer the meat mixture to a greased baking dish (8×8 or similar size) and spread evenly.
- In a bowl, whisk together eggs, milk, and salt.
- Pour the egg mixture over the meat filling.
- Place 2 bay leaves on top for extra aroma.
- Bake for 30-40 minutes or until the custard is golden and set.
Step 3: Serve and Enjoy
- Remove from oven and let it rest for 5-10 minutes.
- Serve warm with yellow rice and chutney on the side.
- Garnish with toasted coconut for extra texture (optional).
Tips & Variations:
- For a richer flavor, use a mix of ground beef and lamb.
- For extra sweetness, add a tablespoon of apricot jam to the filling.
- For a spicier kick, increase the curry powder or add chopped chili.
- Make it ahead! Bobotie tastes even better the next day as the flavors develop.
36. Malaysian Ayam Percik (Grilled Spiced Chicken)
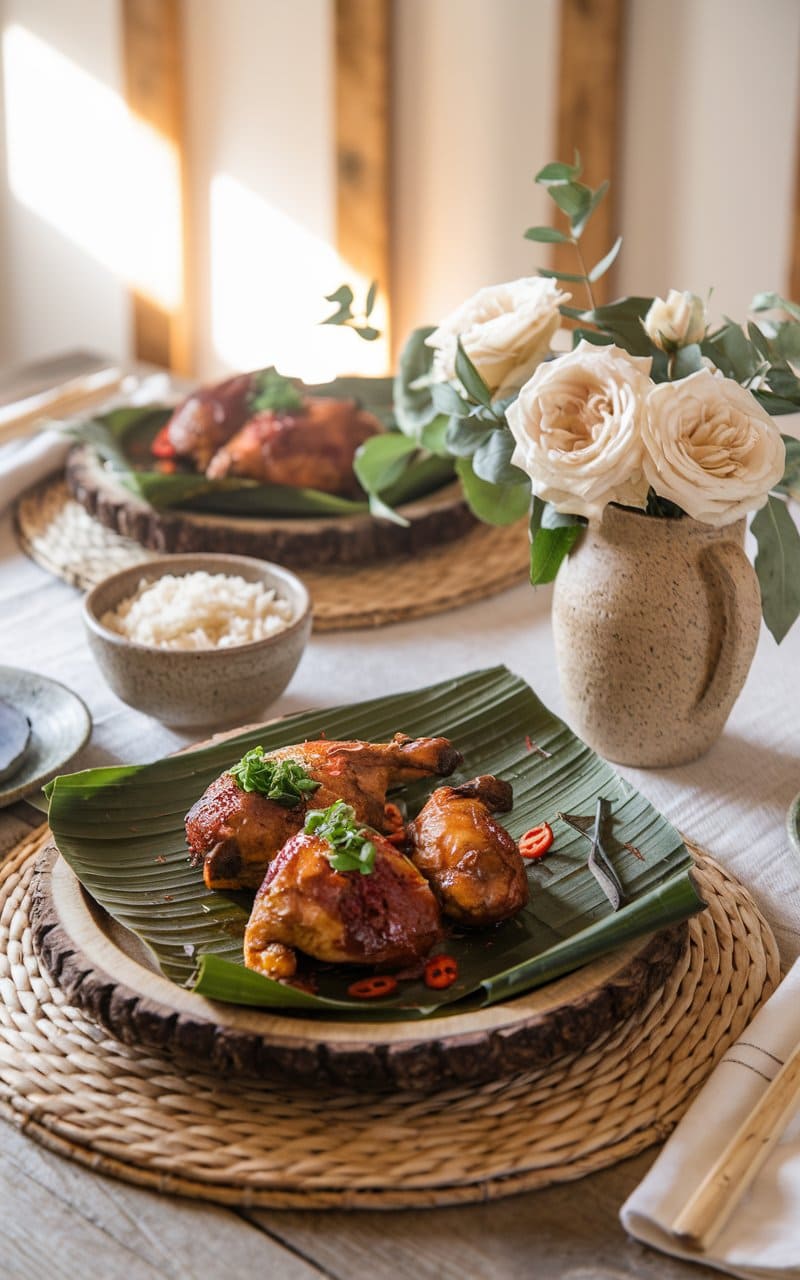
Ingredients
For the Spice Paste:
- 8-10 dried red chilies, soaked in hot water until soft
- 6 shallots, peeled
- 4 cloves garlic, peeled
- 2 stalks lemongrass (white parts only), roughly chopped
- 1 inch ginger, peeled
- 1 inch galangal, peeled (or additional ginger if unavailable)
- 1 inch turmeric, peeled (or 1 tsp turmeric powder)
- 2 candlenuts or macadamia nuts
- 1 tsp ground coriander
- 1 tsp ground cumin
- 1/2 tsp ground fennel
For the Sauce:
- 2 tbsp vegetable oil
- 1 can (14 oz) coconut milk
- 1 tbsp tamarind paste
- 1 tbsp palm sugar or brown sugar
- 1 tsp salt
- 1 stalk lemongrass, bruised
- 2-3 kaffir lime leaves (optional)
For the Chicken:
- 2 lbs chicken pieces (thighs and drumsticks work best)
- 1 tbsp vegetable oil for brushing
- Salt to taste
Instructions
Prepare the Spice Paste:
- Drain the soaked dried chilies.
- Place all spice paste ingredients in a food processor or blender.
- Blend until you achieve a smooth paste, adding a little water if necessary.
Make the Sauce:
- Heat oil in a medium saucepan over medium heat.
- Add the blended spice paste and sauté for 5-7 minutes, until fragrant and the oil begins to separate.
- Add the coconut milk, tamarind paste, sugar, salt, bruised lemongrass, and kaffir lime leaves if using.
- Stir well and bring to a gentle simmer.
- Reduce heat to low and simmer for 15-20 minutes, stirring occasionally, until the sauce thickens.
- Remove from heat and let cool. Set aside about 1/3 of the sauce for serving.
Prepare and Grill the Chicken:
- Season chicken pieces with salt.
- Coat the chicken pieces thoroughly with about 2/3 of the sauce mixture.
- Marinate for at least 2 hours or overnight in the refrigerator for best results.
- Preheat grill or oven to medium heat (around 350°F/175°C).
- For grilling: Place chicken on the grill, skin side down first. Grill for about 25-30 minutes, turning occasionally and basting with the marinade, until fully cooked.
- For oven method: Place chicken on a lined baking tray and bake for 35-40 minutes, turning and basting halfway through.
- The chicken is done when juices run clear and internal temperature reaches 165°F (74°C).
To Serve:
- Arrange the grilled chicken on a serving plate.
- Warm the reserved sauce and serve alongside the chicken.
- Garnish with fresh cilantro leaves if desired.
- Traditional accompaniments include coconut rice, cucumber slices, and a simple salad.
37. Hungarian Hortobágyi Palacsinta (Savory Stuffed Pancakes)
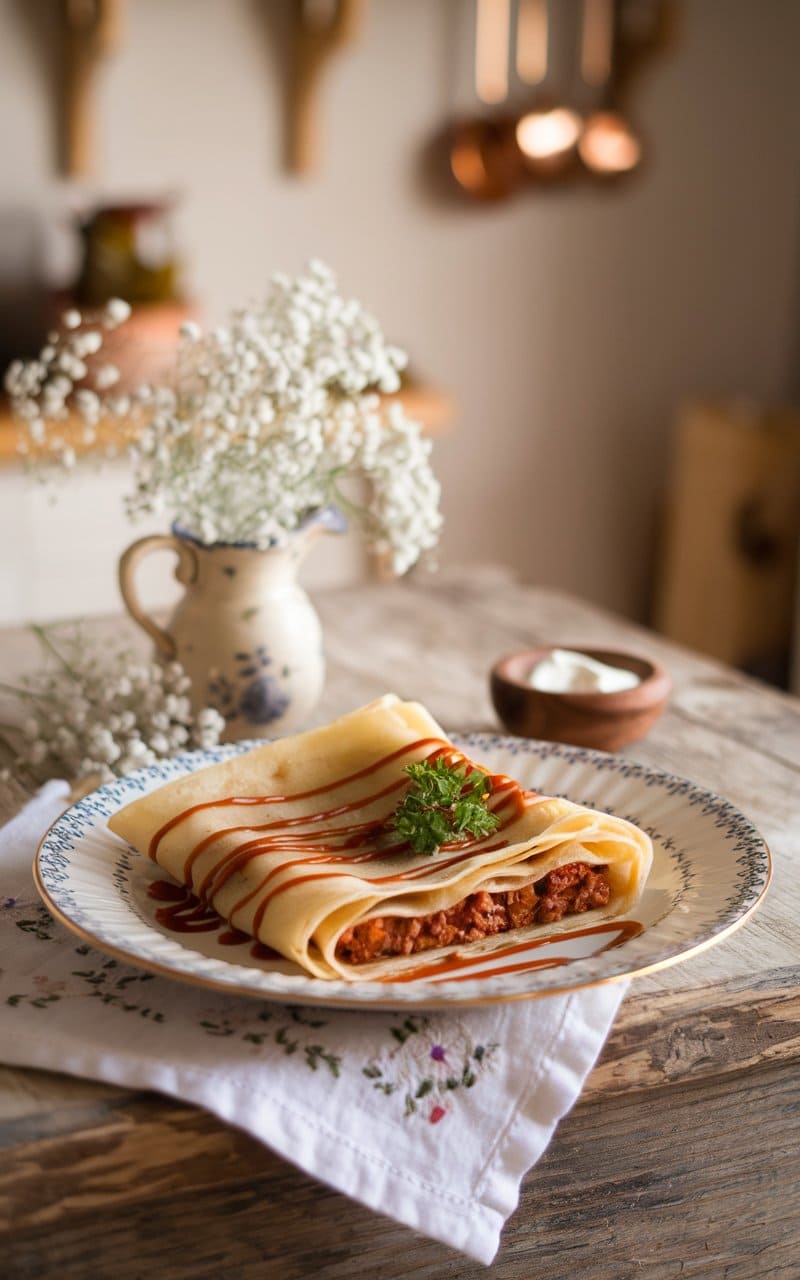
Ingredients
For the Pancakes:
- 2 cups all-purpose flour
- 2 eggs
- 2½ cups milk
- ½ cup sparkling water (for lighter pancakes)
- ¼ teaspoon salt
- 2 tablespoons vegetable oil, plus more for cooking
For the Meat Filling:
- 1 pound beef or veal, cut into small cubes (traditionally veal, but beef works well)
- 1 large onion, finely chopped
- 2 cloves garlic, minced
- 1 tablespoon butter
- 1 tablespoon vegetable oil
- 1 tablespoon Hungarian sweet paprika
- 1 teaspoon caraway seeds
- 1 teaspoon dried marjoram
- ½ cup beef broth
- 3 tablespoons sour cream
- Salt and pepper to taste
- 2 tablespoons fresh parsley, chopped
For the Paprika Sauce:
- 2 tablespoons butter
- 2 tablespoons all-purpose flour
- 1½ cups beef broth
- 1 cup sour cream
- 1 tablespoon Hungarian sweet paprika
- ½ teaspoon salt
- Freshly ground black pepper
Instructions
For the Pancakes:
- In a large bowl, whisk together flour and salt.
- Make a well in the center and add the eggs, gradually whisking in the flour.
- Slowly add the milk while whisking constantly to avoid lumps.
- Add the sparkling water and oil, whisk until the batter is smooth.
- Let the batter rest for at least 30 minutes.
- Heat a non-stick skillet over medium heat. Lightly oil the surface.
- Pour about ¼ cup of batter into the pan, tilting to spread evenly.
- Cook until the bottom is lightly golden, about 1-2 minutes.
- Flip and cook the other side for about 1 minute.
- Remove to a plate and repeat with remaining batter, stacking pancakes.
- You should have about 8-10 pancakes.
For the Meat Filling:
- Heat butter and oil in a large skillet over medium heat.
- Add onions and sauté until translucent, about 5 minutes.
- Add garlic and cook for another minute.
- Increase heat to medium-high, add meat cubes and brown on all sides.
- Sprinkle with paprika, caraway seeds, and marjoram, stirring to coat.
- Pour in beef broth, season with salt and pepper.
- Reduce heat, cover, and simmer for about 45 minutes, or until meat is very tender.
- Uncover and continue cooking until most of the liquid evaporates.
- Use two forks to shred the meat or pulse briefly in a food processor.
- Stir in the sour cream and parsley, adjust seasoning.
- Let the filling cool slightly before assembling.
For the Paprika Sauce:
- Melt butter in a saucepan over medium heat.
- Add flour and whisk for 1-2 minutes to make a roux.
- Gradually add beef broth, whisking constantly to prevent lumps.
- Bring to a simmer and cook until slightly thickened, about 5 minutes.
- Remove from heat and let cool slightly.
- In a separate bowl, mix sour cream with paprika.
- Slowly whisk the sour cream mixture into the sauce.
- Return to low heat (do not boil), season with salt and pepper.
Assembly:
- Preheat oven to 350°F (175°C).
- Place about 2-3 tablespoons of meat filling along the center of each pancake.
- Fold in the sides, then roll up the pancake.
- Place the stuffed pancakes seam-side down in a baking dish.
- Pour the paprika sauce over the pancakes, ensuring they’re fully covered.
- Bake for 20-25 minutes until heated through and the sauce is bubbly.
- Serve hot, garnished with a dollop of sour cream and a sprinkle of paprika.
This classic Hungarian dish is traditionally served with a small side of additional sour cream. It makes for an impressive main course for special occasions!
38. Peruvian Carapulcra (Dried Potato and Pork Stew)
![]()
Ingredients
For the Main Dish:
- 1 pound dried potato chunks (papa seca) or freeze-dried potatoes
- 1½ pounds pork shoulder, cut into 1-inch chunks
- 3 tablespoons vegetable oil
- 1 large red onion, finely diced
- 4 cloves garlic, minced
- 2 tablespoons ají panca paste (Peruvian red pepper paste)
- 1 tablespoon ají amarillo paste (Peruvian yellow pepper paste)
- 1 teaspoon ground cumin
- ½ teaspoon ground cloves
- 1 cinnamon stick
- 2 bay leaves
- ¼ cup peanuts, toasted and ground
- ¼ cup roasted peanut butter (optional, for enhanced flavor)
- 4 cups chicken broth
- 1 cup chicha de jora (Peruvian corn beer) or dry white wine
- 3 tablespoons dark chocolate, chopped (70% cocoa or higher)
- ¼ cup raisins
- Salt and freshly ground black pepper to taste
For Garnish:
- ¼ cup fresh cilantro, chopped
- 2 tablespoons roasted peanuts, crushed
- Red onion slices, briefly soaked in cold water and lime juice
Instructions
Prepare the Dried Potatoes:
- If using traditional papa seca, place in a bowl and cover with cold water. Soak for 2-3 hours, changing the water once or twice.
- Drain the potatoes thoroughly and set aside.
- If using freeze-dried potatoes, they can be used directly without soaking.
Prepare the Pork:
- Season pork chunks generously with salt and pepper.
- Heat 2 tablespoons oil in a large heavy-bottomed pot or Dutch oven over medium-high heat.
- Working in batches, brown the pork on all sides, about 3-4 minutes per batch.
- Transfer the browned meat to a plate and set aside.
Make the Stew Base:
- In the same pot, add the remaining tablespoon of oil if needed.
- Add the diced onion and cook until soft and translucent, about 5 minutes.
- Add the minced garlic and cook for another minute until fragrant.
- Stir in the ají panca and ají amarillo pastes, cooking for 2 minutes to release their flavors.
- Add ground cumin, cloves, cinnamon stick, and bay leaves, stirring to combine.
- Return the browned pork to the pot and mix well with the spice mixture.
Cook the Stew:
- Add the soaked and drained dried potatoes to the pot.
- Pour in the chicken broth and chicha de jora (or white wine).
- Stir in the ground peanuts and peanut butter if using.
- Bring to a boil, then reduce heat to low.
- Cover partially and simmer for about 1.5 hours, stirring occasionally.
- The potatoes will begin to break down and thicken the stew naturally.
- After 1.5 hours, add the chopped chocolate and raisins.
- Continue to simmer uncovered for another 30 minutes, until the meat is very tender and the stew has thickened.
- If the stew becomes too thick, add a little more broth or water.
- Taste and adjust seasoning with salt and pepper.
Serve:
- Remove the bay leaves and cinnamon stick before serving.
- Ladle the hot carapulcra into bowls.
- Garnish with fresh cilantro, crushed roasted peanuts, and red onion slices.
- Traditionally served with white rice on the side.
Notes:
- If you cannot find dried potatoes (papa seca), you can make a simplified version using regular potatoes, though the texture and flavor will be different. Cut 2 pounds of waxy potatoes into chunks and add them to the stew after the meat has been cooking for about an hour.
- Carapulcra tastes even better the next day after the flavors have had time to meld, making it an excellent dish to prepare in advance.
- This dish originates from the Chincha Province in Peru and reflects the country’s African, Indigenous, and Spanish influences.
39. Armenian Khash (Beef Foot Soup)
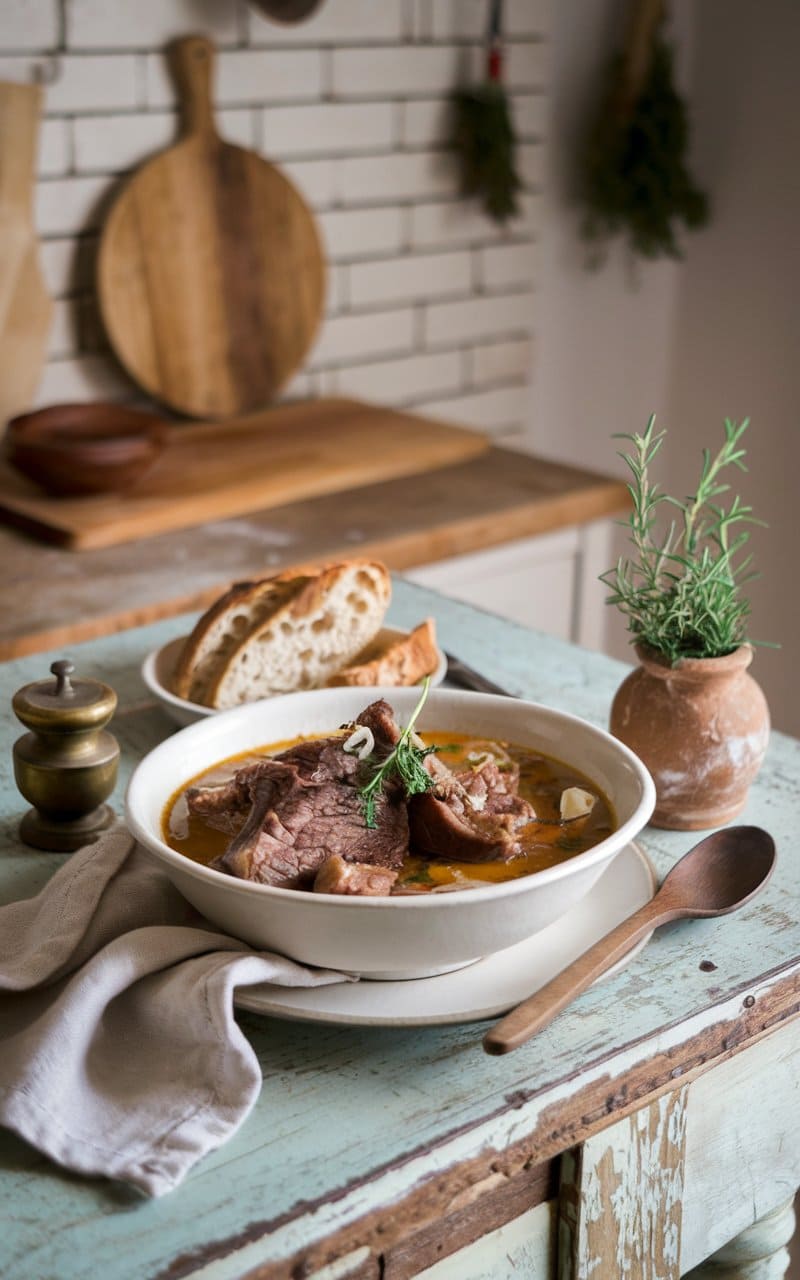
Ingredients
For the Soup:
- 4-5 lbs beef feet (hooves), split and cleaned
- 2 lbs beef knuckles or shin bones (optional, for extra flavor)
- 2 tablespoons salt
- 2-3 cloves garlic, peeled and thinly sliced
- Water (enough to cover)
For Serving:
- 1 bulb garlic, peeled and minced
- 2-3 teaspoons salt (or to taste)
- 1 loaf lavash bread or crusty bread
- Fresh herbs: cilantro, parsley, mint (about 1 cup total, chopped)
- 2-3 tablespoons dried ground red pepper
- 2-3 tablespoons ground cumin
- 1-2 lemons, cut into wedges
Instructions
Preparation (Day Before):
- Clean the beef feet thoroughly. Ask your butcher to split them in half lengthwise.
- Place the beef feet in a large pot and cover with cold water.
- Bring to a boil, then drain and rinse well under cold water.
- Refill the pot with cold water, add 1 tablespoon salt, and bring to a boil again.
- Reduce heat, skim off any foam that rises to the surface.
- Drain and rinse once more under cold water.
Cooking Process (Overnight):
- Place the cleaned beef feet (and knuckles if using) in a large, heavy-bottomed pot.
- Add sliced garlic and remaining salt.
- Fill the pot with enough cold water to cover the meat by about 2 inches.
- Bring to a gentle boil, then reduce heat to the lowest setting.
- Simmer partially covered for 8-10 hours (traditionally overnight). The broth should become milky white and the meat should be falling off the bone.
- Occasionally skim off any foam or impurities that rise to the surface.
- Do not stir the soup as this could make it cloudy.
Final Preparation:
- When the soup is ready, carefully remove the beef feet and bones from the broth.
- Strain the broth if desired for a clearer consistency.
- Separate the meat from the bones and tendons if you wish (though traditionally the whole pieces are served in the broth).
- Return the meat to the broth and keep hot until serving.
Serving (Traditional Method):
- Khash is traditionally served early in the morning after the overnight cooking.
- Heat individual serving bowls.
- Place minced raw garlic in each bowl.
- Ladle the hot broth and meat into each bowl.
- Each diner adds salt to their own taste.
- Serve with a large plate of fresh herbs, dried red pepper, and ground cumin on the side.
- Serve lavash or crusty bread separately – traditionally, pieces are torn off and dipped in the broth.
- Lemon wedges can be squeezed into the soup according to personal preference.
Cultural Notes:
- Khash is considered a celebratory dish in Armenia and is often enjoyed as a communal meal.
- Traditionally, khash is eaten in winter months and often accompanied by vodka.
- The proper way to eat khash is to first add garlic and salt to the broth, then sprinkle herbs and spices according to taste.
- Some people like to crumble dried lavash directly into the soup, while others prefer to dip fresh bread.
- In Armenian tradition, khash is believed to have healing properties, especially for joint pain.
This hearty, gelatinous soup has a rich history in Armenian cuisine and is considered a delicacy despite its humble ingredients. The long, slow cooking process is essential to extract all the flavor and nutrients from the beef feet.
40. Cambodian Amok Trey (Steamed Curry Fish)
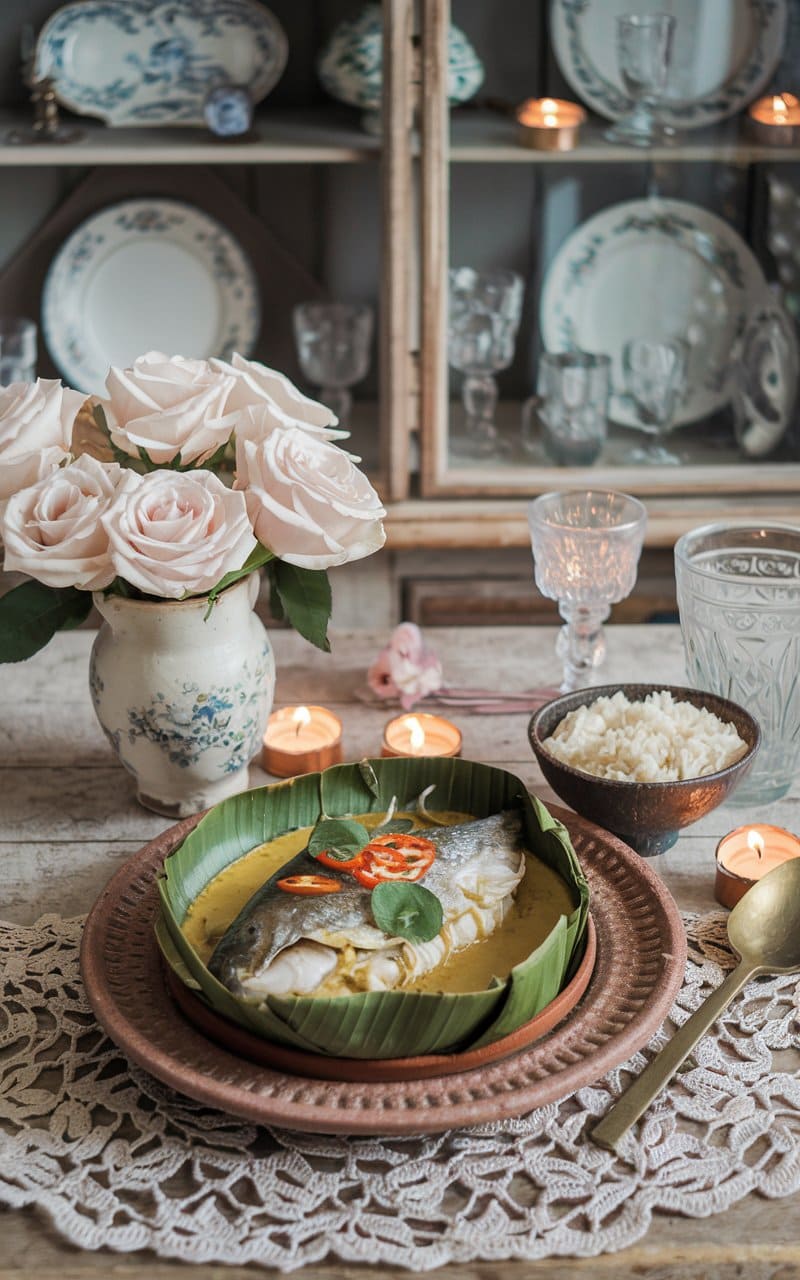
Ingredients
For the Kroeung (Curry Paste):
- 5 stalks lemongrass (white parts only), finely sliced
- 3 shallots, peeled and chopped
- 5 cloves garlic, peeled
- 1-inch piece galangal or ginger, peeled and chopped
- 3 kaffir lime leaves, stems removed, finely sliced
- 2 teaspoons turmeric powder (or 1-inch fresh turmeric, peeled)
- 5 dried red chilies, soaked and deseeded (adjust to taste)
- 1 teaspoon salt
For the Fish Curry:
- 1½ pounds firm white fish fillets (such as snakehead, catfish, cod, or tilapia)
- 2 tablespoons fish sauce
- 1 tablespoon palm sugar or brown sugar
- 1 cup coconut cream (the thicker part from the top of coconut milk)
- ½ cup coconut milk
- 1 egg, lightly beaten (optional, for a more custardy texture)
- 2 tablespoons rice flour or cornstarch
- 1 teaspoon shrimp paste (kapi)
- 10-12 noni leaves or spinach leaves (for lining the vessels)
- 1 red bell pepper, thinly sliced for garnish
- 3-4 kaffir lime leaves, very thinly sliced for garnish
- Thai basil leaves for garnish
- 1-2 red chilies, thinly sliced for garnish (optional)
Instructions
Prepare the Kroeung (Curry Paste):
- Place all the kroeung ingredients in a food processor or mortar and pestle.
- Blend or pound until you have a smooth, fragrant paste.
- If using a mortar and pestle, you may need to work in batches.
- The paste should be smooth and have a vibrant yellow-orange color.
Prepare the Fish:
- Cut the fish fillets into 2-inch cubes or bite-sized pieces.
- In a bowl, season the fish with 1 tablespoon of fish sauce.
- Gently toss and set aside while preparing the curry mixture.
Make the Curry Mixture:
- In a large bowl, combine the kroeung paste, coconut cream, and coconut milk.
- Add the remaining fish sauce, palm sugar, and shrimp paste.
- Mix well until the shrimp paste and palm sugar have dissolved completely.
- Add the rice flour or cornstarch and mix until fully incorporated.
- If using, add the beaten egg and stir until combined.
- The mixture should have a thick, smooth consistency.
Assemble for Steaming:
- Traditionally, amok is served in small banana leaf cups. If available:
- Cut banana leaves into approximately 8-inch squares.
- Briefly pass each leaf over an open flame or hot burner to make it pliable.
- Shape each leaf into a cup and secure with toothpicks.
- Alternatively, use small heatproof bowls, ramekins, or a single larger heatproof dish.
- Line your chosen vessels with noni or spinach leaves.
- Place a layer of fish pieces in each vessel.
- Pour the curry mixture over the fish, ensuring all pieces are well covered.
- Garnish the top with thinly sliced red bell pepper.
Steam the Amok:
- Prepare a steamer with water at the bottom and bring to a boil.
- Place the filled vessels in the steamer, being careful not to tilt them.
- Cover and steam for 15-20 minutes, until the curry has set and is slightly firm to the touch.
- The amok should have a mousse-like, custard texture – firm but still moist.
Serve:
- Garnish each portion with thinly sliced kaffir lime leaves, Thai basil, and sliced red chilies if desired.
- Just before serving, drizzle a small amount of coconut cream on top.
- Serve hot with steamed jasmine rice.
Cultural Notes:
- Amok Trey is considered one of Cambodia’s national dishes and is often prepared for special occasions.
- Traditional preparation involves steaming the curry in banana leaf cups, which imparts a subtle flavor to the dish.
- The dish balances various flavors: spicy, sweet, salty, and the unique sour notes from the kaffir lime leaves.
- While most common with fish, amok can also be made with chicken, beef, or tofu.
- The consistency should be mousse-like rather than soup-like, distinguishing it from other Southeast Asian curries.
41. Mongolian Boodog (Whole Roasted Goat)
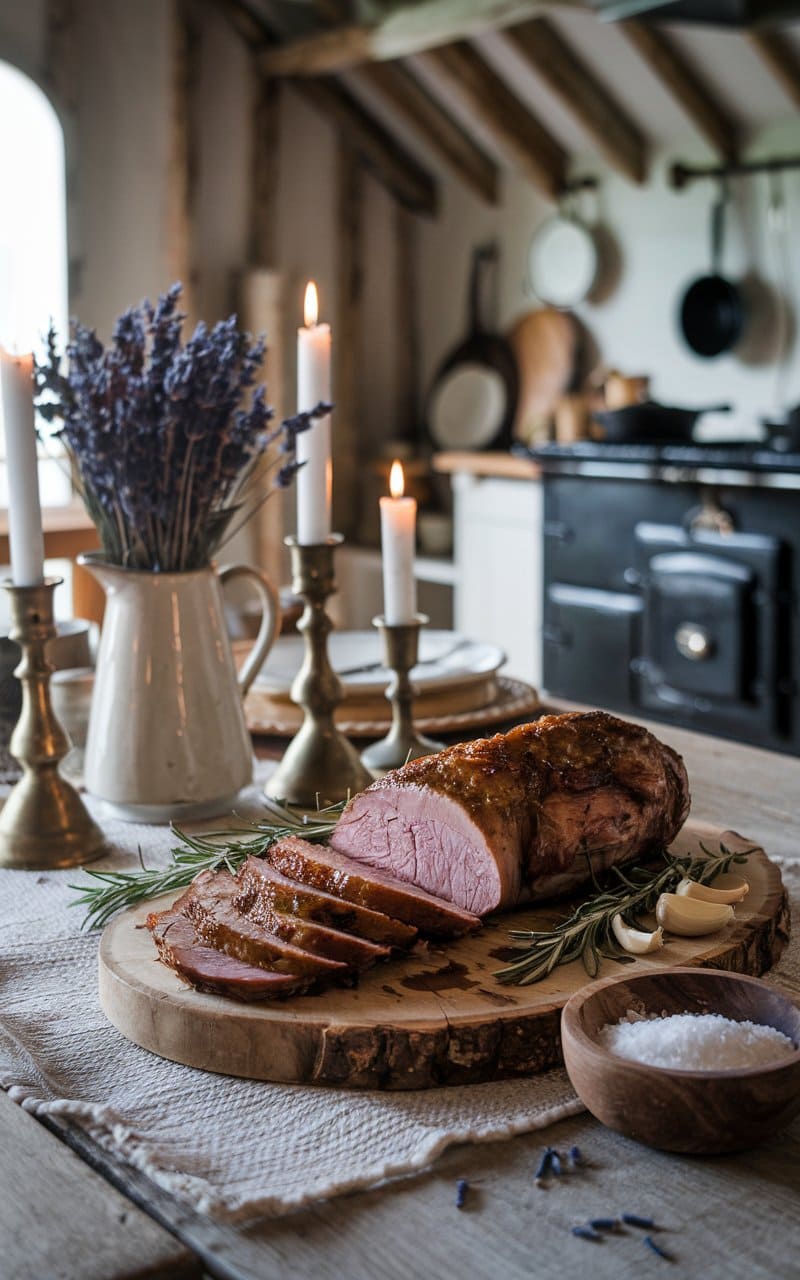
Ingredients
For the Main Dish:
- 1 young goat (approximately 15-20 lbs), cleaned with head and hooves removed
- 10-15 hot river stones (smooth, volleyball-sized rocks that can withstand heat without exploding)
- 3 lbs root vegetables (carrots, potatoes, turnips), roughly chopped
- 2 large onions, quartered
- 6-8 cloves garlic, crushed
- 3 tablespoons sea salt
- 2 tablespoons ground black pepper
- 2 tablespoons ground cumin
- 1 tablespoon dried thyme
- 5-6 bay leaves
- 2 cups water or broth
For the Stuffing/Marinade:
- 1 cup milk or yogurt
- 2 tablespoons sea salt
- 1 tablespoon black pepper
- 1 tablespoon ground cumin
- 1 tablespoon paprika
- 1 teaspoon cayenne pepper (optional)
- 6 cloves garlic, minced
- 2 large onions, thinly sliced
- ¼ cup vegetable oil
Optional Accompaniments:
- Khuushuur (fried meat pastries)
- Boiled millet or rice
- Mongolian milk tea
Instructions
Preparation (1-2 days ahead):
- Prepare the Carcass:
- Clean the goat thoroughly, removing all organs. Keep the liver, heart, and kidneys if desired for stuffing back inside.
- Make sure the skin remains intact with minimal punctures.
- Remove the head and lower legs, but keep the rest of the carcass whole.
- Wash the inside and outside of the carcass thoroughly.
- Prepare the Marinade:
- Mix milk/yogurt with half the salt, pepper, cumin, paprika, and cayenne in a large bowl.
- Rub this mixture thoroughly inside the cavity of the goat.
- Allow to marinate for 12-24 hours in a cool place, turning occasionally.
Rock Preparation (Day of Cooking):
- Gather and Prepare Stones:
- Select smooth river stones (approximately 3-5 inches in diameter).
- Wash stones thoroughly to remove any dirt or debris.
- Heat stones in a very hot fire for at least 1 hour until they are glowing red.
Cooking Process:
- Prepare the Stuffing Mix:
- Mix chopped vegetables, remaining garlic, onions, and spices in a large bowl.
- Reserve some of this mixture for placing around the goat.
- Stuff the Goat:
- Remove goat from marinade and pat dry.
- Stuff the cavity with the vegetable mixture.
- If using organs, place them among the vegetables inside the cavity.
- Prepare for Stone Insertion:
- Using long tongs, carefully remove the super-heated stones from the fire.
- Working quickly, place several hot stones inside the goat’s cavity among the vegetables.
- Sew up the cavity opening using butcher’s twine or metal wire to keep the stones inside.
- Complete the Cooking Setup:
- Place the remaining hot stones under the skin in various places, especially around the thicker meat sections.
- Carefully secure any openings where stones were inserted to keep heat inside.
- Traditional method: Tie the goat to secure its shape and place directly on hot coals.
- Alternative method: Place the stuffed goat in a large, heavy-duty roasting pan or on a wire rack over a drip pan.
- Cooking:
- Traditional method: Cover the entire goat with hot coals and build a fire around and over it.
- Alternative method: Place in a very hot oven (450°F/230°C) for the first 30 minutes, then reduce to 325°F/165°C.
- Total cooking time should be approximately 3-4 hours for a young goat.
- The rocks inside continue cooking the meat from within.
- Baste occasionally with the water/broth mixed with remaining oil and spices.
Serving:
- Presentation:
- Traditionally, the boodog is presented whole to guests before carving.
- In Mongolian culture, it’s customary for the eldest or most honored person to be served first.
- Carving and Serving:
- Carefully remove the cooking stones (they will still be very hot).
- Carve the meat into portions, serving with the cooked vegetables from inside.
- Serve with boiled millet or rice and Mongolian milk tea.
Cultural Notes:
- Boodog is traditionally made with marmot in Mongolia, but goat is a common substitute when marmot is unavailable.
- This is a celebratory dish often prepared for special occasions or to honor guests.
- The technique of cooking with hot stones inside the animal is unique to Mongolian cuisine.
- In traditional settings, the entire cooking process happens outdoors, often using dried dung as fuel.
- This dish is meant to be shared communally, reflecting the importance of community in Mongolian culture.
Note: This dish requires significant outdoor cooking space, fire safety measures, and experience handling very hot stones. It’s not suitable for standard kitchen preparation.
42. Tunisian Brik (Crispy Stuffed Pastry)

Ingredients
For the Pastry:
- 10-12 sheets malsouka pastry (or substitute with spring roll wrappers or thin phyllo dough)
- Vegetable oil for deep frying (approximately 4 cups)
For the Traditional Tuna Filling:
- 2 cans (5 oz each) solid tuna in olive oil, drained
- 4 large eggs
- 3 tablespoons finely chopped flat-leaf parsley
- 2 tablespoons finely chopped fresh cilantro
- 1 small onion, very finely chopped
- 2 cloves garlic, minced
- 2 tablespoons capers, rinsed and chopped
- 1 tablespoon harissa paste (adjust to taste)
- 1 teaspoon ground cumin
- ½ teaspoon ground caraway seeds
- ½ teaspoon salt
- ¼ teaspoon freshly ground black pepper
- 2 tablespoons fresh lemon juice
For Serving:
- Lemon wedges
- Additional harissa paste
- Fresh herbs for garnish (parsley or cilantro)
Instructions
Prepare the Filling:
- In a medium bowl, break up the tuna with a fork until flaky.
- Add the finely chopped onion, garlic, parsley, cilantro, and capers.
- Mix in the harissa paste, cumin, caraway, salt, and pepper.
- Drizzle with lemon juice and mix thoroughly until well combined.
- Taste and adjust seasoning if necessary.
- Divide the mixture into 10-12 equal portions (one for each pastry sheet).
Assemble the Briks:
- Lay out a sheet of malsouka (or substitute pastry) on a clean, flat surface.
- Place a portion of the tuna mixture in the center of the pastry.
- Use the back of a spoon to create a small well in the tuna mixture.
- Crack an egg and carefully separate the white from the yolk.
- Pour the egg white into the well in the tuna filling (this helps it cook fully).
- Gently place the yolk in the center.
- For the traditional triangle shape:
- Fold one edge of the pastry over the filling.
- Continue folding the pastry in a triangular pattern, similar to folding a flag.
- Seal the edges by pressing firmly or using a paste made from flour and water if needed.
- Alternatively, for a simpler method:
- Fold the pastry in half over the filling to create a half-moon shape.
- Press the edges firmly to seal.
- Repeat with the remaining pastry sheets and filling.
Fry the Briks:
- In a deep skillet or pot, heat oil to 350°F (175°C).
- Carefully slide one brik into the hot oil.
- Fry for approximately 2-3 minutes, turning once, until golden brown and crispy.
- The egg inside should be cooked but with the yolk still slightly runny (for authentic texture).
- Remove with a slotted spoon and drain on paper towels.
- Continue frying the remaining briks, adjusting the heat as necessary.
Serve:
- Serve immediately while hot and crispy.
- Traditionally, briks are eaten by hand.
- The proper technique is to take a small bite from one corner and suck out some of the egg before continuing to eat the pastry.
- Accompany with lemon wedges to squeeze over the brik just before eating.
- Serve with extra harissa on the side for those who prefer more heat.
Cultural Notes:
- Brik is a beloved Tunisian street food and is also commonly served during Ramadan to break the fast.
- The runny egg yolk is a hallmark of traditional brik – when done correctly, it creates a delicious sauce inside the crispy shell.
- While tuna is the classic filling, variations exist with minced meat, potato, or cheese.
- In Tunisia, the ability to eat a brik without letting the egg drip is considered a sign of good breeding!
- The pastry should be handled with care as it tears easily, especially if using substitutes like phyllo.
Variations:
- For a vegetarian version, substitute the tuna with mashed potato mixed with capers, olives, and preserved lemon.
- For a meat version, use cooked minced lamb or beef seasoned with the same spices.
- For a breakfast version, omit the tuna and simply use an egg with herbs and spices.
43. Korean Dakbokkeumtang (Spicy Braised Chicken)
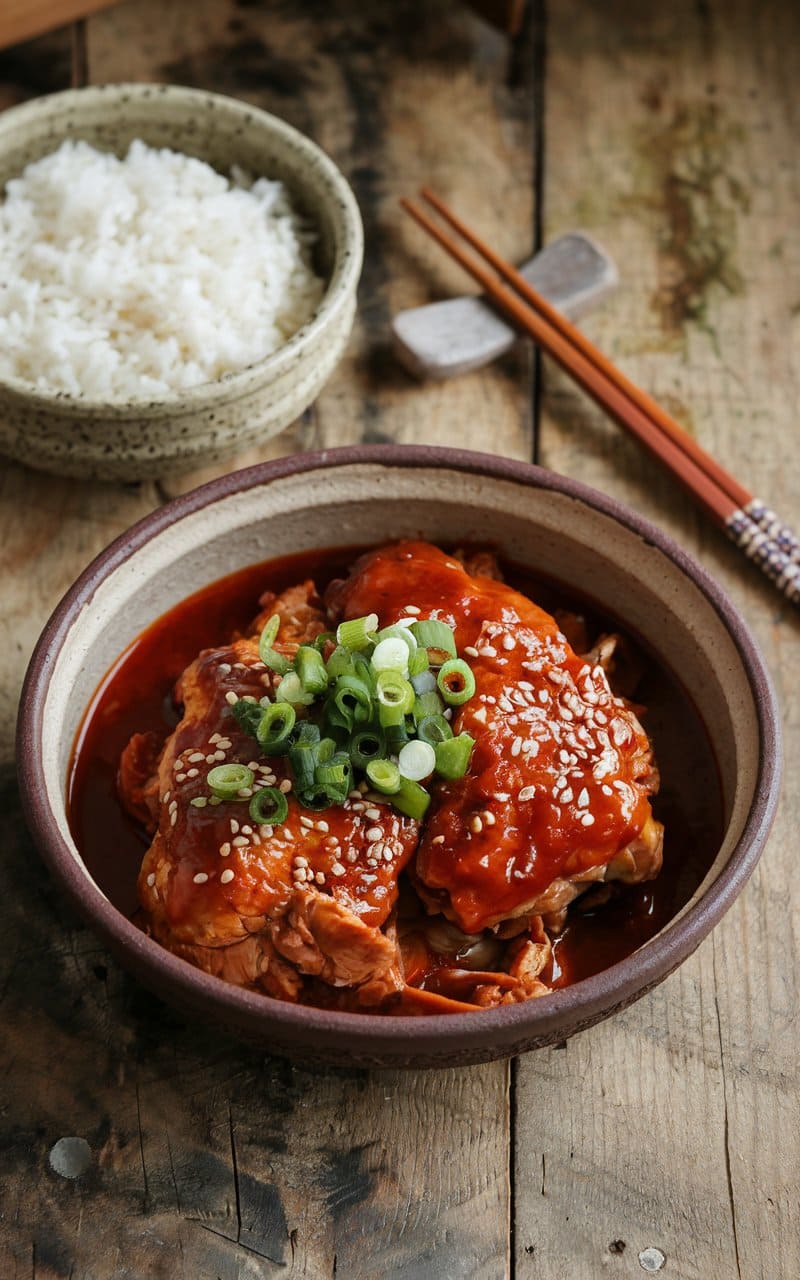
Ingredients
For the Chicken:
- 2½ pounds chicken pieces (mix of thighs, drumsticks, and wings)
- 1 tablespoon vegetable oil
- 1 tablespoon sesame oil
- 2 tablespoons soju or rice wine (optional)
- Salt and pepper to taste
For the Vegetables:
- 2 medium potatoes, cut into 1-inch chunks
- 2 medium carrots, cut into large chunks
- 1 large onion, cut into wedges
- 2 green onions, cut into 2-inch pieces
- 8 cloves garlic, peeled and lightly crushed
- 1-inch piece ginger, thinly sliced
- 2 green Korean chilies (or jalapeños), sliced
- 2 red Korean chilies (or red Fresno chilies), sliced
- 10 dried shiitake mushrooms, soaked and quartered (reserve soaking liquid)
For the Sauce:
- 4 tablespoons gochujang (Korean red pepper paste)
- 2 tablespoons gochugaru (Korean red pepper flakes)
- 3 tablespoons soy sauce
- 2 tablespoons rice syrup or honey
- 1 tablespoon brown sugar
- 1 tablespoon sesame oil
- 2 tablespoons minced garlic
- 1 tablespoon grated ginger
- 1 teaspoon black pepper
- 2 cups chicken broth or water
- ½ cup mushroom soaking liquid (strained)
For Garnish:
- 2 tablespoons toasted sesame seeds
- 2 green onions, thinly sliced
- Perilla leaves, thinly sliced (optional)
Instructions
Preparation:
- If using dried shiitake mushrooms, soak them in warm water for at least 30 minutes until soft. Reserve the soaking liquid after straining.
- Pat chicken pieces dry with paper towels and season with salt and pepper.
- Wash and cut all vegetables as specified.
Make the Sauce:
- In a medium bowl, combine gochujang, gochugaru, soy sauce, rice syrup/honey, brown sugar, sesame oil, minced garlic, grated ginger, and black pepper.
- Mix thoroughly until well blended and set aside.
Cook the Dish:
- Heat a large, heavy-bottomed pot or Dutch oven over medium-high heat.
- Add vegetable oil and sesame oil.
- When oil is hot, add chicken pieces and brown on all sides, about 5-7 minutes total (work in batches if necessary to avoid crowding).
- Pour in soju or rice wine (if using) and let it bubble for 30 seconds to deglaze the pot.
- Add the crushed garlic cloves, sliced ginger, and onion wedges to the pot. Sauté for 2 minutes until fragrant.
- Add the prepared sauce to the pot and stir to coat the chicken pieces.
- Add potatoes, carrots, and mushrooms. Stir to combine.
- Pour in chicken broth/water and mushroom soaking liquid. The liquid should nearly cover the ingredients.
- Bring to a boil, then reduce heat to low.
- Cover and simmer for about 30 minutes, stirring occasionally.
- After 30 minutes, uncover and add the green onions and sliced chilies.
- Continue to simmer uncovered for another 15-20 minutes, or until the chicken is very tender and the sauce has reduced and thickened.
- Taste and adjust seasoning if needed.
Serve:
- Transfer to a large serving dish or individual bowls.
- Garnish with toasted sesame seeds, sliced green onions, and perilla leaves if using.
- Serve hot with steamed rice.
- Traditional accompaniments include kimchi and other banchan (side dishes).
Cooking Notes:
- For extra flavor, marinate the chicken in the sauce ingredients for 1-2 hours before cooking.
- The level of spiciness can be adjusted by varying the amount of gochujang and gochugaru.
- Some regions in Korea add perilla seeds (deulkkae) to the sauce for a nutty flavor.
- For a more stew-like consistency, add more broth; for a thicker sauce, simmer uncovered longer.
- This dish tastes even better the next day after the flavors have had time to meld.
Cultural Context:
- Dakbokkeumtang, sometimes called dakdoritang, is a popular comfort food in Korean households.
- It’s commonly served at family gatherings and is especially popular during cooler months.
- The dish balances spicy, sweet, and savory flavors, which is characteristic of Korean cuisine.
- Traditionally, this dish is served in the center of the table for everyone to share, emphasizing the communal nature of Korean dining.
44. Syrian Sheikh al-Mahshi (Stuffed Eggplants in Yogurt Sauce)
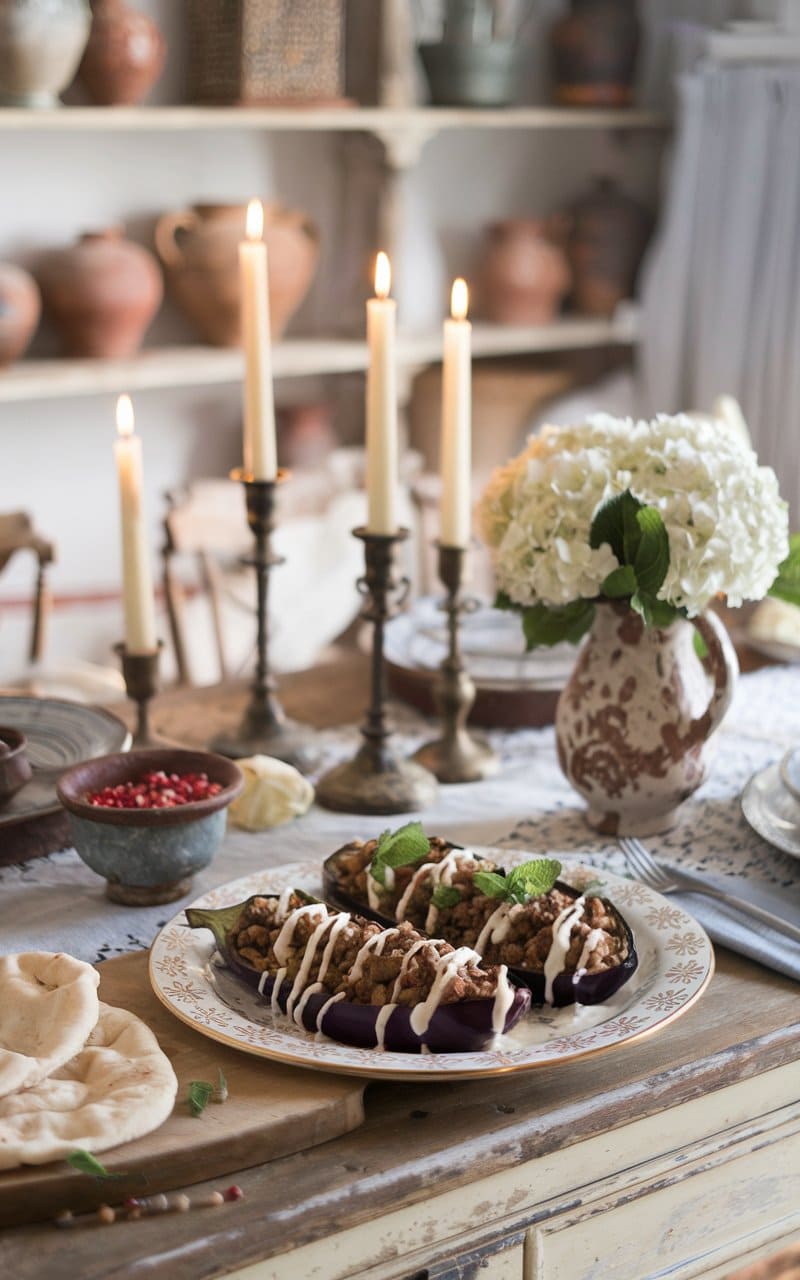
Ingredients
For the Eggplants:
- 6 small to medium-sized eggplants (preferably the shorter, wider variety)
- Salt for sprinkling
- Vegetable oil for frying (approximately 2 cups)
For the Meat Filling:
- 1 pound (450g) ground lamb or beef (lamb is traditional)
- 1 medium onion, finely chopped
- 3 cloves garlic, minced
- 3 tablespoons pine nuts, lightly toasted
- 2 tablespoons ghee or butter
- 1 teaspoon ground allspice
- 1 teaspoon ground cinnamon
- ½ teaspoon ground cumin
- ¼ teaspoon ground cardamom
- ¼ teaspoon ground nutmeg
- 1 teaspoon salt
- ½ teaspoon black pepper
- 2 tablespoons chopped fresh parsley
For the Yogurt Sauce:
- 4 cups plain full-fat yogurt
- 2 tablespoons cornstarch
- 2 egg whites, lightly beaten
- 3 cloves garlic, crushed to a paste with salt
- 1 tablespoon dried mint
- Salt to taste
For Garnish:
- 2 tablespoons ghee or butter
- 2 tablespoons pine nuts, toasted
- 1 tablespoon dried mint
- Fresh parsley, chopped
- Pomegranate seeds (optional, for special occasions)
Instructions
Prepare the Eggplants:
- Peel strips of skin from each eggplant lengthwise, creating a striped pattern (leaving some skin intact helps the eggplants hold their shape).
- Cut off the stem ends and make a deep slit lengthwise in each eggplant, being careful not to cut all the way through.
- Sprinkle salt generously inside and outside the eggplants. Place in a colander and let sit for 30 minutes to draw out the bitter juices.
- After 30 minutes, rinse the eggplants thoroughly under cold water and pat dry with paper towels.
- Heat oil in a deep skillet or pot to 350°F (175°C).
- Fry the eggplants until golden brown on all sides, about 5-7 minutes.
- Remove and drain on paper towels. Set aside.
Prepare the Meat Filling:
- In a large skillet, heat the ghee or butter over medium heat.
- Add the chopped onion and sauté until translucent, about 5 minutes.
- Add the minced garlic and cook for another minute until fragrant.
- Add the ground meat and cook, breaking it up with a wooden spoon, until browned and cooked through, about 8-10 minutes.
- Stir in the allspice, cinnamon, cumin, cardamom, nutmeg, salt, and pepper.
- Add the toasted pine nuts and chopped parsley, mix well, and remove from heat.
- Allow the filling to cool slightly before handling.
Stuff the Eggplants:
- Gently open the slit in each eggplant, being careful not to tear them.
- Spoon the meat filling into each eggplant, distributing it evenly.
- Close the eggplants as much as possible and arrange them in a single layer in a large, deep saucepan or pot.
Prepare the Yogurt Sauce:
- In a large bowl, whisk together the yogurt and cornstarch until smooth.
- Slowly whisk in the egg whites, garlic paste, dried mint, and salt.
- Pour this mixture into a large, heavy-bottomed pot.
- Cook over medium-low heat, stirring constantly in one direction to prevent curdling.
- Continue stirring until the sauce thickens enough to coat the back of a spoon, about 15-20 minutes. Do not allow it to boil.
Final Assembly:
- Carefully pour the hot yogurt sauce over the stuffed eggplants, ensuring they are mostly covered.
- Cover the pot and simmer on low heat for about 20-25 minutes, until the eggplants are completely tender and have absorbed some of the sauce.
- Occasionally spoon the sauce over the eggplants during cooking.
For Garnish:
- Just before serving, heat 2 tablespoons of ghee or butter in a small saucepan.
- Add the dried mint and cook for 30 seconds until fragrant.
- Drizzle this over the eggplant dish.
- Sprinkle with toasted pine nuts, chopped parsley, and pomegranate seeds if using.
Serve:
- Serve hot, with Arabic flat bread or white rice on the side to soak up the delicious yogurt sauce.
- Sheikh al-Mahshi is traditionally served as the main dish for special occasions and gatherings.
Cultural Notes:
- The name “Sheikh al-Mahshi” means “The Lord of Stuffed Vegetables,” indicating the dish’s prestigious status in Syrian cuisine.
- It’s considered one of the most elegant dishes in Levantine cuisine, often prepared for honored guests and special celebrations.
- The combination of tangy yogurt sauce with sweet spices like cinnamon and nutmeg is characteristic of the Levantine flavor palette.
- While eggplant is the traditional vegetable for this dish, zucchini or bell peppers can also be used as variations.
45. Vietnamese Bun Cha (Grilled Pork with Noodles)
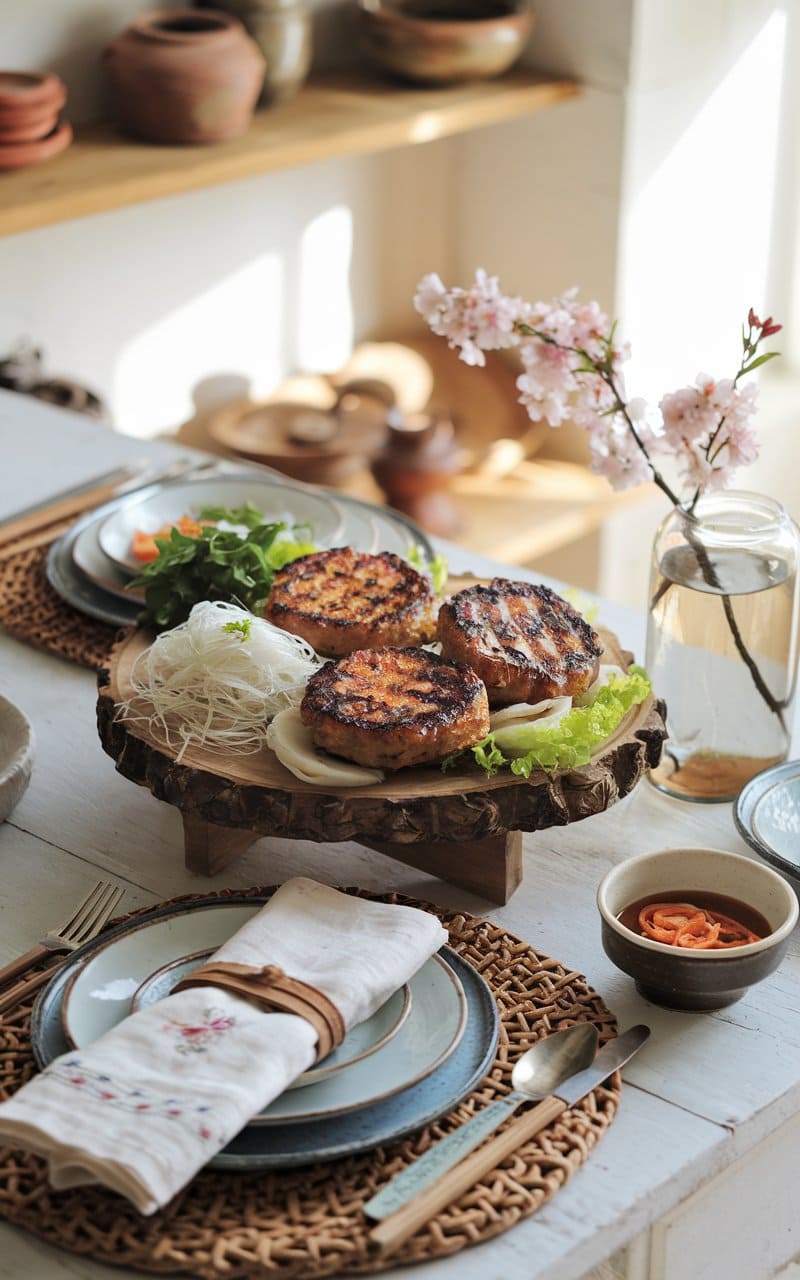
Ingredients
For the Pork Meatballs:
- 1 pound (450g) ground pork (preferably with some fat content)
- 2 tablespoons fish sauce
- 2 tablespoons sugar
- 2 tablespoons finely minced shallots
- 2 cloves garlic, finely minced
- 1 tablespoon caramel sauce (or 1 teaspoon molasses mixed with 1 teaspoon water)
- 1 teaspoon freshly ground black pepper
- 1 tablespoon vegetable oil
For the Pork Belly (Optional but Traditional):
- ½ pound (225g) pork belly, thinly sliced
- 1 tablespoon fish sauce
- 1 tablespoon sugar
- 1 tablespoon finely minced shallots
- 1 teaspoon freshly ground black pepper
For the Dipping Sauce (Nuoc Cham):
- ¼ cup fish sauce
- ¼ cup white sugar
- ⅓ cup warm water
- 3 tablespoons fresh lime juice
- 2 cloves garlic, finely minced
- 1-2 Thai bird chilies, finely chopped (adjust to taste)
- 2 tablespoons shredded green papaya or carrot (optional)
For Serving:
- 1 pound (450g) rice vermicelli noodles (bún)
- 1 head romaine or leaf lettuce, separated into leaves
- 1 cucumber, thinly sliced
- 1 cup fresh herbs (mix of mint, Vietnamese perilla/tía tô, and cilantro)
- 1 cup bean sprouts
- ¼ cup roasted peanuts, coarsely chopped
Instructions
Prepare the Pork:
For the Meatballs:
- In a large bowl, combine ground pork, fish sauce, sugar, minced shallots, minced garlic, caramel sauce, and black pepper.
- Mix thoroughly with your hands until well combined.
- Cover and refrigerate for at least 1 hour, or overnight for better flavor.
- Shape the mixture into small patties, about 2 inches in diameter and ½ inch thick.
For the Pork Belly (if using):
- In a bowl, combine sliced pork belly, fish sauce, sugar, minced shallots, and black pepper.
- Mix well to coat the meat evenly.
- Marinate for at least 30 minutes.
Prepare the Dipping Sauce (Nuoc Cham):
- In a bowl, dissolve sugar in warm water.
- Add fish sauce and lime juice, stir to combine.
- Add minced garlic and chopped chilies.
- Add shredded papaya or carrot if using.
- Allow to sit for at least 15 minutes for flavors to meld.
Cook the Noodles:
- Bring a large pot of water to a boil.
- Add the rice vermicelli and cook according to package instructions (usually 3-5 minutes).
- Drain and rinse with cold water to stop the cooking process.
- Set aside at room temperature.
Grill the Pork:
- Preheat a grill or grill pan to medium-high heat.
- Brush the grill grates lightly with vegetable oil to prevent sticking.
- For the meatballs: Grill for about 3-4 minutes per side, until well charred and cooked through.
- For the pork belly: Grill for about 2-3 minutes per side, until charred and cooked through.
- Transfer to a plate and let rest for a few minutes.
Assemble for Serving:
- Divide the cooked rice vermicelli among serving bowls.
- Arrange lettuce, cucumber slices, herbs, and bean sprouts on a separate platter.
- In another bowl, place the grilled meatballs and pork belly.
- Pour about half of the dipping sauce over the grilled pork, and serve the remaining sauce on the side.
- Sprinkle chopped peanuts over the meat.
How to Eat Bun Cha:
- Each person takes some noodles, vegetables, and herbs and places them in their own bowl.
- Add some pork and sauce to taste.
- Mix everything together before eating.
- Alternatively, diners can dip bundles of noodles, herbs, and pork into the sauce.
Cultural Notes:
- Bun Cha is a beloved street food dish originating from Hanoi, the capital of Vietnam.
- It’s traditionally eaten for lunch rather than dinner in Vietnam.
- The dish gained international recognition when Anthony Bourdain and President Barack Obama enjoyed it together during a 2016 visit to Hanoi.
- The charred, smoky flavor of the pork is essential to authentic Bun Cha.
- In Vietnam, the components are typically served separately, and diners combine them as they eat.
- The balance of sweet, salty, sour, and spicy flavors in the dipping sauce is key to this dish.
For an authentic experience, serve Bun Cha with additional Vietnamese sides like fried spring rolls (nem rán) or grilled corn brushed with scallion oil.
46. Uzbek Naryn (Cold Pasta and Horse Meat Dish)
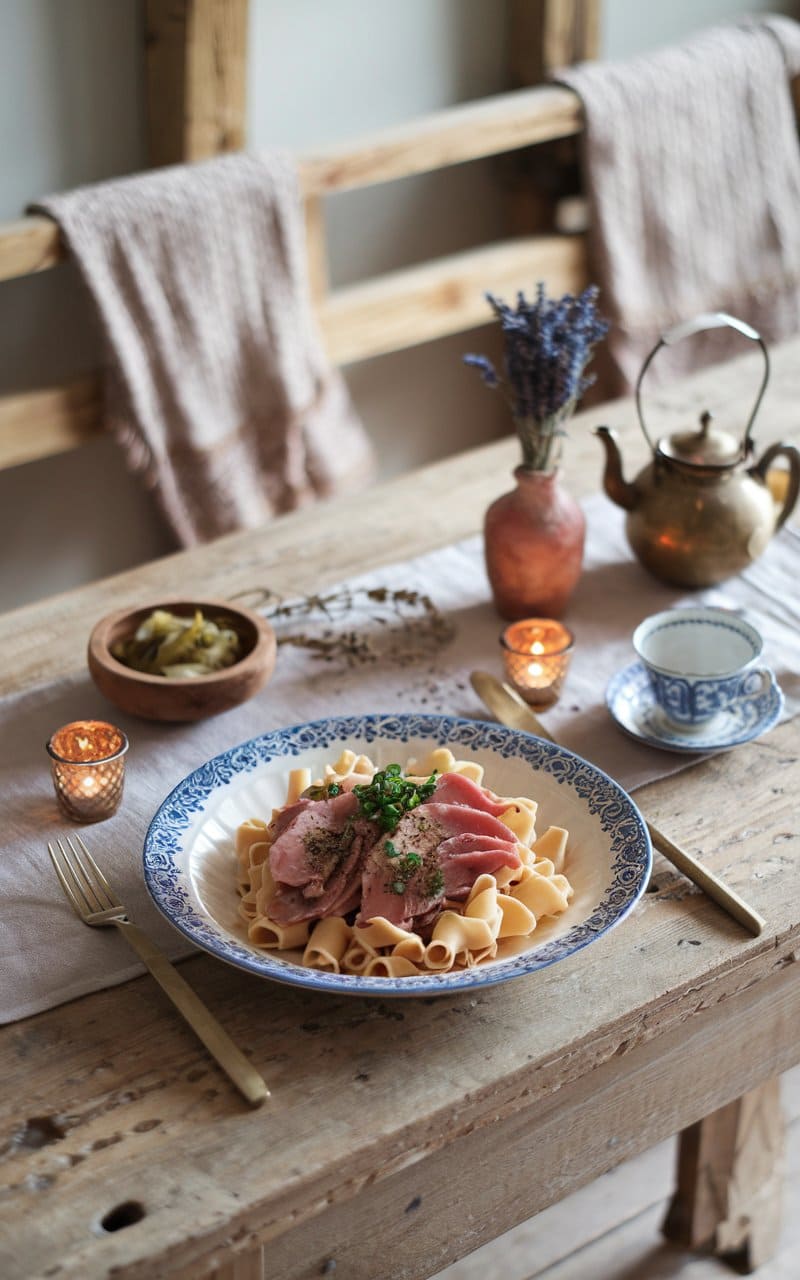
Naryn is a traditional Uzbek dish consisting of thinly rolled pasta cut into strips and mixed with finely sliced horse meat. It’s a beloved celebratory dish in Uzbekistan, typically served cold.
Ingredients
For the dough:
- 3 cups all-purpose flour
- 1 teaspoon salt
- 1 egg
- 3/4 cup water
- 1 tablespoon vegetable oil
For the meat:
- 1 pound horse meat (beef or lamb can be substituted if horse meat is unavailable)
- 1 large onion, peeled and halved
- 2 bay leaves
- 5 whole black peppercorns
- 1 teaspoon salt
- 8 cups water
For serving:
- 1 medium onion, thinly sliced
- 2 tablespoons chopped fresh cilantro
- 2 tablespoons chopped fresh dill
- Black pepper to taste
- Ground cumin to taste (optional)
Instructions
Prepare the meat:
- Place the horse meat, halved onion, bay leaves, peppercorns, salt, and water in a large pot.
- Bring to a boil, then reduce heat and simmer for about 1.5-2 hours until the meat is very tender.
- Remove the meat from the broth and let it cool. Strain the broth and reserve.
- Once cooled, slice the meat very thinly against the grain, almost shaving it. Set aside.
Make the dough:
- In a large bowl, combine flour and salt.
- Make a well in the center and add the egg, water, and oil.
- Mix with a fork until the dough starts to come together, then knead by hand for 8-10 minutes until smooth and elastic.
- Cover with a damp cloth and let rest for 30 minutes.
Roll and cut the pasta:
- Divide the dough into 4 equal portions.
- On a lightly floured surface, roll each portion into a very thin sheet (almost transparent, about 1-2 mm thick).
- Let the sheets dry slightly for about 5 minutes.
- Fold each sheet loosely and cut into very thin strips (about 2-3 mm wide).
- Unfold the strips and spread them out to prevent sticking.
Cook the pasta:
- Bring the reserved meat broth to a boil.
- Add the pasta strips and cook for 2-3 minutes until just tender.
- Drain well and rinse with cold water to stop the cooking process.
Assemble the dish:
- In a large mixing bowl, combine the cooked pasta and sliced meat.
- Add sliced onions, cilantro, and dill.
- Season with black pepper and cumin (if using).
- Toss everything gently until well combined.
- Refrigerate for at least 1 hour before serving.
To serve:
- Serve cold in individual bowls.
- Traditionally, naryn is eaten with the hands, though it can also be enjoyed with a fork.
- It’s often accompanied by a small bowl of the reserved broth on the side.
This dish is typically served at special occasions and celebrations in Uzbekistan. The combination of tender pasta and thinly sliced meat creates a delightful texture contrast, while the herbs add freshness to this hearty dish.
47. Sicilian Pasta con le Sarde (Pasta with Sardines)
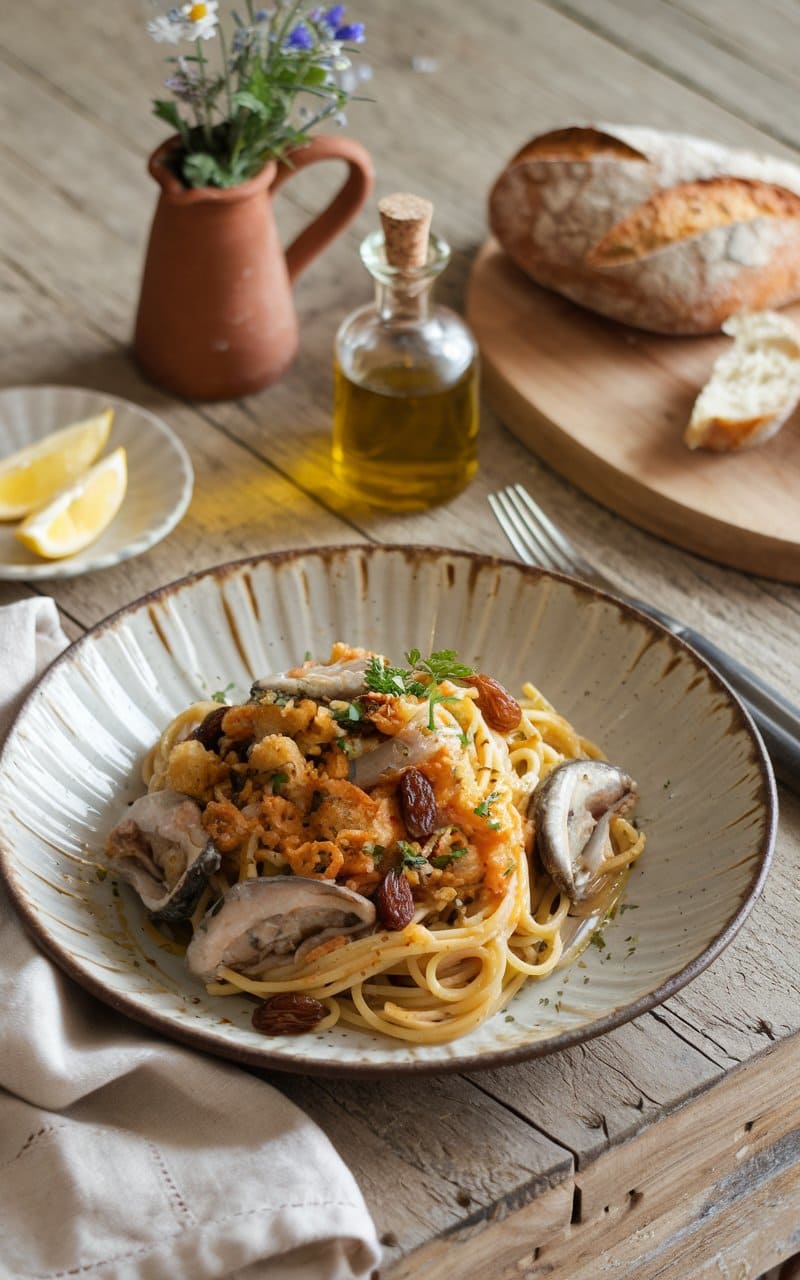
Pasta con le Sarde is an iconic Sicilian dish that beautifully combines sweet, salty, and savory flavors. This traditional recipe showcases the Arab influence on Sicilian cuisine with its unique combination of ingredients.
Ingredients
Main ingredients:
- 1 pound (450g) bucatini or spaghetti pasta
- 1 pound (450g) fresh sardines, cleaned and deboned
- 1 large fennel bulb with fronds
- 1 medium yellow onion, finely chopped
- 4 anchovy fillets, minced
- 3 tablespoons olive oil
- 1/4 cup pine nuts
- 1/4 cup golden raisins (or sultanas)
- Pinch of saffron threads (about 1/4 teaspoon)
- 1/4 cup white wine
- Salt and freshly ground black pepper to taste
For the breadcrumb topping (mudrica):
- 1/2 cup coarse breadcrumbs
- 2 tablespoons olive oil
- 1 tablespoon fresh lemon zest
Instructions
Prepare the ingredients:
- Soak the golden raisins in warm water for 15 minutes, then drain.
- Remove the green fronds from the fennel bulb and set aside. Chop the fennel bulb finely.
- Chop the fennel fronds (you’ll need about 1/2 cup).
- Clean the sardines: remove heads, tails, and backbones. Rinse under cold water and pat dry.
- Cut sardines into 1-inch pieces.
- Dissolve the saffron in 2 tablespoons of warm water.
Cook the sauce:
- Heat olive oil in a large, deep skillet over medium heat.
- Add the onion and cook until translucent, about 5 minutes.
- Add the chopped fennel bulb and cook for another 5-7 minutes until softened.
- Add the anchovy fillets and stir until they dissolve into the oil.
- Add the pine nuts and cook until lightly toasted, about 2 minutes.
- Add the sardine pieces and cook for 2-3 minutes, gently breaking them up with a wooden spoon.
- Pour in the white wine and let it evaporate, about 1-2 minutes.
- Add the drained raisins, chopped fennel fronds, and saffron water.
- Season with salt and pepper (be careful with salt since anchovies are already salty).
- Lower the heat, cover, and simmer for about 10-15 minutes, stirring occasionally.
Prepare the breadcrumb topping:
- In a separate small skillet, heat 2 tablespoons olive oil over medium heat.
- Add the breadcrumbs and toast until golden brown, stirring frequently.
- Remove from heat and stir in lemon zest. Set aside.
Cook the pasta and assemble:
- Bring a large pot of salted water to a boil.
- Cook the pasta according to package instructions until al dente.
- Before draining, reserve 1/2 cup of pasta cooking water.
- Drain the pasta and add it directly to the sardine sauce.
- Add a splash of the reserved pasta water if needed to loosen the sauce.
- Toss gently to coat the pasta evenly with the sauce.
To serve:
- Transfer the pasta to a serving platter or individual plates.
- Sprinkle generously with the toasted breadcrumb mixture.
- Serve immediately while hot.
This dish is traditionally served as a first course for festive occasions, particularly during the Feast of St. Joseph (March 19th) in Sicily. The combination of sardines, wild fennel, pine nuts, and raisins creates a complex flavor profile that represents Sicily’s rich culinary heritage.
48. Indian Goan Prawn Balchão (Spicy Pickled Prawns)
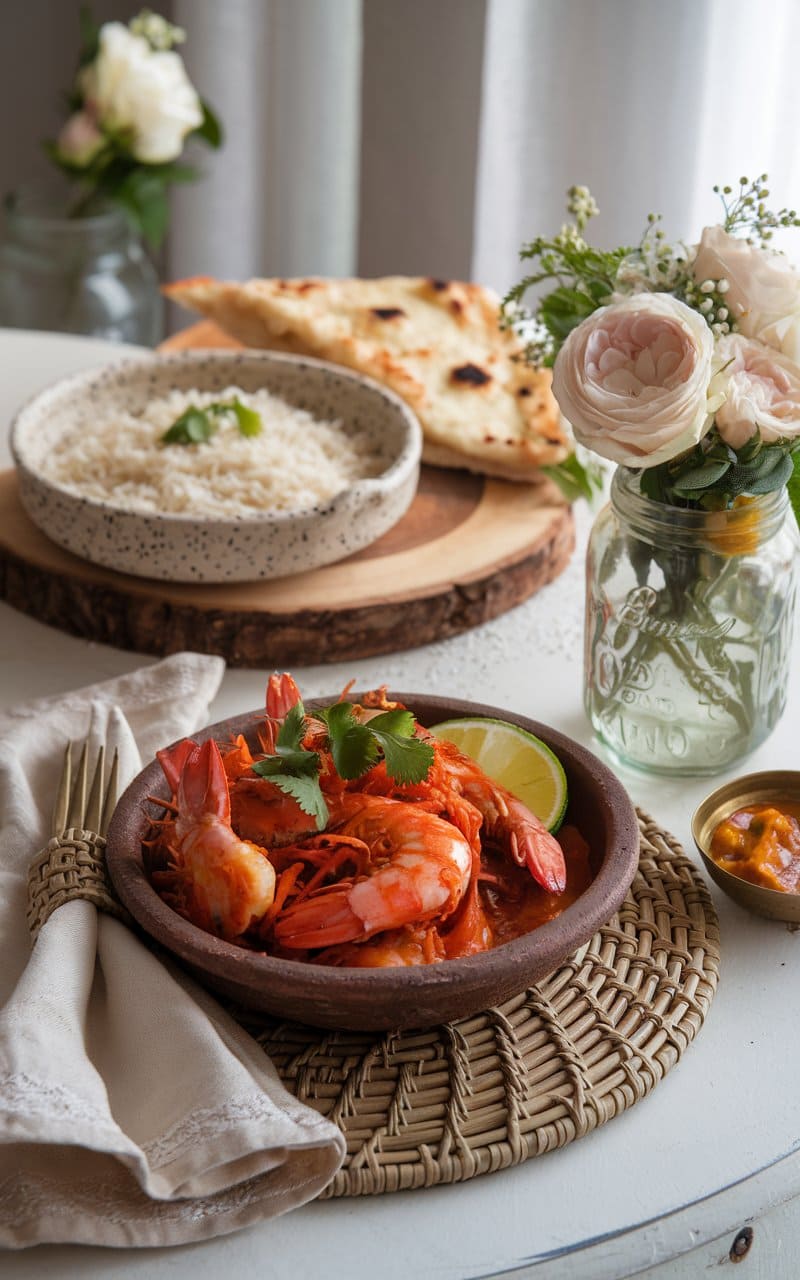
Prawn Balchão is a fiery, tangy pickle-like dish from Goa, India, showcasing Portuguese influences through its unique blend of spices and vinegar. This traditional preparation creates a perfect balance of heat, acidity, and sweetness.
Ingredients
For the prawns:
- 1 pound (450g) large prawns/shrimp, peeled and deveined
- 1/2 teaspoon turmeric powder
- 1/2 teaspoon salt
- 1 tablespoon vegetable oil
For the balchão masala paste:
- 15-20 dried Kashmiri red chilies (adjust to taste)
- 6-8 garlic cloves
- 1-inch piece ginger, chopped
- 1 teaspoon cumin seeds
- 1 teaspoon black peppercorns
- 1/2 teaspoon fenugreek seeds
- 5-6 cloves
- 1-inch cinnamon stick
- 1/4 cup coconut vinegar (or white vinegar)
- Water as needed for grinding
For cooking:
- 3 tablespoons vegetable oil or coconut oil
- 1 large onion, finely chopped
- 1 teaspoon brown sugar or jaggery
- 1 teaspoon tamarind paste
- Salt to taste
- 2 tablespoons palm vinegar or coconut vinegar
Instructions
Prepare the prawns:
- Pat dry the cleaned prawns with paper towels.
- In a bowl, mix the prawns with turmeric and salt. Set aside for 15 minutes.
- Heat 1 tablespoon oil in a pan over medium heat and quickly sauté the marinated prawns for 1-2 minutes until they just turn pink. Do not overcook.
- Remove and set aside. (They will continue cooking in the sauce later.)
Make the balchão masala paste:
- Soak the dried Kashmiri chilies in warm water for 15-20 minutes until soft. Drain well.
- In a dry pan, lightly toast the cumin seeds, black peppercorns, fenugreek seeds, cloves, and cinnamon until fragrant (about 1-2 minutes).
- Let the spices cool, then transfer to a grinder.
- Add the soaked chilies, garlic, ginger, and vinegar to the grinder.
- Grind everything to a smooth paste, adding a little water if necessary.
Cook the balchão:
- Heat 3 tablespoons oil in a heavy-bottomed pan or kadhai over medium heat.
- Add the finely chopped onions and sauté until golden brown, about 8-10 minutes.
- Add the ground balchão masala paste and fry for 8-10 minutes until the oil begins to separate from the masala. Stir frequently to prevent burning.
- Add the brown sugar/jaggery and tamarind paste, mixing well.
- Cook for another 2-3 minutes.
- Add the partially cooked prawns to the masala and gently mix to coat them evenly.
- Season with salt (if needed).
- Simmer on low heat for 5-7 minutes until the prawns are fully cooked and have absorbed the flavors.
- Add the vinegar, stir well, and cook for an additional 2 minutes.
- Remove from heat and let cool completely before transferring to a clean, dry jar.
Storage and serving:
- For immediate serving: Garnish with a few fresh curry leaves (optional) and serve with steamed rice or crusty bread.
- For pickling: Transfer to a sterilized glass jar and allow to mature for at least 24 hours before consuming. The flavors will develop and intensify over time.
- Store in the refrigerator – it will keep well for 1-2 weeks.
Traditionally, Goan Balchão improves with age as the flavors meld together, making it ideal to prepare a day or two before serving. The dish is intensely spicy, tangy, and slightly sweet – a perfect accompaniment to plain rice or as a spread on bread.
