
50 Delicious Birthday Cake Recipes for Every Celebration
Birthdays deserve cake! Whether you’re celebrating a milestone, a little one’s special day, or simply want an excuse for a delicious treat, finding the perfect cake is key. This list offers 50 fantastic birthday cake recipes, ranging from timeless classics to wonderfully creative concoctions. Each recipe includes detailed steps and tips to ensure your baking success. Get ready to preheat your oven!
1. Classic Vanilla Birthday Cake with Buttercream Frosting
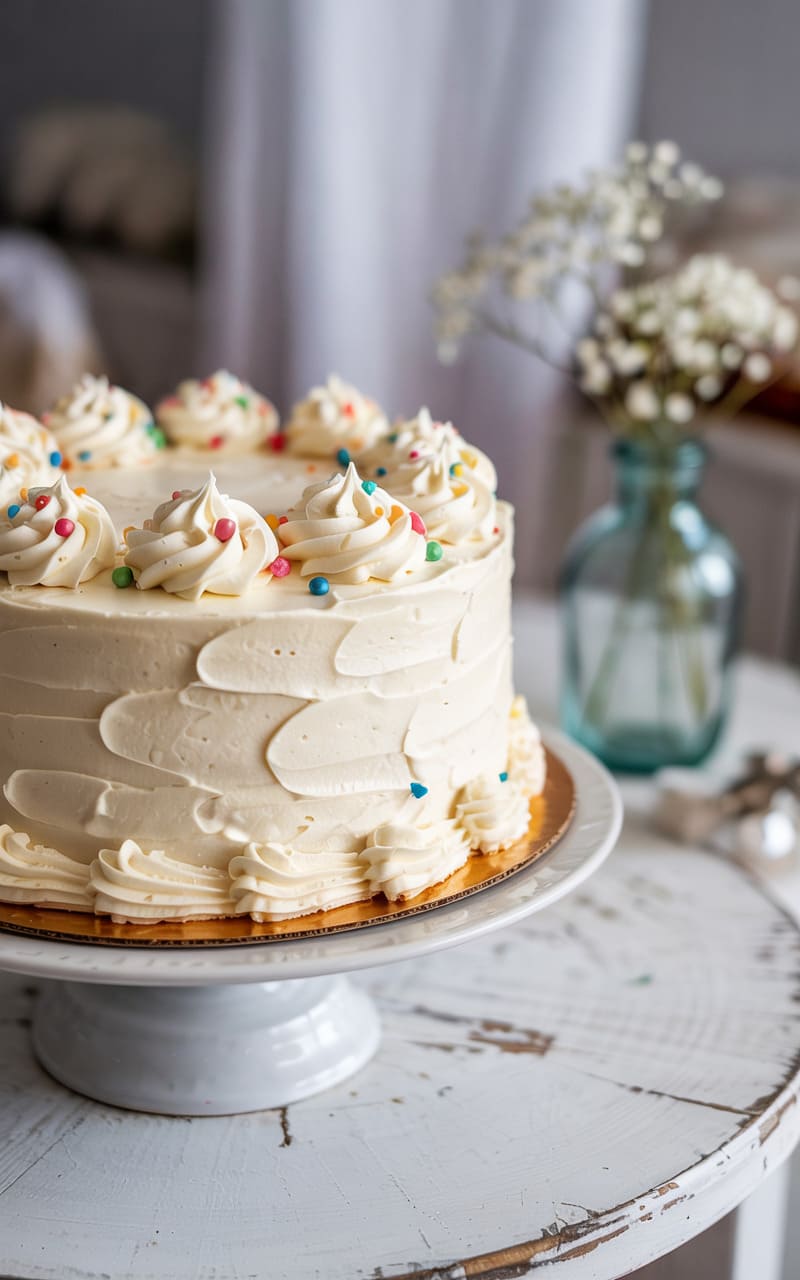
The quintessential birthday cake – light, fluffy, and perfectly sweet. Ideal for decorating and universally loved.
Ingredients:
- For the Cake:
- 2 ½ cups (320g) all-purpose flour, spooned and leveled
- 2 ½ tsp baking powder
- ½ tsp salt
- 1 cup (226g) unsalted butter, softened
- 2 cups (400g) granulated sugar
- 4 large eggs, room temperature
- 1 cup (240ml) whole milk, room temperature
- 2 tsp pure vanilla extract
- For the Vanilla Buttercream:
- 2 cups (452g) unsalted butter, softened
- 4-5 cups (480-600g) powdered sugar, sifted
- ¼ cup (60ml) heavy cream or whole milk
- 2 tsp pure vanilla extract
- ⅛ tsp salt
- Optional: Food coloring, sprinkles
Instructions:
- Prep: Preheat oven to 350°F (175°C). Grease and flour two 9-inch round cake pans. Line the bottoms with parchment paper for easy removal.
- Dry Ingredients: In a medium bowl, whisk together the flour, baking powder, and salt. Set aside.
- Cream Butter and Sugar: In a large bowl using a hand mixer or stand mixer with a paddle attachment, beat the softened butter on medium speed until creamy (about 1 minute). Gradually add the granulated sugar and continue beating on medium-high speed until light and fluffy (about 3-4 minutes). Scrape down the sides and bottom of the bowl.
- Add Eggs: Add the eggs one at a time, beating well after each addition until fully incorporated. Beat in the vanilla extract.
- Combine Wet and Dry: With the mixer on low speed, alternate adding the dry ingredient mixture and the milk to the wet ingredients, beginning and ending with the dry ingredients (add 1/3 flour mixture, then 1/2 milk, then 1/3 flour, then 1/2 milk, then final 1/3 flour). Mix just until combined – do not overmix.
- Bake: Divide the batter evenly between the prepared pans. Smooth the tops with a spatula. Bake for 30-35 minutes, or until a wooden skewer inserted into the center comes out clean.
- Cool: Let the cakes cool in the pans for 10-15 minutes before inverting them onto a wire rack to cool completely. Remove parchment paper.
- Make Buttercream: In a large bowl, beat the softened butter on medium speed until creamy. Gradually add the sifted powdered sugar, alternating with the heavy cream/milk, starting and ending with sugar. Beat on low speed until combined, then increase to medium-high and beat for 3-5 minutes until light and fluffy. Beat in the vanilla extract and salt. Add food coloring if desired.
- Assemble: Place one cooled cake layer on a serving plate. Spread a generous layer of buttercream on top. Place the second cake layer on top. Frost the top and sides of the entire cake. Decorate with sprinkles or as desired.
Tips for Success:
- Room Temperature Ingredients: Ensure butter, eggs, and milk are at room temperature for a smoother batter and better incorporation.
- Measure Flour Correctly: Spoon flour into the measuring cup and level off with a straight edge. Do not scoop directly from the bag, as this compacts the flour.
- Don’t Overmix: Mix the batter only until the ingredients are just combined to keep the cake tender and light.
- Cool Completely: Cakes must be fully cooled before frosting, otherwise the buttercream will melt.
- Crumb Coat: For a neater finish, apply a thin layer of frosting (crumb coat), chill the cake for 30 minutes, then apply the final layer of frosting.
2. Rich Chocolate Fudge Cake
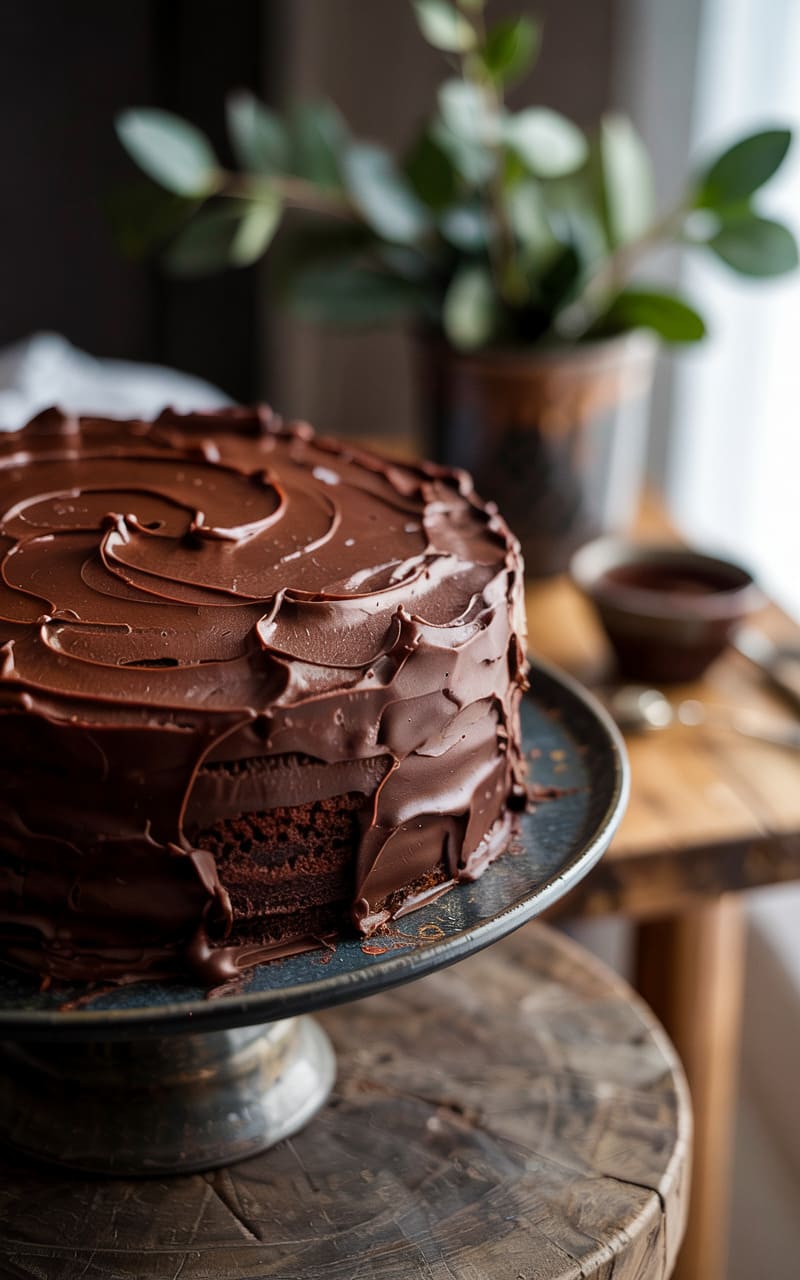
A deeply chocolatey, moist cake that’s pure indulgence for any chocolate lover’s birthday.
Ingredients:
- For the Cake:
- 2 cups (250g) all-purpose flour
- 2 cups (400g) granulated sugar
- ¾ cup (65g) unsweetened cocoa powder (Dutch-process recommended for richer flavor)
- 2 tsp baking soda
- 1 tsp baking powder
- 1 tsp salt
- 1 cup (240ml) buttermilk, room temperature (or 1 cup milk + 1 tbsp white vinegar, let sit 5 mins)
- ½ cup (120ml) vegetable oil
- 2 large eggs, room temperature
- 1 tsp pure vanilla extract
- 1 cup (240ml) boiling water (or hot brewed coffee for deeper flavor)
- For the Chocolate Fudge Frosting:
- 1 ½ cups (340g) unsalted butter, softened
- 1 cup (85g) unsweetened cocoa powder, sifted
- 5-6 cups (600-720g) powdered sugar, sifted
- ½ cup (120ml) milk or heavy cream
- 2 tsp pure vanilla extract
- ¼ tsp salt
Instructions:
- Prep: Preheat oven to 350°F (175°C). Grease and flour two 9-inch round cake pans. Line bottoms with parchment paper.
- Dry Ingredients: In a large bowl, whisk together flour, sugar, cocoa powder, baking soda, baking powder, and salt.
- Wet Ingredients: In a separate medium bowl, whisk together buttermilk, oil, eggs, and vanilla extract.
- Combine: Add the wet ingredients to the dry ingredients and beat on medium speed for 2 minutes until well combined. Scrape down the bowl.
- Add Boiling Water: Reduce mixer speed to low and carefully pour the boiling water (or hot coffee) into the batter. Mix until just combined (batter will be thin).
- Bake: Pour the batter evenly into the prepared pans. Bake for 30-35 minutes, or until a wooden skewer inserted into the center comes out clean.
- Cool: Let cakes cool in the pans for 15 minutes before inverting onto a wire rack to cool completely.
- Make Frosting: In a large bowl, beat the softened butter until creamy. Sift in the cocoa powder and beat until combined. Gradually add powdered sugar, alternating with the milk/cream, beating on low speed. Add vanilla and salt. Once combined, increase speed to medium-high and beat for 3-5 minutes until light and fluffy.
- Assemble: Place one cooled cake layer on a serving plate. Spread with frosting. Top with the second layer. Frost the top and sides of the cake. Create swirls for a fudgy look.
Tips for Success:
- Use Good Quality Cocoa: Dutch-process cocoa provides a darker color and richer flavor.
- Hot Liquid is Key: The boiling water/coffee helps bloom the cocoa powder, intensifying the chocolate flavor and creating a moist cake. Be careful when adding it.
- Don’t Overbake: Chocolate cakes can dry out easily. Start checking for doneness slightly before the minimum time.
- Sift Dry Ingredients for Frosting: Sifting cocoa and powdered sugar prevents lumps in the frosting.
- Coffee Enhancement: Using hot coffee instead of water deepens the chocolate flavor without making it taste like coffee.
3. Funfetti Birthday Cake
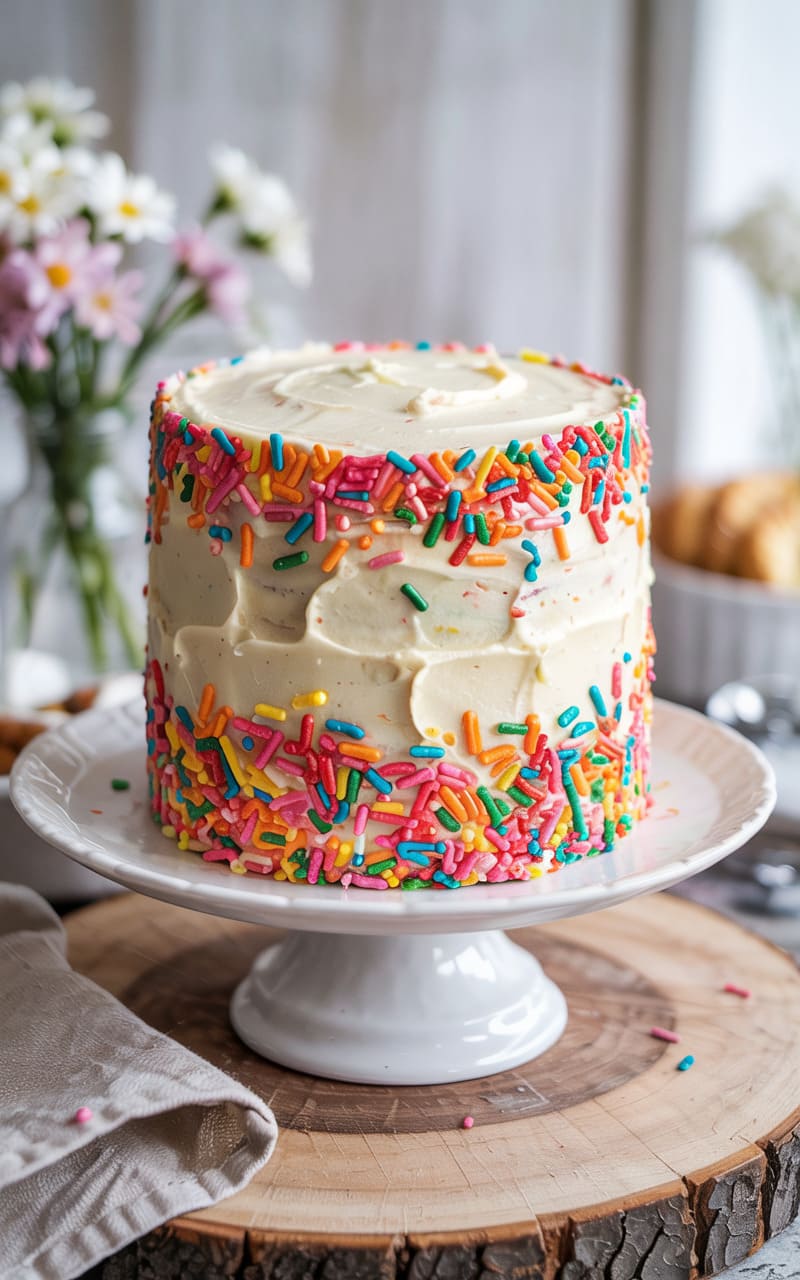
A joyous, sprinkle-filled vanilla cake that screams “celebration!” Perfect for kids and the young at heart.
Ingredients:
- For the Cake:
- 2 ¾ cups (350g) all-purpose flour
- 1 tbsp baking powder
- ½ tsp salt
- 1 cup (226g) unsalted butter, softened
- 1 ¾ cups (350g) granulated sugar
- 4 large egg whites, room temperature
- 1 large whole egg, room temperature
- 1 cup (240ml) buttermilk, room temperature
- 1 tbsp clear vanilla extract (or regular vanilla)
- ½ tsp almond extract (optional, but classic funfetti flavor)
- ¾ cup (about 150g) rainbow sprinkles (jimmies style work best), plus more for decorating
- For the Cream Cheese Frosting (or use Vanilla Buttercream from Recipe #1):
- 8 oz (226g) full-fat block cream cheese, softened
- ½ cup (113g) unsalted butter, softened
- 4 cups (480g) powdered sugar, sifted
- 1 tsp pure vanilla extract
- ⅛ tsp salt
Instructions:
- Prep: Preheat oven to 350°F (175°C). Grease and flour two 9-inch round cake pans (or three 8-inch pans). Line bottoms with parchment paper.
- Dry Ingredients: In a medium bowl, whisk together flour, baking powder, and salt.
- Cream Butter and Sugar: In a large bowl, beat butter and sugar on medium-high speed until light and fluffy (about 3-4 minutes).
- Add Eggs: Add the egg whites one at a time, beating well after each. Beat in the whole egg. Mix in vanilla and almond extracts.
- Combine Wet and Dry: On low speed, alternate adding the dry ingredients and the buttermilk, starting and ending with dry ingredients. Mix just until combined.
- Fold in Sprinkles: Gently fold in the ¾ cup of sprinkles using a spatula. Be careful not to overmix, which can cause colors to bleed.
- Bake: Divide batter evenly between pans. Bake for 28-33 minutes (for 9-inch) or 25-30 minutes (for 8-inch), until a skewer comes out clean.
- Cool: Cool in pans for 10-15 minutes, then invert onto a wire rack to cool completely.
- Make Frosting: Beat softened cream cheese and butter together until smooth. Gradually beat in sifted powdered sugar until combined. Beat in vanilla and salt. Increase speed to medium-high and beat until fluffy (about 2 minutes). Do not overbeat cream cheese frosting.
- Assemble: Level the cooled cakes if necessary. Place one layer on a serving plate, top with frosting. Add the next layer(s), frosting between each. Frost the top and sides. Decorate generously with more sprinkles!
Tips for Success:
- Use Jimmies: These long, skinny sprinkles hold their shape and color better during baking than nonpareils (tiny balls).
- Fold Gently: Mix the sprinkles in quickly and gently at the very end to minimize color bleeding into the batter.
- Egg Whites for Whiteness: Using mostly egg whites helps keep the cake crumb whiter, making the sprinkles pop more.
- Clear Vanilla: Use clear vanilla extract if you want the brightest white cake base possible.
- Don’t Overbake: This keeps the cake moist and tender.
4. Classic Yellow Cake with Chocolate Buttercream
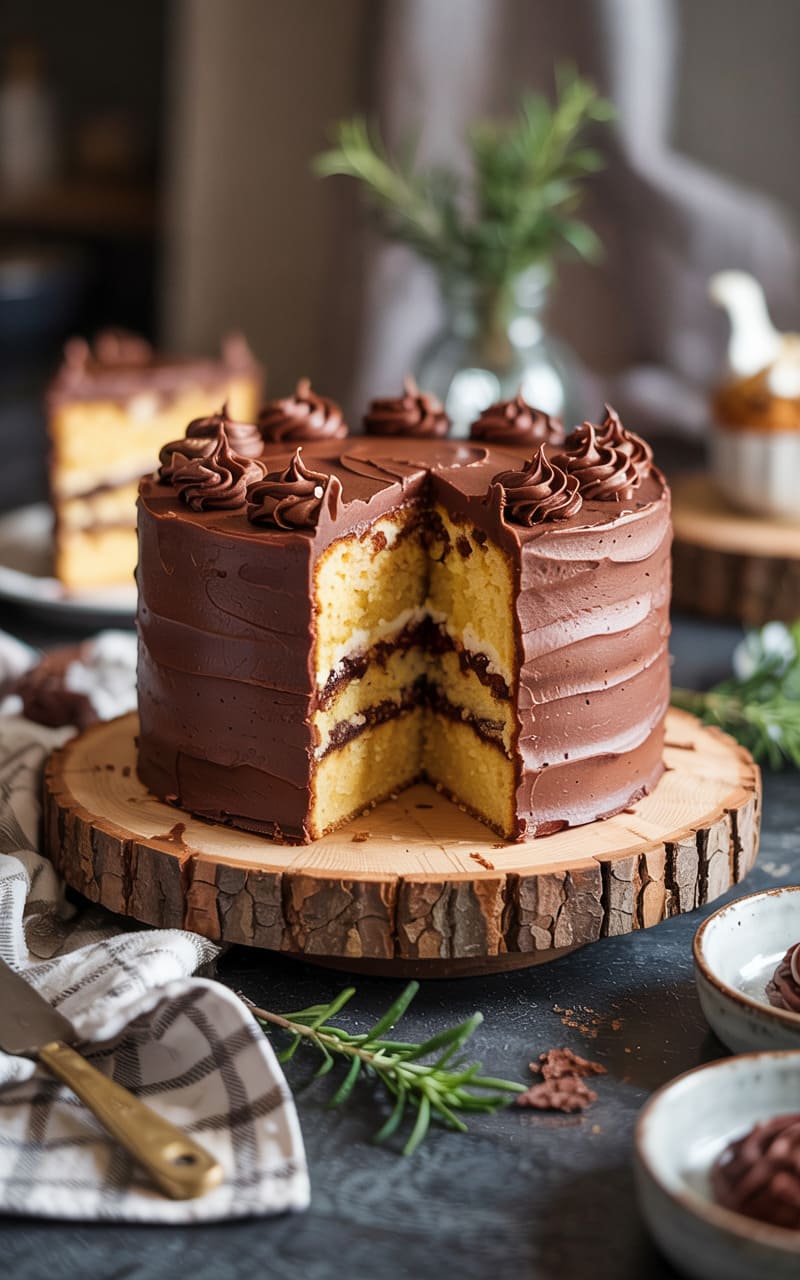
A moist, buttery yellow cake paired perfectly with rich chocolate frosting – a timeless American favorite.
Ingredients:
- For the Yellow Cake:
- 3 cups (380g) cake flour, spooned and leveled (or All-Purpose Flour – see tips)
- 1 tbsp baking powder
- ½ tsp salt
- 1 cup (226g) unsalted butter, softened
- 2 cups (400g) granulated sugar
- 4 large eggs, room temperature
- 2 tsp pure vanilla extract
- 1 ¼ cups (300ml) buttermilk, room temperature
- For the Chocolate Buttercream (Similar to Recipe #2):
- 1 ½ cups (340g) unsalted butter, softened
- 1 cup (85g) unsweetened cocoa powder, sifted
- 5-6 cups (600-720g) powdered sugar, sifted
- ½ cup (120ml) milk or heavy cream
- 2 tsp pure vanilla extract
- ¼ tsp salt
Instructions:
- Prep: Preheat oven to 350°F (175°C). Grease and flour two 9-inch round cake pans. Line bottoms with parchment paper.
- Dry Ingredients: In a medium bowl, whisk together the cake flour, baking powder, and salt.
- Cream Butter and Sugar: In a large bowl, beat the softened butter and granulated sugar on medium-high speed until very light and fluffy (about 5 minutes).
- Add Eggs: Add the eggs one at a time, beating well after each addition until fully incorporated. Scrape down the bowl. Beat in the vanilla extract.
- Combine Wet and Dry: On low speed, alternate adding the dry ingredients (in 3 additions) and the buttermilk (in 2 additions), starting and ending with the dry ingredients. Mix just until combined.
- Bake: Divide batter evenly between prepared pans. Smooth the tops. Bake for 30-35 minutes, or until a wooden skewer inserted into the center comes out clean.
- Cool: Let cakes cool in pans for 10-15 minutes before inverting onto a wire rack to cool completely.
- Make Chocolate Buttercream: Follow Step 8 from Recipe #2 (Rich Chocolate Fudge Cake).
- Assemble: Place one cooled cake layer on your serving plate. Top with a generous layer of chocolate buttercream. Place the second layer on top. Frost the top and sides of the cake smoothly or with decorative swirls.
Tips for Success:
- Cake Flour: For the softest, most tender crumb, use cake flour. If using all-purpose flour, remove 2 tablespoons per cup and replace with 2 tablespoons of cornstarch, then sift together.
- Creaming is Key: Spend adequate time creaming the butter and sugar (around 5 minutes) to incorporate air, which makes the cake light.
- Buttermilk Substitute: If you don’t have buttermilk, add 1 tablespoon plus 1 teaspoon of white vinegar or lemon juice to a liquid measuring cup, then fill with whole milk to the 1 ¼ cup line. Let sit for 5 minutes.
- Even Layers: Weighing the batter in each pan ensures even cake layers.
- Room Temp Ingredients: Crucial for a smooth, emulsified batter.
5. Red Velvet Cake with Cream Cheese Frosting
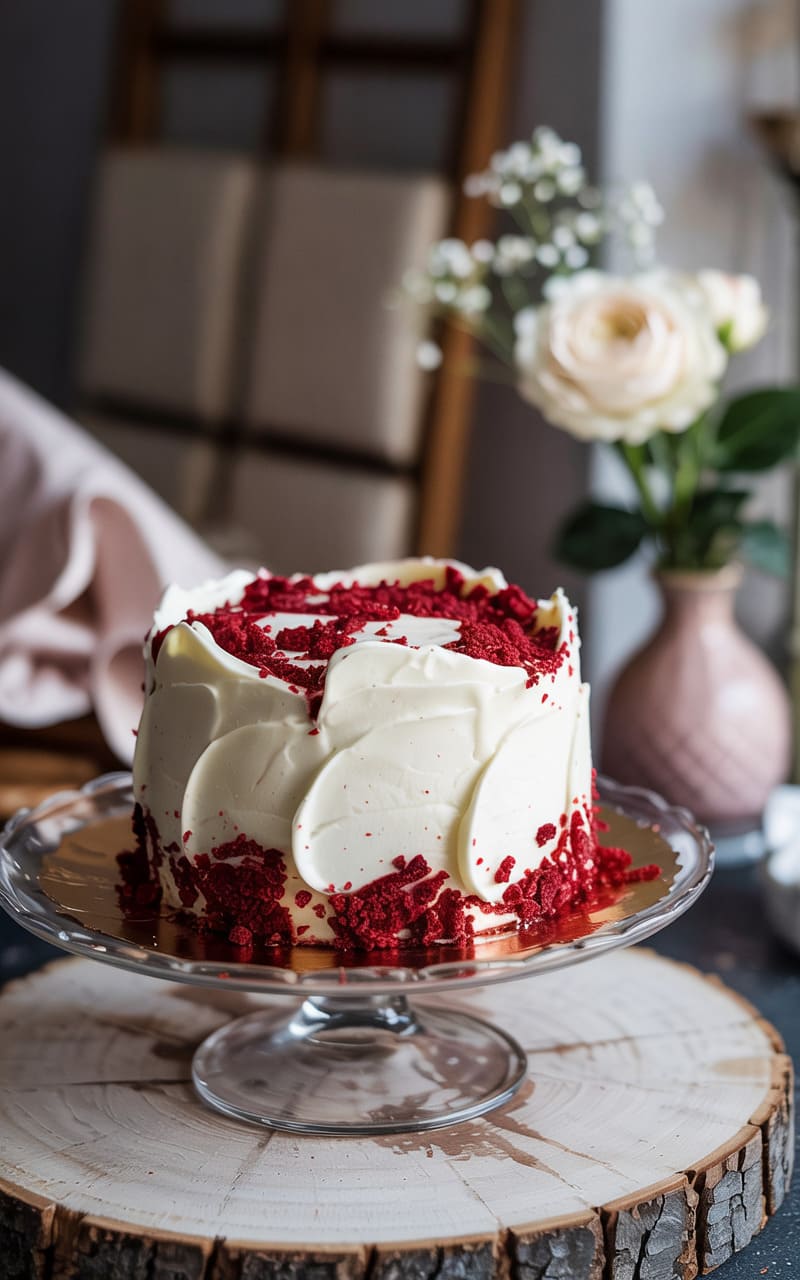
A dramatic, vibrant cake with a hint of cocoa and a tangy cream cheese frosting. Visually stunning and delicious.
Ingredients:
- For the Red Velvet Cake:
- 2 ½ cups (320g) all-purpose flour
- 1 ½ cups (300g) granulated sugar
- 1 tsp baking soda
- 1 tsp salt
- 1 tsp unsweetened cocoa powder
- 1 ½ cups (360ml) vegetable oil
- 1 cup (240ml) buttermilk, room temperature
- 2 large eggs, room temperature
- 2 tbsp (1 oz / 30ml) red food coloring (liquid or gel)
- 1 tsp white distilled vinegar
- 1 tsp pure vanilla extract
- For the Cream Cheese Frosting (Same as Recipe #3):
- 8 oz (226g) full-fat block cream cheese, softened
- ½ cup (113g) unsalted butter, softened
- 4 cups (480g) powdered sugar, sifted
- 1 tsp pure vanilla extract
- ⅛ tsp salt
Instructions:
- Prep: Preheat oven to 350°F (175°C). Grease and flour two 9-inch round cake pans. Line bottoms with parchment paper.
- Dry Ingredients: In a large bowl, whisk together flour, sugar, baking soda, salt, and cocoa powder.
- Wet Ingredients: In a separate medium bowl, whisk together oil, buttermilk, eggs, red food coloring, vinegar, and vanilla extract until well combined.
- Combine: Add the wet ingredients to the dry ingredients and beat on medium speed until just combined (about 1 minute). Do not overmix. Scrape down the bowl.
- Bake: Pour batter evenly into prepared pans. Bake for 30-35 minutes, or until a wooden skewer inserted into the center comes out clean.
- Cool: Let cakes cool in pans for 10-15 minutes, then invert onto a wire rack to cool completely.
- Make Cream Cheese Frosting: Follow Step 9 from Recipe #3 (Funfetti Cake).
- Assemble: Level the cooled cakes if desired (save trimmings for decoration). Place one layer on a serving plate, top with a generous amount of frosting. Add the second layer. Frost the top and sides smoothly. Optionally, crumble the cake trimmings and press them onto the sides or sprinkle on top for a traditional look.
Tips for Success:
- Food Coloring: Gel food coloring provides a more vibrant red with less liquid. Adjust amount based on desired intensity.
- Vinegar and Baking Soda Reaction: The reaction between vinegar (acid) and baking soda (base) helps create a velvety texture and provides leavening.
- Don’t Overmix: Overmixing can lead to a tougher cake.
- Cocoa Powder Note: Red Velvet has only a subtle chocolate flavor; the cocoa mainly helps with the color reaction and texture. Use regular unsweetened cocoa, not Dutch-process.
- Chill for Easier Frosting: Chilling the cake layers slightly can make them easier to handle and frost, especially with cream cheese frosting which is softer.
6. Moist Carrot Cake with Cream Cheese Frosting
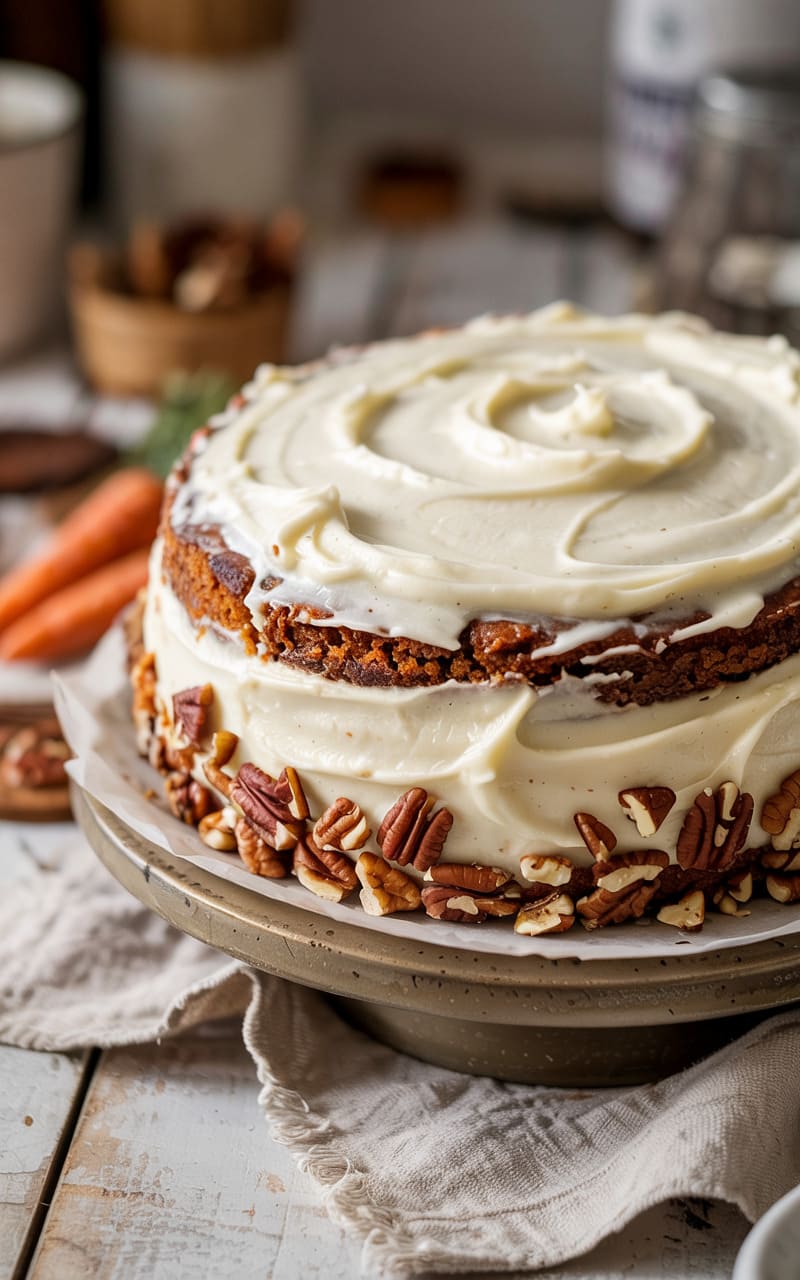
Packed with carrots, spices, and often nuts or raisins, this cake is moist, flavorful, and topped with classic tangy frosting.
Ingredients:
- For the Carrot Cake:
- 2 cups (250g) all-purpose flour
- 2 tsp baking soda
- ½ tsp salt
- 1 ½ tsp ground cinnamon
- ½ tsp ground ginger
- ¼ tsp ground nutmeg
- ¼ tsp ground cloves (optional)
- 1 ½ cups (300g) granulated sugar
- ¾ cup (180ml) vegetable oil (or melted coconut oil)
- ¾ cup (180ml) buttermilk, room temperature
- 2 tsp pure vanilla extract
- 3 large eggs, room temperature
- 2 cups (about 260g) grated carrots (about 3-4 medium carrots)
- 1 cup (120g) chopped pecans or walnuts (optional, toasted for best flavor)
- ½ cup (75g) raisins (optional)
- ½ cup (115g) crushed pineapple, well-drained (optional, adds moisture)
- For the Cream Cheese Frosting (Double Batch of Recipe #3):
- 16 oz (452g) full-fat block cream cheese, softened
- 1 cup (226g) unsalted butter, softened
- 6-8 cups (720-960g) powdered sugar, sifted
- 2 tsp pure vanilla extract
- ¼ tsp salt
Instructions:
- Prep: Preheat oven to 350°F (175°C). Grease and flour two 9-inch round cake pans. Line bottoms with parchment paper.
- Dry Ingredients: In a large bowl, whisk together flour, baking soda, salt, cinnamon, ginger, nutmeg, and cloves (if using). Whisk in the sugar.
- Wet Ingredients: In a separate medium bowl, whisk together oil, buttermilk, vanilla, and eggs until well combined.
- Combine: Pour the wet ingredients into the dry ingredients and mix on low speed (or by hand) until just combined.
- Fold-Ins: Gently fold in the grated carrots, and nuts, raisins, and/or pineapple if using.
- Bake: Divide batter evenly between the prepared pans. Bake for 35-45 minutes, or until a wooden skewer inserted into the center comes out clean.
- Cool: Let cakes cool in the pans for 15-20 minutes before inverting onto a wire rack to cool completely. Carrot cake is often very moist, so handle carefully.
- Make Frosting: In a large bowl, beat softened cream cheese and butter together until smooth and creamy. Gradually beat in the sifted powdered sugar until desired consistency is reached. Beat in vanilla and salt. Do not overmix.
- Assemble: Place one cooled cake layer on a serving plate. Spread generously with frosting. Top with the second layer. Frost the top and sides of the cake. Garnish with extra chopped nuts if desired.
Tips for Success:
- Grate Carrots Finely: Use the smaller holes on a box grater for finely shredded carrots that incorporate well and keep the cake moist. Avoid pre-shredded carrots which are often dry.
- Toast Nuts: Toasting pecans or walnuts briefly enhances their flavor significantly.
- Don’t Squeeze Carrots: Use the moisture from the grated carrots in the batter.
- Optional Add-Ins: Feel free to customize with nuts, raisins, pineapple, or even shredded coconut. Ensure pineapple is well-drained.
- Refrigerate Frosted Cake: Carrot cake with cream cheese frosting is best stored in the refrigerator but serve it closer to room temperature for best flavor and texture.
7. Lemon Layer Cake with Lemon Buttercream
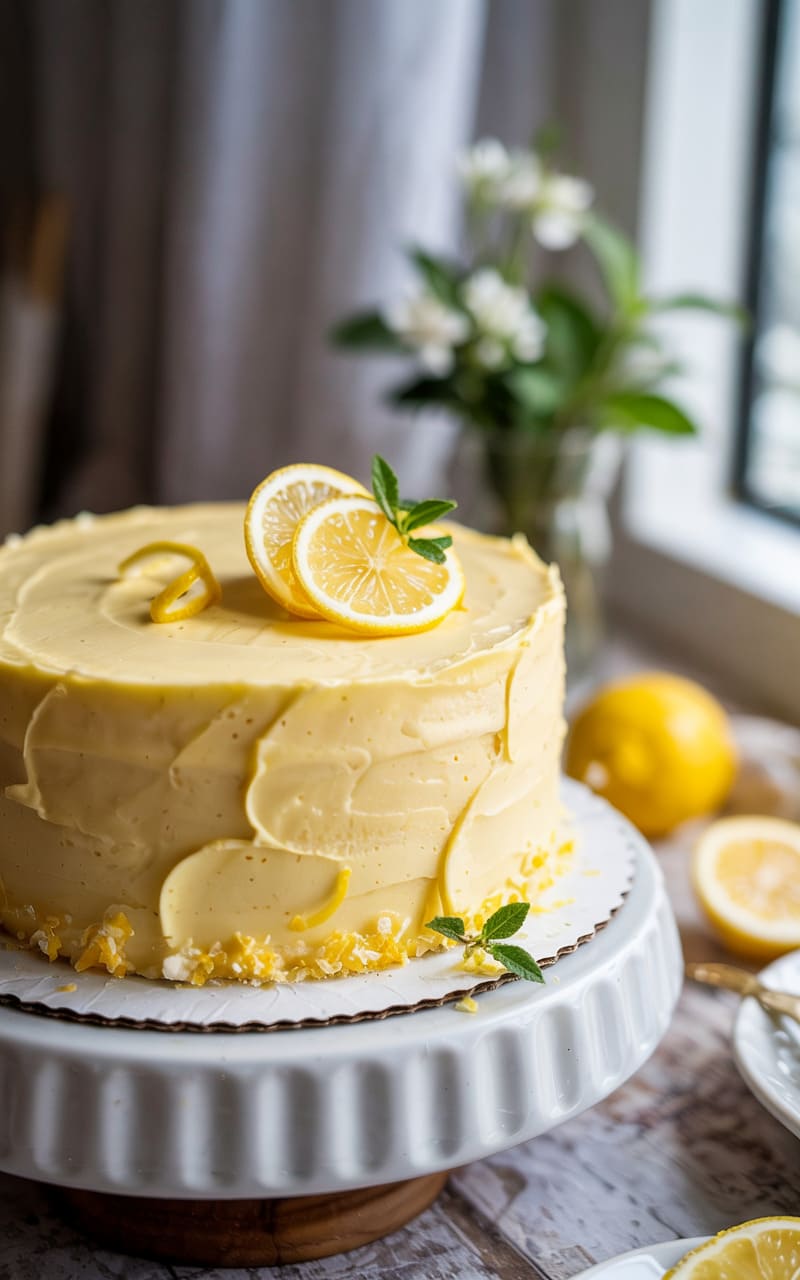
A bright, zesty, and refreshing cake perfect for spring and summer birthdays, or for anyone who loves citrus.
Ingredients:
- For the Lemon Cake:
- 2 ½ cups (320g) all-purpose flour
- 2 tsp baking powder
- ½ tsp baking soda
- ½ tsp salt
- 1 cup (226g) unsalted butter, softened
- 1 ¾ cups (350g) granulated sugar
- 3 large eggs + 1 egg yolk, room temperature
- 1 cup (240ml) buttermilk, room temperature
- ½ cup (120ml) fresh lemon juice (from about 2-3 lemons)
- 1 tbsp lemon zest (from about 2 lemons)
- 1 tsp pure vanilla extract
- For the Lemon Buttercream:
- 1 ½ cups (340g) unsalted butter, softened
- 4-5 cups (480-600g) powdered sugar, sifted
- ¼ cup (60ml) fresh lemon juice
- 1 tsp lemon zest
- pinch of salt
- Optional: Yellow food coloring
- Optional: Lemon curd for filling
Instructions:
- Prep: Preheat oven to 350°F (175°C). Grease and flour two 9-inch round cake pans. Line bottoms with parchment paper.
- Zest and Juice Lemons: Zest lemons first, then juice them. Set aside.
- Dry Ingredients: In a medium bowl, whisk together flour, baking powder, baking soda, and salt.
- Cream Butter and Sugar: In a large bowl, beat butter and sugar on medium-high speed until light and fluffy (3-4 minutes). Add lemon zest and beat for another minute.
- Add Eggs: Add eggs and egg yolk one at a time, beating well after each. Beat in vanilla extract.
- Combine Liquids: In a small bowl or liquid measuring cup, whisk together buttermilk and fresh lemon juice.
- Combine Wet and Dry: On low speed, alternate adding the dry ingredients (in 3 parts) and the lemon-buttermilk mixture (in 2 parts), starting and ending with dry ingredients. Mix until just combined.
- Bake: Divide batter evenly between pans. Bake for 30-35 minutes, or until a skewer comes out clean.
- Cool: Cool in pans for 10-15 minutes, then invert onto a wire rack to cool completely.
- Make Lemon Buttercream: Beat softened butter until creamy. Gradually add sifted powdered sugar, alternating with the lemon juice, beating on low until combined. Add lemon zest and salt. Increase speed to medium-high and beat for 3 minutes until light and fluffy. Add yellow food coloring if desired.
- Assemble: Place one cooled layer on a plate. Optional: spread a thin layer of lemon curd. Top with lemon buttercream. Place the second layer on top. Frost the entire cake. Garnish with extra zest or candied lemon slices.
Tips for Success:
- Fresh Lemon Juice is Best: Use freshly squeezed lemon juice for the brightest, most authentic flavor.
- Zest Before Juicing: It’s much easier to zest a whole lemon than a juiced one.
- Don’t Overmix After Adding Flour: This ensures a tender crumb.
- Room Temperature Matters: Especially for eggs and buttermilk, for proper emulsification.
- Lemon Curd Filling: Adds an extra burst of tangy lemon flavor between the layers.
8. Strawberry Shortcake Layer Cake
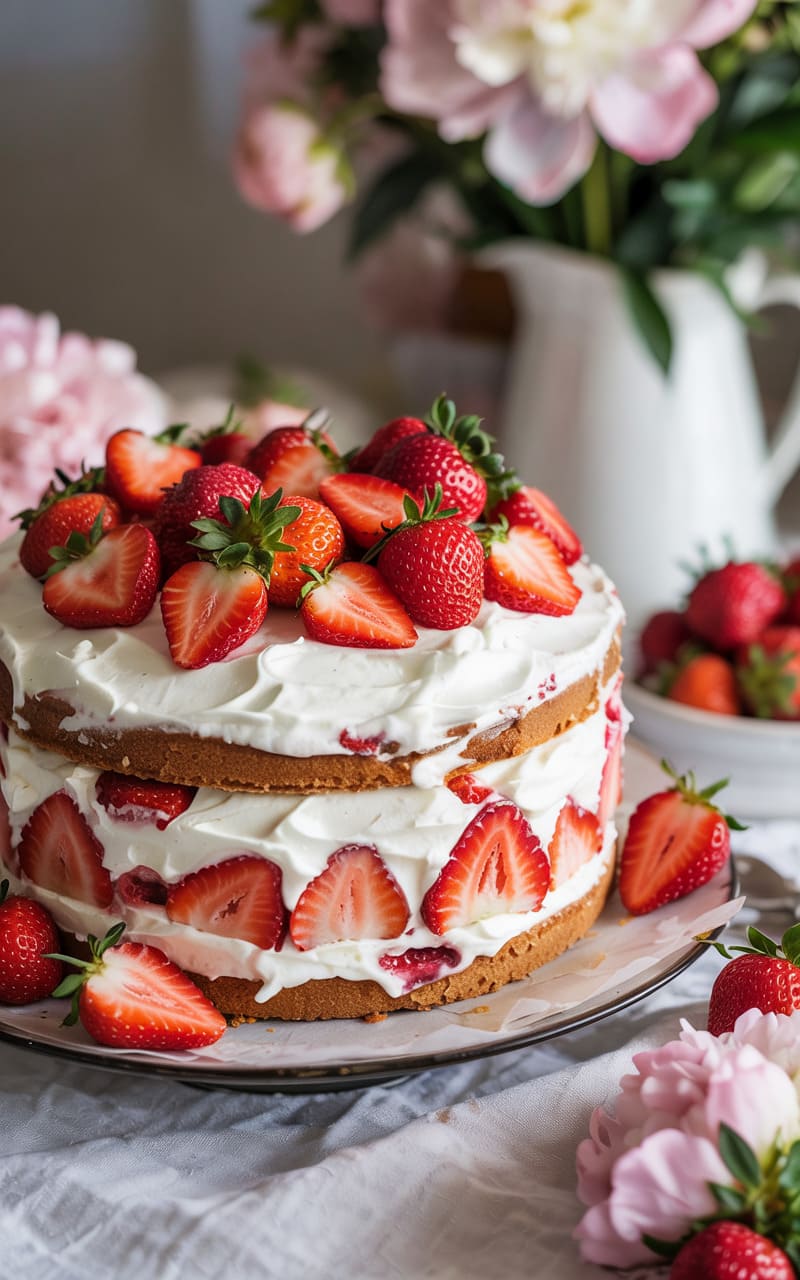
A summery delight featuring tender vanilla cake layers, fresh strawberries, and whipped cream frosting.
Ingredients:
- For the Vanilla Cake (Sponge-like):
- Use the Classic Vanilla Cake recipe (Recipe #1) OR a lighter sponge cake recipe. Ensure it’s sturdy enough to hold the filling.
- For the Strawberry Filling:
- 2 lbs (about 900g) fresh strawberries, hulled and sliced
- ¼ cup (50g) granulated sugar (adjust to strawberry sweetness)
- 1 tbsp fresh lemon juice (optional)
- For the Stabilized Whipped Cream Frosting:
- 3 cups (720ml) heavy whipping cream, very cold
- ⅔ cup (80g) powdered sugar, sifted
- 1 tsp pure vanilla extract
- 2 tbsp powdered milk OR 1 tsp unflavored gelatin bloomed in 2 tbsp cold water (for stability)
Instructions:
- Bake Cake Layers: Prepare and bake the vanilla cake layers (using Recipe #1 or your preferred sponge) as directed. Let cool completely.
- Prepare Strawberries: In a medium bowl, gently toss the sliced strawberries with the granulated sugar and optional lemon juice. Let sit for at least 30 minutes at room temperature (or up to a few hours refrigerated) to macerate – this draws out the juices.
- Make Stabilized Whipped Cream: Chill your mixing bowl and whisk attachment in the freezer for 10-15 minutes. Pour the very cold heavy cream into the chilled bowl. Beat on medium speed until soft peaks form.
- Add Sweetener & Stabilizer: Sift in the powdered sugar and add the vanilla extract. If using powdered milk, add it now. If using gelatin, gently heat the bloomed gelatin until just melted (do not boil) and drizzle it in slowly while mixing on low speed.
- Whip to Stiff Peaks: Increase speed to medium-high and whip until stiff peaks form. Be careful not to overwhip into butter.
- Assemble: Level the cooled cake layers if needed. Place one layer on a serving platter. Drain the macerated strawberries slightly, reserving some juice if desired for drizzling. Create a dam of whipped cream around the edge of the first layer to hold the strawberries. Fill the center with a generous layer of the sliced strawberries.
- Add Second Layer: Carefully place the second cake layer on top.
- Frost Cake: Frost the top and sides of the cake with the stabilized whipped cream. You can make it smooth or create soft swirls.
- Decorate: Garnish with whole or sliced fresh strawberries just before serving. Drizzle with reserved strawberry juice if desired.
Tips for Success:
- Use Fresh, Ripe Strawberries: The flavor of the cake depends heavily on the quality of the berries.
- Stabilized Whipped Cream: Essential for frosting a layer cake, as regular whipped cream can weep or deflate. Gelatin or powdered milk provides structure. Ensure cream is VERY cold for best volume.
- Macerate Strawberries: This step softens the berries slightly and creates a delicious syrupy juice.
- Assemble Just Before Serving (Ideally): While the stabilized cream holds up, this cake is best enjoyed within a few hours of assembly for the freshest taste and texture. Store leftovers covered in the refrigerator.
- Cake Base Choice: A slightly denser vanilla cake or sponge holds up better to the moist filling than an extremely airy angel food cake.
9. Black Forest Gateau (Cake)
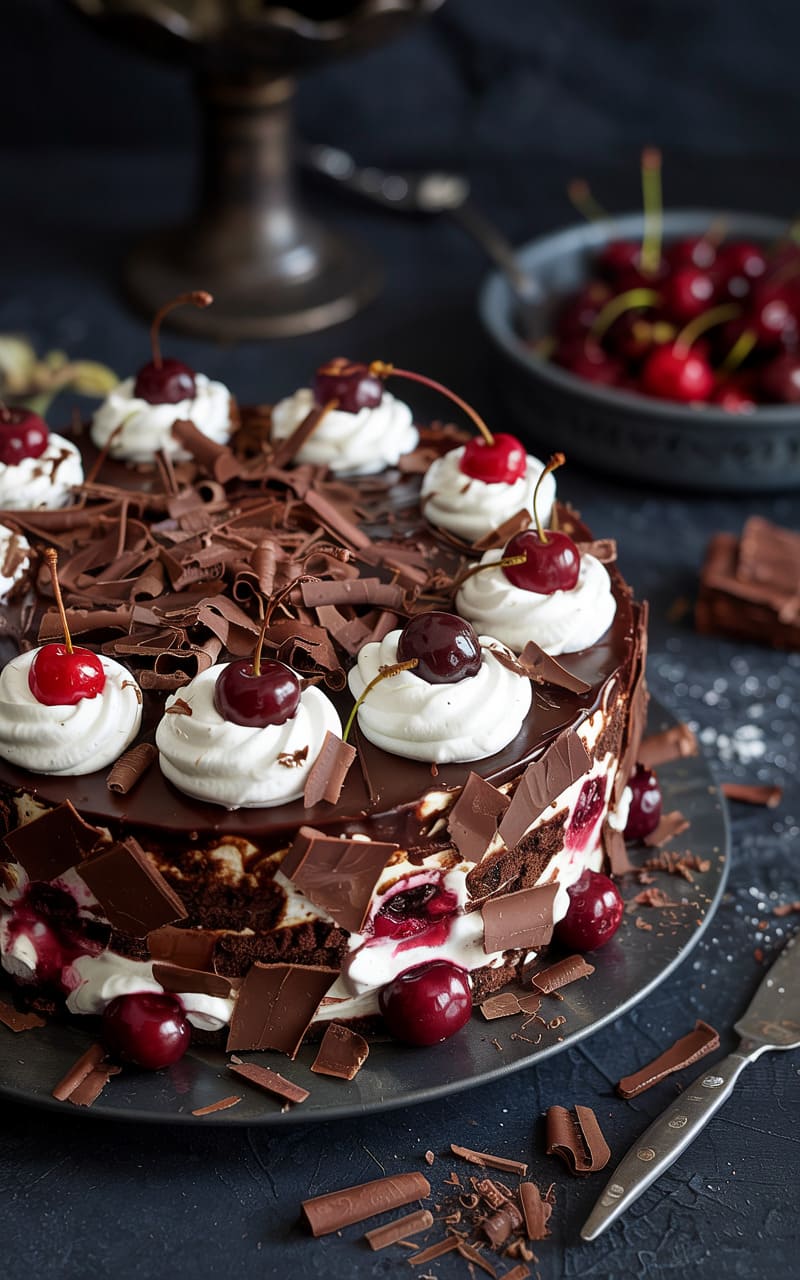
A German classic featuring layers of chocolate cake, Kirsch (cherry liqueur)-soaked cherries, and whipped cream.
Ingredients:
- For the Chocolate Cake Layers:
- Use the Rich Chocolate Fudge Cake recipe (Recipe #2), baked in three 8-inch pans for thinner layers.
- For the Cherry Filling:
- 2 cans (15 oz / 425g each) pitted tart cherries in heavy syrup OR 2 lbs fresh tart cherries, pitted
- ½ cup (100g) granulated sugar (if using fresh cherries)
- ¼ cup (60ml) Kirsch (cherry liqueur)
- 2 tbsp cornstarch + 3 tbsp cold water (slurry)
- For the Kirsch Syrup:
- ½ cup (120ml) reserved cherry syrup (from can) OR water
- ¼ cup (50g) granulated sugar
- ¼ cup (60ml) Kirsch
- For the Whipped Cream Frosting (Stabilized):
- 4 cups (960ml) heavy whipping cream, very cold
- ¾ cup (90g) powdered sugar, sifted
- 1 tbsp Kirsch (optional, for flavor)
- 1 tbsp powdered milk OR 1.5 tsp bloomed gelatin (see Recipe #8 for method)
- For Garnish:
- Fresh cherries with stems
- Chocolate shavings or sprinkles
Instructions:
- Bake Chocolate Cake: Prepare and bake the chocolate cake layers (Recipe #2 batter in three 8-inch pans). Cool completely.
- Make Cherry Filling: If using canned cherries, drain them, reserving ½ cup syrup for the Kirsch Syrup. If using fresh cherries, combine them with ½ cup sugar in a saucepan and cook over medium heat until juices release (5-10 mins). Pour off about 1 cup liquid (add water if needed). In a saucepan, combine the drained cherries (or cooked fresh cherries) and their reserved liquid (or the 1 cup fresh cherry liquid). Stir in Kirsch. Bring to a simmer. Whisk the cornstarch slurry and slowly pour it into the simmering cherries, whisking constantly until thickened (1-2 minutes). Remove from heat and let cool completely.
- Make Kirsch Syrup: In a small saucepan, combine the reserved cherry syrup (or water) and sugar. Heat until sugar dissolves. Remove from heat and stir in the Kirsch. Let cool.
- Make Stabilized Whipped Cream: Follow Step 3-5 from Recipe #8, adding the optional 1 tbsp Kirsch with the vanilla/stabilizer.
- Assemble: Level the cooled cake layers. Place one layer on a serving plate. Brush generously with Kirsch syrup. Spread about one-third of the whipped cream over the layer. Top with half of the cooled cherry filling.
- Layer Two: Place the second cake layer on top. Brush with Kirsch syrup. Spread another third of the whipped cream. Top with the remaining cherry filling.
- Layer Three: Place the third cake layer on top. Brush with Kirsch syrup.
- Frost: Frost the top and sides of the entire cake with the remaining whipped cream.
- Decorate: Press chocolate shavings or sprinkles onto the sides of the cake. Pipe rosettes of whipped cream around the top edge and garnish each with a fresh cherry.
Tips for Success:
- Kirsch is Key: This cherry liqueur is traditional and provides the signature Black Forest flavor. If omitting alcohol, substitute cherry juice or water in the syrup and filling, perhaps adding a drop of almond extract for complexity.
- Tart Cherries: Use tart cherries (like Morello) if possible, as their flavor balances the sweetness. Canned packed in heavy syrup are convenient.
- Cool Components: Ensure the cake layers, cherry filling, and syrup are completely cool before assembling with the whipped cream.
- Generous Syrup: Don’t skimp on brushing the layers with the Kirsch syrup; it adds moisture and flavor.
- Stabilized Cream Essential: Absolutely necessary to hold the layers and filling. Keep everything cold.
10. Classic Coconut Cake with Coconut Cream Cheese Frosting
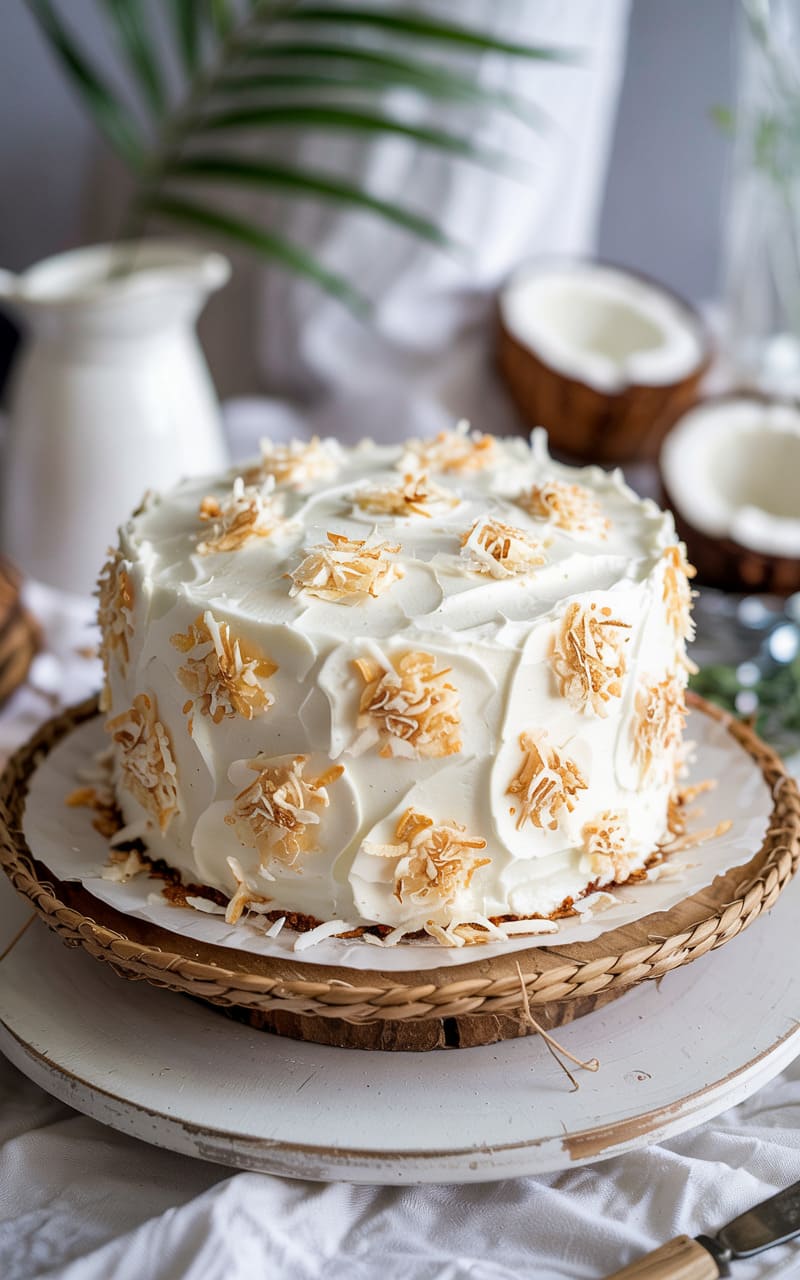
A moist, tropical delight loaded with coconut flavor in both the cake and the creamy frosting, often coated in shredded coconut.
Ingredients:
- For the Coconut Cake:
- 2 ½ cups (320g) cake flour
- 1 tsp baking powder
- ½ tsp baking soda
- ½ tsp salt
- 1 cup (226g) unsalted butter, softened
- 1 ¾ cups (350g) granulated sugar
- 4 large egg whites, room temperature
- 1 cup (240ml) canned full-fat coconut milk, well shaken, room temperature
- ½ cup (120ml) buttermilk, room temperature
- 1 tsp pure vanilla extract
- ½ tsp coconut extract
- 1 cup (90g) sweetened shredded coconut
- For the Coconut Cream Cheese Frosting:
- 12 oz (340g) full-fat block cream cheese, softened
- ¾ cup (170g) unsalted butter, softened
- 5-6 cups (600-720g) powdered sugar, sifted
- 1 tsp pure vanilla extract
- ½ tsp coconut extract
- Pinch of salt
- 1-2 tbsp coconut milk or heavy cream, if needed for consistency
- For Garnish:
- 1-2 cups (90-180g) sweetened shredded coconut (toasted optional)
Instructions:
- Prep: Preheat oven to 350°F (175°C). Grease and flour three 8-inch or two 9-inch round cake pans. Line bottoms with parchment paper.
- Dry Ingredients: Whisk together cake flour, baking powder, baking soda, and salt in a medium bowl.
- Combine Liquids: In a liquid measuring cup, whisk together the coconut milk, buttermilk, vanilla extract, and coconut extract.
- Cream Butter and Sugar: In a large bowl, beat butter and sugar on medium-high speed until light and fluffy (3-4 minutes).
- Add Egg Whites: Add egg whites one at a time, beating well after each addition.
- Combine Wet and Dry: On low speed, alternate adding the dry ingredients (in 3 parts) and the coconut milk mixture (in 2 parts), beginning and ending with dry ingredients. Mix until just combined.
- Fold in Coconut: Gently fold in the 1 cup of shredded coconut.
- Bake: Divide batter evenly among pans. Bake for 25-30 minutes (8-inch) or 30-35 minutes (9-inch), until a skewer comes out clean.
- Cool: Cool in pans for 10-15 minutes, then invert onto a wire rack to cool completely.
- Make Frosting: Beat softened cream cheese and butter until smooth. Gradually beat in powdered sugar until combined. Beat in vanilla extract, coconut extract, and salt. If too thick, add coconut milk or cream 1 tbsp at a time. Beat on medium-high until fluffy (about 2 minutes).
- Assemble: Level cakes if needed. Place one layer on a plate, top with frosting. Repeat with remaining layers. Frost the top and sides of the cake.
- Coat with Coconut: Gently press the garnish shredded coconut onto the sides and sprinkle generously over the top of the cake. Toasting some of the coconut first adds a nice nutty flavor and color contrast.
Tips for Success:
- Cake Flour Preferred: Yields a more tender crumb, complementing the coconut texture.
- Full-Fat Coconut Milk: Use canned full-fat coconut milk (not coconut beverage) for the best flavor and richness. Shake the can well before measuring.
- Room Temperature Ingredients: Essential for a smooth batter and fluffy frosting.
- Coconut Extract: Enhances the coconut flavor significantly.
- Toasted Coconut Garnish: Spread shredded coconut on a baking sheet and toast at 350°F (175°C) for 5-10 minutes, watching carefully, until lightly golden for extra flavor.
11. German Chocolate Cake
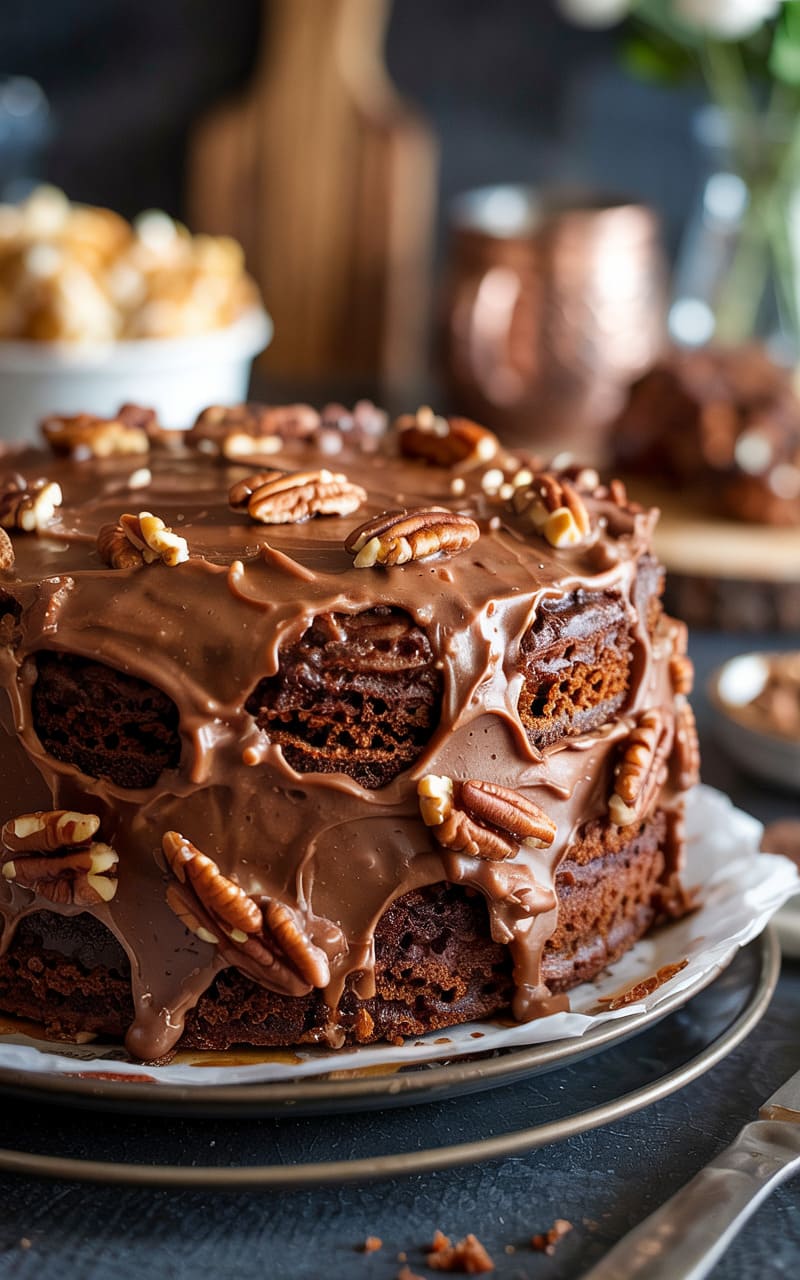
Despite the name, this is an American cake featuring mild chocolate layers and a distinct gooey caramel-coconut-pecan frosting.
Ingredients:
- For the Chocolate Cake Layers:
- 4 oz (113g) German’s Sweet Chocolate baking bar (like Baker’s brand)
- ½ cup (120ml) boiling water
- 1 cup (226g) unsalted butter, softened
- 1 ¾ cups (350g) granulated sugar
- 4 large eggs, separated (yolks and whites), room temperature
- 2 cups (250g) all-purpose flour
- 1 tsp baking soda
- ½ tsp salt
- 1 cup (240ml) buttermilk, room temperature
- 1 tsp pure vanilla extract
- For the Coconut-Pecan Frosting:
- 1 cup (240ml) evaporated milk (not condensed milk)
- 1 cup (200g) granulated sugar
- ¾ cup (170g) unsalted butter, cut into pieces
- 3 large egg yolks, lightly beaten
- 1 tsp pure vanilla extract
- 1 ⅓ cups (120g) sweetened shredded coconut
- 1 cup (115g) chopped pecans, toasted
- Optional: Chocolate buttercream for sides
Instructions:
- Prep: Preheat oven to 350°F (175°C). Grease and flour three 8-inch round cake pans. Line bottoms with parchment paper.
- Melt Chocolate: Break German’s chocolate bar into pieces. Pour boiling water over chocolate in a small bowl. Stir until melted and smooth. Let cool slightly.
- Cream Butter & Sugar, Add Yolks: In a large bowl, beat butter and sugar until light and fluffy. Beat in the 4 egg yolks one at a time. Beat in the melted chocolate mixture and vanilla extract.
- Dry Ingredients: In a separate bowl, whisk flour, baking soda, and salt.
- Combine Wet and Dry: On low speed, alternate adding dry ingredients (in 3 parts) and buttermilk (in 2 parts) to the butter mixture, starting and ending with dry. Mix until just combined.
- Whip Egg Whites: In a clean, dry bowl with clean beaters, beat the 4 egg whites on high speed until stiff peaks form.
- Fold Egg Whites: Gently fold about one-third of the beaten egg whites into the batter to lighten it. Then gently fold in the remaining egg whites until just incorporated – do not deflate.
- Bake: Divide batter evenly among prepared pans. Bake for 25-30 minutes, or until a skewer comes out clean.
- Cool: Cool in pans for 15 minutes, then invert onto a wire rack to cool completely.
- Make Coconut-Pecan Frosting: In a medium saucepan, combine evaporated milk, sugar, butter pieces, and the 3 beaten egg yolks. Cook over medium heat, stirring constantly, until the mixture thickens and bubbles gently (about 10-12 minutes). Do not boil vigorously.
- Finish Frosting: Remove from heat. Stir in vanilla extract, shredded coconut, and toasted pecans. Let cool completely, stirring occasionally, until thick enough to spread (it will thicken considerably as it cools).
- Assemble: Place one cooled cake layer on a serving plate. Spread about one-third of the Coconut-Pecan frosting evenly over the top. Repeat with the second layer and another third of the frosting. Place the third layer on top and spread the remaining frosting over the top layer only. Traditionally, the sides are left unfrosted, but you can frost them with chocolate buttercream if desired.
Tips for Success:
- Use German’s Sweet Chocolate: This specific type of sweet baking chocolate is key to the authentic flavor.
- Separate Eggs Carefully: Ensure no yolk gets into the whites, as fat prevents whites from whipping properly.
- Toast Pecans: Enhances their flavor for the frosting.
- Cook Frosting Gently: Stir constantly to prevent scorching and ensure the egg yolks cook without scrambling. It needs to cool fully to thicken.
- Room Temperature Buttermilk and Eggs: Critical for cake texture.
12. Classic New York Cheesecake (Birthday Style)
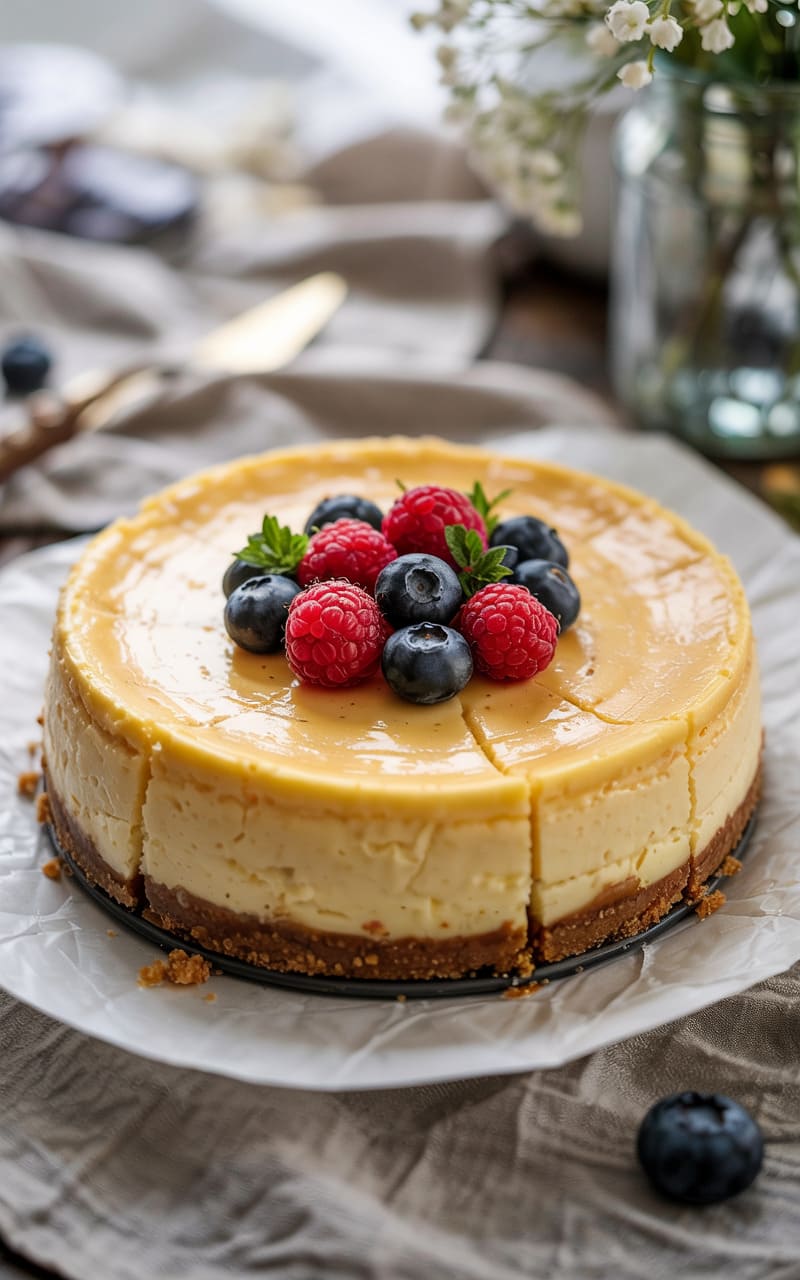
Dense, rich, and creamy cheesecake with a graham cracker crust. A sophisticated birthday alternative.
Ingredients:
- For the Crust:
- 1 ½ cups (150g) graham cracker crumbs (about 10-12 full sheets)
- ¼ cup (50g) granulated sugar
- 6 tbsp (85g) unsalted butter, melted
- For the Cheesecake Filling:
- 32 oz (4 blocks, 904g) full-fat block cream cheese, very softened
- 1 ¾ cups (350g) granulated sugar
- ⅓ cup (40g) all-purpose flour OR 3 tbsp cornstarch
- 1 tbsp lemon zest (optional)
- 1 tsp pure vanilla extract
- 5 large eggs + 2 large egg yolks, room temperature
- ½ cup (120ml) heavy cream, room temperature
- ½ cup (120g) sour cream, room temperature
- For Optional Topping:
- Fresh berries, cherry pie filling, caramel sauce, chocolate ganache
Instructions:
- Prep: Preheat oven to 350°F (175°C). Prepare a 9 or 10-inch springform pan. Wrap the outside bottom and sides of the pan tightly with heavy-duty aluminum foil (multiple layers) to prevent water bath leaks.
- Make Crust: In a medium bowl, combine graham cracker crumbs and sugar. Pour in melted butter and stir until evenly moistened. Press mixture firmly and evenly onto the bottom and slightly up the sides of the prepared springform pan. Bake for 10 minutes. Let cool completely on a wire rack. Reduce oven temperature to 325°F (160°C).
- Make Filling – Cream Cheese: In a large bowl using a hand mixer or stand mixer with paddle attachment, beat the *very* softened cream cheese on medium-low speed until completely smooth and lump-free. This is crucial – take your time (2-3 minutes). Scrape down the bowl frequently.
- Add Sugar & Flavor: Gradually add the sugar and flour (or cornstarch) and beat on low speed until just combined. Do not overbeat from here on. Beat in lemon zest (if using) and vanilla extract.
- Add Eggs: Add eggs and egg yolks one at a time, beating on low speed just until each is incorporated. Do not overmix!
- Add Creams: On low speed, mix in the heavy cream and sour cream until just combined. The batter should be smooth and thick.
- Pour & Water Bath: Pour the filling over the cooled crust in the springform pan. Place the foil-wrapped pan into a larger roasting pan. Carefully pour boiling water into the roasting pan until it reaches about halfway up the sides of the springform pan.
- Bake: Carefully transfer the roasting pan to the oven. Bake at 325°F (160°C) for 60-75 minutes (9-inch) or 75-90 minutes (10-inch). The edges should be set, but the center should still have a slight wobble when gently shaken.
- Cool Gradually: Turn off the oven and crack the oven door open. Let the cheesecake cool in the cooling oven with the door ajar for 1 hour. This helps prevent cracking.
- Chill: Remove the cheesecake from the water bath (carefully remove foil). Let it cool completely on a wire rack at room temperature. Then, cover loosely with plastic wrap and refrigerate for at least 6 hours, preferably overnight.
- Serve: Once thoroughly chilled, run a thin knife around the edge of the pan before releasing the springform side. Slice with a hot, wet knife (dip knife in hot water and wipe clean between slices). Top with desired toppings just before serving.
Tips for Success:
- Softened Cream Cheese is MANDATORY: Leave it out for several hours. If it’s not fully softened, you’ll get lumps.
- Don’t Overmix After Adding Eggs: Overmixing incorporates too much air, which can cause cracks. Mix on low speed.
- Room Temperature Wet Ingredients: Eggs, heavy cream, sour cream must be at room temp for a smooth, homogenous batter.
- Water Bath is Crucial: Provides moist heat, ensuring even baking and preventing cracks. Seal the pan VERY well with foil.
- Gradual Cooling: Prevents sudden temperature changes that cause cracking. The oven cool-down is key.
- Patience is a Virtue: Cheesecake needs a long, slow bake and a long chill time to fully set and develop flavor. Don’t rush it!
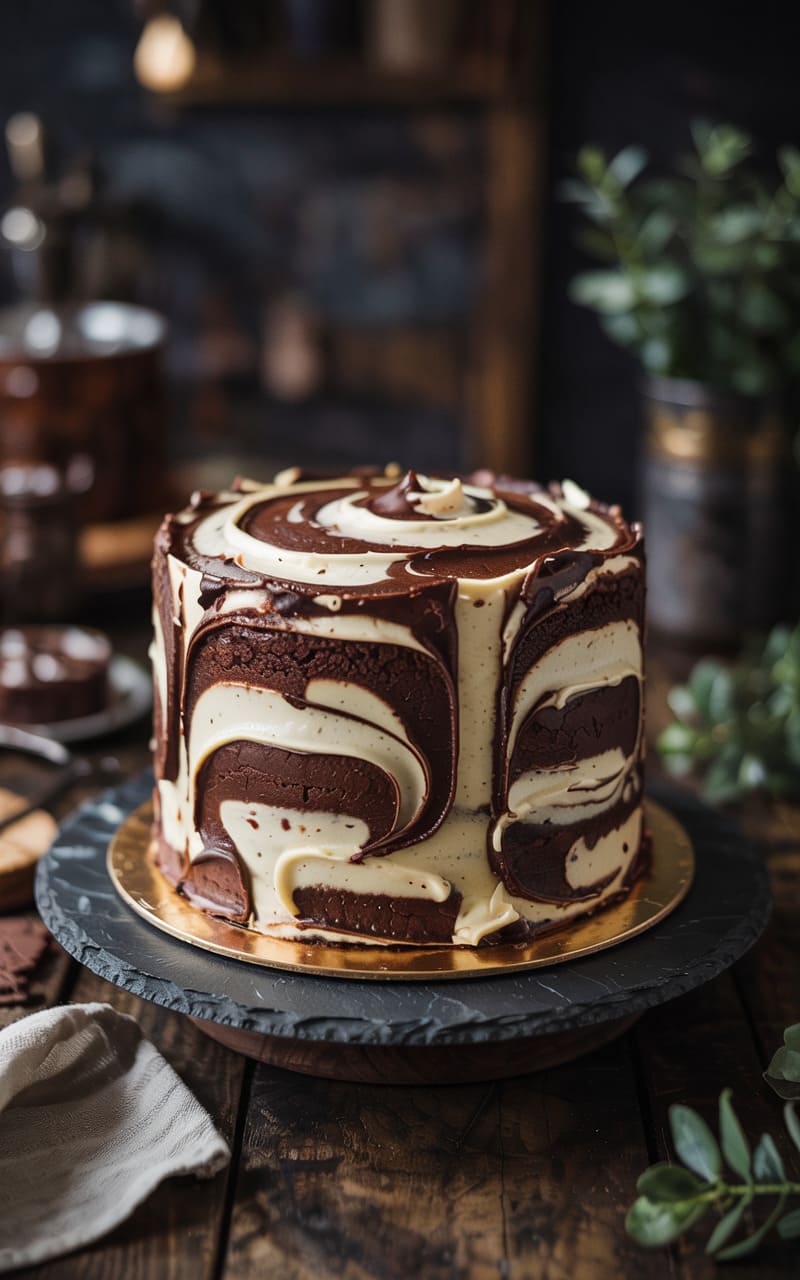
13. Marble Cake with Chocolate Vanilla Swirl Frosting
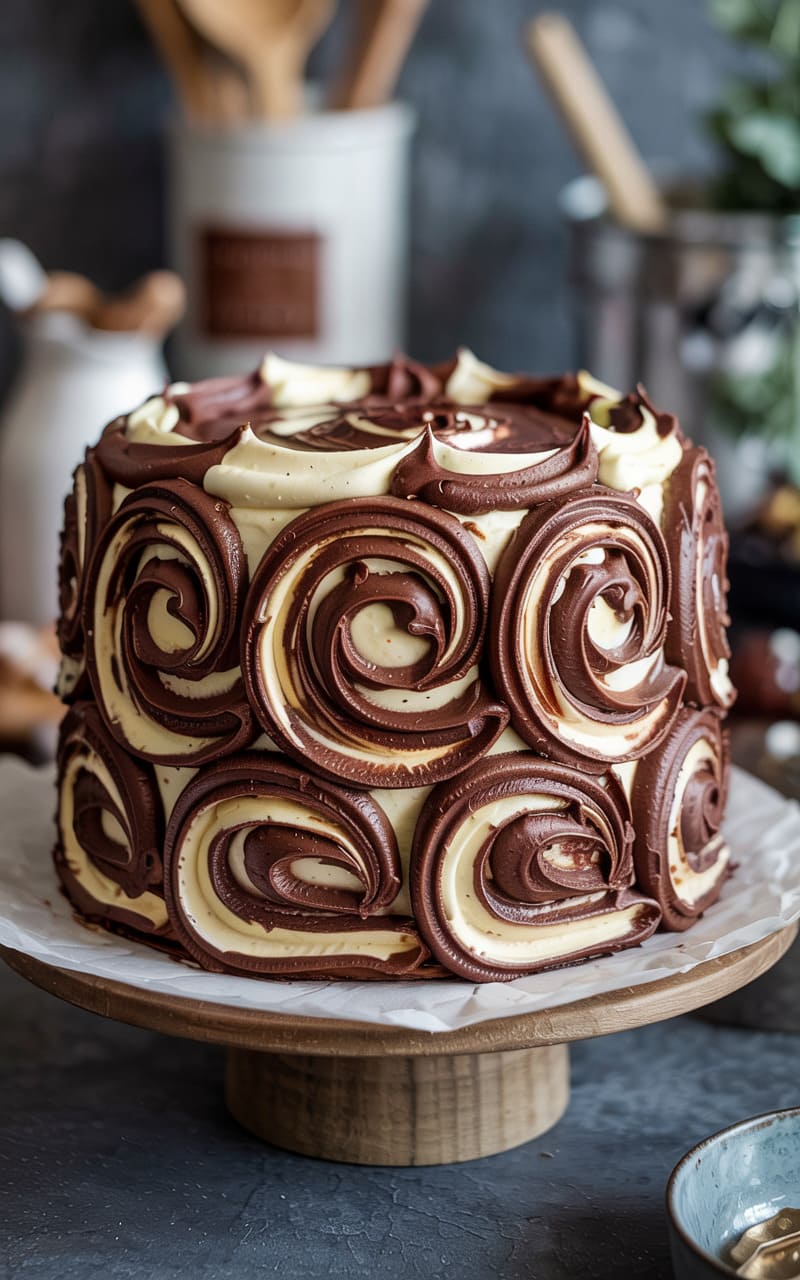
The best of both worlds! Vanilla and chocolate batters are swirled together for a beautiful pattern and delicious flavor combination.
Ingredients:
- For the Vanilla Batter Base:
- Follow ingredients for Classic Vanilla Cake (Recipe #1) up to Step 4 (after adding eggs and vanilla).
- For the Chocolate Batter Modification:
- 2 oz (57g) unsweetened chocolate, melted and cooled slightly OR ¼ cup (21g) unsweetened cocoa powder mixed with 2-3 tbsp hot water/coffee to form a paste
- 1-2 tbsp milk or buttermilk (if needed for consistency)
- For the Swirl Frosting:
- Prepare 1 batch Vanilla Buttercream (Recipe #1)
- Prepare ½ batch Chocolate Buttercream (use half the ingredients from Recipe #2 or #4)
Instructions:
- Prep: Preheat oven to 350°F (175°C). Grease and flour two 9-inch round cake pans. Line bottoms with parchment paper.
- Prepare Vanilla Batter Base: Follow steps 1-4 of the Classic Vanilla Cake recipe (cream butter/sugar, add eggs/vanilla).
- Divide Batter: Measure out approximately 1/3 to 1/2 of the vanilla batter into a separate medium bowl. Set the remaining larger portion of vanilla batter aside.
- Make Chocolate Batter: Add the melted and cooled unsweetened chocolate (or cocoa paste) to the smaller portion of batter you set aside. Gently stir until just combined. If the batter seems much thicker than the vanilla, stir in 1-2 tbsp milk or buttermilk.
- Combine Wet and Dry (Vanilla): Following Recipe #1 Step 5, finish making the *vanilla* batter by alternating the dry ingredients and milk with the larger portion of vanilla batter base. Mix until just combined.
- Marble the Batters: Drop alternating spoonfuls of vanilla and chocolate batter into the prepared cake pans. You can do large dollops or smaller ones.
- Swirl: Insert a butter knife or skewer into the batter and gently swirl it through the pans in a figure-eight or S-shape pattern a few times. Do not over-swirl, or the colors will become muddy. Just a few passes are enough.
- Bake: Bake for 30-35 minutes, or until a wooden skewer inserted into the center comes out clean (test both vanilla and chocolate sections if possible).
- Cool: Let cakes cool in pans for 10-15 minutes before inverting onto a wire rack to cool completely.
- Make Frostings: Prepare both the full batch of vanilla buttercream and the half batch of chocolate buttercream as per their respective recipes.
- Frosting Swirl Technique: Place one cooled cake layer on the serving plate. Frost with vanilla buttercream. Place the second layer on top. Apply a crumb coat if desired and chill. To create the swirl effect on the final coat: place dollops of vanilla and chocolate frosting randomly over the top and sides of the cake. Use an offset spatula to gently spread and swirl the two colors together. Avoid over-blending. Alternatively, fill a piping bag half with vanilla and half with chocolate frosting (side-by-side) and pipe onto the cake for a more defined swirl.
Tips for Success:
- Don’t Over-Swirl: The key to a distinct marble pattern is minimal swirling. Just enough to blend the edges slightly.
- Batter Consistency: Try to keep the vanilla and chocolate batters at a similar consistency so they swirl nicely. Add a touch of liquid to the chocolate if needed.
- Melted Chocolate vs Cocoa: Melted chocolate provides a richer flavor, while cocoa paste is easier. Ensure melted chocolate is slightly cooled so it doesn’t cook the eggs.
- Frosting Swirl: Don’t overthink it! Random dollops blended gently often look best. Piping side-by-side gives a different, striped effect.
- Cool Completely: Essential before frosting, as always.
14. Angel Food Cake with Berries and Cream
Incredibly light, airy, and fat-free sponge cake made primarily from egg whites. Often served simply with fresh fruit and whipped cream.
Ingredients:
- For the Angel Food Cake:
- 1 ½ cups (180g) granulated sugar, divided
- 1 cup (130g) cake flour, sifted
- 1 ½ cups (about 12 large) egg whites, room temperature (MUST be free of yolk)
- 1 ½ tsp cream of tartar
- ¼ tsp salt
- 1 tsp pure vanilla extract
- ½ tsp almond extract (optional)
- For Serving:
- Fresh berries (strawberries, blueberries, raspberries)
- Sweetened whipped cream (1 cup heavy cream + 2 tbsp powdered sugar + ½ tsp vanilla) OR use Stabilized Whipped Cream (Recipe #8)
Instructions:
- Prep: Adjust oven rack to the lower-middle position. Preheat oven to 325°F (160°C). Have a 10-inch tube pan (with removable bottom, NON-GREASED) ready. Do NOT grease the pan.
- Sift Dry Ingredients: Sift the cake flour with ½ cup (100g) of the granulated sugar into a medium bowl. Sift it again (total 2 times). This makes it very fine and light. Set aside.
- Beat Egg Whites: In a very large, clean, grease-free bowl, beat the room temperature egg whites with an electric mixer on medium speed until foamy. Add the cream of tartar and salt. Continue beating until soft peaks form (peaks curl over when beaters are lifted).
- Add Sugar Gradually: Increase mixer speed to medium-high. Gradually add the remaining 1 cup (200g) granulated sugar, about 1-2 tablespoons at a time, beating well after each addition. Continue beating until stiff, glossy peaks form (peaks stand straight up). Beat in the vanilla and almond extract (if using).
- Fold in Flour Mixture: Sift about one-third of the flour-sugar mixture over the beaten egg whites. Gently fold it in using a large rubber spatula or wire whisk, using an under-and-over motion. Repeat twice more with the remaining flour mixture, folding just until no white streaks remain. Be very gentle not to deflate the egg whites.
- Fill Pan: Gently pour the batter into the ungreased tube pan. Smooth the top gently with the spatula. Run a thin knife or skewer through the batter once to remove large air pockets.
- Bake: Bake for 40-45 minutes, or until the top is golden brown, springs back when lightly touched, and cracks appear dry.
- Cool Upside Down: Immediately invert the pan onto a wire rack (or over the neck of a sturdy bottle if the pan doesn’t have feet). Let the cake hang upside down and cool completely in the pan (at least 1.5 – 2 hours). This prevents it from collapsing.
- Release Cake: Once completely cool, run a thin flexible knife or offset spatula carefully around the outer and inner edges of the pan to release the cake. Lift out the removable bottom, then run the knife under the bottom to release it.
- Serve: Slice using a serrated knife with a sawing motion. Serve slices topped with fresh berries and sweetened whipped cream.
Tips for Success:
- No Fat!: Ensure bowl, beaters, and egg whites are completely free of any fat (yolk, grease), which inhibits whipping.
- Room Temperature Egg Whites: Whip to a greater volume.
- Cake Flour is Recommended: Its lower protein content yields a more tender cake.
- Cream of Tartar: Stabilizes the egg whites and helps them reach full volume.
- Do Not Grease the Pan: The batter needs to cling to the sides of the pan to rise properly.
- Fold Gently but Thoroughly: Incorporate flour without deflating the whites. Under-mixing leaves flour pockets; over-mixing deflates.
- Cool Upside Down Completely: Absolutely critical step to maintain the cake’s height and airy texture.
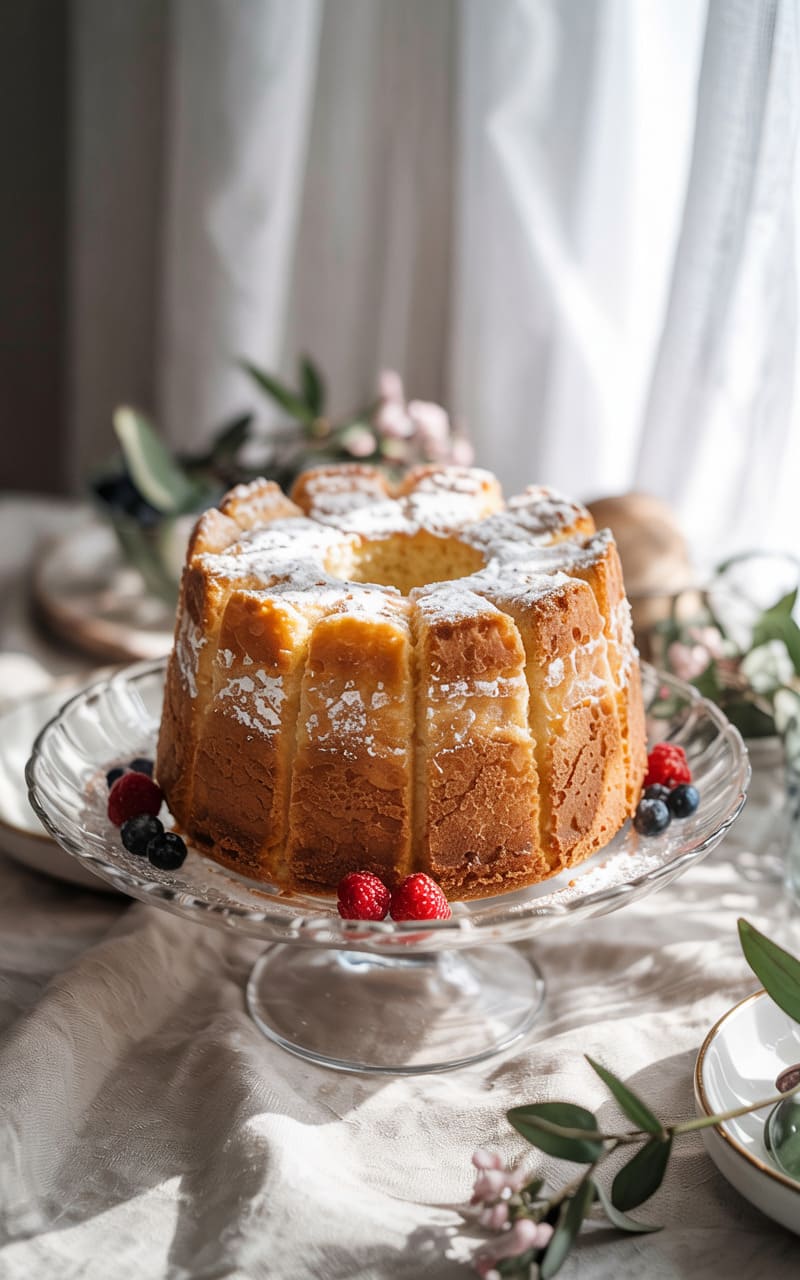
15. Classic Pound Cake (Birthday Loaf)

A dense, buttery, rich cake traditionally made with a pound each of butter, sugar, eggs, and flour. Great on its own or with simple toppings.
Ingredients:
- For the Pound Cake:
- 1 ½ cups (340g) unsalted butter (3 sticks), very softened
- 3 cups (600g) granulated sugar
- 6 large eggs, room temperature
- 3 cups (380g) all-purpose flour, spooned and leveled
- ½ tsp baking powder (optional, for slightly lighter texture)
- ½ tsp salt
- 1 cup (240ml) whole milk or heavy cream, room temperature
- 2 tsp pure vanilla extract
- Optional: 1 tsp lemon or almond extract
- For Optional Glaze:
- 1 cup (120g) powdered sugar, sifted
- 2-3 tbsp milk or lemon juice
- ½ tsp vanilla extract
Instructions:
- Prep: Preheat oven to 325°F (160°C). Generously grease and flour a 10 or 12-cup Bundt pan or two 9×5 inch loaf pans. Ensure every nook is covered.
- Cream Butter and Sugar: In a very large bowl, beat the *very* softened butter with an electric mixer on medium speed until creamy. Gradually add the granulated sugar and beat on medium-high speed for 5-7 minutes, until very pale, light, and fluffy. This step is crucial for texture. Scrape down the bowl often.
- Add Eggs: Add the room temperature eggs one at a time, beating well (about 1 minute) after each addition until fully incorporated. Scrape down the bowl.
- Dry Ingredients: In a separate medium bowl, whisk together the flour, optional baking powder, and salt.
- Combine Liquids: In a small bowl or measuring cup, stir together the room temperature milk/cream and vanilla/other extracts.
- Alternate Additions: With the mixer on low speed, add the dry ingredients in three parts, alternating with the milk mixture in two parts, beginning and ending with the dry ingredients. Mix only until just combined after each addition. Do not overmix.
- Fill Pan: Spoon the thick batter into the prepared Bundt or loaf pan(s), spreading it evenly. Smooth the top.
- Bake: Bake for 65-85 minutes (Bundt) or 60-75 minutes (loaf pans), or until a long wooden skewer inserted into the center comes out clean. The cake should be golden brown. If browning too quickly, loosely tent with foil.
- Cool in Pan: Let the cake cool in the pan(s) on a wire rack for 15-20 minutes before carefully inverting it onto the rack to cool completely.
- Make Glaze (Optional): Whisk together powdered sugar, 2 tbsp liquid, and vanilla until smooth. Add more liquid, ½ tsp at a time, if needed to reach desired drizzle consistency.
- Serve: Once the cake is completely cool, drizzle with glaze if desired. Slice and serve. Excellent toasted the next day too!
Tips for Success:
- Room Temperature Everything: Butter, eggs, milk/cream MUST be at room temperature for proper emulsification and texture. Butter should be very soft.
- Creaming is KING: Spend the full 5-7 minutes creaming the butter and sugar. This incorporates air that acts as the primary leavening (especially if omitting baking powder).
- Generous Pan Prep: Bundt pans have nooks; grease and flour meticulously to prevent sticking. A baking spray with flour works well too.
- Don’t Overmix Final Batter: Leads to a tough cake. Mix just until combined.
- Low and Slow Bake: Bake at a lower temperature for longer to ensure the dense cake cooks through without drying out the edges.
- Cooling Time in Pan: Allows the cake structure to set slightly before inverting.
16. Rainbow Layer Cake
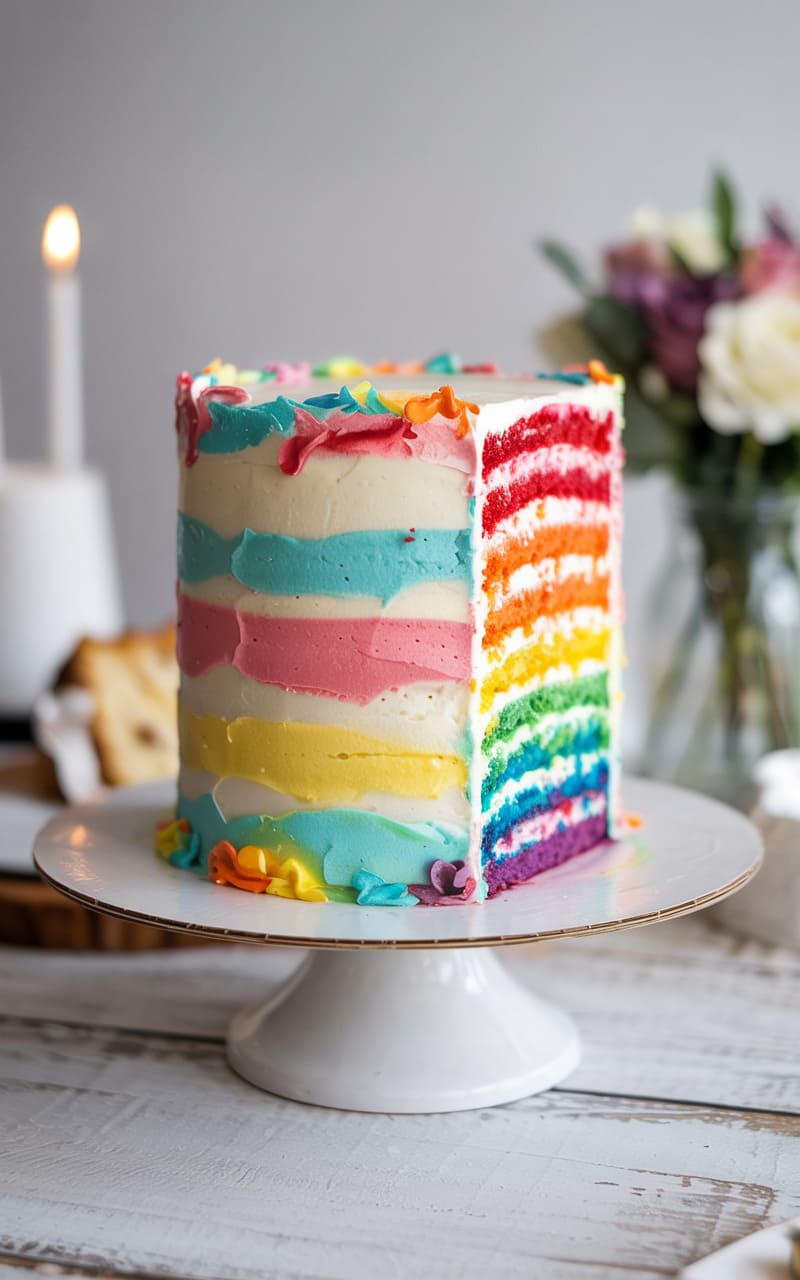
A showstopper! Six (or more) thin layers of brightly colored vanilla cake stacked high with frosting between each layer.
Ingredients:
- For the Cake Batter:
- Use a double batch of the Classic Vanilla Birthday Cake batter (Recipe #1) OR Funfetti Cake batter (Recipe #3, omit sprinkles in batter). You need enough batter for 6 thin layers.
- Gel Food Coloring: Red, Orange, Yellow, Green, Blue, Violet (or your preferred rainbow combination) – Gel colors provide vibrant hues without adding excess liquid.
- For the Frosting:
- Prepare a double batch of Vanilla Buttercream (Recipe #1) OR Cream Cheese Frosting (Recipe #3, ensure it’s stiff enough for stacking).
Instructions:
- Prep: Preheat oven to 350°F (175°C). Grease and flour six 8-inch or 9-inch round cake pans. Line bottoms with parchment paper. (If you only have 2-3 pans, bake in batches, washing and prepping pans between batches).
- Make Cake Batter: Prepare the double batch of vanilla cake batter according to its recipe instructions, stopping before dividing into pans.
- Divide and Color Batter: Divide the batter evenly among 6 medium bowls (use a kitchen scale for precision, usually about 1.5-2 cups batter per bowl depending on pan size and recipe yield).
- Color Each Portion: Add a different gel food color to each bowl. Start with a small amount and add more until desired vibrant shade is reached. Stir gently until color is uniform.
- Bake: Pour each colored batter into one of the prepared pans. Spread evenly – layers will be thin. Bake for 12-18 minutes (depending on thickness), or until a skewer inserted comes out clean. Baking time is much shorter for thin layers.
- Cool: Let cakes cool in pans for 5-10 minutes, then carefully invert onto wire racks to cool completely. Handle thin layers gently.
- Make Frosting: Prepare the double batch of your chosen frosting while cakes cool.
- Level Cakes (Optional but Recommended): Once cool, use a long serrated knife to level the tops of each layer for even stacking.
- Assemble: Place the Violet layer on your serving plate or cake board. Spread a thin, even layer of frosting (about ¼ to ½ inch thick). Carefully place the Blue layer on top. Frost. Continue stacking and frosting in rainbow order: Green, Yellow, Orange, Red.
- Crumb Coat: Apply a thin layer of frosting over the entire stacked cake (top and sides) to trap crumbs. Chill the cake in the refrigerator for 30 minutes.
- Final Frosting: Apply the final, thicker layer of frosting smoothly over the top and sides of the cake. Decorate as desired (sprinkles, clouds of frosting, etc.).
- Chill and Serve: Chill the finished cake for at least 30-60 minutes to help it set before slicing. Use a long, sharp knife, wiping clean between slices, to reveal the rainbow surprise!
Tips for Success:
- Gel Food Coloring is Best: Provides intense color without thinning the batter significantly.
- Even Batter Distribution: Use a scale to divide batter for layers of equal thickness.
- Bake in Batches if Needed: Don’t let colored batter sit out too long. Bake as soon as possible.
- Handle Layers Gently: They are thinner and more delicate than standard cake layers.
- Leveling Creates Stability: Ensures a straight, stable cake that doesn’t lean.
- Thin Frosting Layers Inside: Don’t make the frosting layers between the cake too thick, or the cake might become unstable and overly sweet.
- Chilling is Important: Helps the cake hold its shape, especially before slicing.
17. Chocolate Stout Cake with Irish Cream Frosting
A dark, moist, deeply flavored chocolate cake enhanced by stout beer, paired with a frosting spiked with Irish cream liqueur. Great for adult birthdays.
Ingredients:
- For the Chocolate Stout Cake:
- 1 cup (240ml) stout beer (like Guinness)
- 1 cup (226g) unsalted butter, cut into pieces
- ¾ cup (65g) unsweetened cocoa powder (Dutch-process preferred)
- 2 cups (250g) all-purpose flour
- 2 cups (400g) granulated sugar
- 1 ½ tsp baking soda
- ¾ tsp salt
- 2 large eggs, room temperature
- ⅔ cup (160g) sour cream, room temperature
- 1 tsp pure vanilla extract
- For the Irish Cream Frosting:
- 1 ½ cups (340g) unsalted butter, softened
- 4-5 cups (480-600g) powdered sugar, sifted
- ¼ cup (60ml) Irish cream liqueur (like Baileys)
- 1-2 tbsp milk or heavy cream (if needed)
- Pinch of salt
Instructions:
- Prep: Preheat oven to 350°F (175°C). Grease and flour two 9-inch round cake pans. Line bottoms with parchment paper.
- Heat Stout and Butter: In a medium saucepan, combine the stout and butter pieces. Heat over medium heat until the butter is melted. Remove from heat.
- Add Cocoa: Whisk the cocoa powder into the warm stout/butter mixture until smooth. Let cool slightly for about 10 minutes.
- Dry Ingredients: In a large bowl, whisk together flour, sugar, baking soda, and salt.
- Wet Ingredients: In a separate medium bowl, whisk together the eggs, sour cream, and vanilla extract.
- Combine: Pour the slightly cooled stout-cocoa mixture into the dry ingredients and mix on low speed until partially combined. Add the egg/sour cream mixture and continue mixing on low speed until everything is just incorporated. Do not overmix. Scrape down the bowl. Batter will be somewhat thin.
- Bake: Pour batter evenly into the prepared pans. Bake for 35-45 minutes, or until a wooden skewer inserted into the center comes out clean.
- Cool: Let cakes cool in pans for 15 minutes before inverting onto a wire rack to cool completely. The cake is quite moist.
- Make Irish Cream Frosting: In a large bowl, beat the softened butter until creamy. Gradually add the sifted powdered sugar, alternating with the Irish cream liqueur, starting and ending with sugar. Beat on low until combined. Add salt. If needed, add milk/cream 1 tbsp at a time to reach desired consistency. Increase speed to medium-high and beat for 3-5 minutes until light and fluffy.
- Assemble: Place one cooled cake layer on a serving plate. Top with a generous layer of Irish cream frosting. Add the second layer. Frost the top and sides of the cake. Create rustic swirls. Optional: garnish with chocolate shavings.
Tips for Success:
- Stout Selection: Guinness Extra Stout is classic, but any dark stout or even porter will work. The beer enhances the chocolate and adds moisture. The alcohol bakes off.
- Dutch-Process Cocoa: Recommended for a deeper, smoother chocolate flavor that pairs well with the stout.
- Don’t Overheat Stout Mixture: Just melt the butter. Let it cool slightly before mixing with other ingredients to avoid cooking the eggs.
- Sour Cream: Adds moisture and richness, balancing the stout. Use full-fat, room temperature.
- Adjust Frosting Liqueur: Add more or less Irish cream to taste, adjusting powdered sugar/cream for consistency.
18. Tiramisu Layer Cake
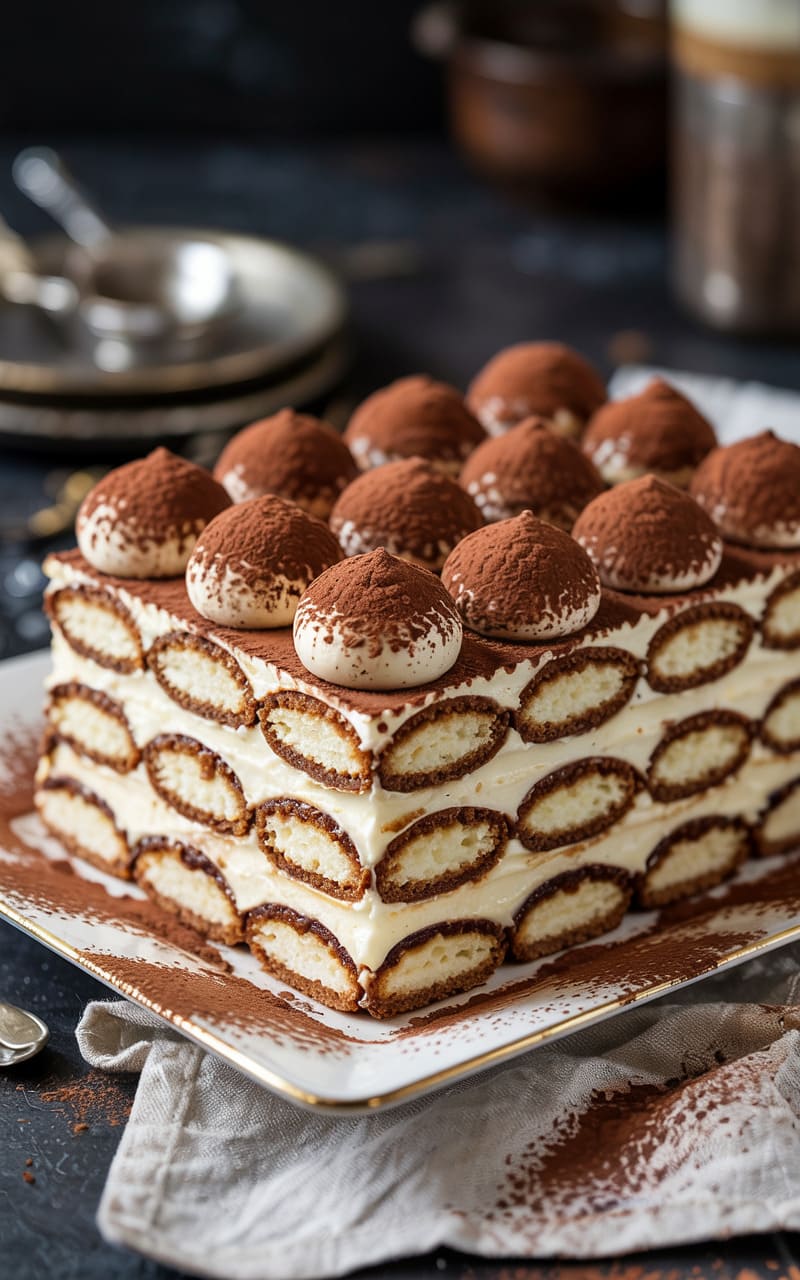
All the flavors of the classic Italian dessert – coffee, mascarpone, cocoa – transformed into a stunning layer cake.
Ingredients:
- For the Vanilla Sponge Cake Layers (or use Ladyfingers alternative):
- Use a sturdy but light vanilla cake recipe (like Recipe #1 or #14 base baked in layers), or purchase Savoiardi ladyfingers. If baking cake, aim for three 8-inch layers.
- For the Coffee Soak:
- 1 ½ cups (360ml) strong brewed coffee or espresso, cooled
- ¼ cup (60ml) coffee liqueur (like Kahlua or Tia Maria) or Marsala wine (optional)
- 2 tbsp granulated sugar (optional, adjust to taste)
- For the Mascarpone Filling/Frosting:
- 16 oz (450g) mascarpone cheese, cold
- 4 large egg yolks
- ½ cup (100g) granulated sugar
- 1 ½ cups (360ml) heavy whipping cream, cold
- 1 tsp pure vanilla extract
- Pinch of salt
- For Assembly:
- Unsweetened cocoa powder for dusting
- Chocolate shavings (optional)
Instructions:
- Prepare Cake Layers/Ladyfingers: Bake and completely cool the vanilla sponge cake layers OR have your ladyfingers ready. Level the cake layers if needed.
- Prepare Coffee Soak: In a shallow dish, combine the cooled strong coffee/espresso, liqueur/wine (if using), and optional sugar. Stir to dissolve sugar.
- Make Mascarpone Cream (Part 1 – Yolks): In a heatproof bowl set over a saucepan of barely simmering water (double boiler), whisk the egg yolks and granulated sugar constantly until the mixture is pale yellow, thickened, and reaches 160°F (71°C) on an instant-read thermometer (about 5-8 minutes). This cooks the yolks safely. Remove from heat and let cool slightly.
- Make Mascarpone Cream (Part 2 – Combine): In a large bowl, gently beat the cold mascarpone cheese on low speed just until smooth (do not overbeat, it can curdle). Add the slightly cooled egg yolk mixture, vanilla, and salt. Beat on low speed until just combined and smooth.
- Make Mascarpone Cream (Part 3 – Whipped Cream): In a separate, chilled bowl, beat the cold heavy whipping cream until stiff peaks form.
- Fold Gently: Gently fold the whipped cream into the mascarpone-yolk mixture in two or three additions until evenly combined and no streaks remain. Be careful not to deflate the whipped cream. Chill this mixture briefly if it seems too soft.
- Assemble (Cake Layers): Place the first cake layer on a serving plate. Brush generously with the coffee soak mixture. Spread about one-third of the mascarpone cream evenly over the layer. Place the second layer on top, brush with coffee soak, and spread another third of the cream. Place the third layer on top, brush lightly with coffee soak.
- Assemble (Ladyfingers): Quickly dip each ladyfinger into the coffee soak (do not saturate) and arrange in a layer in a serving dish (often a trifle bowl or rectangular dish). Spread with half the mascarpone cream. Repeat with another layer of dipped ladyfingers and the remaining mascarpone cream.
- Frost (Cake Version): Use the remaining mascarpone cream to thinly frost the sides of the cake (it’s typically a more rustic finish) or leave the sides exposed/semi-naked. Smooth the top.
- Chill Thoroughly: Cover the cake/dessert loosely with plastic wrap and refrigerate for at least 6 hours, or preferably overnight. This allows the flavors to meld and the structure to set.
- Serve: Just before serving, dust the top generously with unsweetened cocoa powder using a fine-mesh sieve. Garnish with chocolate shavings if desired.
Tips for Success:
- Cake Choice: Use a sponge cake that’s absorbent but sturdy enough not to disintegrate when soaked.
- Coffee Soak: Use strong coffee for robust flavor. Adjust liqueur/sugar to your preference. Don’t over-soak the layers, just brush generously.
- Mascarpone Quality: Use good quality, cold mascarpone. Overbeating can cause it to break or become grainy. Beat gently.
- Cook Egg Yolks Safely: Heating the yolks with sugar over simmering water pasteurizes them.
- Folding Technique: Preserve the airiness of the whipped cream by folding gently.
- Chill Time is Crucial: Essential for flavor development and setting the mascarpone cream. Don’t skip this!
19. Salted Caramel Pretzel Cake
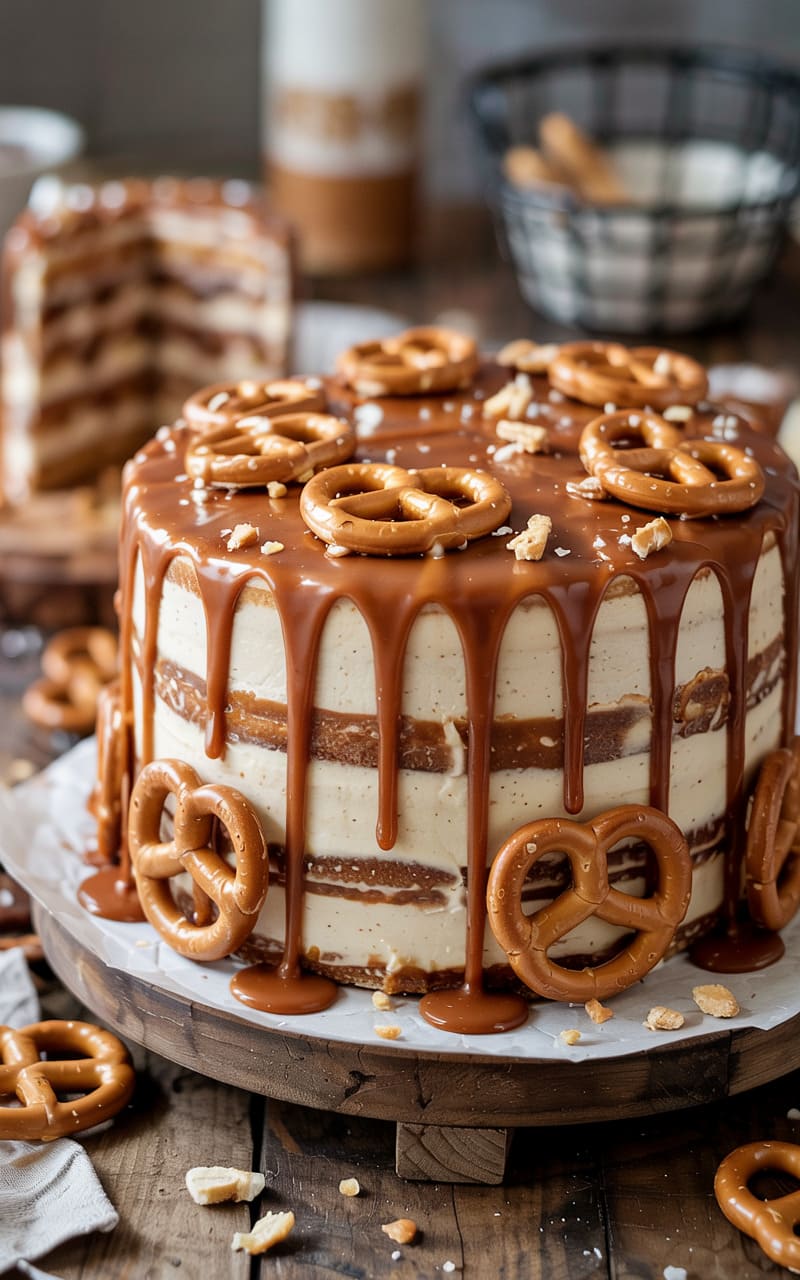
A sweet and salty dream! Often features brown sugar cake layers, salted caramel filling/drizzle, and crunchy pretzels incorporated or as garnish.
Ingredients:
- For the Brown Sugar Cake Layers:
- 2 ½ cups (320g) all-purpose flour
- 1 tsp baking soda
- ½ tsp baking powder
- ½ tsp salt
- 1 cup (226g) unsalted butter, softened
- 1 cup (220g) packed light brown sugar
- ½ cup (100g) granulated sugar
- 3 large eggs, room temperature
- 1 tsp pure vanilla extract
- 1 cup (240ml) buttermilk, room temperature
- For the Salted Caramel Sauce (or use store-bought):
- 1 cup (200g) granulated sugar
- 6 tbsp (85g) unsalted butter, cut into pieces, room temperature
- ½ cup (120ml) heavy cream, room temperature
- 1 tsp sea salt (flaky or coarse), plus more for garnish
- For the Caramel Buttercream:
- 1 ½ cups (340g) unsalted butter, softened
- 4-5 cups (480-600g) powdered sugar, sifted
- ½ cup prepared salted caramel sauce, cooled
- 1-2 tbsp milk or heavy cream (if needed)
- ½ tsp pure vanilla extract
- Pinch of salt
- For Assembly/Garnish:
- 1-2 cups crushed pretzels, plus whole pretzels for decoration
Instructions:
- Prep: Preheat oven to 350°F (175°C). Grease and flour two or three 8-inch round cake pans. Line bottoms with parchment paper.
- Make Brown Sugar Cake: Whisk together flour, baking soda, baking powder, and salt. Set aside. Cream butter and both sugars until light and fluffy (3-4 mins). Beat in eggs one at a time, then vanilla. Alternate adding dry ingredients and buttermilk (start/end with dry) on low speed, mixing until just combined.
- Bake: Divide batter between pans. Bake for 25-30 mins (3 pans) or 30-35 mins (2 pans), until skewer comes out clean. Cool in pans 10-15 mins, then invert to cool completely on wire rack.
- Make Salted Caramel Sauce: In a medium, heavy-bottomed saucepan, heat granulated sugar over medium heat, stirring constantly with a heatproof spatula, until it melts into a smooth amber liquid (watch carefully not to burn). Remove from heat immediately. Carefully stir in the room temperature butter pieces until melted (mixture will bubble). Slowly pour in the room temperature heavy cream while stirring constantly (mixture will bubble vigorously). Return to low heat if needed to smooth out. Stir in 1 tsp sea salt. Pour into a heatproof jar and let cool completely (will thicken as it cools).
- Make Caramel Buttercream: Beat softened butter until creamy. Gradually beat in sifted powdered sugar. Beat in ½ cup cooled salted caramel sauce, vanilla, and pinch of salt. If too thick, add milk/cream 1 tbsp at a time. Beat on medium-high until light and fluffy (2-3 mins).
- Assemble: Level cooled cakes if needed. Place one layer on serving plate. Create a dam of buttercream around the edge. Drizzle some salted caramel sauce inside the dam. Sprinkle a layer of crushed pretzels over the caramel. Top with a thin layer of buttercream over the pretzels.
- Layer Up: Add the next cake layer. Repeat the filling process (dam, caramel, pretzels, buttercream). Place the final layer on top.
- Frost: Apply a crumb coat if desired and chill. Frost the entire cake with the remaining caramel buttercream.
- Decorate: Drizzle generously with extra salted caramel sauce, letting it drip down the sides. Press crushed pretzels around the base and/or sprinkle on top. Garnish with whole pretzels. Sprinkle with a little extra flaky sea salt just before serving.
Tips for Success:
- Careful Caramel Making: Melt sugar evenly and watch constantly to prevent burning. Use room temperature butter and cream to minimize seizing/splattering.
- Cool Caramel Fully: Must be cool before adding to buttercream or using as filling.
- Room Temperature Ingredients: Crucial for both cake batter and buttercream smoothness.
- Pretzel Timing: Add crushed pretzels just before serving or within the filling layers to keep them crunchiest. They can soften over time in the frosting.
- Balance Sweet & Salty: Adjust salt in caramel and buttercream to your preference. The pretzels add significant saltiness.
20. Matcha Green Tea Cake with White Chocolate Frosting
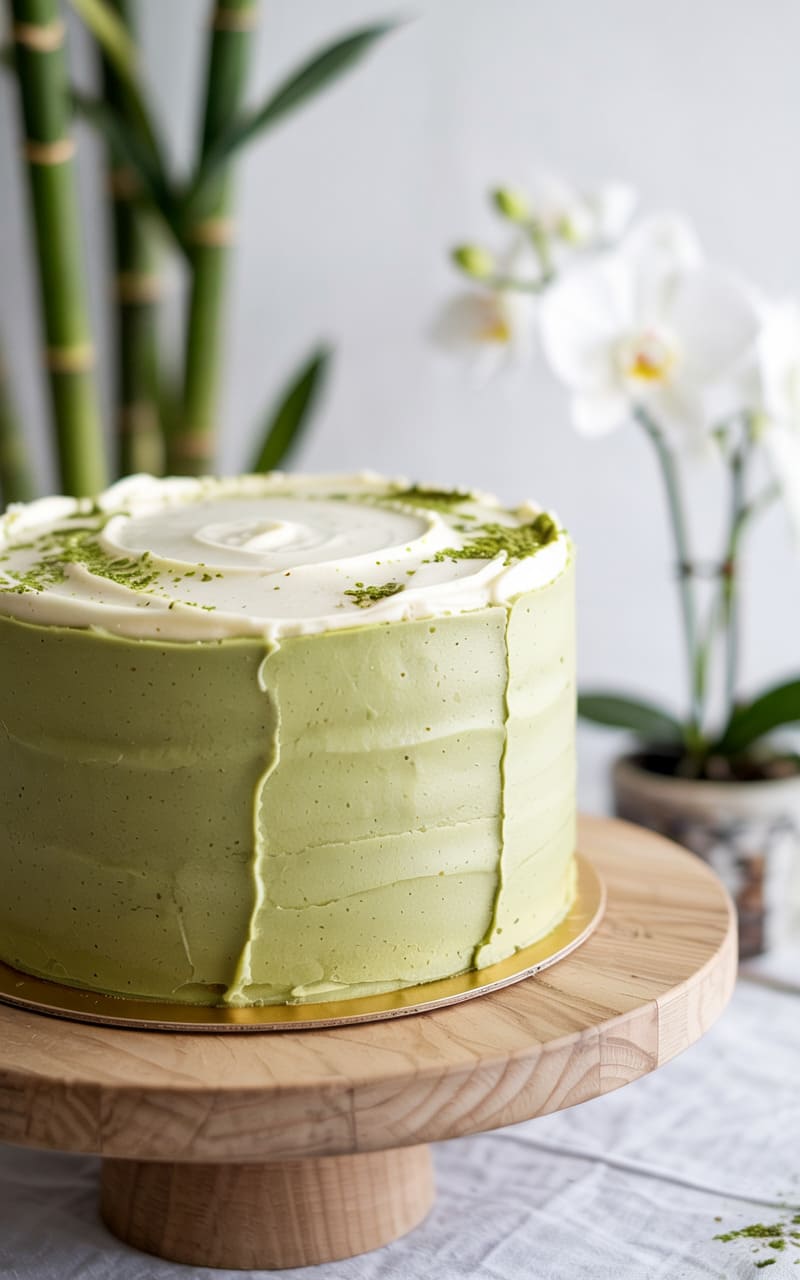
An earthy, slightly vegetal flavor from matcha powder balanced by the sweetness of white chocolate in a beautiful green-hued cake.
Ingredients:
- For the Matcha Cake Layers:
- 2 cups (250g) cake flour
- 2-3 tbsp high-quality culinary grade matcha powder (adjust to taste preference)
- 1 ½ tsp baking powder
- ½ tsp salt
- ¾ cup (170g) unsalted butter, softened
- 1 ½ cups (300g) granulated sugar
- 3 large eggs, room temperature
- 1 tsp pure vanilla extract
- 1 cup (240ml) buttermilk, room temperature
- For the White Chocolate Frosting:
- 8 oz (226g) good quality white chocolate, chopped
- 1 cup (226g) unsalted butter, softened
- 2-3 cups (240-360g) powdered sugar, sifted
- 1 tsp pure vanilla extract
- Pinch of salt
- 1-2 tbsp milk or heavy cream (if needed)
Instructions:
- Prep: Preheat oven to 350°F (175°C). Grease and flour two 8-inch round cake pans. Line bottoms with parchment paper.
- Sift Dry Ingredients: In a medium bowl, sift together the cake flour, matcha powder, baking powder, and salt. Sifting matcha prevents clumps and distributes it evenly. Whisk well.
- Cream Butter and Sugar: In a large bowl, beat butter and sugar until light and fluffy (3-4 minutes).
- Add Eggs & Vanilla: Beat in eggs one at a time, then stir in vanilla extract.
- Alternate Additions: On low speed, alternate adding the dry ingredients (in 3 parts) and the buttermilk (in 2 parts), beginning and ending with dry. Mix until just combined. The batter will be green.
- Bake: Divide batter evenly between pans. Bake for 30-35 minutes, or until a skewer inserted into the center comes out clean.
- Cool: Cool in pans for 10-15 minutes, then invert onto a wire rack to cool completely.
- Melt White Chocolate: Place chopped white chocolate in a heatproof bowl. Melt gently over a double boiler (simmering water) or in the microwave in 30-second intervals, stirring frequently, until smooth. Let cool to room temperature but still liquid.
- Make White Chocolate Frosting: Beat softened butter until creamy. Gradually beat in the sifted powdered sugar until combined. Beat in vanilla and salt. Add the cooled, melted white chocolate and beat on low speed until incorporated, then increase to medium-high and beat until light and fluffy (2-3 minutes). Add milk/cream if needed for consistency.
- Assemble: Place one cooled matcha cake layer on a serving plate. Top with a layer of white chocolate frosting. Add the second layer. Frost the top and sides of the cake smoothly or with swirls.
- Garnish: Dust lightly with extra matcha powder or top with white chocolate shavings before serving.
Tips for Success:
- Quality Matcha Matters: Use culinary grade matcha (not ceremonial, which is pricier) for good flavor and color. Quality varies; cheaper matcha can be dull or bitter. Adjust amount based on its strength and your taste.
- Sift Matcha: Essential to avoid green specks and ensure even flavor distribution.
- Cake Flour for Tenderness: Recommended for a delicate crumb.
- Cool White Chocolate: Ensure melted white chocolate is cooled before adding to butter, or it will melt the butter. Use good quality white chocolate that contains cocoa butter.
- Color Note: Baked matcha color may be less vibrant than the raw powder. White chocolate frosting provides a nice contrast.
21. Chai Spice Cake with Honey Cinnamon Buttercream
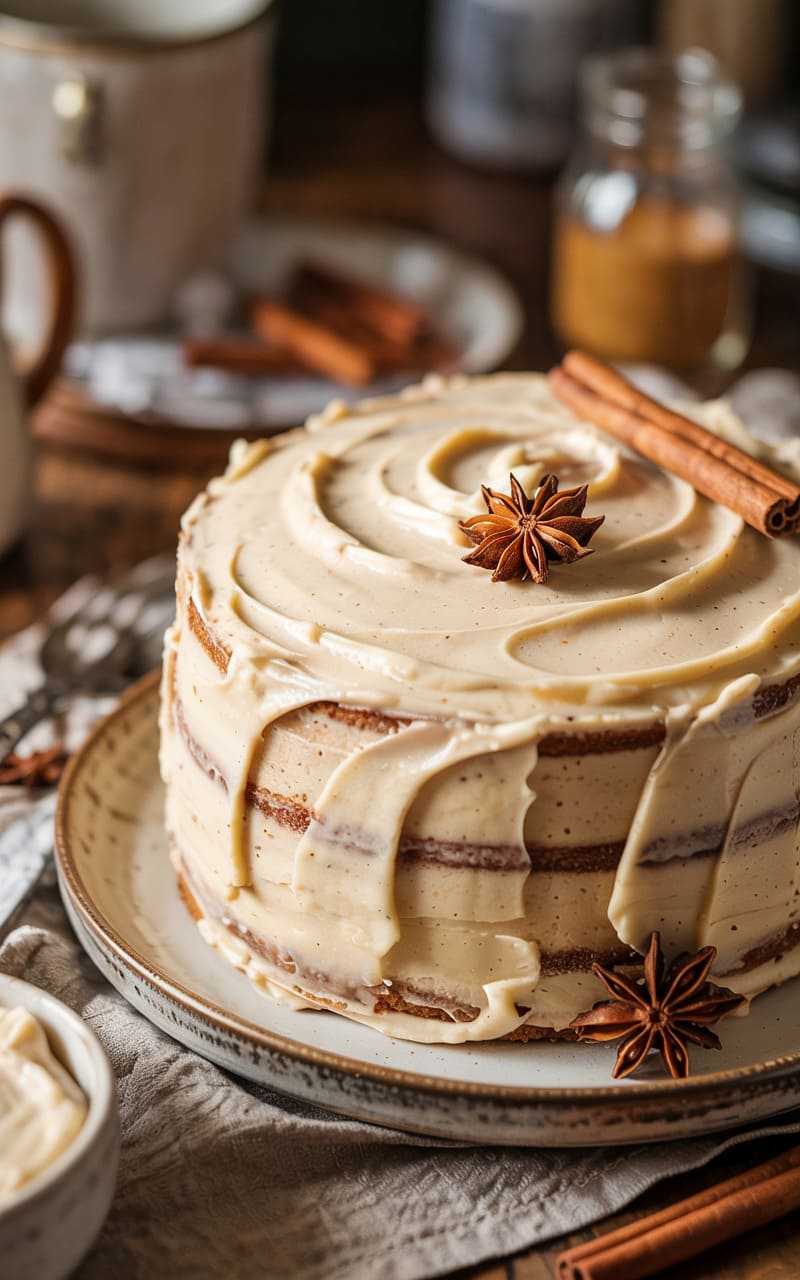
Warm, aromatic spices reminiscent of chai tea infused into a tender cake, complemented by a sweet honey-cinnamon frosting.
Ingredients:
- For the Chai Spice Cake:
- 2 ½ cups (320g) all-purpose flour
- 1 tbsp baking powder
- ½ tsp salt
- 2 tsp ground cinnamon
- 1 tsp ground cardamom
- 1 tsp ground ginger
- ½ tsp ground cloves
- ¼ tsp ground black pepper (optional, for a kick)
- 1 cup (226g) unsalted butter, softened
- 1 ¾ cups (350g) granulated sugar
- 4 large eggs, room temperature
- 1 cup (240ml) brewed strong black tea (like Assam or English Breakfast), cooled OR use milk
- 1 tsp pure vanilla extract
- For the Honey Cinnamon Buttercream:
- 1 ½ cups (340g) unsalted butter, softened
- 4-5 cups (480-600g) powdered sugar, sifted
- ¼ cup (85g) honey
- 1 tsp ground cinnamon
- 1-2 tbsp milk or heavy cream
- Pinch of salt
Instructions:
- Prep: Preheat oven to 350°F (175°C). Grease and flour two 9-inch round cake pans. Line bottoms with parchment paper. Brew strong black tea and let it cool completely.
- Dry Ingredients & Spices: In a medium bowl, whisk together flour, baking powder, salt, cinnamon, cardamom, ginger, cloves, and optional black pepper.
- Cream Butter and Sugar: In a large bowl, beat butter and sugar until light and fluffy (3-4 minutes).
- Add Eggs & Vanilla: Beat in eggs one at a time, then beat in vanilla extract.
- Alternate Additions: On low speed, alternate adding the dry ingredients (in 3 parts) and the cooled black tea or milk (in 2 parts), starting and ending with dry. Mix until just combined.
- Bake: Divide batter evenly between pans. Bake for 30-35 minutes, or until a skewer inserted into the center comes out clean.
- Cool: Cool in pans 10-15 minutes, then invert onto wire racks to cool completely.
- Make Honey Cinnamon Buttercream: Beat softened butter until creamy. Gradually beat in sifted powdered sugar, alternating with the milk/cream. Beat in the honey, cinnamon, and salt. Increase speed to medium-high and beat until light and fluffy (3-5 minutes).
- Assemble: Place one cooled cake layer on serving plate. Top with frosting. Add the second layer. Frost the top and sides of the cake.
- Garnish: Create swirls in the frosting. Optionally dust lightly with cinnamon or garnish with cinnamon sticks or star anise just before serving (remove before eating).
Tips for Success:
- Spice Adjustment: Feel free to adjust the chai spices based on your preference. Use fresh, good quality ground spices for best flavor.
- Brewed Tea Option: Using cooled strong black tea instead of milk adds a subtle layer of complexity complementing the spices. Ensure it’s fully cooled.
- Honey in Frosting: Honey adds flavor but also moisture. You may need slightly more powdered sugar or less liquid to get the right frosting consistency.
- Room Temp Ingredients: Key for smooth batter and frosting.
- Don’t Overmix: Keep the cake tender.
22. Peanut Butter Chocolate Cake
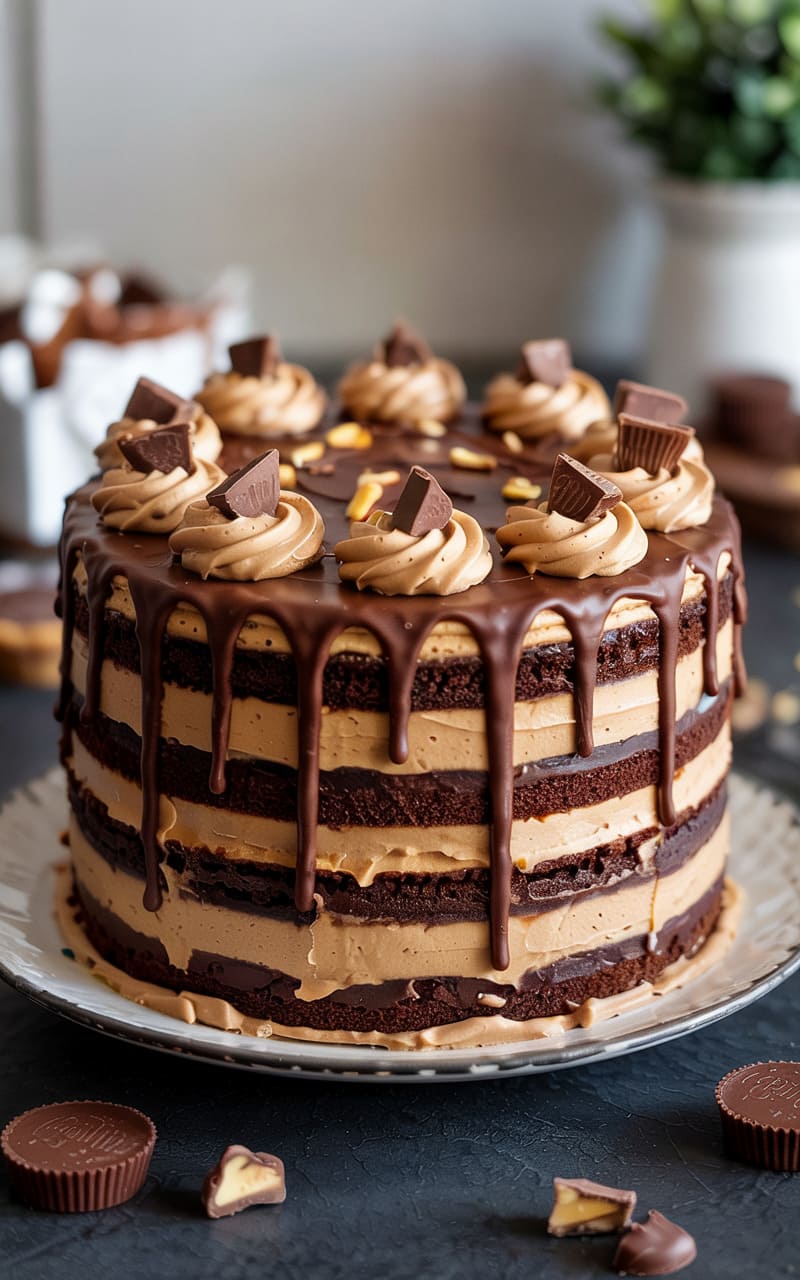
An irresistible combination for fans of the dynamic duo! Layers of chocolate cake with peanut butter frosting and often a chocolate ganache topping.
Ingredients:
- For the Chocolate Cake Layers:
- Use the Rich Chocolate Fudge Cake recipe (Recipe #2), baked in two or three 8-inch or 9-inch pans.
- For the Peanut Butter Frosting:
- 1 cup (226g) unsalted butter, softened
- 1 ½ cups (385g) creamy peanut butter (use standard commercial type like Jif/Skippy, not natural separation style)
- 3-4 cups (360-480g) powdered sugar, sifted
- ¼ cup (60ml) milk or heavy cream
- 1 tsp pure vanilla extract
- Pinch of salt
- For Optional Chocolate Ganache Drip:
- 4 oz (113g) semi-sweet chocolate, chopped finely
- ½ cup (120ml) heavy cream
- For Garnish:
- Chopped peanut butter cups, peanuts, chocolate chips
Instructions:
- Bake Chocolate Cake: Prepare and bake the chocolate cake layers (Recipe #2). Cool completely.
- Make Peanut Butter Frosting: In a large bowl, beat the softened butter and peanut butter together until smooth and combined. Gradually beat in the sifted powdered sugar, alternating with the milk/cream. Add vanilla and salt. Beat on low until combined, then increase speed to medium-high and beat for 2-3 minutes until fluffy. Add more milk if too thick, or more powdered sugar if too thin.
- Assemble & Fill: Level cooled cake layers if needed. Place one layer on serving plate. Top generously with peanut butter frosting. Add next layer(s), frosting between each.
- Frost Cake: Apply a crumb coat if desired and chill. Frost the entire cake (top and sides) with the peanut butter frosting. Smooth the sides and top if planning a drip, or create swirls. Chill the frosted cake for at least 30 minutes before adding ganache.
- Make Ganache (Optional): Place finely chopped chocolate in a heatproof bowl. Heat heavy cream in a small saucepan until just simmering (bubbles around edges). Pour hot cream over chocolate. Let sit for 5 minutes, then whisk gently until smooth and glossy. Let the ganache cool slightly until it’s thick enough to drip but still pourable (test consistency on side of bowl).
- Apply Ganache Drip (Optional): Carefully spoon or pour the slightly cooled ganache around the top edge of the chilled cake, letting it drip down the sides. Pour remaining ganache over the top surface and spread gently.
- Garnish: While ganache is still wet (if using), or on top of the frosting, add chopped peanut butter cups, peanuts, or chocolate chips.
- Chill & Serve: Chill the cake for at least 30 minutes for the ganache to set before slicing.
Tips for Success:
- Peanut Butter Choice: Standard commercial creamy peanut butter works best for frosting stability and texture. Natural peanut butter can separate or make the frosting oily.
- Frosting Consistency: Adjust powdered sugar and milk/cream to get a spreadable but stable consistency.
- Ganache Temperature: Critical for a good drip effect. Too hot, it runs thin. Too cool, it’s clumpy. Let it cool, stirring occasionally, until slightly thickened but pourable. Test on the chilled cake first.
- Chill Before Dripping: A cold cake helps the ganache drips set faster and prevents them from running all the way down.
- Flavor Balance: The rich chocolate cake pairs perfectly with the salty-sweet peanut butter frosting.
23. Banana Cake with Brown Butter Cream Cheese Frosting
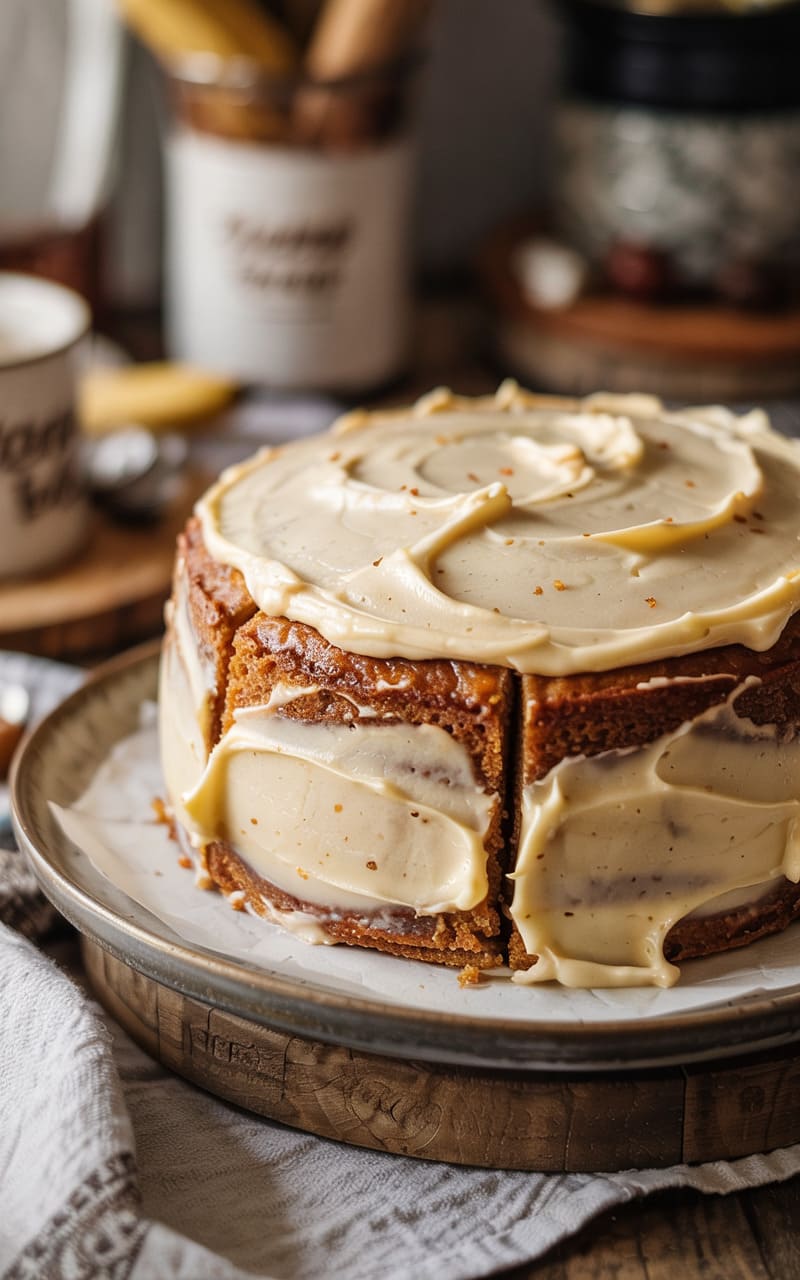
Like banana bread but better! A super moist banana cake enhanced by the nutty depth of brown butter in the frosting.
Ingredients:
- For the Banana Cake:
- 3-4 very ripe bananas (about 1 ½ cups mashed)
- 2 cups (250g) all-purpose flour
- 1 tsp baking soda
- ½ tsp salt
- ½ tsp ground cinnamon
- ½ cup (113g) unsalted butter, softened
- 1 cup (220g) packed light brown sugar
- 2 large eggs, room temperature
- ½ cup (120g) sour cream or plain yogurt, room temperature
- 1 tsp pure vanilla extract
- For the Brown Butter Cream Cheese Frosting:
- ¾ cup (170g) unsalted butter
- 8 oz (226g) full-fat block cream cheese, softened
- 3-4 cups (360-480g) powdered sugar, sifted
- 1 tsp pure vanilla extract
- Pinch of salt
Instructions:
- Prep: Preheat oven to 350°F (175°C). Grease and flour a 9×13 inch pan OR two 8-inch round pans. Line round pans with parchment if using. Mash the ripe bananas well in a bowl and set aside.
- Brown the Butter: In a light-colored saucepan, melt the ¾ cup butter over medium heat. Continue cooking, swirling the pan occasionally, until the butter melts, foams, then subsides, and finally, brown solids form at the bottom and it smells nutty (about 5-8 minutes). Watch carefully to avoid burning. Immediately pour the brown butter (including the brown bits) into a heatproof bowl and let it cool completely, then chill until solid but still scoopable (like softened butter consistency). This takes time, plan ahead!
- Make Banana Cake Batter: Whisk together flour, baking soda, salt, and cinnamon. Set aside. In a large bowl, cream the ½ cup softened (not browned) butter and brown sugar until fluffy. Beat in eggs one at a time. Beat in mashed bananas, sour cream/yogurt, and vanilla extract. Gradually add dry ingredients, mixing on low until just combined.
- Bake: Pour batter into the prepared pan(s). Bake for 30-40 minutes (9×13) or 25-35 minutes (round pans), until a skewer comes out clean.
- Cool: Cool completely in the pan (for 9×13) or cool in round pans for 15 mins then invert to cool completely on a wire rack.
- Make Brown Butter Frosting: Once the brown butter has solidified but is soft, place it in a large mixing bowl. Add the softened cream cheese and beat together until smooth. Gradually beat in the sifted powdered sugar until desired consistency. Beat in vanilla and salt. Beat on medium-high for 1-2 minutes until fluffy.
- Frost: Frost the cooled cake(s) generously with the brown butter cream cheese frosting.
- Garnish: Create swirls. Optionally sprinkle with chopped toasted pecans or walnuts.
Tips for Success:
- Very Ripe Bananas: Black-streaked or mostly black bananas provide the best flavor and moisture.
- Browning Butter Perfectly: Use a light pan to monitor color. Look for amber color and nutty smell. Pour out immediately to stop cooking. Don’t discard the brown bits – that’s flavor!
- Chilling Brown Butter: Must be chilled back to a solid-but-soft state before using in frosting, otherwise the frosting will be liquid. Allow several hours for this.
- Room Temp Ingredients: As always, important for cake and frosting texture.
- Pan Choice: Works well as a sheet cake (9×13) or layers. Adjust baking time accordingly.
24. Pistachio Cardamom Cake with Rosewater Buttercream
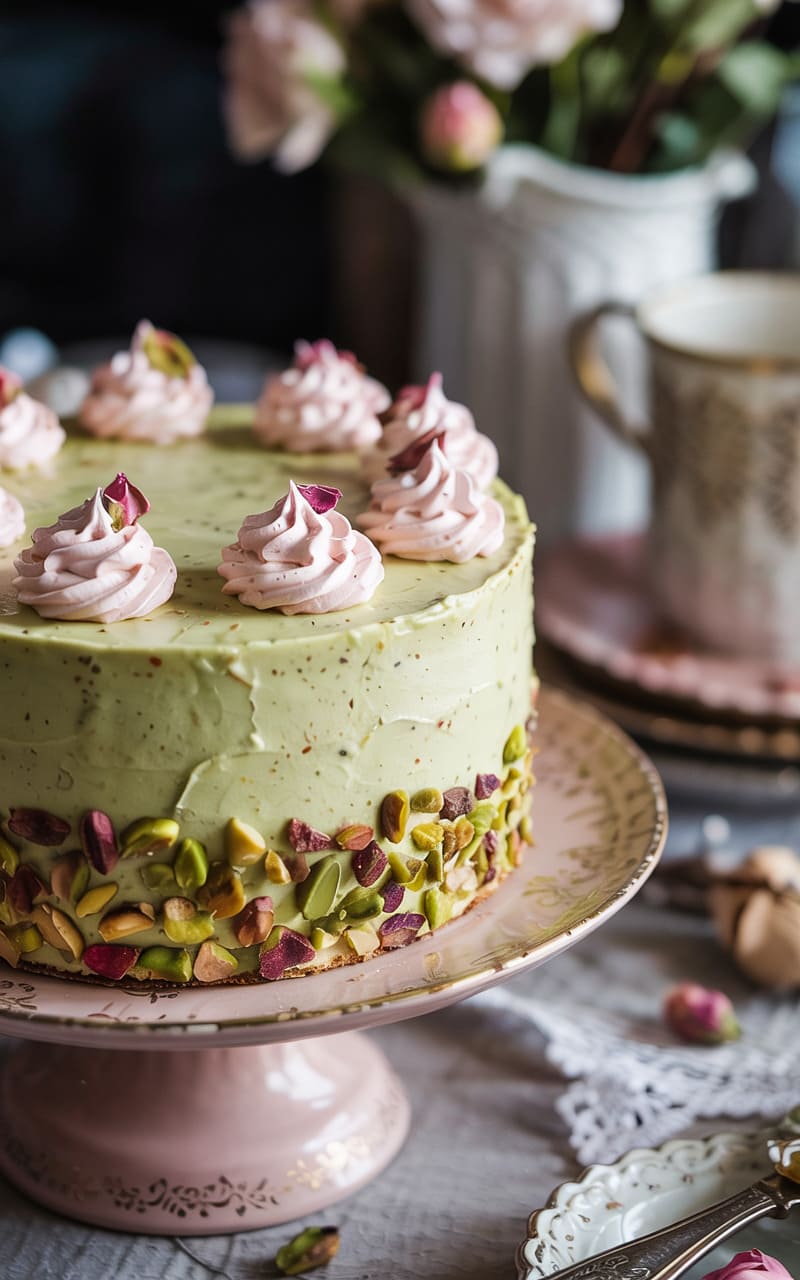
An elegant and aromatic cake with nutty pistachio, warm cardamom, and floral rosewater notes.
Ingredients:
- For the Pistachio Cardamom Cake:
- 1 ½ cups (180g) shelled raw pistachios, divided
- 2 cups (250g) all-purpose flour
- 1 tsp baking powder
- ½ tsp baking soda
- ½ tsp salt
- 1 tsp ground cardamom
- 1 cup (226g) unsalted butter, softened
- 1 ½ cups (300g) granulated sugar
- 3 large eggs, room temperature
- 1 cup (240ml) buttermilk, room temperature
- 1 tsp pure vanilla extract
- ½ tsp almond extract (optional, enhances nuttiness)
- Green food coloring (optional)
- For the Rosewater Buttercream:
- 1 ½ cups (340g) unsalted butter, softened
- 4 cups (480g) powdered sugar, sifted
- 2-3 tbsp milk or heavy cream
- 1-2 tsp rosewater (adjust to taste, can be strong)
- Pinch of salt
- Optional: Pink food coloring
- For Garnish:
- Chopped pistachios, dried edible rose petals
Instructions:
- Prep: Preheat oven to 350°F (175°C). Grease and flour two 8-inch round cake pans. Line bottoms with parchment paper.
- Prepare Pistachios: Reserve about ¼ cup pistachios for garnish. Place the remaining 1 ¼ cups pistachios in a food processor. Pulse until finely ground, resembling coarse meal. Be careful not to over-process into butter.
- Dry Ingredients: In a medium bowl, whisk together flour, ground pistachios, baking powder, baking soda, salt, and cardamom.
- Cream Butter and Sugar: In a large bowl, beat butter and sugar until light and fluffy (3-4 mins).
- Add Eggs & Extracts: Beat in eggs one at a time. Beat in vanilla and optional almond extract. Add a few drops of green food coloring if desired and mix in.
- Alternate Additions: On low speed, alternate adding the dry ingredients (in 3 parts) and the buttermilk (in 2 parts), starting and ending with dry. Mix until just combined.
- Bake: Divide batter evenly between pans. Bake for 30-35 minutes, or until a skewer comes out clean.
- Cool: Cool in pans 10-15 mins, then invert onto wire racks to cool completely.
- Make Rosewater Buttercream: Beat softened butter until creamy. Gradually beat in sifted powdered sugar, alternating with milk/cream. Beat in rosewater (start with 1 tsp, add more to taste) and salt. Add a drop of pink food coloring if desired. Beat on medium-high until light and fluffy (3-5 mins).
- Assemble: Place one cooled cake layer on serving plate. Top with frosting. Add the second layer. Frost the top and sides of the cake.
- Garnish: Gently press reserved chopped pistachios onto the sides or sprinkle on top. Decorate with edible dried rose petals.
Tips for Success:
- Grind Pistachios Carefully: Pulse just until finely ground. Over-processing releases oils and creates paste. Raw, unsalted pistachios work best.
- Cardamom & Rosewater Balance: Both are potent flavors. Start with smaller amounts, especially rosewater, and add more to taste.
- Food Coloring Optional: Enhances the pistachio and rose look but doesn’t affect flavor.
- Almond Extract: Complements the pistachio flavor nicely.
- Garnish Elegantly: Chopped pistachios and edible rose petals make this cake look as special as it tastes. Source rose petals specifically sold as edible.
25. Tres Leches Cake (“Three Milks” Cake)
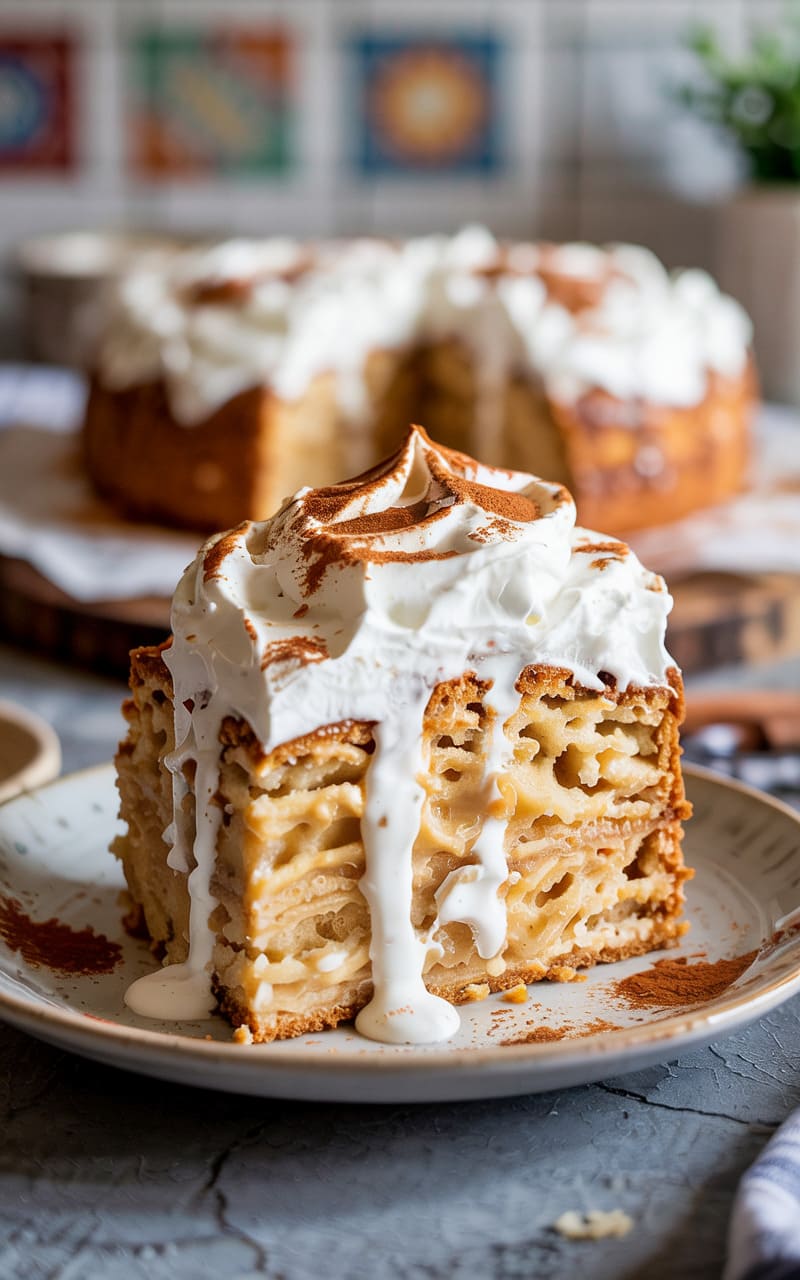
A light sponge cake soaked in a mixture of three types of milk, topped with whipped cream and often cinnamon or fruit. Incredibly moist!
Ingredients:
- For the Sponge Cake:
- 1 ½ cups (190g) all-purpose flour
- 1 tsp baking powder
- ¼ tsp salt
- 5 large eggs, separated (yolks and whites), room temperature
- 1 cup (200g) granulated sugar, divided
- ⅓ cup (80ml) whole milk, room temperature
- 1 tsp pure vanilla extract
- For the Three Milks Soak:
- 1 can (12 oz / 354ml) evaporated milk
- 1 can (14 oz / 396g) sweetened condensed milk
- ½ cup (120ml) heavy cream OR whole milk
- 1 tsp pure vanilla extract (optional)
- For the Whipped Cream Topping:
- 2 cups (480ml) heavy whipping cream, very cold
- ¼ cup (30g) powdered sugar (or to taste)
- 1 tsp pure vanilla extract
- Garnish: Ground cinnamon, fresh berries, maraschino cherries
Instructions:
- Prep: Preheat oven to 350°F (175°C). Grease and flour a 9×13 inch baking pan.
- Make Sponge Cake – Dry Ingredients: Whisk together flour, baking powder, and salt in a medium bowl.
- Make Sponge Cake – Yolks: In a large bowl, beat the egg yolks with ¾ cup (150g) of the granulated sugar until pale yellow and thick ribbons form when beaters are lifted (about 5 minutes). Beat in the ⅓ cup milk and vanilla extract.
- Make Sponge Cake – Whites: In a separate, clean, large bowl, beat the egg whites on medium speed until soft peaks form. Gradually add the remaining ¼ cup (50g) granulated sugar and continue beating on high speed until stiff, glossy peaks form.
- Combine Batters: Gently fold about one-third of the beaten egg whites into the egg yolk mixture to lighten it. Then, gently fold the remaining egg whites into the yolk mixture.
- Fold in Flour: Sift the flour mixture over the egg mixture in three additions, folding gently after each addition just until combined. Do not overmix.
- Bake: Pour batter into the prepared 9×13 inch pan and spread evenly. Bake for 25-30 minutes, or until golden brown and a skewer inserted into the center comes out clean.
- Cool Slightly & Poke Holes: Let the cake cool in the pan on a wire rack for about 30 minutes. While still warm, use a fork or skewer to poke holes all over the top surface of the cake.
- Prepare Three Milks Soak: In a large bowl or pitcher, whisk together the evaporated milk, sweetened condensed milk, and heavy cream (or whole milk), and optional vanilla until well combined.
- Soak the Cake: Slowly and evenly pour the three milks mixture over the warm, poked cake. Pour slowly, allowing the milk to soak in. It might look like a lot of liquid, but the cake will absorb it. Cover the pan with plastic wrap.
- Chill Thoroughly: Refrigerate the soaked cake for at least 4-6 hours, or preferably overnight, to allow it to fully absorb the milks and chill completely.
- Make Whipped Cream Topping: Just before serving, beat the very cold heavy cream, powdered sugar, and vanilla extract until stiff peaks form.
- Serve: Spread the whipped cream evenly over the top of the chilled Tres Leches cake. Dust generously with ground cinnamon or garnish with fresh berries or maraschino cherries. Slice and serve cold directly from the pan.
Tips for Success:
- Sponge Cake Structure: Properly whipping the egg yolks and whites separately creates the light structure needed to absorb the milks without becoming soggy.
- Gentle Folding: Crucial to maintain the air incorporated into the eggs.
- Poke Many Holes: Ensures the milk soak penetrates the entire cake evenly.
- Slow Soaking: Pour the milk mixture gradually to allow absorption.
- Chill Time is Non-Negotiable: Allows the cake to fully absorb the liquid and develop its characteristic moist texture and flavor. Minimum 4 hours, overnight is better.
- Serve Cold: Tres Leches cake is best served chilled.
26. Ombre Layer Cake (Single Color Fade)
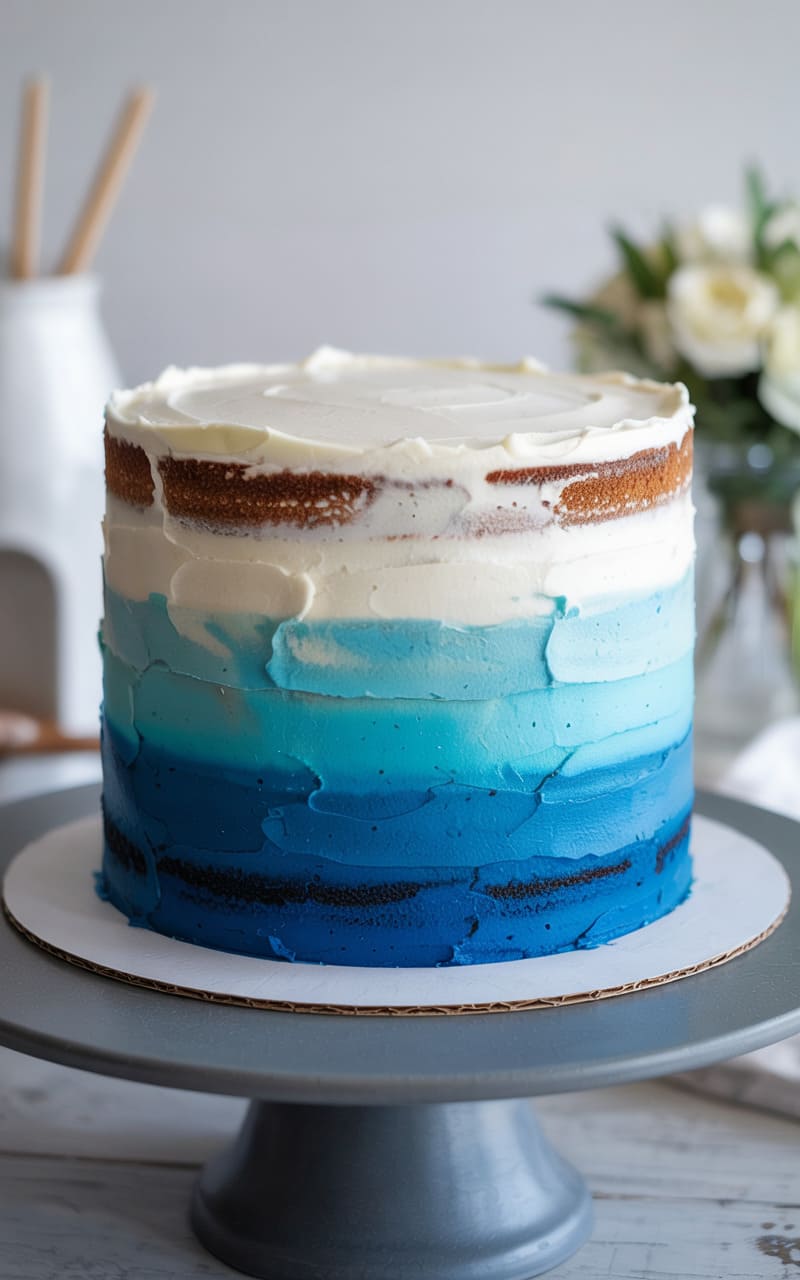
Visually striking cake where layers (or frosting) gradually fade from dark to light in a single color hue.
Ingredients:
- For the Cake Layers:
- Use one batch of Classic Vanilla Cake batter (Recipe #1) OR White Cake batter (using only egg whites for true white base).
- Gel Food Coloring in ONE color of your choice (e.g., pink, blue, purple)
- For the Frosting:
- Prepare 1.5 to 2 batches of Vanilla Buttercream (Recipe #1) OR Swiss Meringue Buttercream (for smoother finish).
Instructions:
- Prep: Preheat oven to 350°F (175°C). Grease and flour 4 or 5 round cake pans of the same size (e.g., 8-inch). Line bottoms with parchment. (Bake in batches if needed).
- Make Cake Batter: Prepare the vanilla or white cake batter according to its recipe.
- Divide Batter for Layers: Divide the batter evenly among 4 or 5 bowls (one for each pan). Use a kitchen scale for accuracy.
- Color Batters: Leave one bowl plain (lightest layer). Add a tiny amount of gel color to the second bowl for a pale shade. Add slightly more color to the third bowl for a medium-light shade. Add progressively more color to the fourth and fifth bowls for medium-dark and darkest shades. Mix each gently until color is uniform. Aim for distinct but graduating shades.
- Bake: Pour each colored batter into a prepared pan. Bake for approximately 15-25 minutes (layers are thinner than standard), until a skewer comes out clean. Adjust time based on layer thickness.
- Cool: Cool layers in pans for 10 mins, then invert onto wire racks to cool completely.
- Make Frosting: Prepare the buttercream frosting.
- Assemble with White/Single Color Frosting (Option 1): Level cooled cake layers. Stack the layers starting with the darkest color on the bottom, then medium-dark, medium-light, pale, and finally the plain white layer on top. Spread a layer of white (or a single pale shade) frosting between each cake layer. Frost the entire cake with the same white/pale frosting. The surprise is inside!
- Assemble with Ombre Frosting (Option 2): Stack cake layers as above (darkest to lightest), using a thin layer of white frosting between layers. Crumb coat the cake with white frosting and chill. Divide the remaining frosting into 4-5 bowls. Leave one white. Tint the others in graduating shades of your chosen color, matching or complementing the cake layers (darkest, medium, light). Place each color into a separate piping bag (or sections of one large bag). Pipe horizontal bands of frosting around the cake, starting with the darkest shade at the bottom, then medium, light, and finally white at the top. Use an offset spatula or bench scraper held vertically against the cake and rotate the cake stand to smooth and blend the color transitions. Smooth the top.
- Chill & Serve: Chill the finished cake briefly to set the frosting before slicing.
Tips for Success:
- White Cake Base: Using an all-egg-white cake provides a truer white base for the lightest layer/color accuracy.
- Gel Colors: Essential for achieving vibrant shades without thinning the batter/frosting.
- Gradual Color Addition: Start with tiny amounts of color and add more. It’s easier to darken than to lighten. Compare bowls side-by-side.
- Even Batter Division: Use a scale for consistent layer thickness and baking times.
- Ombre Frosting Technique: Practice smoothing with a bench scraper. Keep scraper clean and perpendicular to the cake. Don’t over-blend the colors.
- Chill for Stability: Especially important if doing the ombre frosting exterior.
27. Coffee Walnut Cake
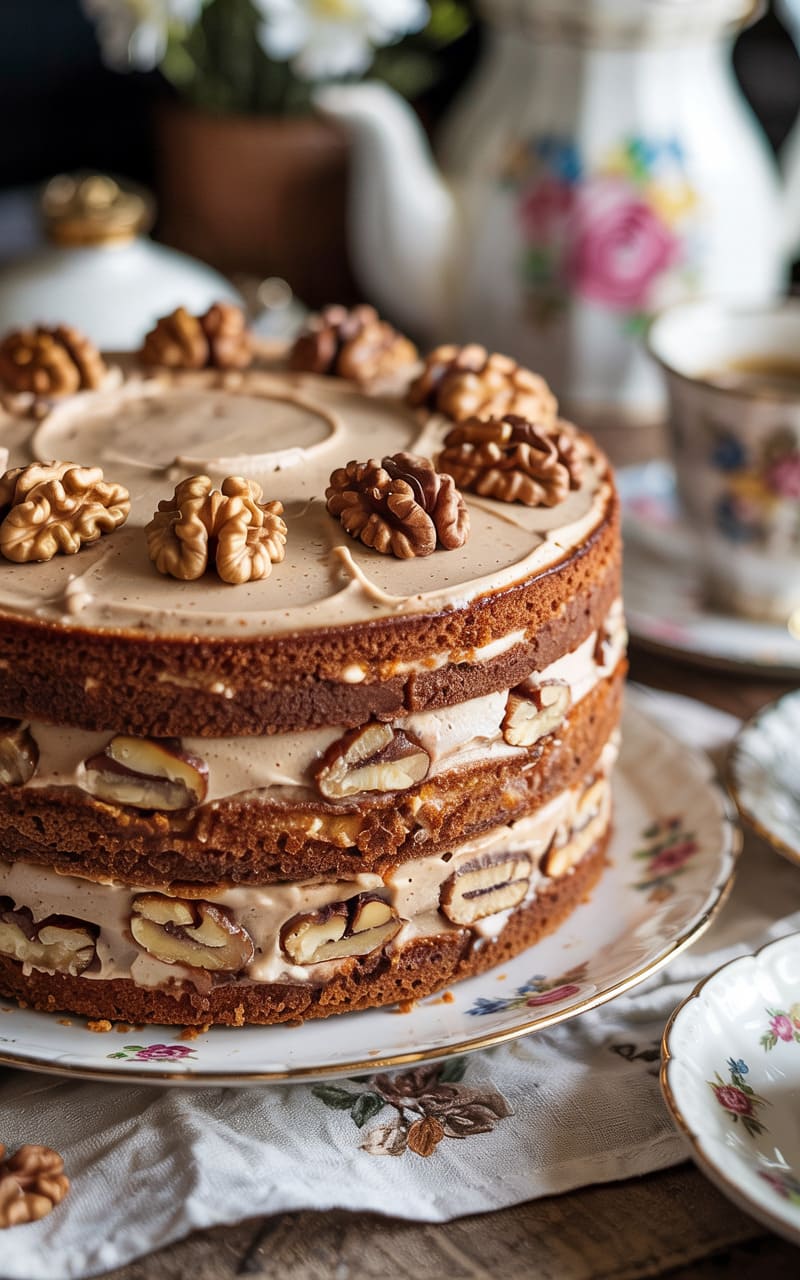
A classic British tea-time cake, wonderfully moist with coffee flavor and crunchy walnuts throughout, usually topped with coffee buttercream.
Ingredients:
- For the Coffee Walnut Cake:
- 1 ¾ cups (220g) self-rising flour (OR 1 ¾ cups All-Purpose Flour + 2 ½ tsp Baking Powder + ½ tsp Salt)
- 1 tsp baking powder (omit if using self-rising flour)
- 1 cup (226g) unsalted butter, softened
- 1 cup (200g) packed light brown sugar or golden caster sugar
- 4 large eggs, room temperature
- 2 tbsp instant espresso powder or strong instant coffee granules dissolved in 1 tbsp boiling water, cooled
- 1 tsp pure vanilla extract
- ¾ cup (75g) walnuts, roughly chopped, plus extra halves for decoration
- 2-3 tbsp milk (if needed for consistency)
- For the Coffee Buttercream:
- 1 cup (226g) unsalted butter, softened
- 2 ½ – 3 cups (300-360g) powdered sugar, sifted
- 1 ½ tbsp instant espresso powder dissolved in 1 tbsp boiling water, cooled
- 1-2 tbsp milk or heavy cream (if needed)
- Pinch of salt
Instructions:
- Prep: Preheat oven to 350°F (175°C / 160°C Fan). Grease and flour two 8-inch round cake pans. Line bottoms with parchment paper. Dissolve espresso powder for cake and frosting in separate small bowls with boiling water; let cool completely.
- Dry Ingredients: Whisk together flour (and baking powder/salt if using AP flour).
- Cream Butter and Sugar: In a large bowl, beat butter and brown sugar until light and fluffy (3-4 mins).
- Add Eggs & Flavor: Beat in eggs one at a time. Beat in the cooled espresso mixture for the cake and the vanilla extract.
- Combine: Gradually fold in the flour mixture until just combined. Do not overmix. Gently fold in the chopped walnuts. If the batter seems very stiff, fold in 2-3 tbsp milk.
- Bake: Divide batter evenly between prepared pans. Bake for 25-30 minutes, or until golden brown and springy to the touch, and a skewer comes out clean.
- Cool: Cool in pans for 10 minutes, then invert onto a wire rack to cool completely.
- Make Coffee Buttercream: Beat softened butter until creamy. Gradually beat in sifted powdered sugar. Beat in the cooled espresso mixture for the frosting and pinch of salt. Add milk/cream 1 tbsp at a time if needed for desired consistency. Beat on medium-high until light and fluffy (2-3 mins).
- Assemble: Place one cooled cake layer on serving plate. Spread with about half of the coffee buttercream. Top with the second layer. Spread the remaining buttercream over the top (sides are often left bare in traditional style, but you can frost them).
- Decorate: Create swirls on top. Decorate the top edge with walnut halves.
Tips for Success:
- Self-Rising Flour: Common in UK recipes; provides a good rise. Substitute works well too.
- Instant Espresso Powder: Provides concentrated coffee flavor easily. Ensure it’s fully dissolved and cooled before adding.
- Walnut Prep: Roughly chopped walnuts provide nice texture within the cake. Toasting them lightly beforehand enhances flavor.
- Don’t Overmix: Keep the cake tender.
- Traditional Look: Often served with frosting just on top and between layers, sides left natural.
28. Neapolitan Cake (Chocolate, Vanilla, Strawberry Layers)
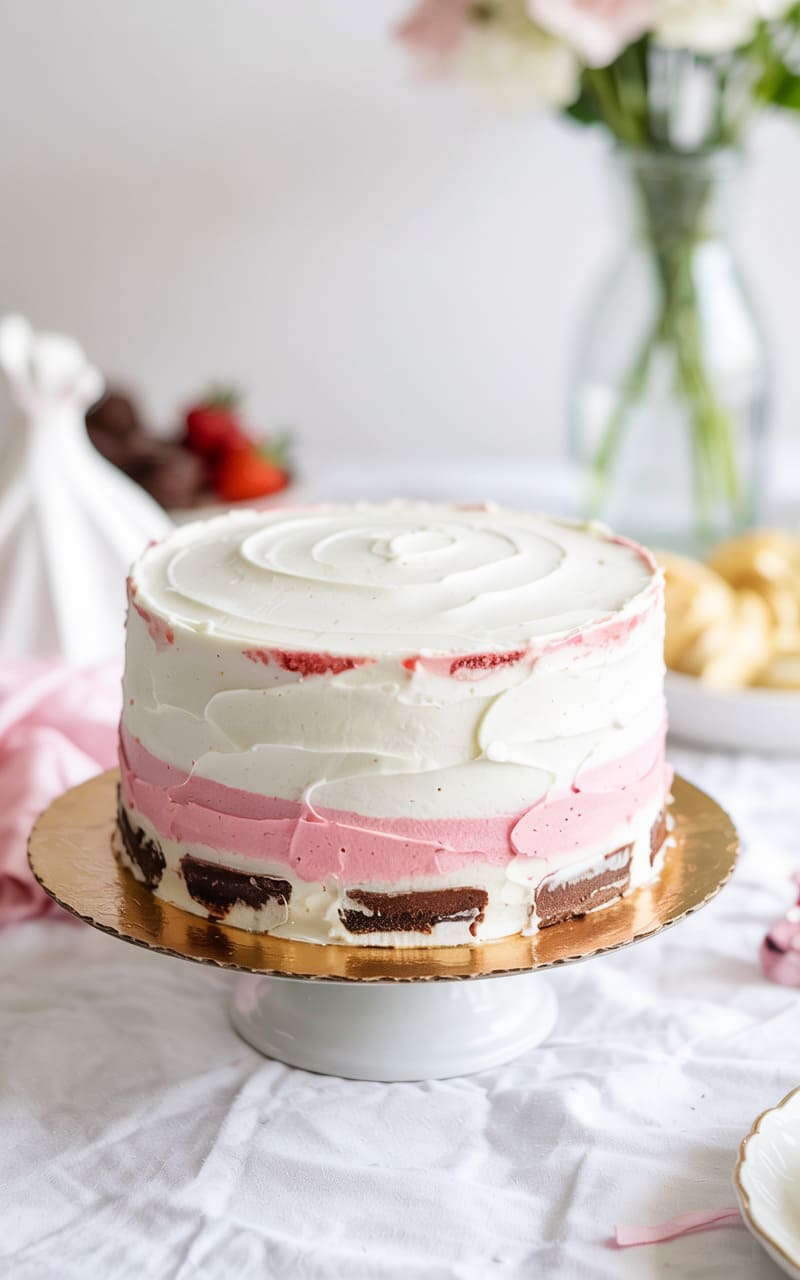
Inspired by the ice cream, this cake features distinct layers of chocolate, vanilla, and strawberry cake, often with corresponding frostings or a neutral one.
Ingredients:
- For the Base Batter (to be divided):
- Use one large batch of Classic Vanilla Cake batter (Recipe #1, maybe increase by 25-50% depending on pan size) OR a sturdy White Cake batter.
- For Chocolate Layer Modification:
- 1.5 oz (43g) unsweetened chocolate, melted and cooled OR 3 tbsp cocoa powder + 1-2 tbsp hot water/milk (paste)
- For Strawberry Layer Modification:
- ¼ cup pureed fresh or frozen (thawed) strawberries, reduced slightly on stovetop OR freeze-dried strawberry powder (2-3 tbsp)
- Pink or red gel food coloring
- 1-2 tbsp flour (if using puree, to balance liquid)
- For the Frosting:
- Prepare 1.5 batches of Vanilla Buttercream (Recipe #1), OR Cream Cheese Frosting (Recipe #3), OR divide and make small batches of chocolate, vanilla, and strawberry frosting.
Instructions:
- Prep: Preheat oven to 350°F (175°C). Grease and flour three 8-inch round cake pans. Line bottoms with parchment.
- Make Base Batter: Prepare the large batch of vanilla or white cake batter up to the point *before* adding the final liquid (milk/buttermilk).
- Divide Batter: Divide the batter as evenly as possible into three separate medium bowls (use a scale).
- Flavor Layer 1 (Vanilla): To the first bowl, add its share of the milk/buttermilk (approx ⅓ of total needed for the large batch) and the corresponding share of the final flour addition, if using the alternating method. Mix gently until just combined.
- Flavor Layer 2 (Chocolate): To the second bowl, add the melted & cooled chocolate or cocoa paste. Add its share of milk/buttermilk and final flour addition. Mix gently until just combined.
- Flavor Layer 3 (Strawberry): To the third bowl, add the strawberry puree (plus 1-2 tbsp extra flour) OR freeze-dried strawberry powder, and pink/red food coloring. Add its share of milk/buttermilk and final flour addition. Mix gently until just combined.
- Bake: Pour each flavored batter into one of the prepared pans. Bake for 20-30 minutes (adjust based on layer thickness), until a skewer comes out clean.
- Cool: Cool layers in pans 10 mins, then invert onto wire racks to cool completely.
- Make Frosting(s): Prepare your chosen frosting(s). If making three flavors, divide ingredients accordingly.
- Assemble: Level cooled cakes. Decide on layer order (e.g., chocolate, vanilla, strawberry). Place bottom layer on plate. Frost. Add middle layer. Frost. Add top layer.
- Frost Exterior: Frost the entire cake with vanilla or cream cheese frosting for a surprise inside. Alternatively, carefully frost each third of the cake exterior with the corresponding flavor frosting for a Neapolitan look on the outside too (challenging but visually fun!).
- Decorate: Garnish with chocolate shavings, sprinkles, fresh strawberries, etc.
Tips for Success:
- Sturdy Base Cake: Choose a recipe that holds up well to additions. White cake allows strawberry color to pop more.
- Flavoring Methods: Melted chocolate gives richer flavor. Freeze-dried strawberry powder provides intense flavor and color without extra liquid. Reducing puree concentrates flavor.
- Balancing Consistency: Try to keep the three batters at similar consistencies for even baking. Add a touch more liquid or flour if one seems drastically different.
- Even Division: Use a scale for accuracy when dividing batter and liquids/flour.
- Frosting Choice: Single flavor frosting is easiest. Multiple flavors require more bowls and careful application.
29. Hummingbird Cake
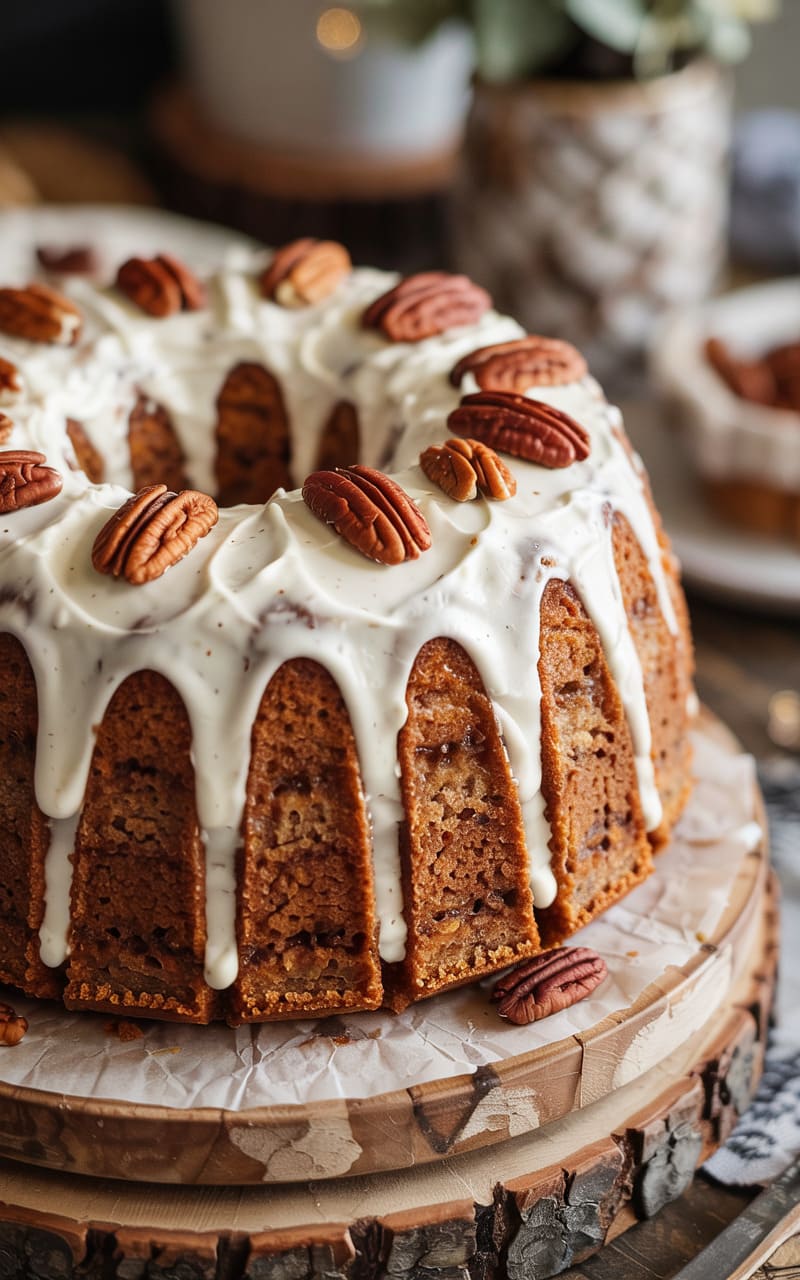
A Southern US classic, this ultra-moist cake is packed with bananas, pineapple, pecans, and spices, traditionally topped with cream cheese frosting.
Ingredients:
- For the Hummingbird Cake:
- 3 cups (380g) all-purpose flour
- 2 cups (400g) granulated sugar
- 1 tsp baking soda
- 1 tsp ground cinnamon
- ½ tsp salt
- 3 large eggs, lightly beaten
- 1 ½ cups (360ml) vegetable oil or melted coconut oil
- 1 ½ tsp pure vanilla extract
- 1 can (8 oz / 227g) crushed pineapple in juice, undrained
- 2 cups (about 3-4) ripe bananas, mashed (about 1 lb)
- 1 cup (115g) chopped pecans, toasted
- For the Cream Cheese Frosting (Same as Recipe #6 – double batch):
- 16 oz (452g) full-fat block cream cheese, softened
- 1 cup (226g) unsalted butter, softened
- 6-8 cups (720-960g) powdered sugar, sifted
- 2 tsp pure vanilla extract
- ¼ tsp salt
- Garnish: Extra toasted pecan halves
Instructions:
- Prep: Preheat oven to 350°F (175°C). Grease and flour three 8-inch or 9-inch round cake pans OR a 10-inch tube/Bundt pan. Line round pans with parchment if using. Toast chopped pecans and let cool.
- Dry Ingredients: In a large bowl, whisk together flour, sugar, baking soda, cinnamon, and salt.
- Combine Wet and Dry: Add the lightly beaten eggs and oil to the dry ingredients. Stir with a wooden spoon or rubber spatula until just combined (do not use a mixer for the whole process).
- Fold in Fruit & Nuts: Stir in the vanilla extract, undrained crushed pineapple, mashed bananas, and toasted chopped pecans until evenly incorporated. The batter will be thick.
- Bake: Pour batter into the prepared pan(s). Bake for 25-35 minutes (round pans) or 60-75 minutes (tube/Bundt pan), until a wooden skewer inserted into the center comes out clean.
- Cool: Let cake(s) cool in the pan(s) on a wire rack for 15-20 minutes before inverting to cool completely. This cake is very moist, so handle with care.
- Make Cream Cheese Frosting: Prepare frosting as per Recipe #6 (double batch instructions).
- Assemble (Layer Cake): Level cooled cakes if needed. Place one layer on plate, top with frosting. Repeat with layers. Frost top and sides.
- Frost (Bundt/Tube Cake): Once completely cool, frost the cake generously.
- Garnish: Decorate with toasted pecan halves.
Tips for Success:
- Ripe Bananas & Undrained Pineapple: Key for moisture and flavor. Don’t drain the pineapple juice!
- Don’t Overmix: Mix by hand or use mixer only briefly. Overmixing develops gluten and makes cake tough.
- Toasted Pecans: Significantly enhances flavor.
- Moisture Level: This is a very moist, dense cake. Baking times can vary; rely on the skewer test.
- Cooling Time: Allow adequate cooling time in the pan before inverting due to the cake’s moistness and weight.
30. Cookie Dough Cake
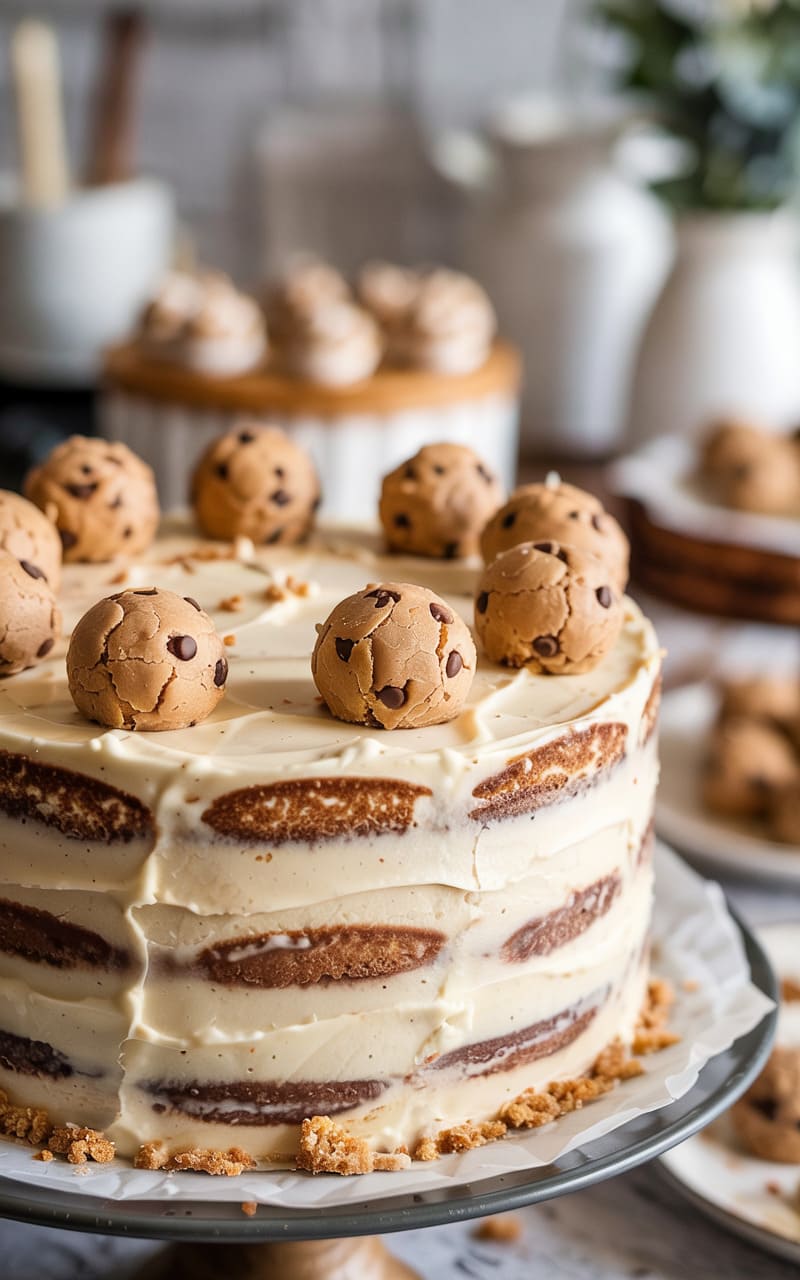
For the ultimate indulgence! Layers of vanilla cake with safe-to-eat eggless cookie dough incorporated into the filling and/or frosting.
Ingredients:
- For the Cake Layers:
- Use Classic Vanilla Cake (Recipe #1) or Yellow Cake (Recipe #4), baked in two or three 8-inch pans.
- For the Edible Eggless Cookie Dough:
- ½ cup (113g) unsalted butter, softened
- ¾ cup (165g) packed light brown sugar
- 1 tsp pure vanilla extract
- 1 cup (130g) all-purpose flour, heat-treated*
- ½ tsp salt
- 2-4 tbsp milk
- 1 cup (170g) mini chocolate chips
- For the Brown Sugar Buttercream:
- 1 ½ cups (340g) unsalted butter, softened
- 1 cup (220g) packed light brown sugar
- 3-4 cups (360-480g) powdered sugar, sifted
- ¼ cup (60ml) milk or heavy cream
- 1 tsp pure vanilla extract
- Pinch of salt
- Garnish: Mini chocolate chips, extra cookie dough balls
Instructions:
- *Heat-Treat Flour: Spread flour on a baking sheet. Bake at 300°F (150°C) for 5-7 minutes until it reaches 165°F (74°C) on an instant-read thermometer, or microwave on high for 60-90 seconds, stirring every 30 seconds, until it reaches temperature. Let cool completely. This kills potential bacteria.
- Bake Cake Layers: Prepare and bake vanilla or yellow cake layers. Cool completely.
- Make Edible Cookie Dough: Cream softened butter and brown sugar until fluffy. Beat in vanilla. Mix in the heat-treated flour and salt on low speed until combined. Add milk, 1 tbsp at a time, until dough comes together (should be slightly stiff but pliable). Stir in mini chocolate chips. Chill for about 30 minutes to firm up slightly.
- Make Brown Sugar Buttercream: Beat softened butter until creamy. Beat in brown sugar until combined (it might look slightly grainy). Gradually beat in sifted powdered sugar, alternating with milk/cream. Beat in vanilla and salt. Increase speed to medium-high and beat until fluffy (3-4 minutes).
- Assemble: Level cooled cakes. Place one layer on plate. Create a dam of buttercream around the edge. Crumble about half of the chilled cookie dough evenly inside the dam. Top with a thin layer of buttercream over the cookie dough.
- Layer Up: Add the next cake layer. Repeat filling (dam, cookie dough, buttercream). Add final cake layer.
- Frost: Crumb coat if desired and chill. Frost entire cake with brown sugar buttercream.
- Decorate: Press mini chocolate chips around the base. Optional: Roll small balls of leftover cookie dough and place around the top edge.
Tips for Success:
- Heat-Treat Flour: Crucial safety step for consuming raw flour. Don’t skip it.
- Eggless Dough: This recipe is eggless, making it safe to eat raw.
- Chill Cookie Dough: Makes it easier to handle and crumble for the filling.
- Brown Sugar Buttercream: Adds a caramel note that complements the cookie dough flavor. Expect slight graininess from brown sugar.
- Filling Technique: The dam helps keep the cookie dough contained.
31. Spiced Pear Cake with Salted Caramel Drizzle
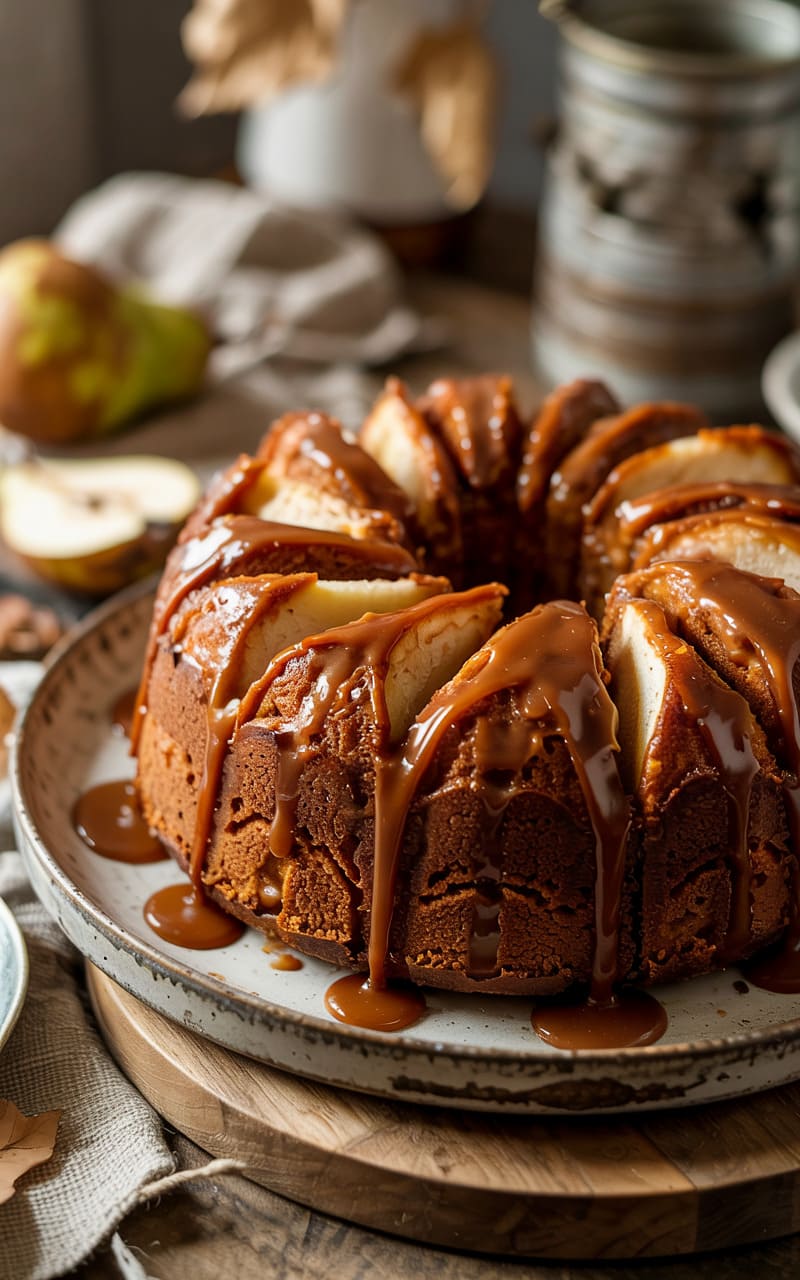
Tender cake with chunks of soft pear, warm spices like ginger and cinnamon, finished with a decadent salted caramel sauce.
Ingredients:
- For the Spiced Pear Cake:
- 2-3 ripe but firm pears (like Bosc or Anjou), peeled, cored, and diced
- 1 tbsp lemon juice
- 2 cups (250g) all-purpose flour
- 1 tsp baking soda
- ½ tsp salt
- 1 tsp ground ginger
- ½ tsp ground cinnamon
- ¼ tsp ground nutmeg
- ½ cup (113g) unsalted butter, softened
- 1 cup (200g) granulated sugar
- ½ cup (110g) packed light brown sugar
- 2 large eggs, room temperature
- ½ cup (120ml) buttermilk or plain yogurt, room temperature
- 1 tsp pure vanilla extract
- For the Salted Caramel Sauce (See Recipe #19):
- Use Recipe #19 instructions OR good quality store-bought.
- Optional: Simple Glaze or Cream Cheese Frosting:
- If not using caramel, a simple vanilla glaze or cream cheese frosting works well.
Instructions:
- Prep Pears & Oven: Preheat oven to 350°F (175°C). Grease and flour a 9-inch round or square pan, or a 10-inch Bundt pan. Toss diced pears with lemon juice to prevent browning. Set aside.
- Dry Ingredients: Whisk together flour, baking soda, salt, ginger, cinnamon, and nutmeg.
- Cream Butter & Sugars: Beat butter and both sugars until light and fluffy.
- Add Eggs & Wet Ingredients: Beat in eggs one at a time. Beat in buttermilk/yogurt and vanilla.
- Combine & Add Pears: Gradually add dry ingredients to wet, mixing on low until just combined. Gently fold in the diced pears.
- Bake: Pour batter into prepared pan. Bake for 35-45 minutes (round/square) or 50-60 minutes (Bundt), until skewer comes out clean.
- Cool: Cool in pan 15-20 minutes before inverting onto rack to cool completely.
- Prepare Caramel/Glaze: Make salted caramel sauce (Recipe #19) and let cool slightly OR prepare a simple glaze/frosting.
- Serve: Drizzle the slightly warm or room temperature salted caramel sauce generously over the cooled cake. Serve slices as is or with a dollop of whipped cream.
Tips for Success:
- Pear Choice: Use pears that hold their shape when baked (Bosc, Anjou). Avoid very soft pears like Bartlett unless you want them to completely melt into the cake.
- Dicing Pears: Aim for about ½-inch dice.
- Folding Pears: Be gentle to avoid breaking them up too much.
- Caramel Temperature: Should be pourable but not hot enough to melt into the cake entirely. Room temp or slightly warm works well.
32. Orange Creamsicle Cake
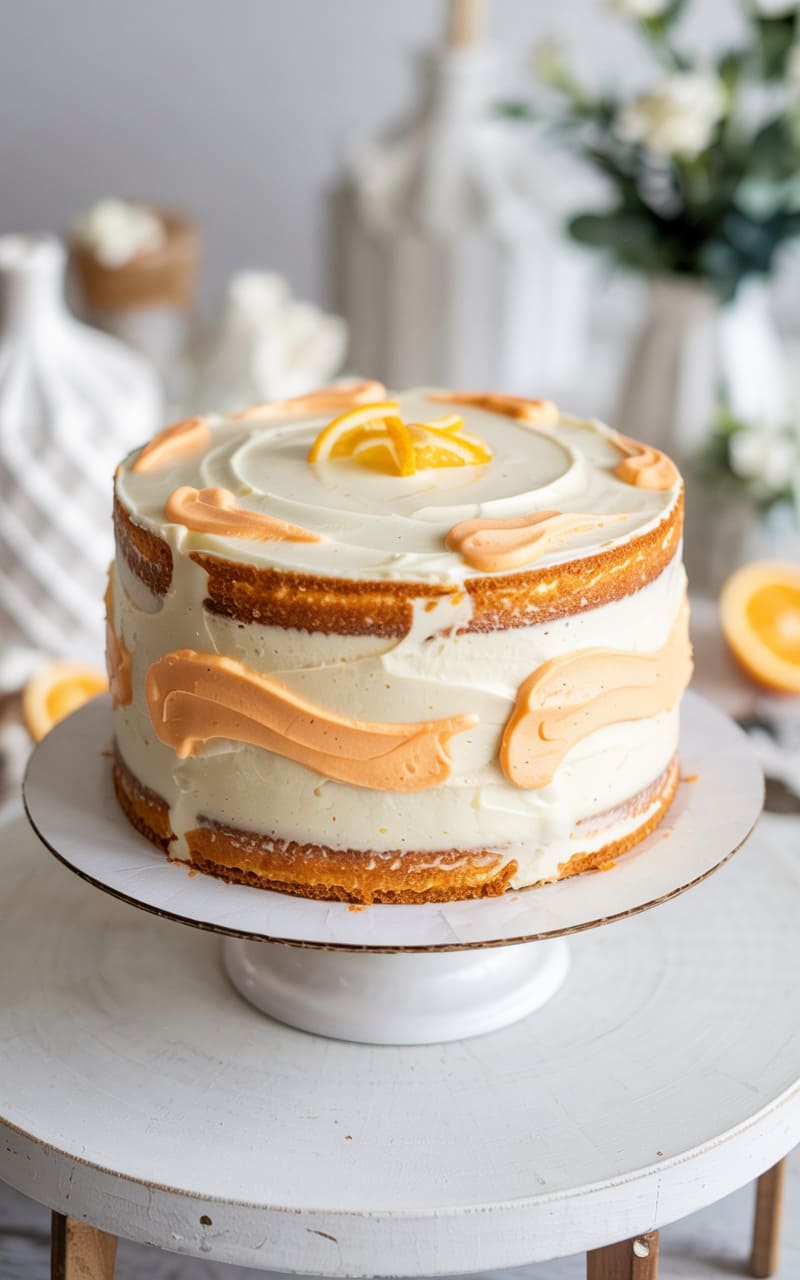
Evokes the nostalgic flavor of the ice cream bar: bright orange cake layers swirled or layered with creamy vanilla frosting.
Ingredients:
- For the Orange Cake:
- Use Classic Vanilla Cake recipe (Recipe #1), BUT substitute ½ cup of the milk with ½ cup fresh orange juice, AND add 2 tbsp orange zest to the butter/sugar mixture.
- Optional: Orange gel food coloring.
- For the Vanilla Cream Filling/Frosting:
- Use Cream Cheese Frosting (Recipe #3) OR Vanilla Buttercream (Recipe #1). Ensure it’s very vanilla-forward.
- Optional: Mix some orange zest into a portion of the frosting for swirling.
Instructions:
- Prep & Make Batter: Preheat oven (350°F/175°C). Grease/flour two 9-inch pans. Prepare Vanilla Cake batter (Recipe #1), making the orange juice/zest substitutions noted above. Add orange gel color if desired.
- Bake & Cool: Divide batter, bake 30-35 mins, cool layers completely.
- Make Frosting: Prepare vanilla buttercream or cream cheese frosting. Optional: set aside 1/3 of frosting and mix in 1 tsp orange zest.
- Assemble & Frost: Layer cakes with plain vanilla frosting. Frost exterior with vanilla frosting.
- Swirl Option: If desired, dot the orange-zest frosting randomly onto the vanilla exterior frosting and gently swirl together with an offset spatula for a marbled creamsicle effect.
- Garnish: Top with fresh orange slices (candied or fresh) or orange zest.
Tips for Success:
- Fresh Orange Juice & Zest: Key for authentic flavor. Zest before juicing.
- Creamy Vanilla Contrast: The vanilla frosting should be smooth and creamy to mimic the ‘cream’ part of creamsicle. Cream cheese frosting works particularly well.
- Swirl Technique: Don’t over-swirl, just gently blend the edges of the colors/flavors.
33. Lemon Rosemary Olive Oil Cake
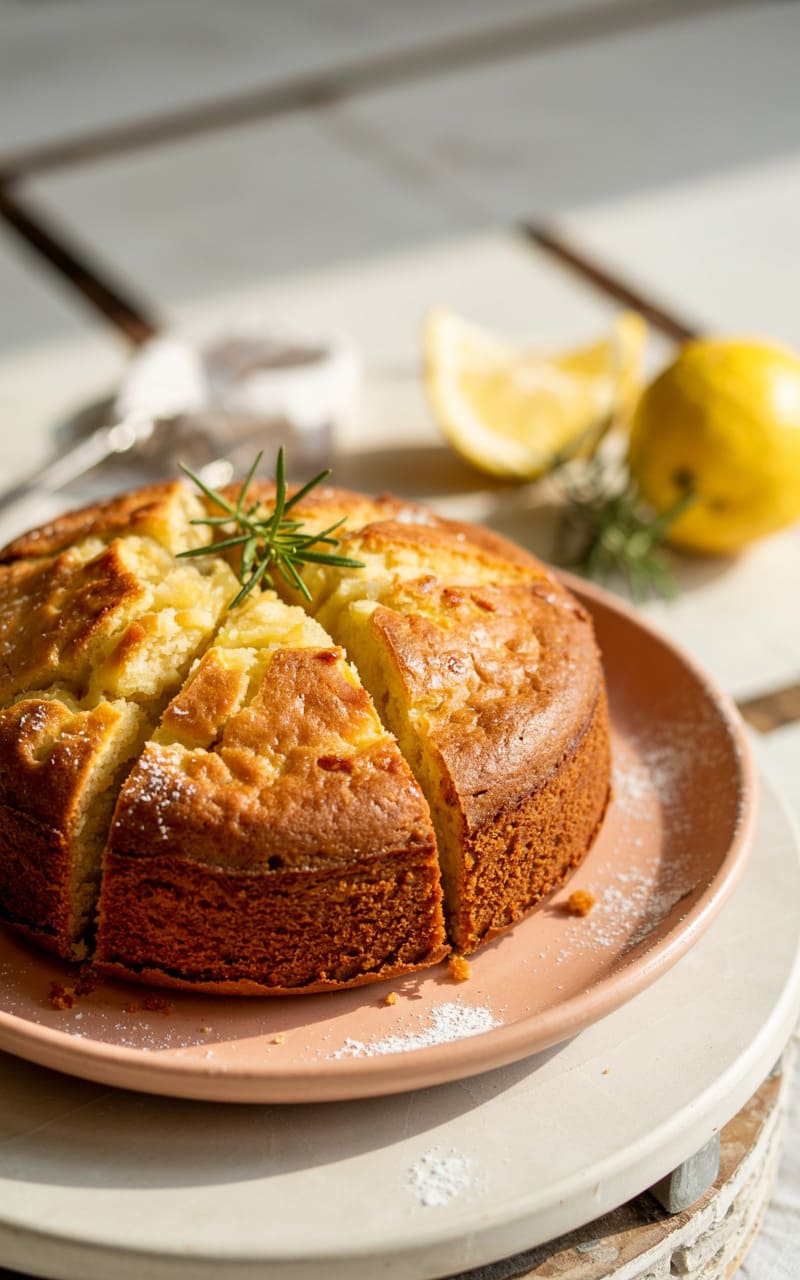
A sophisticated, moist cake with the bright tang of lemon, herbaceous notes of rosemary, and the fruity richness of olive oil.
Ingredients:
- For the Cake:
- 1 ½ cups (190g) all-purpose flour
- 1 tsp baking powder
- ½ tsp salt
- 1 cup (200g) granulated sugar
- 3 large eggs
- ¾ cup (180ml) good quality extra virgin olive oil (fruity profile preferred)
- ½ cup (120ml) whole milk or plain yogurt
- Zest of 2 large lemons
- ¼ cup (60ml) fresh lemon juice
- 1 tbsp fresh rosemary, finely chopped
- For Glaze/Topping (Optional):
- Powdered sugar for dusting
- Lemon Glaze: 1 cup powdered sugar + 2-3 tbsp lemon juice
- Candied rosemary sprigs
Instructions:
- Prep: Preheat oven to 350°F (175°C). Grease and flour a 9-inch round cake pan or loaf pan. Line bottom with parchment.
- Combine Dry Ingredients: Whisk flour, baking powder, and salt.
- Combine Wet Ingredients: In a large bowl, whisk sugar and lemon zest together (releases oils). Whisk in eggs until combined. Gradually whisk in olive oil until emulsified. Whisk in milk/yogurt, lemon juice, and chopped rosemary.
- Combine: Gently fold dry ingredients into wet ingredients until just combined.
- Bake: Pour into prepared pan. Bake 40-50 minutes (round) or 50-60 minutes (loaf), until skewer comes out clean.
- Cool: Cool in pan 15 mins, then invert onto rack to cool completely.
- Serve: Dust with powdered sugar OR drizzle with lemon glaze once cool. Garnish with candied rosemary if desired.
Tips for Success:
- Good Olive Oil: Flavor is prominent, so use an extra virgin olive oil you enjoy the taste of. A fruity one works well.
- Finely Chopped Rosemary: Ensures flavour distribution without large pieces.
- Don’t Overbake: Olive oil cakes are moist but can become dry if baked too long.
- Simple Finish: Often best with just powdered sugar or a light glaze to let the cake flavors shine.
34. S’mores Cake
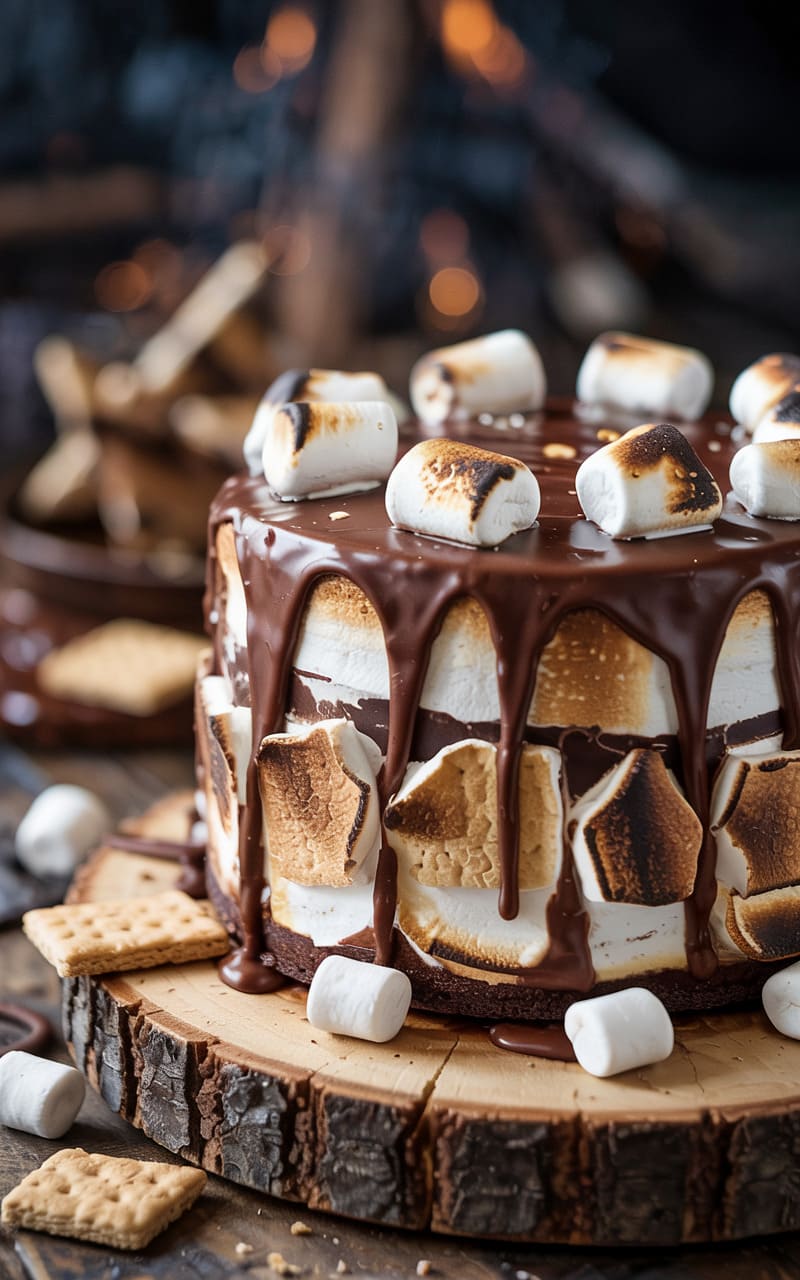
All the elements of the campfire classic: graham cracker crust or cake layer, chocolate cake, marshmallow frosting (often toasted!).
Ingredients:
- For Graham Cracker Element:
- Option 1 (Crust): 1 ½ cups graham crumbs, ¼ cup sugar, 6 tbsp melted butter (press into bottom of pans before adding batter).
- Option 2 (Layer): Add 1 cup graham cracker crumbs into a vanilla/yellow cake batter (Recipe #1 or #4).
- For Chocolate Cake Layer(s):
- Use Rich Chocolate Fudge Cake recipe (Recipe #2), baked in 1 or 2 pans (depending on graham element).
- For Marshmallow Frosting:
- Use store-bought Marshmallow Fluff OR make meringue frosting (like Swiss or Italian meringue, stable and fluffy). Recipe for basic 7-minute frosting: 2 egg whites, 1 ½ cups sugar, ¼ cup water, 1 tbsp light corn syrup, 1 tsp vanilla, ¼ tsp cream of tartar – cooked over double boiler whisking constantly until stiff peaks form.
- For Topping:
- Chocolate Ganache (Recipe #22) OR Hershey’s chocolate bar pieces
- Mini marshmallows, extra graham crackers
Instructions:
- Prep Graham Element: If making crust, press into greased/floured pans. If adding to batter, mix crumbs in at the end.
- Prep Chocolate Cake: Prepare chocolate cake batter. Pour over graham crust OR use as separate layer(s).
- Bake & Cool: Bake chocolate cake (adjust time if on crust). Cool completely.
- Make/Prep Marshmallow Frosting: Use Fluff or prepare meringue frosting.
- Assemble: Layer cake(s) (graham, chocolate) with marshmallow frosting between layers if using multiple. Frost entire cake with marshmallow frosting.
- Toast Frosting (Optional): Use a kitchen torch to carefully toast the marshmallow frosting until lightly golden brown all over. Work quickly and carefully.
- Garnish: Drizzle with chocolate ganache. Top with mini marshmallows, graham cracker pieces, and chocolate bar segments.
Tips for Success:
- Graham Element Choice: Crust provides distinct base; crumbs in batter add flavor throughout.
- Marshmallow Frosting: Meringue frosting (like 7-minute) is authentic and toasts beautifully. Fluff is quicker but sweeter and doesn’t hold shape as well.
- Toasting Safety: Use torch carefully, keep flame moving. Do this just before serving for best effect. Frosting will be sticky.
- Campfire Feel: Messy garnish is part of the fun!
35. Blackberry Lavender Cake
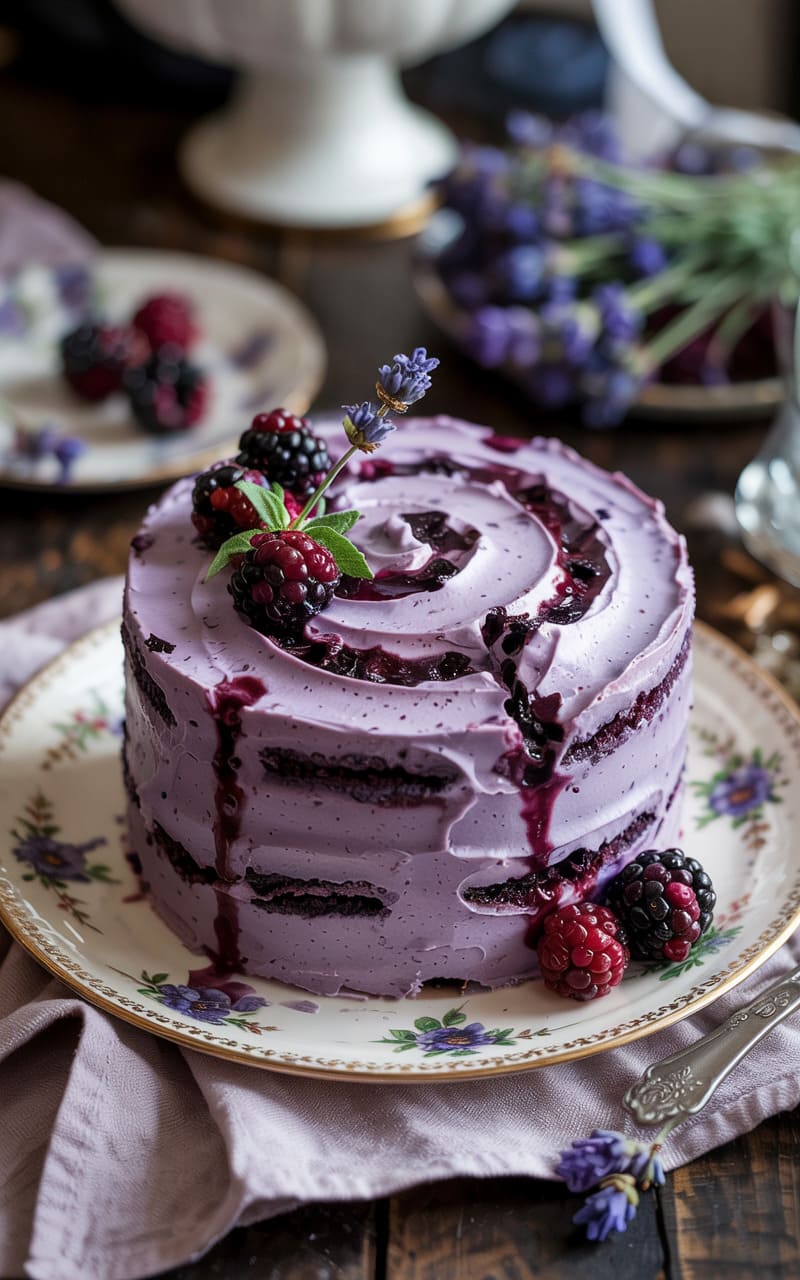
A sophisticated pairing of sweet-tart blackberries and fragrant floral lavender in a tender cake, often with lemon or vanilla frosting.
Ingredients:
- For the Lavender Cake:
- Use Classic Vanilla Cake (Recipe #1) or Lemon Cake (Recipe #7) batter.
- Add 1-2 tbsp dried culinary lavender buds, finely crushed (use mortar & pestle or spice grinder) OR make lavender infused milk (steep 1 tbsp buds in the warm milk for 30 mins, strain).
- Optional: Purple gel food coloring.
- For Blackberry Filling/Swirl:
- 1-2 cups fresh or frozen blackberries
- ¼ cup sugar
- 1 tbsp lemon juice
- 1 tbsp cornstarch + 2 tbsp cold water (slurry)
- For the Frosting:
- Lemon Buttercream (Recipe #7) OR Cream Cheese Frosting (Recipe #3).
Instructions:
- Prep: Preheat oven (350°F/175°C). Grease/flour two 8-inch pans.
- Make Blackberry Filling: Combine blackberries, sugar, lemon juice in saucepan. Cook over medium heat until berries burst and mixture simmers (5-10 mins). Stir in cornstarch slurry, cook 1-2 mins more until thickened. Cool completely.
- Make Lavender Cake Batter: Prepare chosen cake batter, incorporating finely crushed lavender buds directly OR using lavender-infused milk (replace plain milk). Add purple color if desired.
- Assemble Batter Options:
- A) Fold half the cooled blackberry filling gently into the batter.
- B) Pour half the batter into pans, dot with filling, top with remaining batter, swirl gently.
- C) Bake plain lavender cake, use filling between layers.
- Bake & Cool: Bake 30-35 mins. Cool completely.
- Make Frosting: Prepare lemon or cream cheese frosting.
- Assemble & Frost: Level cakes. If not swirled, layer cake with remaining blackberry filling and frosting. Frost exterior.
- Garnish: Top with fresh blackberries and/or fresh lavender sprigs (culinary safe).
Tips for Success:
- Culinary Lavender: Ensure you use lavender specifically sold for cooking (usually English Lavender varieties). Other types can be bitter or treated.
- Lavender Amount: Start small, lavender can become soapy if overused. Infusing milk gives subtle flavor. Crushing buds releases more aroma.
- Blackberry Filling: Cooking down berries concentrates flavor. Ensure it’s cool before adding to batter or frosting.
- Pairing: Lavender pairs beautifully with lemon or vanilla.
36. Fig and Honey Cake with Mascarpone Cream
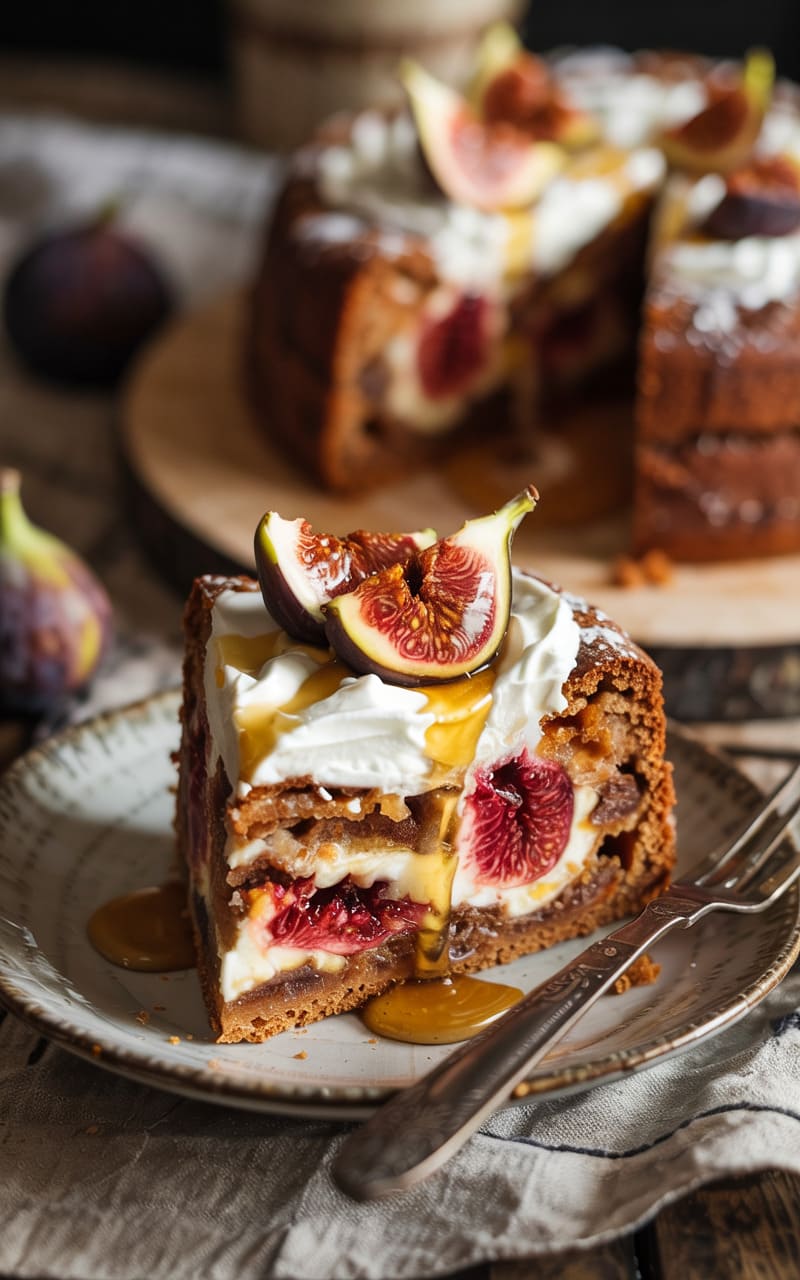
A rustic, elegant cake featuring sweet figs (fresh or dried) and honey, complemented by tangy, rich mascarpone cream.
Ingredients:
- For the Fig & Honey Cake:
- 1 ½ cups (190g) all-purpose flour
- 1 tsp baking powder
- ½ tsp salt
- ½ tsp ground cinnamon (optional)
- ½ cup (113g) unsalted butter, softened
- ½ cup (100g) granulated sugar
- ¼ cup (85g) honey
- 2 large eggs
- ½ cup (120ml) buttermilk or plain yogurt
- 1 tsp vanilla extract
- 1 cup chopped fresh figs OR rehydrated chopped dried figs (soak dried figs in hot water/tea/brandy for 30 mins, drain)
- For Mascarpone Cream:
- 8 oz (225g) mascarpone cheese, cold
- ½ cup (120ml) heavy cream, cold
- ¼ cup (30g) powdered sugar
- ½ tsp vanilla extract
- Garnish: Fresh fig halves, drizzle of honey
Instructions:
- Prep: Preheat oven 350°F/175°C. Grease/flour 8-inch or 9-inch round pan. Prep figs.
- Make Cake: Whisk dry ingredients. Cream butter, sugar, honey until fluffy. Beat in eggs one by one. Mix in buttermilk/yogurt and vanilla. Fold in dry ingredients until just combined. Gently fold in chopped figs.
- Bake: Pour into pan. Bake 35-45 minutes until skewer is clean.
- Cool: Cool in pan 15 mins, then invert onto rack to cool completely.
- Make Mascarpone Cream: Gently beat cold mascarpone until smooth (don’t overbeat). In separate bowl, whip cold heavy cream with powdered sugar and vanilla until soft peaks form. Gently fold whipped cream into mascarpone.
- Serve: Serve slices of cooled cake topped with a generous dollop of mascarpone cream. Garnish with fresh fig halves and an extra drizzle of honey just before serving. (Frosting the whole cake is possible but often served this way).
Tips for Success:
- Fig Choice: Fresh figs are lovely when in season. Dried figs provide intense sweetness; rehydrating makes them tender.
- Mascarpone Handling: Must be cold, beat gently and briefly just to smooth before folding in cream, otherwise it can curdle.
- Serving Style: Often served as a single layer cake with topping added per slice for freshness.
- Honey Flavor: Use a honey you enjoy the taste of.
37. Vegan Chocolate Avocado Cake
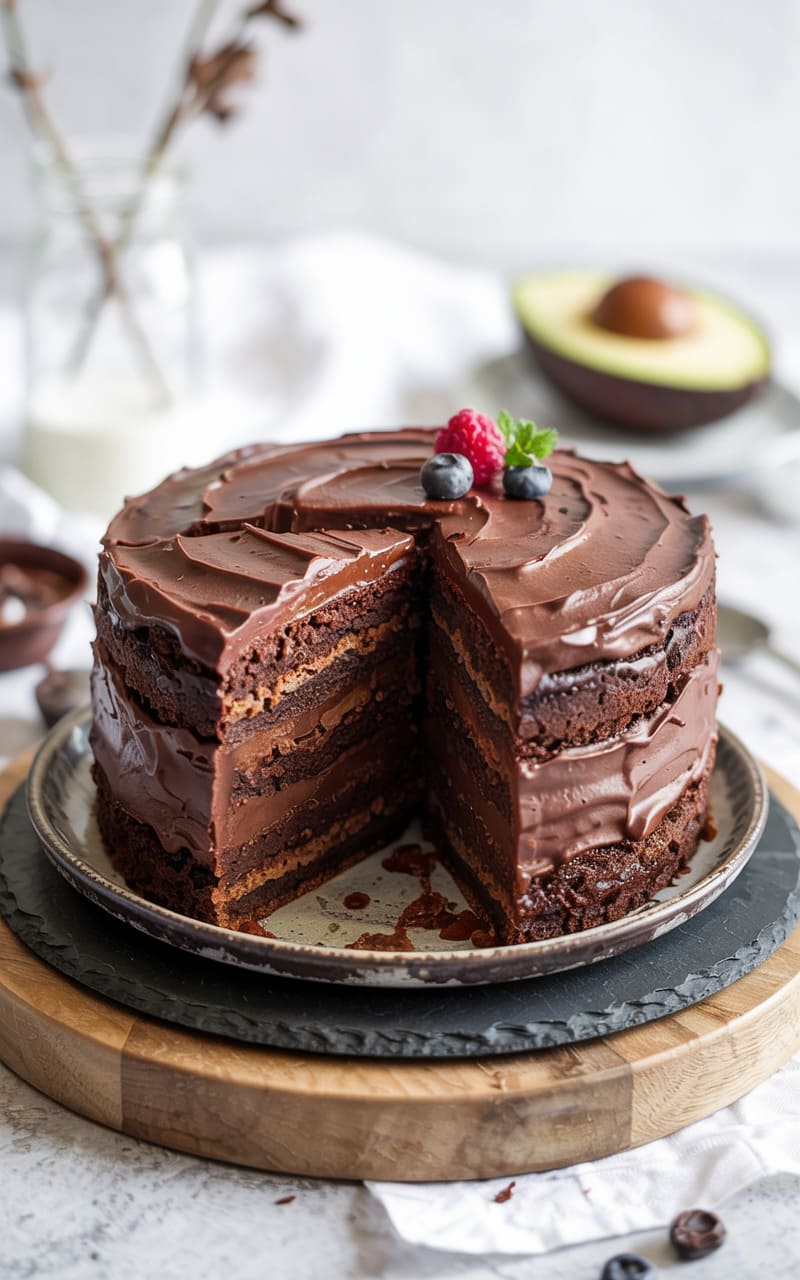
Surprisingly rich and moist chocolate cake using avocado instead of butter/oil and eggs. A healthier, plant-based option.
Ingredients:
- For the Cake:
- 1 large ripe avocado, mashed very smooth (about ¾ cup)
- 1 ½ cups (360ml) unsweetened plant-based milk (almond, soy, oat)
- 1 tbsp apple cider vinegar
- 1 ½ cups (190g) all-purpose flour
- 1 cup (200g) granulated sugar
- ⅓ cup (30g) unsweetened cocoa powder
- 1 tsp baking soda
- ½ tsp salt
- 1 tsp pure vanilla extract
- For Vegan Chocolate Frosting:
- ½ cup vegan butter (like Miyoko’s or Melt), softened
- ½ cup unsweetened cocoa powder, sifted
- 2-3 cups (240-360g) powdered sugar, sifted
- ¼ cup plant-based milk
- 1 tsp pure vanilla extract
- Pinch of salt
Instructions:
- Prep: Preheat oven 350°F/175°C. Grease/flour one 8-inch or 9-inch round pan or square pan.
- Make ‘Buttermilk’ & Mash Avocado: Combine plant milk and vinegar in a cup; let sit 5 mins to curdle slightly. Mash avocado until extremely smooth with no lumps (use blender if needed).
- Combine Ingredients: In large bowl, whisk flour, sugar, cocoa, baking soda, salt. Add mashed avocado, vegan ‘buttermilk’, and vanilla. Stir until just combined (don’t overmix).
- Bake: Pour into pan. Bake 30-40 minutes, until skewer comes out clean.
- Cool: Cool in pan 15 mins, then invert to cool completely on rack.
- Make Frosting: Beat vegan butter until creamy. Beat in cocoa. Alternate adding powdered sugar and plant milk. Beat in vanilla and salt. Beat until fluffy.
- Frost & Serve: Frost cooled cake.
Tips for Success:
- Smooth Avocado: Essential for texture. Lumps will show. Ensure avocado is ripe.
- Vegan ‘Buttermilk’: Acid helps activate baking soda for rise.
- Don’t Overmix: Vegan cakes can become dense easily.
- Taste Note: You don’t taste the avocado; it provides richness and moisture.
38. Rhubarb Custard Cake

Tangy rhubarb baked into a simple cake batter, creating pockets of jammy fruit and custardy texture.
Ingredients:
- For the Cake & Rhubarb:
- 3 cups fresh or frozen rhubarb, chopped into ½-inch pieces (about 1 lb)
- 1 cup (200g) granulated sugar, divided
- 1 ½ cups (190g) all-purpose flour
- 1 tsp baking powder
- ½ tsp salt
- 2 large eggs
- ½ cup (120ml) vegetable oil
- ½ cup (120ml) milk
- 1 tsp vanilla extract
- For Custard Topping (Optional):
- Pourable custard (store-bought or homemade) for serving
Instructions:
- Prep: Preheat oven 350°F/175°C. Grease/flour 9-inch square or round pan. Toss chopped rhubarb with ¼ cup (50g) of the sugar; set aside.
- Make Batter: Whisk flour, baking powder, salt. In separate bowl, whisk eggs, remaining ¾ cup (150g) sugar, oil, milk, and vanilla.
- Combine: Add wet to dry ingredients; stir until just combined.
- Assemble: Pour half the batter into pan. Top with half the sugared rhubarb. Pour remaining batter over. Top with remaining rhubarb.
- Bake: Bake 45-55 minutes, until golden brown and skewer comes out clean (may have some rhubarb moisture).
- Cool & Serve: Cool in pan. Serve warm or at room temperature, optionally with warm custard poured over slices.
Tips for Success:
- Rhubarb Prep: No need to thaw frozen rhubarb first. Ensure pieces are small enough to cook through.
- Moisture: Rhubarb releases liquid, making cake very moist. Skewer might not be perfectly dry near fruit. Look for set batter and golden top.
- Sweetness: Adjust sugar based on rhubarb tartness.
- Custard Pairing: Classic British pairing enhances the cake.
39. Savory Cheese and Herb ‘Cake’ (Quick Bread Style)

A savory alternative! More like a rich quick bread/muffin batter baked in a cake pan, perfect for less-sweet celebrations or brunch birthdays.
Ingredients:
- 2 cups (250g) all-purpose flour
- 1 tbsp baking powder
- ½ tsp salt
- ¼ tsp black pepper
- ¼ tsp garlic powder
- 1 cup (100g) shredded sharp cheddar cheese (or Gruyere, Parmesan)
- ¼ cup chopped fresh herbs (chives, parsley, dill, thyme mix)
- 2 large eggs
- ¾ cup (180ml) milk
- ⅓ cup (80ml) olive oil or melted butter
- Optional Add-ins: Cooked bacon bits, sun-dried tomatoes, olives
- Topping: Extra shredded cheese, flaky sea salt
Instructions:
- Prep: Preheat oven 375°F/190°C. Grease/flour 8-inch round or square pan, or muffin tin.
- Combine Dry: Whisk flour, baking powder, salt, pepper, garlic powder. Stir in shredded cheese and chopped herbs.
- Combine Wet: In separate bowl, whisk eggs, milk, oil/melted butter.
- Combine: Pour wet into dry. Stir until just moistened (lumpy is okay, like muffins). Fold in optional add-ins.
- Bake: Pour into pan/muffin cups. Sprinkle with extra cheese and flaky salt. Bake 25-35 minutes (pan) or 18-22 minutes (muffins), until golden and skewer comes out clean.
- Serve: Cool slightly. Serve warm or room temperature, perhaps with butter or cream cheese.
Tips for Success:
- Don’t Overmix: Key for tender quick bread texture. Mix until just combined.
- Cheese & Herb Choices: Customize with your favorite hard/semi-hard cheeses and herbs.
- Add-ins: Ensure extras like bacon or sun-dried tomatoes are chopped small.
- Serving Temp: Best served warm.
40. Mirror Glaze Cake (Galaxy or Solid Color)
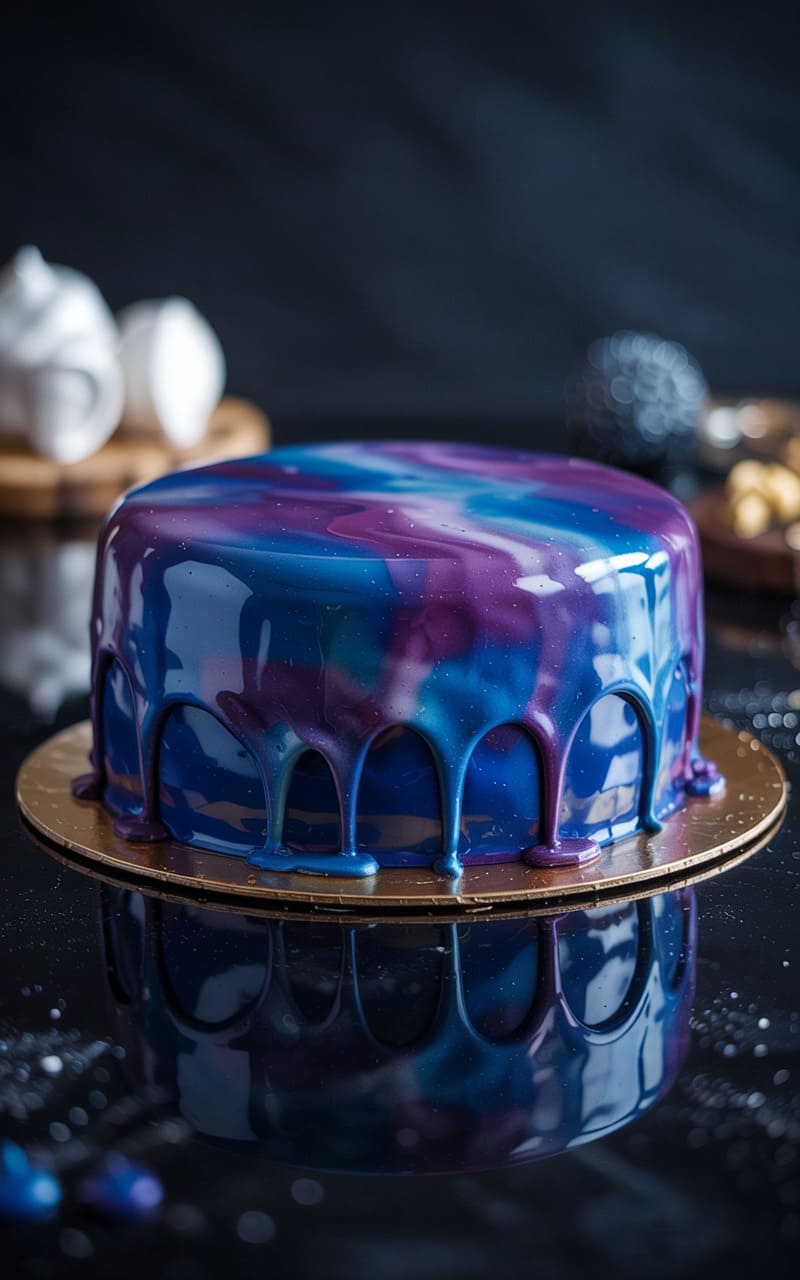
A true showpiece featuring a smooth, shiny glaze poured over a chilled mousse cake or buttercream cake.
Ingredients:
- For the Base Cake:
- Needs a very smooth, well-chilled base. Options:
- A frozen mousse cake (any flavor).
- A buttercream cake (any flavor) frosted *extremely* smoothly and frozen solid.
- For the Mirror Glaze:
- 1 cup (200g) granulated sugar
- ½ cup (120ml) water
- ½ cup (120ml) light corn syrup
- ½ cup (120ml) sweetened condensed milk
- 1 tbsp powdered gelatin + ¼ cup cold water
- 1 ½ cups (250g) good quality white chocolate, finely chopped
- Gel food coloring(s) (e.g., blue, purple, black, white for galaxy; single color)
- Optional: Edible glitter
Instructions:
- Prep Cake Base: Ensure your mousse cake or smoothly frosted buttercream cake is frozen absolutely solid (at least 4-6 hours, preferably overnight).
- Bloom Gelatin: Sprinkle gelatin over the ¼ cup cold water. Let sit 5-10 mins to bloom/thicken.
- Heat Syrup Mixture: In saucepan, combine sugar, the ½ cup water, and corn syrup. Bring to a boil over medium heat, stirring until sugar dissolves. Boil gently for 1 minute. Remove from heat.
- Add Gelatin & Condensed Milk: Stir in the bloomed gelatin until dissolved. Whisk in the sweetened condensed milk.
- Pour over White Chocolate: Place finely chopped white chocolate in a large heatproof bowl or measuring cup. Pour the hot syrup mixture over the chocolate. Let sit 5 minutes without stirring.
- Emulsify Glaze: Using an immersion blender (ideal for minimizing air bubbles) or carefully with a whisk, blend the mixture until completely smooth and glossy. Try to keep the blender head submerged. Strain through fine mesh sieve to remove any lumps or bubbles.
- Cool Glaze to Correct Temp: Let glaze cool, stirring occasionally, to 90-95°F (32-35°C). This temperature is crucial – too hot it runs off, too cold it’s too thick. Use a thermometer.
- Color Glaze: Divide glaze into separate bowls/cups. Add gel coloring to each. For galaxy: blue, purple, black, white. For solid: one color. Leave some white aside for swirling.
- Prepare for Pouring: Place frozen cake on a wire rack set over a large baking sheet (to catch drips). Remove cake from freezer just before pouring.
- Pour Glaze: Pour colors randomly or strategically over the top of the frozen cake, ensuring full coverage. Swirl slightly with a skewer if desired, or drizzle white over other colors for effect. Work quickly as glaze sets fast on frozen cake.
- Let Drip & Set: Let glaze drip for 10-15 minutes. Carefully trim any drips from bottom edge with offset spatula or knife.
- Chill: Carefully transfer cake (still on rack or moved to board) to refrigerator to thaw and fully set glaze (at least 2-3 hours) before serving.
Tips for Success:
- Frozen Base is Key: Absolutely solid base ensures glaze sets properly. Smoothness is vital.
- Glaze Temperature: Non-negotiable. Use a thermometer. 90-95°F (32-35°C) is the target range.
- Immersion Blender: Best tool for smooth, bubble-free glaze.
- Strain Glaze: Catches undissolved bits or bubbles.
- Work Quickly: Glaze sets fast on contact with frozen cake.
- Practice?: Can be tricky first time. Watch videos for technique.
41. Passion Fruit Mojito Cake
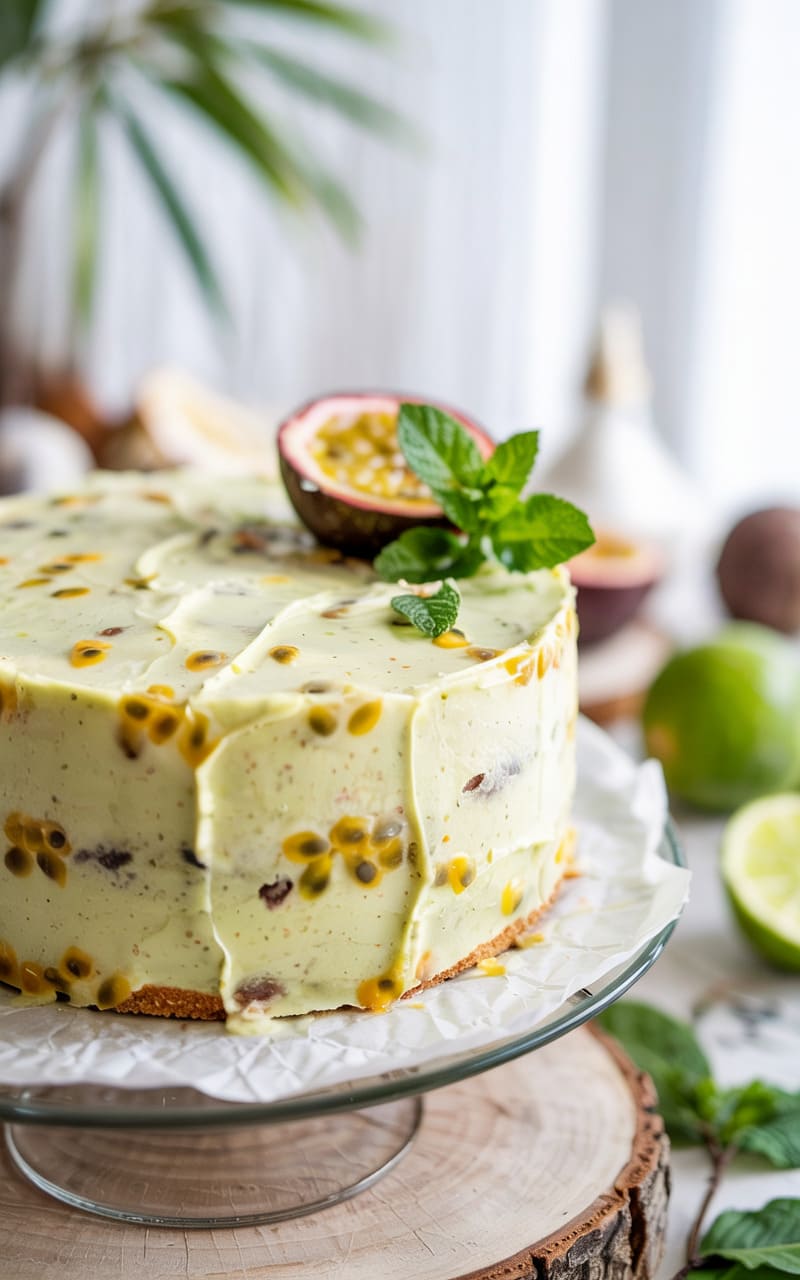
Tropical and refreshing! Combines passion fruit tang, mint, and a hint of rum (optional) in the cake or frosting, like the cocktail.
Ingredients:
- For the Cake:
- Use Lime Cake variation (similar to Lemon Recipe #7, sub lime for lemon).
- Add ½ cup passion fruit pulp/puree (seeds strained or included per preference) to wet ingredients.
- Optional: 1-2 tbsp finely chopped fresh mint folded into batter.
- Optional: 1-2 tbsp white rum added to wet ingredients.
- For the Frosting/Soak:
- Option 1 (Frosting): Lime or Vanilla Buttercream (Recipe #7/#1) with added passion fruit pulp/puree and finely chopped mint to taste. Optional rum splash.
- Option 2 (Soak): Simple syrup (1:1 sugar/water, heated to dissolve) infused with mint leaves, splash of rum, and passion fruit puree, brushed onto cooled cake layers. Frost with plain lime/vanilla cream.
Instructions:
- Prep & Bake: Preheat oven 350°F/175°C. Grease/flour two 8-inch pans. Prepare lime cake batter, incorporating passion fruit, optional mint/rum. Bake 30-35 mins. Cool.
- Prepare Frosting/Soak: Make chosen frosting, incorporating passion fruit/mint/rum. OR make infused simple syrup soak.
- Assemble: If using soak, brush onto cooled layers. Layer cake with frosting. Frost exterior.
- Garnish: Top with fresh mint sprigs, passion fruit seeds, or lime zest.
Tips for Success:
- Passion Fruit: Use pulp/puree for concentrated flavor. Seeds add texture if desired.
- Mint: Use fresh mint. Chop finely for frosting, infuse whole for soak.
- Rum Optional: Adds cocktail flavor; omit if preferred.
- Balance Flavors: Adjust passion fruit, lime, mint, rum levels to taste.
42. Baklava Inspired Cake
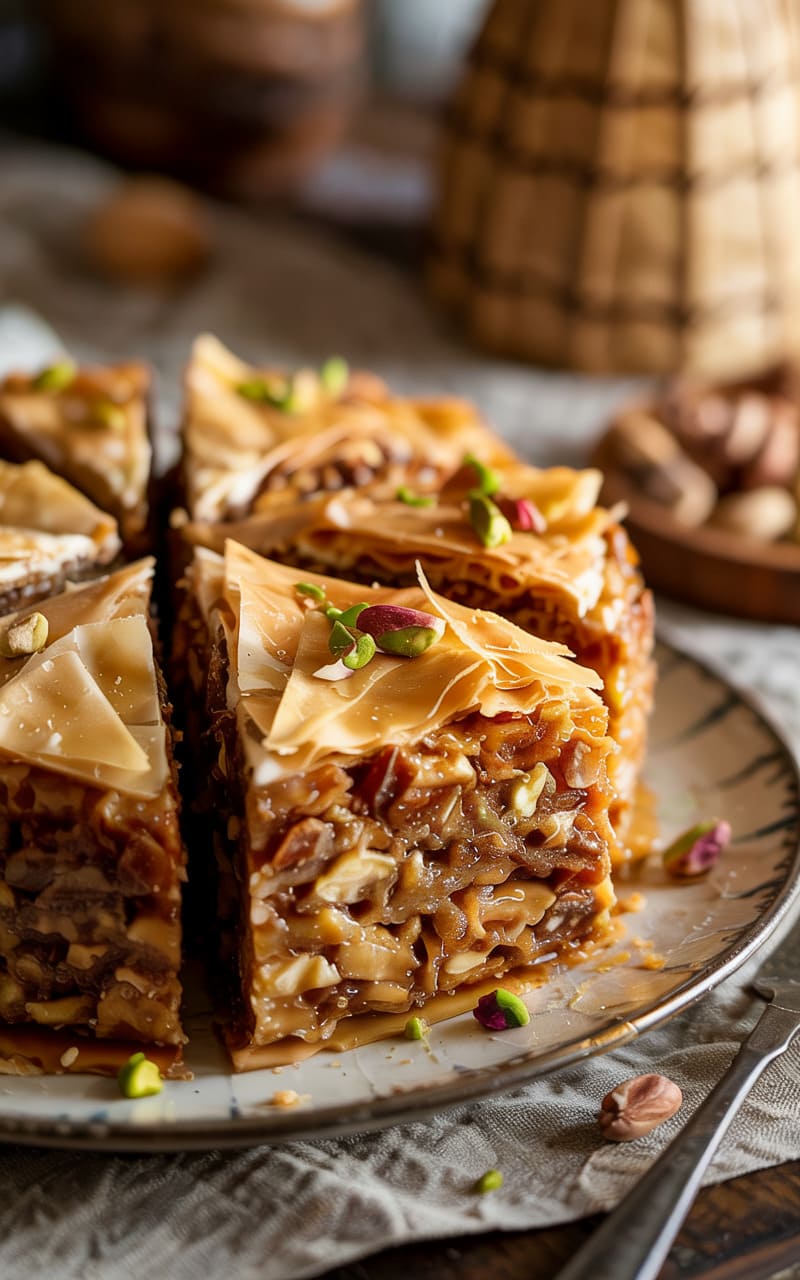
Layers of honey-or-syrup-soaked nutty cake (often pistachio/walnut) with phyllo crisp garnish, capturing the essence of baklava.
Ingredients:
- For Nutty Cake Layers:
- Use Pistachio Cardamom Cake (Recipe #24, omit cardamom/rosewater if desired) OR Almond Cake batter. Use walnuts or pistachios, finely ground.
- For Honey Syrup Soak:
- 1 cup water
- 1 cup sugar
- ½ cup honey
- Strip of lemon or orange peel
- 1 cinnamon stick (optional)
- For Phyllo Garnish:
- 2-3 sheets phyllo dough, thawed
- 2 tbsp melted butter
- Chopped nuts (pistachios/walnuts)
- For Frosting (Optional):
- Light Honey Buttercream (Recipe #21) OR Mascarpone Cream (Recipe #36). Often served with just syrup.
Instructions:
- Prep & Bake Cake: Preheat oven 350°F/175°C. Grease/flour two 8-inch pans. Bake nutty cake layers. Cool slightly.
- Make Honey Syrup: Combine water, sugar, honey, citrus peel, cinnamon stick in saucepan. Bring to boil, simmer 5-10 minutes until slightly thickened. Remove peel/stick. Let cool slightly.
- Soak Cake: Poke holes in warm cake layers. Pour honey syrup evenly over layers. Let cool completely, absorbing syrup.
- Make Phyllo Garnish: Reduce oven to 375°F/190°C. Brush phyllo sheets lightly with melted butter. Stack them. Cut into diamonds or squares. Place on baking sheet. Sprinkle with chopped nuts. Bake 5-8 minutes until golden and crisp. Cool.
- Assemble: Layer soaked cakes, optionally with thin layer of frosting/cream between. Frost lightly or leave bare.
- Serve: Top with crisp phyllo pieces just before serving (they get soggy quickly).
Tips for Success:
- Soaking: Apply syrup to warm cake for better absorption.
- Nut Choice: Pistachios or walnuts are traditional for baklava.
- Phyllo Handling: Work quickly, keep covered as it dries out fast. Garnish just before serving for crispness.
- Sweetness: Cake and syrup are sweet; a lighter frosting or none balances it.
43. Earl Grey Cake with Lemon Glaze
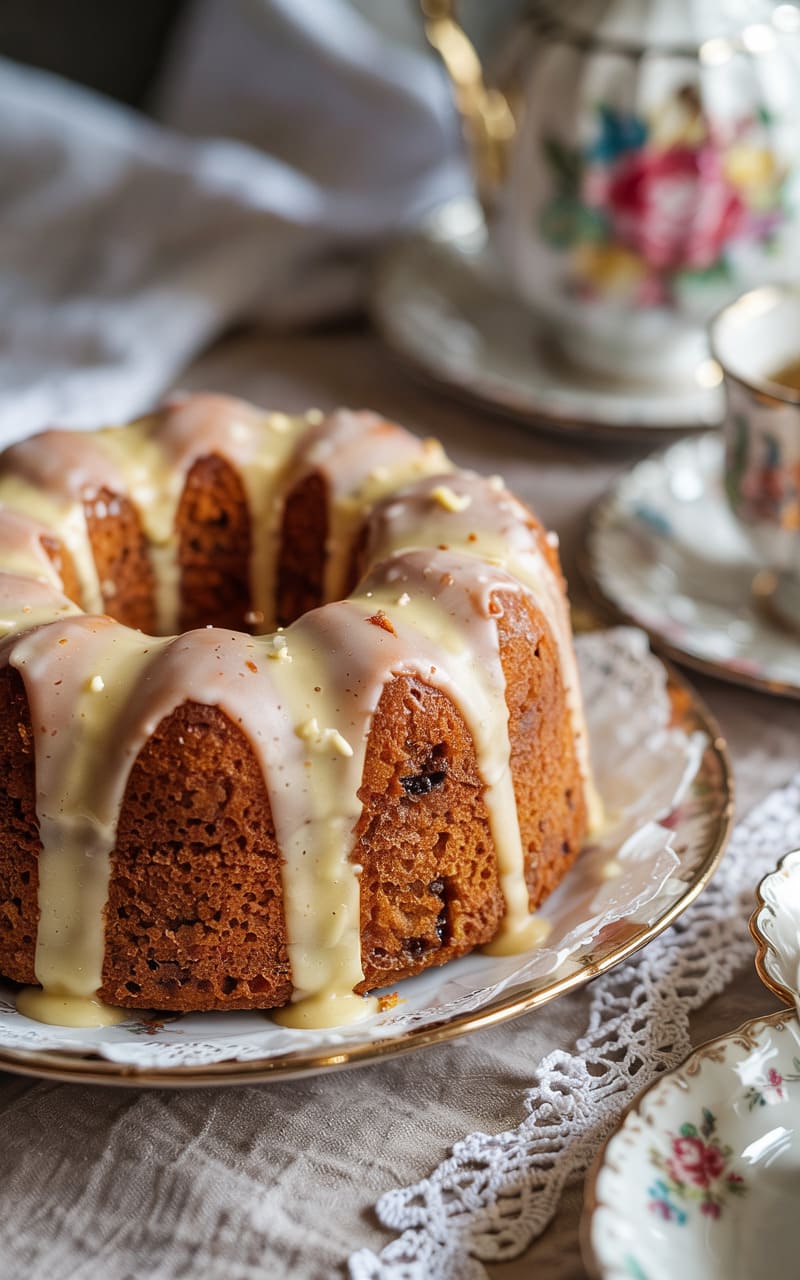
Delicate tea-infused cake with bergamot notes from Earl Grey, paired beautifully with a bright lemon glaze.
Ingredients:
- For Earl Grey Cake:
- Use Classic Vanilla Cake batter (Recipe #1) OR a simple butter cake recipe.
- Infuse the Milk: Heat milk gently (don’t boil). Add 3-4 Earl Grey tea bags or 2 tbsp loose leaf tea. Steep 15-30 minutes off heat. Strain milk well, discard leaves/bags. Use this infused milk in the recipe.
- Optional: Add zest of 1 lemon to batter for extra brightness.
- For Lemon Glaze:
- 1 cup (120g) powdered sugar, sifted
- 2-3 tbsp fresh lemon juice
- ½ tsp vanilla extract (optional)
Instructions:
- Prep & Infuse Milk: Preheat oven 350°F/175°C. Grease/flour Bundt pan or 9-inch round/loaf pan. Prepare Earl Grey infused milk and let cool.
- Make Cake Batter: Prepare vanilla/butter cake batter using the cooled, infused milk. Add lemon zest if using.
- Bake: Pour into pan. Bake (adjust time for pan type – Bundt 45-55 mins, others 30-45 mins) until skewer is clean.
- Cool: Cool in pan 15 mins, then invert to cool completely on rack.
- Make Glaze: Whisk powdered sugar, 2 tbsp lemon juice, vanilla (if using). Add more juice ½ tsp at a time for desired drizzle consistency.
- Glaze & Serve: Drizzle glaze over completely cooled cake. Let set briefly.
Tips for Success:
- Strong Infusion: Use good quality Earl Grey. Steep long enough for distinct flavor. Ensure milk is strained well.
- Pairing: Bergamot in Earl Grey naturally pairs well with lemon.
- Simple is Best: Often presented as a loaf or Bundt cake with just a glaze.
44. Mexican Chocolate Spice Cake
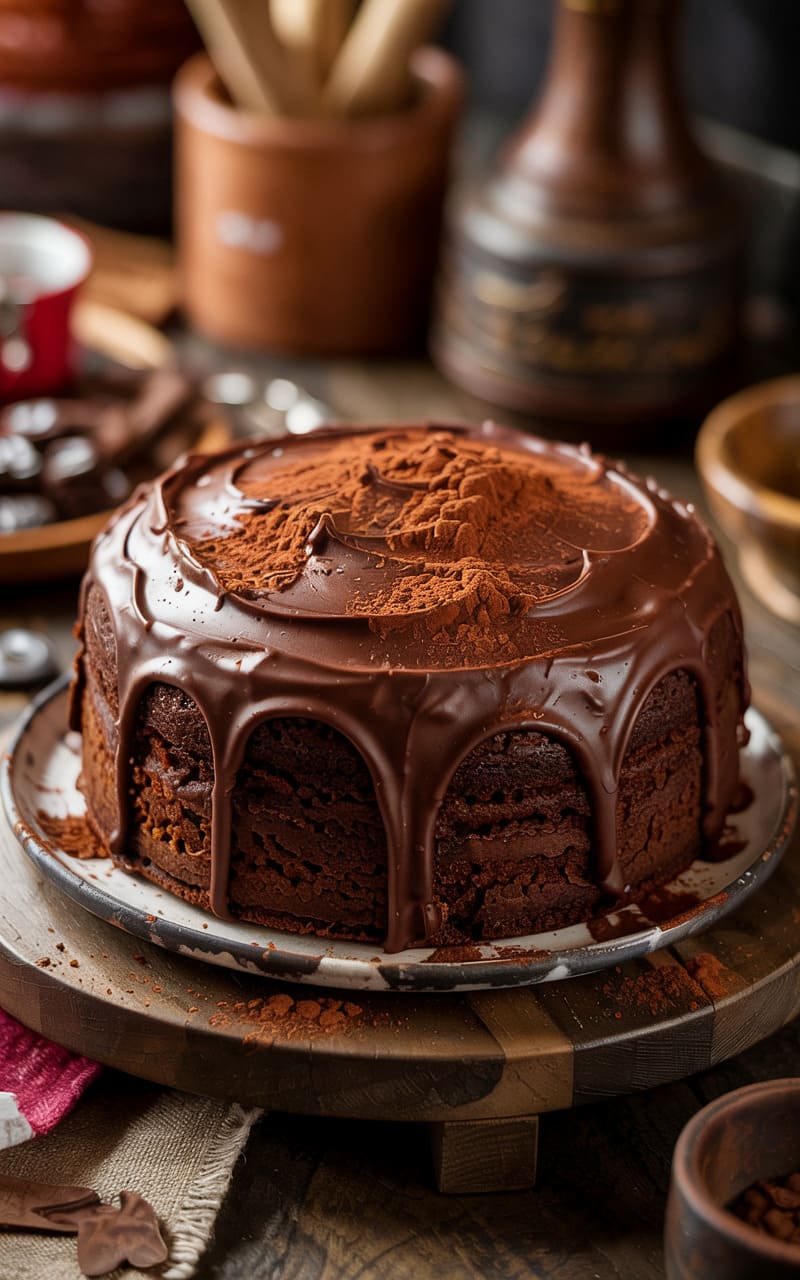
Deep chocolate cake warmed with cinnamon and a touch of cayenne pepper for a gentle heat, reminiscent of Mexican hot chocolate.
Ingredients:
- For the Cake:
- Use Rich Chocolate Fudge Cake recipe (Recipe #2).
- Add Spices: Whisk 1 ½ tsp ground cinnamon AND ¼ – ½ tsp cayenne pepper (adjust heat level) into the dry ingredients (flour, sugar, cocoa etc).
- Enhancement: Use hot brewed coffee instead of boiling water for deeper flavor.
- For Frosting:
- Chocolate Buttercream (Recipe #2) OR Cinnamon Cream Cheese Frosting (Recipe #3 base + 1 tsp cinnamon).
Instructions:
- Prep & Make Batter: Preheat oven 350°F/175°C. Grease/flour two 9-inch pans. Prepare chocolate cake batter (Recipe #2), adding the cinnamon and cayenne to dry ingredients. Use coffee if desired.
- Bake & Cool: Divide batter, bake 30-35 mins, cool completely.
- Make Frosting: Prepare chocolate or cinnamon cream cheese frosting.
- Assemble & Frost: Layer cakes with frosting. Frost exterior.
- Garnish: Dust with cocoa powder or cinnamon, maybe some chocolate shavings.
Tips for Success:
- Cayenne Level: Start with less cayenne; you can always add more next time. It should be a gentle background warmth, not overpowering heat.
- Cinnamon: Key flavor in Mexican chocolate profile.
- Coffee: Deepens chocolate flavor, pairs well with spices.
- Frosting Choice: Rich chocolate or tangy cinnamon cream cheese both complement the spices well.
45. Geode Cake (Rock Candy Crystal Effect)
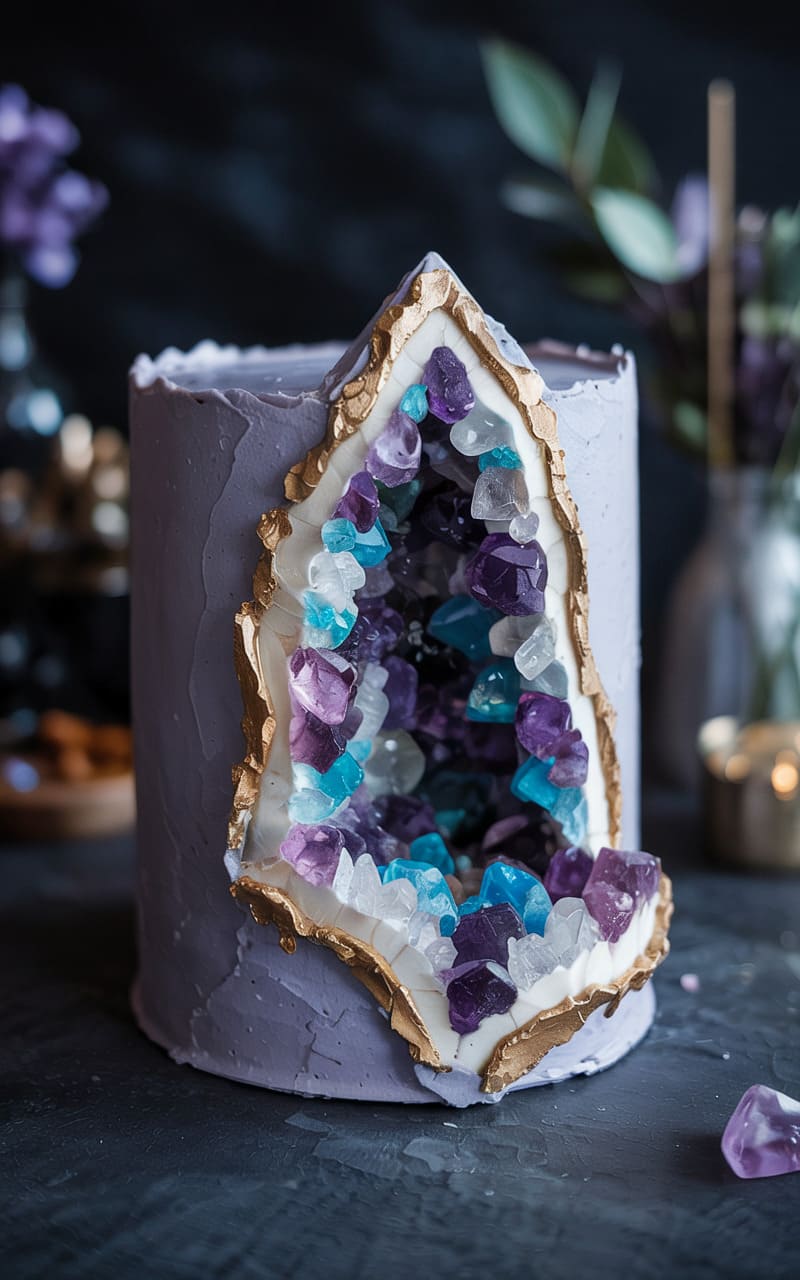
Stunning cake decorated to look like a geode, with a “cavity” filled with shimmering rock candy crystals.
Ingredients:
- For the Cake:
- Any sturdy layer cake recipe (Recipes #1, #4, #2, etc.), baked in 2 or 3 layers and cooled.
- For the Frosting:
- Sturdy Buttercream (Vanilla Recipe #1, or Swiss Meringue), enough for filling, crumb coat, and final coat. White or a light color works well as a base.
- For the Geode Cavity:
- Rock Candy Crystals on strings or loose (clear, blue, purple, pink are popular – match your desired geode). Coarse sanding sugar can supplement.
- Clear edible piping gel or light corn syrup.
- Edible Luster Dust or Petal Dust (gold, silver, pearl, matching crystal colors).
- Vodka or lemon extract (for mixing dust into paint).
- Small clean paintbrushes (food-safe).
Instructions:
- Assemble & Crumb Coat Cake: Stack and fill cooled cake layers. Crumb coat smoothly with buttercream. Chill until firm.
- Carve Cavity: Decide geode placement (often diagonal slash). Using a sharp knife, carefully carve out a cavity/indentation into the side of the chilled cake. Don’t go too deep, just enough to hold crystals. Make edges jagged/uneven.
- Final Frosting Coat: Frost the entire cake smoothly with the final layer of buttercream, covering everything *except* the carved cavity. Achieve smooth finish. Chill well.
- Prepare Crystals: Break rock candy off strings into varying small/medium chunks. Mix with sanding sugar if using.
- Paint Cavity Edge (Optional): Mix gold/silver luster dust with a few drops vodka/extract to create edible paint. Carefully paint the carved edge of the cavity. Let dry.
- Apply Crystals: Spread a thin layer of piping gel or corn syrup inside the cavity. Press rock candy crystals firmly into the gel, starting with larger pieces in the center/deeper parts and filling gaps with smaller pieces/sanding sugar. Build up layers for dimension. Aim for dense coverage.
- Add Color/Shimmer to Crystals: Mix colored luster/petal dusts with vodka/extract. Use fine paintbrush to dab color onto crystals, darker shades deeper in, lighter near edge. Dust dry luster dust for extra sparkle.
- Chill to Set: Chill the finished cake for at least 30 mins before serving.
Tips for Success:
- Sturdy Cake & Frosting: Needs to hold up to carving and crystal weight. Swiss meringue or crusting American buttercream work well.
- Sharp Knife & Chilled Cake: Essential for clean carving.
- Smooth Frosting Base: Contrasts nicely with the rough crystal texture.
- Crystal Placement: Vary sizes, pack tightly for best effect.
- Edible Materials: Ensure all dusts, gels, candies are edible grade.
- Patience!: This is more about decoration technique than baking complexity.
46. Fault Line Cake (Exposed Crumb/Sprinkle Center)
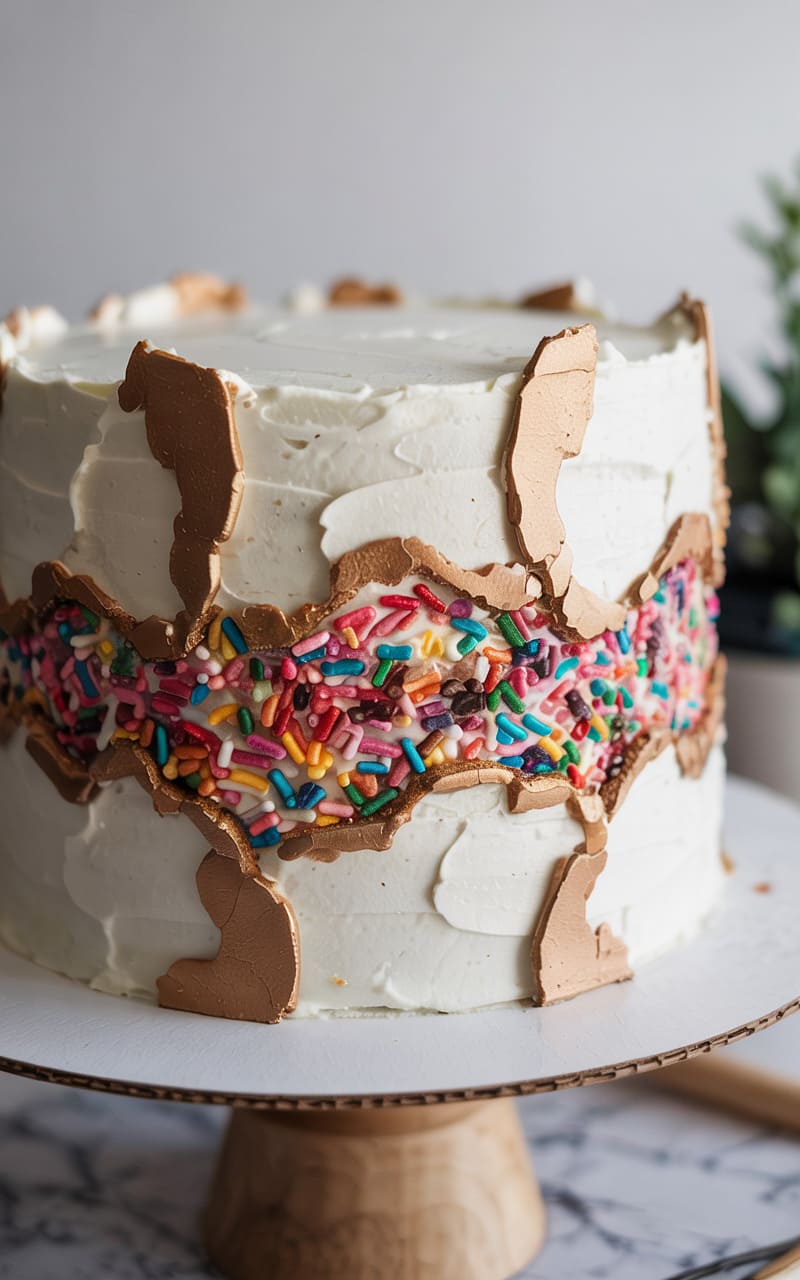
Trendy design where the middle section of frosting looks “missing”, revealing sprinkles, candies, or painted designs underneath, with rough edges.
Ingredients:
- For the Cake: Any layer cake recipe (2-3 layers), baked and cooled.
- For Frosting: Plenty of sturdy buttercream (at least 1.5-2 batches of Recipe #1 or Swiss Meringue). Can be one color or multiple.
- For the “Fault Line” Filling:
- Sprinkles (lots!), small candies, crushed cookies, edible glitter, OR buttercream painted with designs/colors.
- For Edge Detail: Edible gold or silver luster dust + vodka/extract for paint OR contrasting color frosting piped thinly.
Instructions:
- Assemble & Crumb Coat: Stack, fill, crumb coat cake smoothly. Chill well.
- Apply “Filling”: Apply a thick band of your chosen fault line filling (sprinkles, etc.) around the middle circumference of the chilled crumb-coated cake. Press sprinkles gently to adhere. Be generous and cover well.
- Apply Top & Bottom Frosting: Carefully apply a thick layer of the final buttercream frosting *above* and *below* the sprinkle band, leaving the sprinkle band exposed. Make these top and bottom frosting layers thicker than the sprinkle layer, so they protrude slightly.
- Create Rough Edge: Using an offset spatula or bench scraper, smooth the top and bottom frosting sections. As you smooth, intentionally create a rough, uneven “torn” edge where the frosting meets the sprinkle band. Don’t aim for perfect lines here.
- Paint Edges (Optional): Mix luster dust with vodka/extract. Use fine brush to paint the rough top and bottom edges of the frosting where they meet the sprinkles, enhancing the “fault line” effect. Alternatively, pipe a thin line of contrasting frosting.
- Smooth Top & Chill: Smooth the top surface of the cake. Chill until firm before serving.
Tips for Success:
- Chilled Cake: Makes applying sprinkles and frosting easier.
- Thick Frosting Layers: Top/bottom frosting must be thicker than the filling band to create the protrusion effect.
- Rough Edges are Key: Resist making it neat; the imperfection defines the look.
- Sprinkle Coverage: Ensure fault line band is densely covered.
- Gold/Silver Edge: Really makes the design pop.
47. Number or Letter Cake (Cream Tart Style)
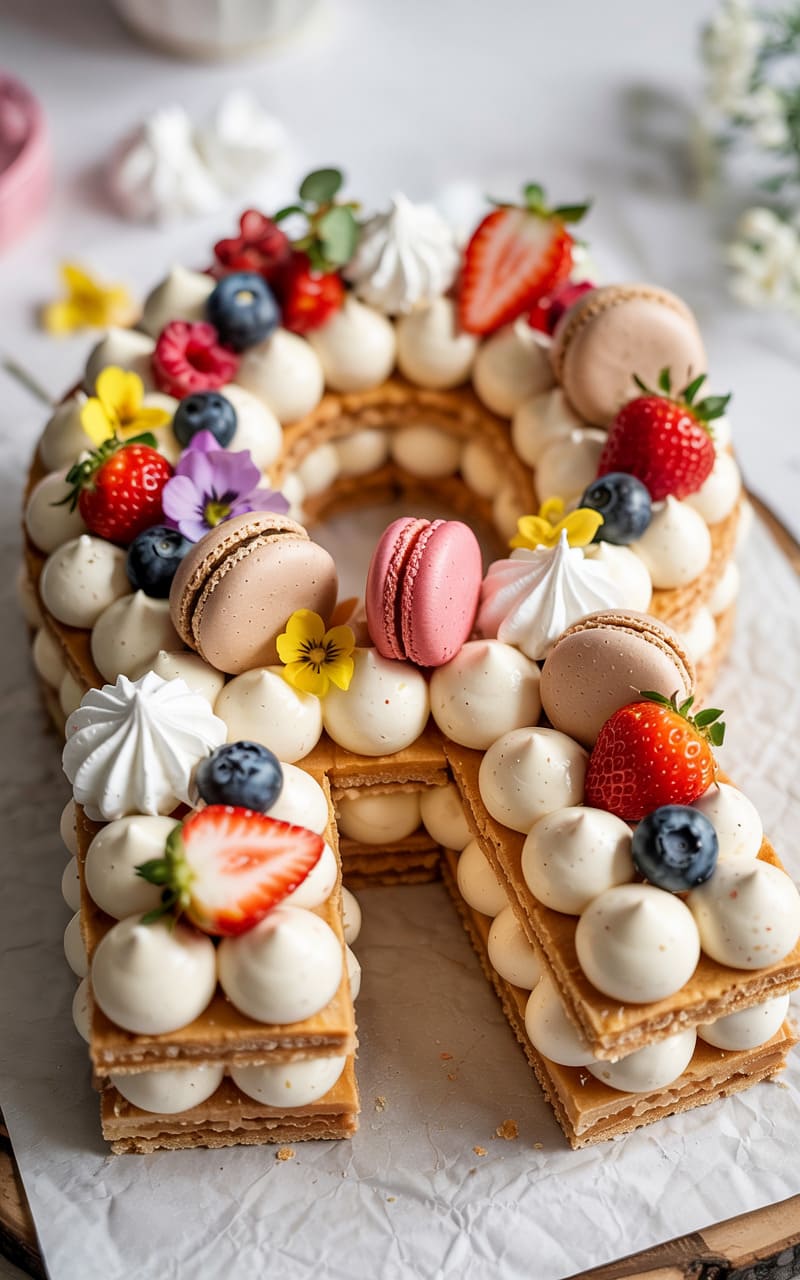
Two layers of shaped cookie or cake base filled with cream/frosting and decorated elaborately with fruits, macarons, flowers, candies.
Ingredients:
- For the Base (Choose One):
- Sturdy Sugar Cookie Dough (enough for two large shapes) OR
- Almond Tart Dough OR
- Dense Cake Batter (like Pound Cake #15, baked thin in sheet pan & cut).
- Templates: Print out desired Number(s) or Letter(s) to fit your board/platter.
- For Filling/Frosting:
- Stabilized Whipped Cream (Recipe #8) OR
- Cream Cheese Frosting (Recipe #3, maybe slightly softer) OR
- Mascarpone Cream (Recipe #36) OR
- Diplomat Cream (Pastry cream lightened with whipped cream). Needs to be pipeable.
- For Decoration (Assortment):
- Fresh Berries (strawberries, raspberries, blueberries)
- Macarons (mini or regular, coordinating colors)
- Fresh Flowers (small, edible/non-toxic like pansies, roses – ensure food safe!)
- Meringue Kisses
- Chocolates, small candies, sprinkles
- Fruit slices (kiwi, citrus)
Instructions:
- Prep Base: Prepare chosen dough/batter. If cookie/tart, chill dough. If cake, bake thin sheet cake.
- Cut Shapes: Roll out chilled dough OR use cooled sheet cake. Place template on top. Carefully cut out TWO identical shapes of each number/letter needed using a sharp knife. Bake cookie/tart shapes according to recipe until lightly golden. Let cool completely on rack. If using cake, handle very carefully.
- Prepare Filling: Make chosen cream/frosting. Place in piping bag fitted with large round tip.
- Assemble Layer 1: Place one cooled base shape on serving board/platter. Pipe dollops (or ropes) of filling evenly over the entire surface.
- Assemble Layer 2: Carefully place the second identical base shape directly on top of the piped filling.
- Decorate Top: Pipe more dollops of filling evenly over the top base shape. Now, arrange your chosen decorations artistically over the piped cream. Mix textures, colors, heights. Fill spaces well.
- Chill: Chill for at least 30-60 minutes to allow cream to set slightly before serving. Best served same day.
Tips for Success:
- Base Choice: Cookie/tart base holds up better and longer. Cake base is softer but more delicate to handle. Base needs to be sturdy.
- Cool Completely: Bases must be totally cool before filling/decorating.
- Piping Technique: Consistent dollops look best and provide even support for top layer and decorations.
- Decoration Variety: Use a good mix of items for visual appeal. Consider color theme.
- Food Safety (Flowers): Only use flowers confirmed non-toxic and ideally grown organically without pesticides if they touch food. Some florists sell edible varieties.
- Serve Soon: Best enjoyed within a few hours of assembly for optimal texture (especially with whipped cream/fruit).
48. Cassata Cake (Italian Ricotta Cake)
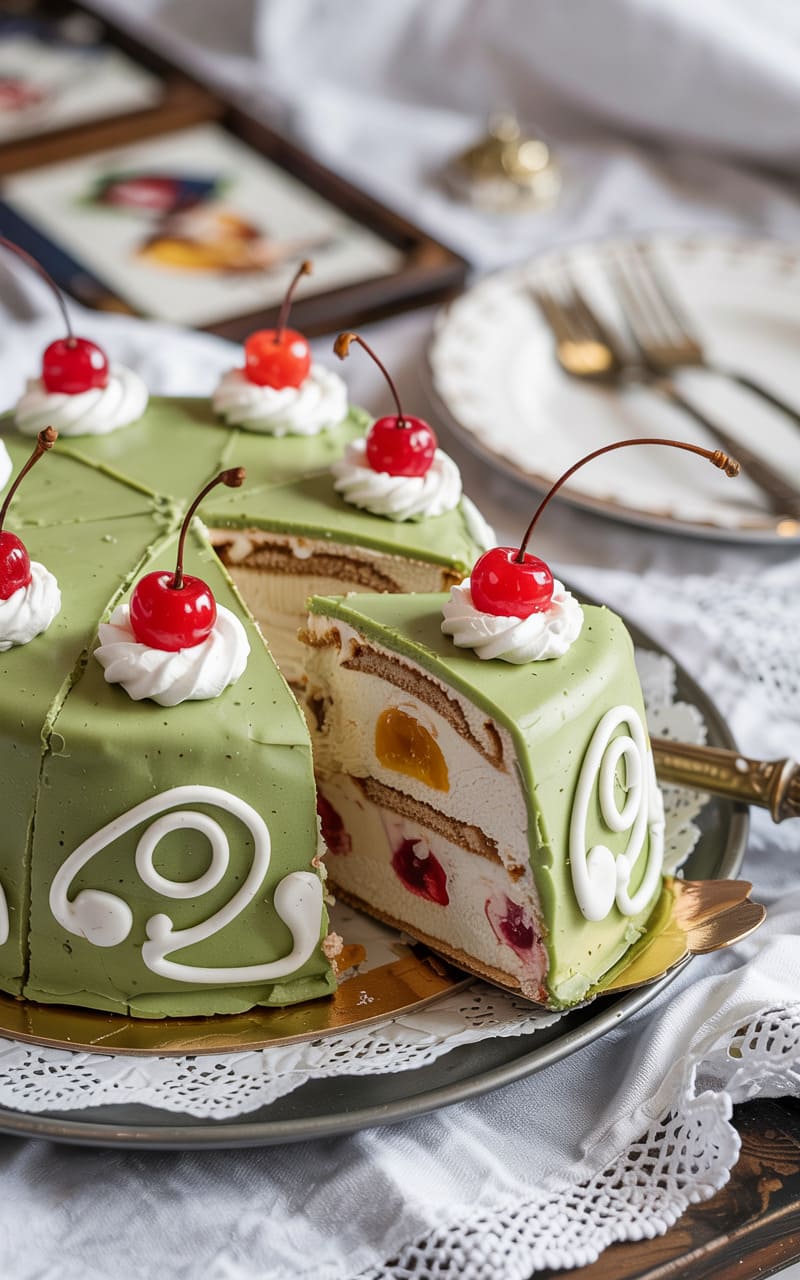
Traditional Sicilian dessert featuring sponge cake soaked in liqueur or syrup, layered with sweetened ricotta filling (often with chocolate chips/candied fruit), and covered in marzipan or fondant.
Ingredients:
- For Sponge Cake:
- Use Angel Food (Recipe #14) base or similar light sponge, baked in round pan.
- For Syrup Soak:
- Simple syrup (1:1 sugar/water) flavored with orange liqueur (Grand Marnier/Cointreau) or rum, OR non-alcoholic orange juice/syrup.
- For Ricotta Filling:
- 2 lbs (about 4 cups) whole milk ricotta cheese, drained very well*
- 1 – 1 ½ cups (120-180g) powdered sugar, sifted (adjust to taste)
- ½ tsp vanilla extract
- Optional: ½ cup mini chocolate chips, ¼ cup chopped candied citrus peel/fruit
- For Covering:
- Green Marzipan OR Fondant (store-bought or homemade)
- Optional: Royal icing for decoration, candied cherries
Instructions:
- *Drain Ricotta: Line sieve with cheesecloth, place ricotta in, set over bowl. Refrigerate overnight or at least 4-6 hours to drain excess whey. This is crucial for thick filling.
- Prep Cake: Slice cooled sponge cake horizontally into 3 layers.
- Make Filling: Beat the well-drained ricotta with sifted powdered sugar and vanilla until smooth and creamy. Stir in optional chocolate chips/candied fruit.
- Assemble (Often in a bowl): Line a dome-shaped bowl (slightly larger than cake layers) tightly with plastic wrap. Place top cake layer inside, cut-side up. Brush generously with syrup/liqueur. Spread about half the ricotta filling over it. Place middle cake layer, brush with syrup, spread remaining filling. Place bottom cake layer, cut-side down, brush with syrup.
- Chill: Fold plastic wrap over. Chill firmly for at least 4-6 hours or overnight.
- Unmold & Cover: Invert chilled cake onto serving plate. Remove bowl and plastic wrap. Roll out marzipan/fondant thinly, large enough to cover cake. Drape over cake, smooth down sides, trim excess.
- Decorate: Traditionally decorated with piped royal icing patterns and candied fruits/cherries.
- Chill & Serve: Chill briefly after decorating. Slice and serve cold.
Tips for Success:
- Drain Ricotta Thoroughly: Absolutely essential step, otherwise filling will be runny.
- Assembly Method: Using a bowl helps shape the dome and compact layers.
- Flavor Profile: Sweet ricotta, citrus/liqueur notes are classic.
- Marzipan/Fondant Handling: Dust surface with powdered sugar to prevent sticking. Work relatively quickly.
- Chill Times: Necessary for setting the filling and structure.
49. Churro Cake with Dulce de Leche Frosting
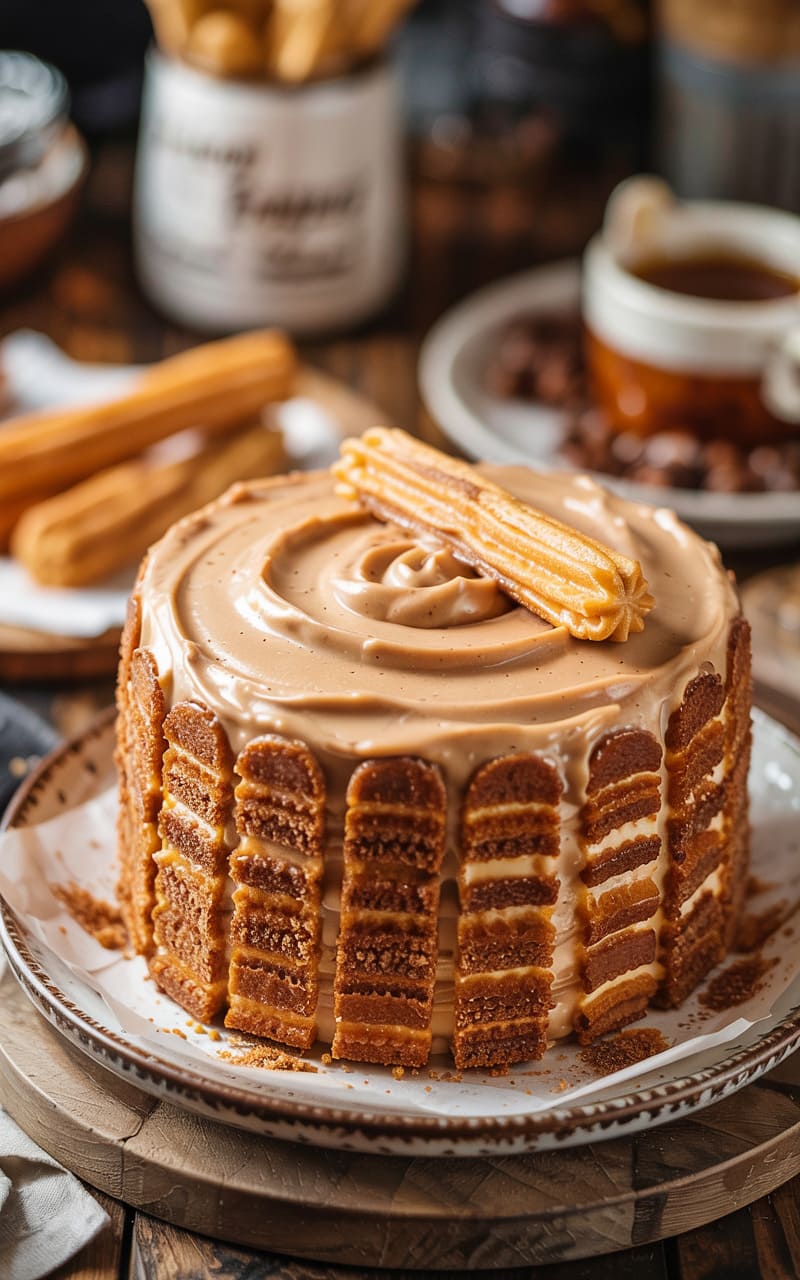
Cinnamon-sugar coated cake layers mimicking churro flavor, filled and frosted with creamy dulce de leche buttercream.
Ingredients:
- For Cinnamon Cake Layers:
- Use Classic Vanilla Cake (Recipe #1) or Yellow Cake (Recipe #4) batter.
- Add 1 ½ – 2 tsp ground cinnamon to dry ingredients.
- For Churro Coating:
- ¼ cup granulated sugar + 1 tbsp ground cinnamon (mix well)
- 2-3 tbsp melted butter
- For Dulce de Leche Buttercream:
- 1 ½ cups (340g) unsalted butter, softened
- 4-5 cups (480-600g) powdered sugar, sifted
- ¾ – 1 cup (250-330g) good quality dulce de leche, room temperature
- 1-2 tbsp milk or heavy cream (if needed)
- 1 tsp vanilla extract
- Pinch of salt
- Garnish: Baked churro pieces (optional), extra cinnamon sugar
Instructions:
- Prep & Bake: Preheat oven 350°F/175°C. Grease/flour two 8 or 9-inch pans. Prepare cinnamon cake batter. Bake 30-35 mins. Cool completely.
- Coat Cake Layers: Once cool, lightly brush the tops (and optionally sides) of each cake layer with melted butter. Immediately sprinkle generously with the cinnamon-sugar mixture, pressing gently to adhere.
- Make Dulce de Leche Buttercream: Beat butter until creamy. Gradually beat in powdered sugar. Beat in dulce de leche, vanilla, salt. Add milk/cream if needed for consistency. Beat until light and fluffy (3-4 mins).
- Assemble & Frost: Place one cinnamon-sugar coated layer (coated side up) on plate. Top with generous layer of frosting. Add second layer (coated side up). Frost top and sides smoothly or with swirls.
- Garnish: Sprinkle extra cinnamon-sugar around base or on top. Decorate with small baked churro pieces if desired.
Tips for Success:
- Coating Application: Apply butter/sugar coating just before assembly for best texture. Ensure layers are fully cool.
- Dulce de Leche Quality: Use a thick, good quality dulce de leche for best flavor and frosting consistency. Room temperature is key.
- Cinnamon Level: Adjust cinnamon in cake and coating to preference.
- Frosting Texture: Dulce de leche makes frosting very creamy. Adjust sugar/liquid for stability if needed.
50. Princess Cake (Prinsesstårta) Slice Cake
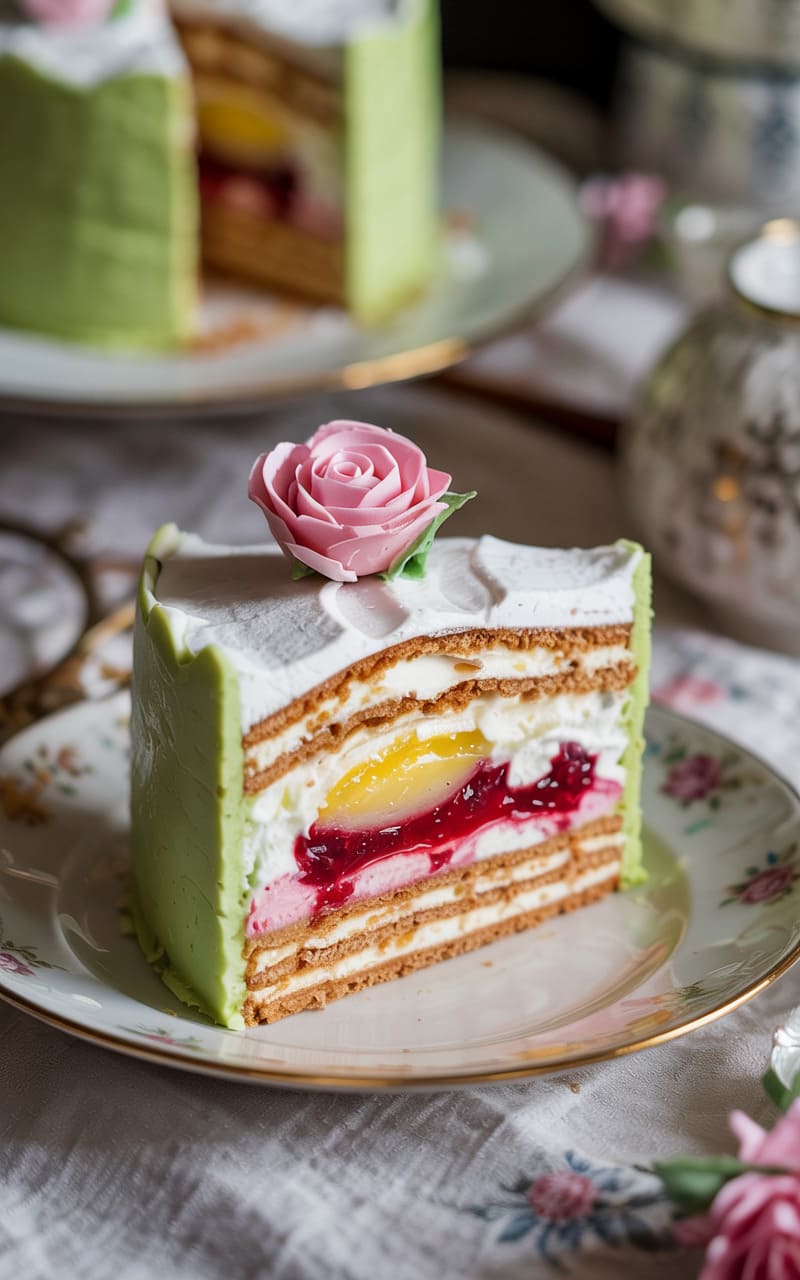
A simplified take on the Swedish classic: layers of sponge, pastry cream, whipped cream, and raspberry jam, all wrapped in green marzipan (served as individual ‘slice’ shapes or one larger log).
Ingredients:
- For Sponge Cake: Thin sheet of light sponge (Genoise or Recipe #14 base baked in sheet pan).
- For Pastry Cream (Crème Pâtissière):
- 1 cup milk, 2 large egg yolks, ¼ cup sugar, 2 tbsp cornstarch, ½ tsp vanilla extract (Cook milk; whisk yolks/sugar/cornstarch; temper yolks with hot milk; cook all in pan whisking until thick; stir in vanilla; chill completely covered).
- For Whipped Cream: 1 ½ cups heavy cream + 2 tbsp powdered sugar + ½ tsp vanilla, whipped to stiff peaks (stabilized optional – Recipe #8).
- Other Fillings: Raspberry jam (good quality).
- Covering: Green marzipan.
- Garnish: Pink marzipan rose (traditional), powdered sugar.
Instructions:
- Prep Components: Bake thin sponge sheet cake & cool. Make pastry cream & chill completely. Make stabilized whipped cream.
- Assemble Log/Slice Shape: Cut cooled sponge cake into long rectangle(s). Spread thin layer of raspberry jam on sponge. Top jam with cooled pastry cream. Fold about half the whipped cream into the remaining pastry cream (Diplomat Cream). Spread this mixture over pastry cream layer. Mound remaining plain whipped cream slightly domed down the center of the log.
- Wrap/Shape: Carefully fold sponge sides up over the domed whipped cream to form a log shape OR cut into individual slice-shaped wedges and carefully shape dome. Chill briefly to firm up.
- Cover with Marzipan: Roll out green marzipan thinly. Carefully drape over the chilled cake log/slices, smoothing down sides. Trim excess.
- Decorate: Place traditional pink marzipan rose on top (or simple swirl). Dust lightly with powdered sugar.
- Chill & Serve: Chill until ready to serve. Slice log cake or serve individual slices cold.
Tips for Success:
- Thin Sponge: Needs to be thin and pliable enough to fold/shape.
- Cold Pastry Cream: Must be fully chilled and thick before using.
- Whipped Cream Dome: The characteristic shape comes from mounded whipped cream in center.
- Marzipan Handling: Keep surface lightly dusted. Smooth carefully to avoid tearing.
- Simplified Approach: This avoids the complex traditional dome build but captures the flavors/layers.
Enjoy baking and celebrating with these diverse and delicious birthday cake recipes! Remember to read through the entire recipe before starting and have fun with the process.
