
Quick Recipe Version (TL;DR)
Quick Ingredients
- 4 cups whole peeled garlic cloves (about 12–15 heads)
- 2 cups distilled white vinegar (5% acidity) or apple cider vinegar
- 1 cup water
- 3 tbsp granulated sugar
- 2 tbsp kosher salt (Diamond Crystal; see note below)
- 2 small bay leaves
- 4 sprigs fresh thyme (or 2 tsp dried)
- 2 sprigs fresh rosemary (optional)
- 2 tsp whole black peppercorns
- 2 tsp yellow mustard seeds (optional)
- 1/2 tsp red pepper flakes (optional, for heat)
- 1 small lemon, very thinly sliced, seeds removed (optional)
Do This
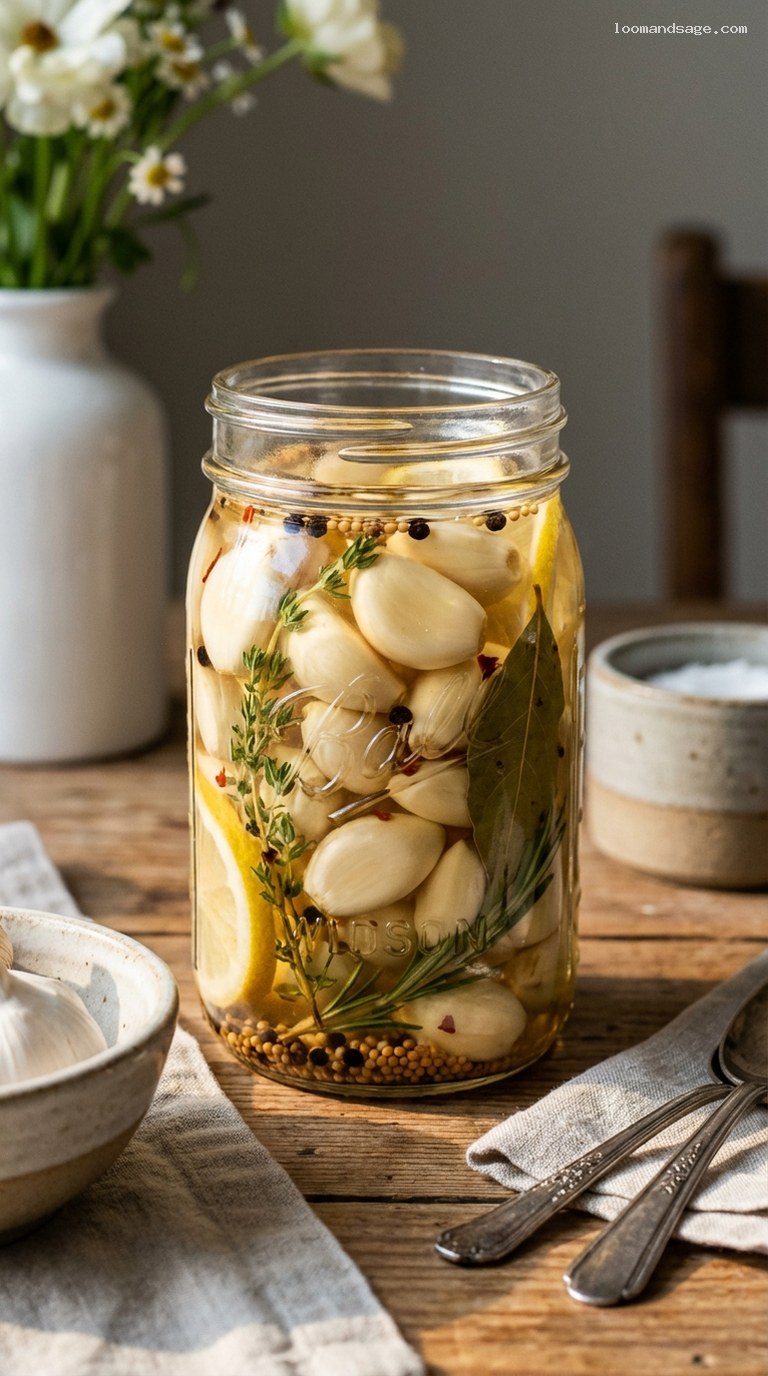
- 1. Peel 4 cups garlic cloves and pack into 2 clean pint jars with herbs, spices, and optional lemon slices, leaving 1/2 inch headspace.
- 2. Optional: Blanch cloves in boiling water for 20 seconds, then cool in ice water and pat dry for a milder bite.
- 3. In a saucepan, bring vinegar, water, sugar, and salt to a gentle simmer (about 185–190°F / 85–88°C) until dissolved.
- 4. Pour hot brine over garlic in jars, covering completely and leaving 1/4–1/2 inch headspace; tap jars to remove air bubbles.
- 5. Seal jars, cool to room temperature, then refrigerate.
- 6. Let cure at least 48 hours, ideally 3–7 days, before snacking for best mellow, sweet-tart flavor.
- 7. Keep refrigerated and use within about 3 months, always using a clean utensil to remove garlic.
Why You’ll Love This Recipe
- Mellow, snackable garlic: crunchy cloves with a gentle, savory, sweet-tart flavor instead of raw harshness.
- Simple pantry ingredients: just garlic, vinegar, sugar, salt, and a few herbs and spices.
- Versatile: perfect for snacking, cheese boards, salads, sandwiches, and pasta or grain bowls.
- Make-ahead friendly: a quick batch gives you jars of flavor that keep for weeks in the fridge.
Grocery List
- Produce: 12–15 heads garlic, 1 small lemon (optional), fresh thyme, fresh rosemary (optional)
- Dairy: None
- Pantry: Distilled white vinegar (or apple cider vinegar, 5% acidity), granulated sugar, kosher salt, bay leaves, whole black peppercorns, yellow mustard seeds (optional), red pepper flakes (optional)
Full Ingredients
Garlic & Aromatics
- 4 cups whole peeled garlic cloves (about 12–15 medium heads of garlic)
- 2 small bay leaves
- 4 sprigs fresh thyme or 2 tsp dried thyme
- 2 sprigs fresh rosemary, about 3–4 inches long (optional)
- 2 tsp whole black peppercorns
- 2 tsp yellow mustard seeds (optional, for a subtle tang and crunch)
- 1/2 tsp red pepper flakes (optional, for gentle heat)
- 1 small lemon, scrubbed and very thinly sliced, seeds removed (optional; for extra brightness and a pretty look)
Sweet-Tart Pickling Brine
- 2 cups distilled white vinegar (5% acidity) or apple cider vinegar (5% acidity)
- 1 cup water
- 3 tbsp granulated sugar
- 2 tbsp kosher salt (Diamond Crystal); if using Morton kosher salt, use 1 tbsp + 1 tsp
Step-by-Step Instructions
Step 1: Prepare the jars and peel the garlic
Wash 2 pint-size glass jars (or one 1-quart jar) and their lids in hot, soapy water, then rinse well. They do not need to be sterilized for this refrigerator recipe, but they should be very clean.
Separate the garlic heads into cloves. Peel until you have 4 cups of whole cloves. For easier peeling, lightly crush each clove with the flat side of a knife or the palm of your hand, just enough to loosen the skin without smashing the clove. Discard any bruised, sprouting, or soft cloves; you want firm, fresh garlic for the best crunch.
Step 2: Optional quick blanch to mellow the bite
This optional step helps tame the sharp raw flavor while keeping the cloves crisp. Bring a small pot of water to a boil. Add the peeled garlic cloves and blanch for just 20 seconds. Immediately drain and transfer the cloves to a bowl of ice water to stop the cooking.
Once cooled, drain thoroughly and pat the cloves very dry with a clean kitchen towel or paper towels. Excess water can dilute the brine, so dry them well.
Step 3: Pack jars with aromatics, lemon, and garlic
Divide the bay leaves, thyme, rosemary (if using), black peppercorns, mustard seeds, and red pepper flakes between the jars. If you are using the lemon, tuck a few thin slices against the sides of each jar so they are visible from the outside.
Pack the peeled garlic cloves snugly into the jars, leaving about 1/2 inch of space at the top (headspace). Do not crush the cloves; just pack them in firmly so they do not float once the brine is added.
Step 4: Make the sweet-tart brine
In a small saucepan, combine the vinegar, water, sugar, and kosher salt. Set over medium heat and stir until the sugar and salt dissolve.
Bring the mixture to a gentle simmer, about 185–190°F (85–88°C). There is no need to boil vigorously; you only want the mixture hot enough to dissolve everything and heat through. Once it reaches a light simmer and the sugar and salt are fully dissolved, remove from the heat.
Step 5: Pour the brine over the garlic
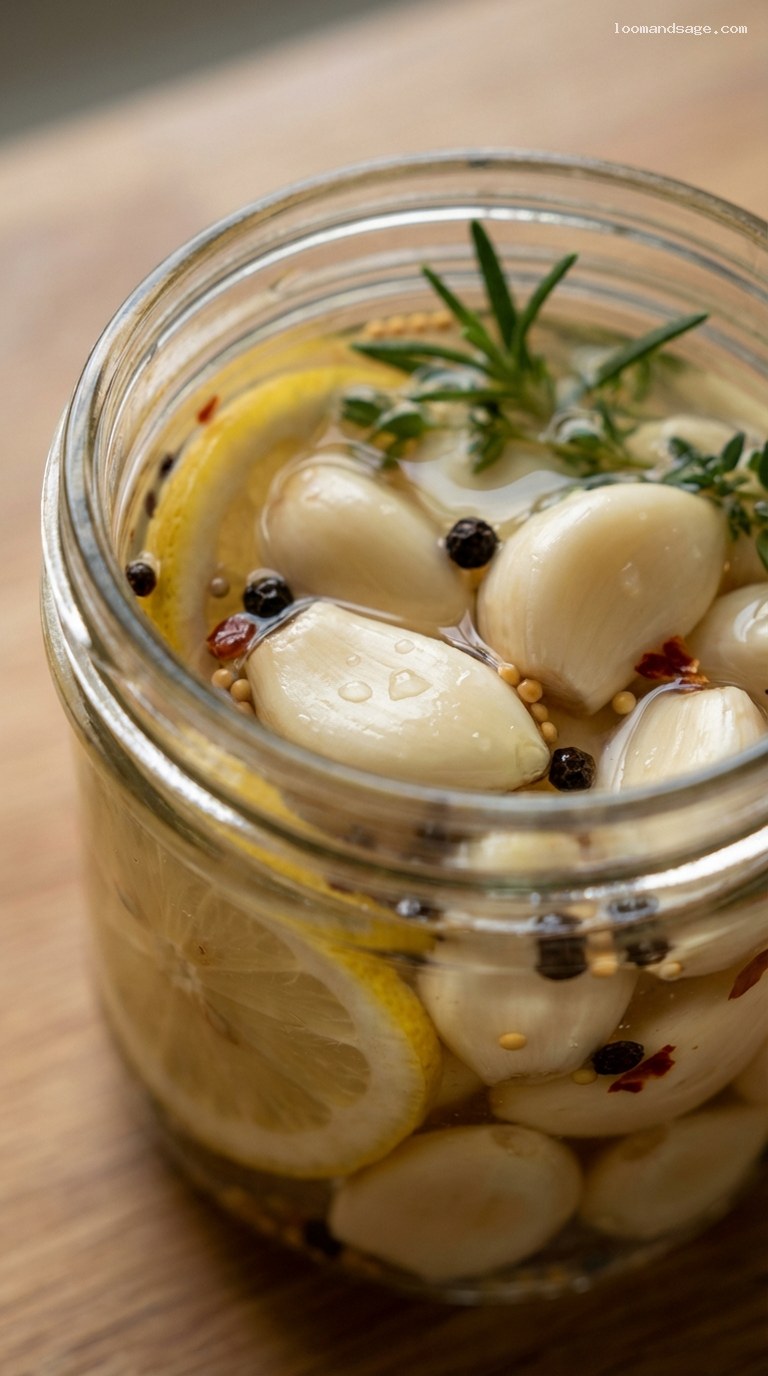
Place the packed jars on a folded kitchen towel (this helps protect the glass from the heat). Carefully pour the hot brine over the garlic and aromatics, dividing it evenly between the jars. A small funnel makes this easier, but it is not required.
Use a clean butter knife or chopstick to gently slide down the inside of the jars and release any trapped air bubbles. Add more brine if needed so the garlic is completely submerged, still leaving about 1/4–1/2 inch headspace. If you run slightly short on brine, top up with a bit more vinegar rather than water to keep the acidity high.
Wipe the rims of the jars with a clean, damp cloth and screw on the lids until fingertip tight.
Step 6: Cool, chill, and let the flavors develop
Let the jars sit at room temperature until they have cooled to room temperature, about 1 hour. Do not refrigerate hot jars straight from the stove to avoid thermal shock and to let the flavors begin to mingle.
Once cooled, transfer the jars to the refrigerator. The garlic will begin to taste good after about 24 hours, but for a truly mellow, sweet-tart, snackable clove, allow at least 48–72 hours. The flavor and color will continue to improve over the first week.
Step 7: Serve, snack, and enjoy
When you are ready to enjoy, fish out a few cloves with a clean fork or spoon. Serve them straight from the jar for snacking, add to charcuterie and cheese boards, or slice and toss into salads, pasta, grain bowls, or sandwiches. The cloves will be pleasantly crunchy, gently garlicky, and tangy-sweet.
Always return the jar to the refrigerator promptly, and keep the cloves covered with brine between uses.
Pro Tips
- Use 5% acidity vinegar: Check the label on your vinegar; it should list 5% acidity. Do not dilute the vinegar more than the ratio given here to keep the pickles safely acidic for refrigerator storage.
- Choose very fresh garlic: Older garlic can taste sharp and become soft. Look for firm heads with tight skin and no green sprouts.
- Keep everything submerged: Any garlic that sticks up above the brine may discolor or spoil more quickly. If needed, you can place a small piece of parchment or a food-safe fermentation weight on top to keep cloves submerged.
- Adjust sweetness to taste: For a less sweet pickle, reduce the sugar to 2 tbsp. For more of a sweet-and-sour vibe, increase to 4 tbsp.
- Do not can this recipe as written: This is designed as a refrigerator pickle, not a shelf-stable canned product. For pantry storage, use a tested canning recipe from a reliable source.
Variations
- Spicy chili-garlic: Add 1–2 sliced fresh red chilies or 1 tsp extra red pepper flakes per pint jar. Use apple cider vinegar for a fruitier base and increase sugar by 1 tbsp for a sweet-heat combo.
- Mediterranean lemon-herb: Use apple cider vinegar, add extra lemon slices, a few strips of lemon zest, and swap thyme/rosemary for oregano and a bay leaf. Delicious with grilled chicken, fish, or mezze platters.
- Smoky paprika and thyme: Stir 1 tsp smoked paprika into the brine and add extra thyme sprigs to each jar. This version is especially good chopped into roasted vegetables or potato salad.
Storage & Make-Ahead
These pickled garlic cloves are meant for refrigerator storage only. Once cooled, keep the jars tightly sealed in the refrigerator for up to 3 months. For best flavor and crunch, enjoy them within the first 6–8 weeks.
Always use a clean utensil to remove garlic from the jar to avoid introducing bacteria. Make sure the cloves stay fully submerged in the brine. A bit of natural cloudiness in the brine from the garlic and herbs is normal, especially over time, but discard the batch if you ever see mold, significant fizzing, or smell anything unpleasant.
Because the flavor improves as it sits, this recipe is perfect to make several days or even a week before you plan to serve it on a snack board or at a gathering.
Nutrition (per serving)
Approximate values per serving (about 5–6 cloves, brine drained): 20 calories; 0 g fat; 4 g carbohydrates; 1 g sugar; 1 g protein; 0 g fiber; about 200–250 mg sodium. Actual nutrition will vary depending on the exact size of cloves and how much brine you consume.
