
Quick Recipe Version (TL;DR)
Quick Ingredients
- 2 lb (900 g) turnips, peeled and cut into sticks
- 1 small beet, peeled and sliced into wedges
- 4 large garlic cloves, halved
- 2 1/2 cups (600 ml) water
- 1 1/2 cups (360 ml) distilled white vinegar (5% acidity)
- 3 tbsp kosher salt (or 2 tbsp fine sea salt)
- 1 tsp sugar (optional but recommended)
- 1 tsp whole black peppercorns (optional)
- 1 bay leaf (optional)
Do This
- 1. Wash two 1-quart (950 ml) jars and lids very well in hot, soapy water; rinse and let air-dry.
- 2. Peel turnips and beet; cut turnips into thick matchsticks, beet into small wedges; peel and halve garlic cloves.
- 3. Tightly pack jars with turnip sticks, slipping beet pieces, garlic, and peppercorns between layers; leave about 1/2 inch space at top.
- 4. In a small saucepan, combine water, vinegar, salt, sugar, and bay leaf; bring just to a boil, stirring to dissolve salt and sugar.
- 5. Carefully pour hot brine over vegetables to fully cover, tapping jars to release air bubbles; discard bay leaf if you like.
- 6. Wipe rims, close lids finger-tight, cool to room temperature, then refrigerate.
- 7. Let pickle at least 24 hours (best after 3–5 days). Serve chilled with Middle Eastern sandwiches, grilled meats, or mezze.
Why You’ll Love This Recipe
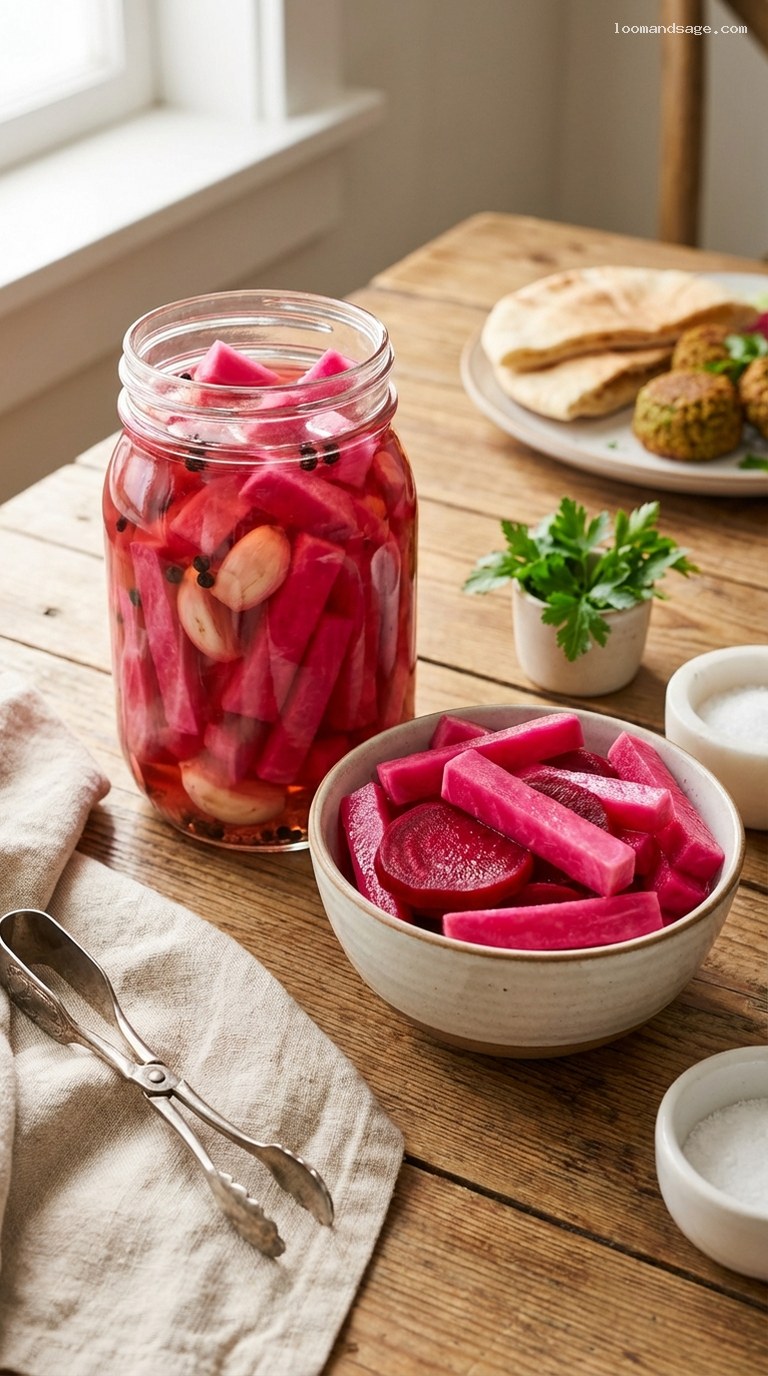
- Classic Middle Eastern flavor and color: crisp turnips tinted a vivid pink from beet and perfumed with garlic.
- Very easy, no canning skills required – just a simple vinegar brine and clean jars.
- Bright, tangy crunch that instantly upgrades shawarma, falafel, grilled meats, and mezze plates.
- Keeps well in the fridge for weeks, so you can make a batch once and enjoy it again and again.
Grocery List
- Produce: Turnips (about 2 lb), 1 small beet, garlic, optional fresh red chili or jalapeño.
- Dairy: None.
- Pantry: Distilled white vinegar, kosher or sea salt, sugar, whole black peppercorns, bay leaf, optional coriander seeds.
Full Ingredients
Vegetables & Aromatics
- 2 lb (about 900 g) small to medium turnips, peeled
- 1 small beet (about 2–3 oz / 60–85 g), peeled
- 4 large garlic cloves, peeled and halved lengthwise
- 1 small red chili or jalapeño, sliced (optional, for heat)
Pickling Brine
- 2 1/2 cups (600 ml) water
- 1 1/2 cups (360 ml) distilled white vinegar, 5% acidity
- 3 tbsp kosher salt (Diamond Crystal)
- If using Morton kosher salt: use 2 1/2 tbsp
- If using fine sea/table salt: use 2 tbsp
- 1 tsp sugar (optional, softens the sharpness of the vinegar)
- 1 tsp whole black peppercorns (optional)
- 1 bay leaf (optional)
- 1/2 tsp whole coriander seeds (optional, for extra aroma)
Equipment
- 2 clean glass jars, each 1-quart (950 ml) capacity, with tight-fitting lids
- Small saucepan (1–2 quart size)
- Cutting board and chef’s knife
- Measuring cups and spoons
- Heatproof jug or ladle (for pouring brine)

Step-by-Step Instructions
Step 1: Prepare and Clean Your Jars
Wash two 1-quart (950 ml) glass jars and their lids in very hot, soapy water. Rinse thoroughly so there is no soap film left. For extra peace of mind, you can pour freshly boiled water into and over the jars, then pour it out carefully. Let the jars air-dry upside down on a clean towel while you prepare the vegetables.
These are refrigerator pickles, so full canning sterilization is not required, but very clean jars help your pickles stay crisp and fresh longer.
Step 2: Peel and Cut the Turnips and Beet
Peel the turnips and trim off the root and stem ends. Cut each turnip into thick matchsticks: first slice into 1/2-inch (1.25 cm) rounds, then cut the rounds into 1/2-inch-wide sticks about 2–3 inches (5–7.5 cm) long. Aim for even thickness so they pickle at the same rate and stay crunchy.
Peel the beet and cut it into small wedges or sticks about the same length as the turnips, but you only need enough to slip a few pieces into each jar. The beet’s job is to give that iconic rosy-pink color and a subtle earthiness, so do not overload the jar or the beet flavor can become strong.
Step 3: Prep the Garlic and Optional Chili
Peel the garlic cloves and slice each one in half lengthwise. This exposes more surface area so the garlic flavor infuses the brine. If you love garlic, you can add an extra clove or two.
If using a fresh red chili or jalapeño, rinse it, remove the stem, and slice it into thin rings. For a milder heat, remove the seeds and inner membranes; for a fiery batch, leave them in.
Step 4: Pack the Jars with Vegetables
Divide the turnip sticks between the two jars, standing them upright and packing them in fairly tightly. Slide a few beet pieces along the sides and in the center of each jar so their color can bleed into the brine. Nestle in the garlic halves and chili slices (if using) as you go.
Leave about 1/2 inch (1.25 cm) of headspace at the top of each jar; this room is important so the brine can fully surround the vegetables without overflowing, and to allow for any slight expansion.
Step 5: Make the Pickling Brine
In a small saucepan, combine the water, distilled white vinegar, kosher salt, sugar (if using), black peppercorns, bay leaf, and coriander seeds. Place over medium-high heat and bring just to a boil, stirring occasionally to make sure the salt and sugar fully dissolve.
As soon as the brine reaches a boil and the salt is dissolved, turn off the heat. You want the brine hot so it penetrates the vegetables quickly but not boiling for a long time, which would reduce it too much and make it overly salty.
Step 6: Pour the Brine Over the Vegetables
Carefully pour the hot brine into each packed jar, using a heatproof jug or ladle. Make sure to distribute the peppercorns and any spices between the jars. Pour until the vegetables are fully submerged, still leaving about 1/4–1/2 inch (0.5–1.25 cm) of headspace at the top.
Use a clean butter knife or chopstick to gently run around the inside edges of the jar to release any trapped air bubbles. If needed, top up with a little extra hot water or vinegar so everything is completely covered by liquid. Discard the bay leaf if you prefer a milder flavor.
Step 7: Seal, Chill, and Let Them Pickle
Wipe the rims of the jars with a clean, damp cloth, then screw on the lids until they are fingertip-tight. Let the jars cool on the counter until they reach room temperature, then transfer them to the refrigerator.
The turnips will begin to blush pink within a few hours. They are mildly pickled and ready to taste after 24 hours, but the flavor and color are best after 3–5 days. Keep refrigerated and enjoy within 4–6 weeks for optimal crunch and brightness.
Pro Tips
- Choose firm turnips: Small to medium turnips with smooth skin and firm flesh stay the crispiest when pickled.
- Do not overdo the beet: A little beet goes a long way; too much can make the brine earthy and dark instead of a bright pink.
- Salt type matters: Different salts have different densities. If your brine tastes bland, add another 1/2–1 tsp of salt while it is still hot.
- Let the brine cool slightly if you want extra crunch: Pouring brine that is very hot but not boiling (about 160–180°F / 70–80°C) helps maintain a firmer texture.
- Keep everything submerged: If any turnip sticks float, tuck a small beet slice or a clean cabbage leaf on top to weigh them down.
Variations
- Spicy Pickled Turnips: Add extra sliced chilies, a pinch of red pepper flakes, or a small dried chili to each jar for a gradual, building heat.
- Herb-Infused: Tuck a sprig of fresh thyme, oregano, or a few parsley stems into each jar for a subtle herbal note that pairs well with grilled meats and kebabs.
- Mixed Root Pickle: Replace up to one-third of the turnips with carrots or kohlrabi sticks for a colorful, mixed-vegetable version.
Storage & Make-Ahead
These are refrigerator pickles and are not shelf-stable. Once cooled, keep the jars tightly sealed in the refrigerator. The pickles taste good after 24 hours, better after 3–5 days, and hold their flavor and crunch for about 4–6 weeks. Always use a clean utensil to remove pickles from the jar (no fingers) to avoid introducing bacteria that could shorten their life or cloud the brine. This recipe is excellent for making ahead of gatherings: prepare a batch up to 1–2 weeks in advance so the flavors are fully developed when you serve them with falafel, shawarma, grilled chicken, or as part of a mezze spread.
Nutrition (per serving)
Approximate values for one 1/2-cup (about 95 g) serving: 25 calories; 0 g fat; 0 g saturated fat; 6 g carbohydrates; 1 g fiber; 3 g sugar; 1 g protein; about 500–650 mg sodium (varies with exact salt used and how much brine you consume). These pickles are low in calories but relatively high in sodium, so enjoy them as a flavorful accent alongside a balanced meal.
