
Quick Recipe Version (TL;DR)
Quick Ingredients
- 500 g (about 2 1/2 cups) dried chickpeas
- 1 tsp baking soda (for soaking, optional)
- 3 medium onions, thinly sliced
- 3–4 garlic cloves, sliced (optional)
- 120 ml (1/2 cup) extra-virgin olive oil
- 3–4 bay leaves
- 1 1/2–2 tsp fine sea salt, to taste
- 1 tsp freshly ground black pepper
- 1.2–1.4 L (5–6 cups) water or light vegetable broth
- 2 tbsp fresh lemon juice, plus lemon wedges to serve
- Chopped fresh parsley, extra olive oil, optional feta (to serve)
Do This
- 1) Rinse chickpeas, soak 12 hours in plenty of water with baking soda. Drain and rinse very well.
- 2) Heat oven to 150°C / 300°F. Lightly oil a heavy lidded pot or baking dish (Dutch oven or earthenware).
- 3) Add onions, chickpeas, garlic, bay leaves, salt, pepper, and olive oil. Pour in enough water/broth to cover by about 2 cm (3/4 inch).
- 4) Cover tightly with lid (and foil if needed to seal). Bake 6–7 hours, until chickpeas are very soft and creamy.
- 5) Uncover, stir in lemon juice, and bake 20–30 minutes more to thicken and lightly brown the top if desired.
- 6) Adjust seasoning with more salt, pepper, and lemon. The chickpeas should be tender, brothy, and silky with olive oil.
- 7) Serve warm with extra olive oil, parsley, lemon wedges, and optional crumbled feta and crusty bread.
Why You’ll Love This Recipe
- Classic Cycladic comfort food: simple ingredients transformed by slow, gentle cooking.
- Hands-off: the oven does almost all the work while you sleep or go about your day.
- Deeply flavored and naturally creamy without any dairy or thickening agents.
- Perfect for batch cooking: keeps well, reheats beautifully, and is even better the next day.
Grocery List
- Produce: Dried chickpeas, onions, garlic, lemons, fresh parsley (or other soft herbs).
- Dairy: Feta cheese (optional, for serving).
- Pantry: Extra-virgin olive oil, bay leaves, sea salt, black pepper, vegetable broth (or bouillon), baking soda (optional).
Full Ingredients
Main Casserole
- 500 g dried chickpeas (about 2 1/2 cups), sorted for stones
- 1 tsp baking soda (optional, for soaking to help soften older chickpeas)
- 3 medium yellow onions (about 600 g), thinly sliced
- 3–4 garlic cloves, thinly sliced (optional but traditional in many homes)
- 120 ml (1/2 cup) extra-virgin olive oil, plus more for serving
- 3–4 dried bay leaves
- 1 1/2–2 tsp fine sea salt, or to taste
- 1 tsp freshly ground black pepper (plus extra for serving)
- 1.2–1.4 L (5–6 cups) water or light vegetable broth, enough to cover chickpeas by about 2 cm (3/4 inch)
To Finish & Serve
- 2 tbsp freshly squeezed lemon juice, or more to taste
- Lemon wedges, for serving
- 2–3 tbsp chopped fresh flat-leaf parsley (or dill/oregano), for garnish
- Extra-virgin olive oil, for drizzling
- Crumbled feta cheese (optional but delicious)
- Crusty bread or warm pita, for soaking up the juices
Step-by-Step Instructions
Step 1: Soak the chickpeas
Rinse the dried chickpeas under cool running water, removing any stones or debris. Place them in a large bowl and add enough cold water to cover by at least 7–8 cm (3 inches) — they will expand significantly. Stir in the baking soda, if using. Let the chickpeas soak at room temperature for at least 12 hours or overnight.
After soaking, drain the chickpeas and rinse them very thoroughly under cold water to remove any remaining baking soda and starch. Proper rinsing helps prevent off flavors and ensures a cleaner, sweeter taste.
Step 2: Preheat the oven and prepare the baking dish
About 20 minutes before you want to start baking, preheat your oven to 150°C / 300°F.
Choose a heavy, oven-safe pot with a tight-fitting lid, such as a Dutch oven or a deep ceramic or clay casserole (traditionally used in the Cyclades). The capacity should be at least 3.5–4 liters (3.5–4 quarts) to give the chickpeas room to bubble gently. Lightly oil the inside of the pot with a bit of olive oil to help prevent sticking.
Step 3: Layer the onions and chickpeas with seasonings
Spread the sliced onions evenly over the bottom of the pot. They will melt down and sweeten as they cook, forming a flavorful base for the dish. Scatter the sliced garlic (if using) over the onions.
Add the drained chickpeas on top of the onions. Tuck the bay leaves down into the beans. Sprinkle the salt and black pepper evenly over everything.
Pour the 120 ml (1/2 cup) of olive oil over the chickpeas. Add enough water or light vegetable broth to cover the chickpeas by about 2 cm (3/4 inch), usually between 5 and 6 cups depending on the shape of your pot. Gently stir once to distribute the seasonings without disturbing the onion base too much.
Step 4: Seal the pot for slow, gentle baking
Cover the pot tightly with its lid. If the lid is not very tight, cover the pot first with a layer of parchment paper or aluminum foil, then place the lid on top and crimp the edges to seal. The goal is to trap moisture so the chickpeas can slowly become tender and creamy without drying out.
This well-sealed, low-and-slow environment is what gives traditional revithada its characteristic silky texture and deep flavor.
Step 5: Bake slowly until the chickpeas are creamy
Place the covered pot in the preheated oven and bake at 150°C / 300°F for 6–7 hours. Do not be tempted to raise the temperature; the gentle heat is important for keeping the chickpeas intact yet creamy.
After about 5 hours, carefully open the lid and check the liquid level. The chickpeas should still be mostly submerged in a thick, lightly golden broth. If they look dry or the liquid is barely at the surface, add a little hot water (about 120 ml / 1/2 cup at a time) to keep them just barely covered. Taste a chickpea: it should be quite soft but may still have a tiny bit of bite at this stage.
Step 6: Finish uncovered to thicken and deepen flavor
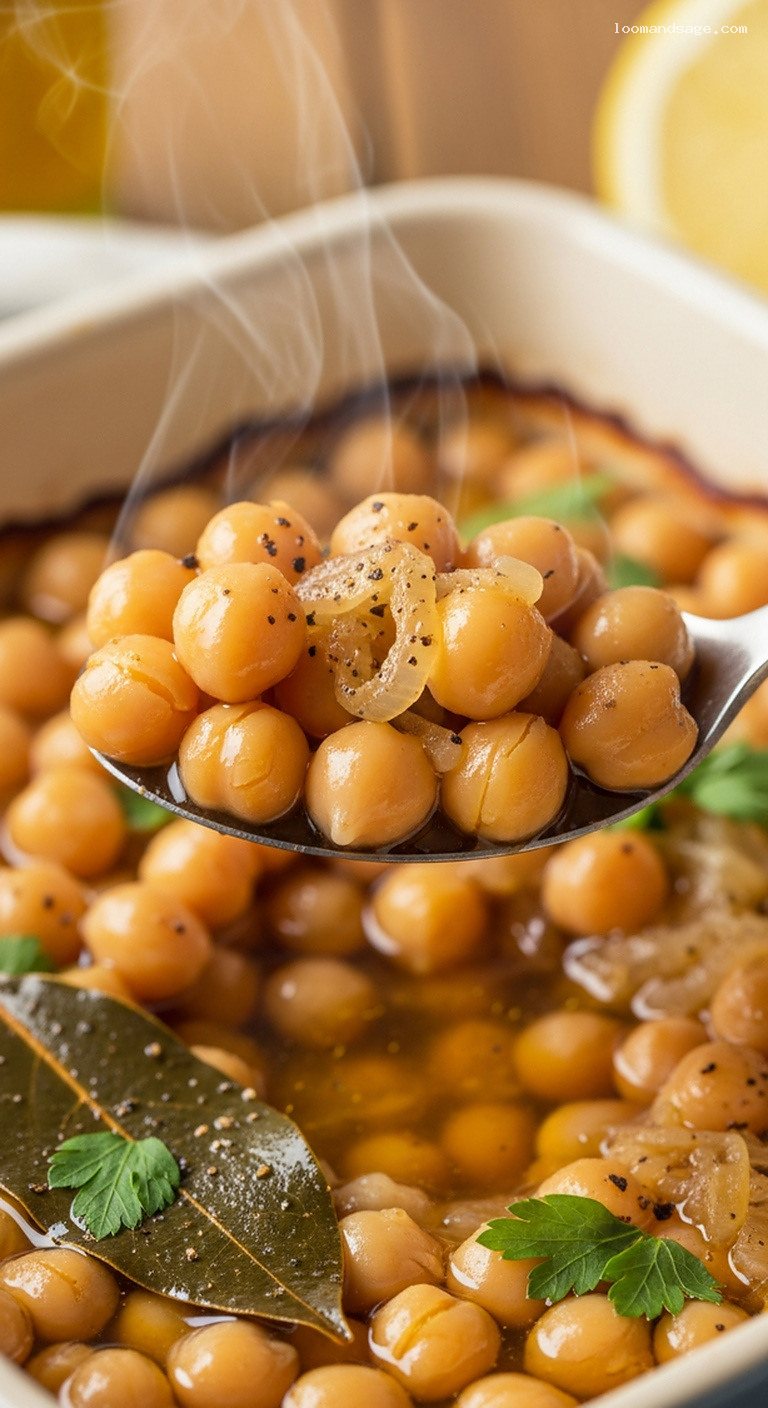
When the chickpeas are very tender and most of the liquid has turned into a rich, slightly thickened broth, remove the lid. Stir in the 2 tbsp lemon juice and taste the broth. Add more salt, pepper, or lemon juice if needed.
Return the pot to the oven, uncovered, and bake for an additional 20–30 minutes. This allows the top layer to gently caramelize and the juices to thicken into a luscious, olive-oil-enriched sauce. If you prefer them saucier, bake on the shorter side; for a thicker, almost stew-like consistency, leave them in a bit longer, watching so they do not dry out.
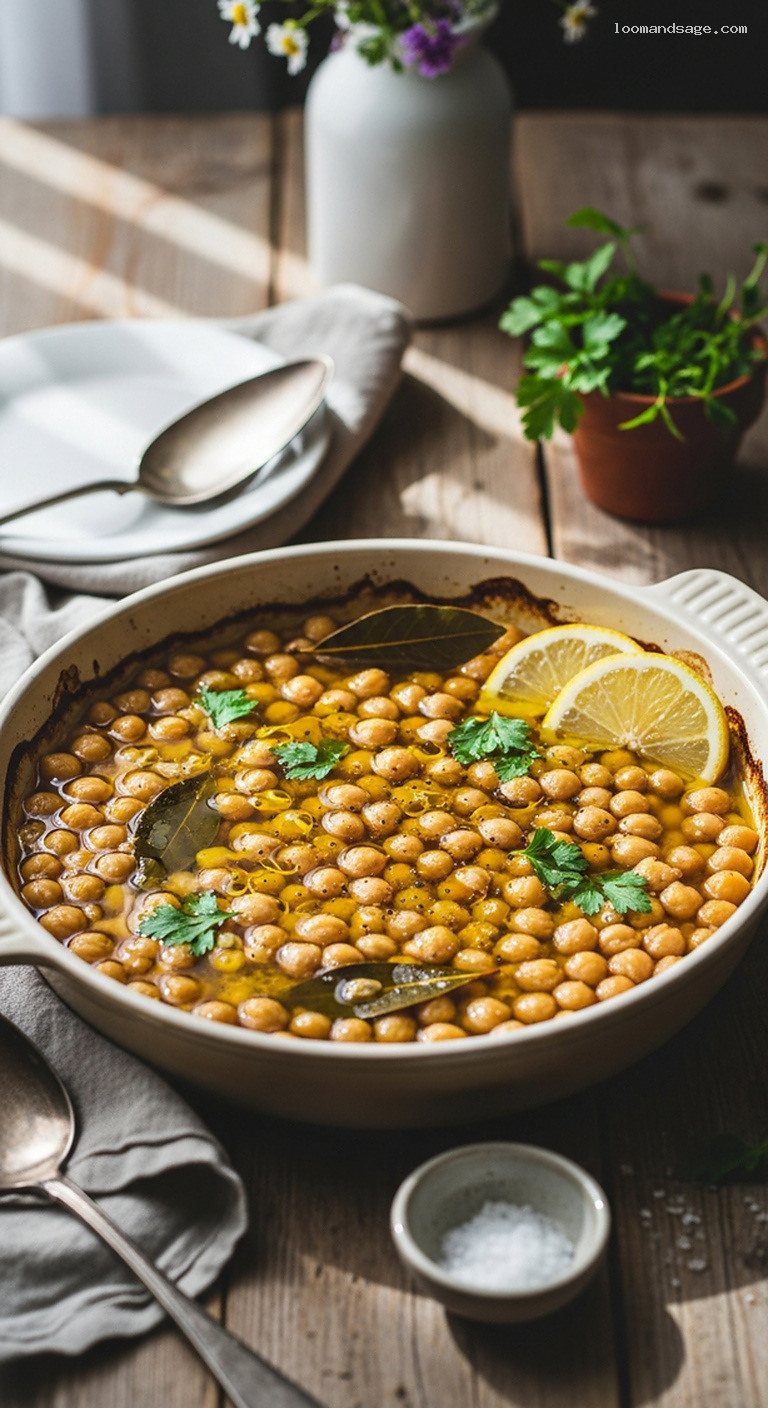
Step 7: Rest, garnish, and serve island-style
Remove the pot from the oven and let the revithada rest for at least 10–15 minutes. This brief rest helps the flavors settle and the sauce thicken slightly more. The chickpeas should be very soft, with some starting to break down and enrich the broth, and the onions should be nearly invisible, melted into the sauce.
Just before serving, drizzle generously with extra-virgin olive oil and sprinkle with chopped fresh parsley. Serve hot, warm, or even at room temperature, with lemon wedges on the side for squeezing at the table. Offer crumbled feta, extra black pepper, and crusty bread to soak up every drop of the fragrant, peppery, lemony olive oil broth.
Pro Tips
- Use good olive oil: Because this dish is so simple, the flavor of the olive oil really shines. A fruity, good-quality extra-virgin olive oil makes a big difference.
- Mind the water level: Different pots and ovens evaporate at different rates. Keep the chickpeas just barely submerged during most of the cooking for the creamiest texture and richest broth.
- Old chickpeas need more time: If your chickpeas are older, they can take longer to soften. Add an extra hour of baking if needed and check tenderness before moving to the uncovered stage.
- For extra creaminess: Near the end of cooking, lightly mash a ladleful of chickpeas against the side of the pot and stir them back in to naturally thicken the sauce.
- Overnight method: To wake up to revithada, put the pot into a 120–130°C / 250–265°F oven just before bed and bake 8–9 hours, checking that your pot and oven are safe for such long cooking.
Variations
- Lemony herb revithada: Add a strip of lemon zest and a sprig of fresh rosemary or thyme to the pot along with the bay leaves. Remove the herbs before serving and finish with extra lemon juice and plenty of fresh parsley or dill.
- Tomato-kissed version: Stir 2–3 tbsp tomato paste into the water or broth before pouring it over the chickpeas. This adds a gentle sweetness and a deeper color without turning it into a tomato stew.
- Spiced revithada: For a subtle warmth, add 1/2 tsp smoked paprika and a pinch of chili flakes with the salt and pepper. Keep the spices light so the olive oil and chickpeas remain the stars.
Storage & Make-Ahead
Revithada is an ideal make-ahead dish and often tastes even better the next day. Allow leftovers to cool completely, then transfer to an airtight container. Refrigerate for up to 4–5 days. Reheat gently on the stovetop over low heat, adding a splash of water if the chickpeas have absorbed too much liquid, and finish with a fresh drizzle of olive oil and a squeeze of lemon.
For longer storage, freeze in portioned containers for up to 3 months. Thaw overnight in the refrigerator before reheating. You can also soak the chickpeas up to 24 hours ahead, draining and refrigerating them until you are ready to assemble and bake.
Nutrition (per serving)
Approximate values for 1 of 6 servings (without feta): about 360 kcal, 13 g protein, 45 g carbohydrates, 10 g dietary fiber, 16 g fat (mostly from heart-healthy olive oil), 2 g saturated fat, 0 mg cholesterol, and 480 mg sodium (will vary depending on salt used and broth). Adding feta will increase protein, fat, and sodium.
