
Quick Recipe Version (TL;DR)
Quick Ingredients
- 5 cups (600 g) all-purpose flour
- 5 tsp baking powder + 1 tsp fine salt
- 2 cups (4 sticks / 454 g) unsalted butter, room temperature (for cake)
- 4 cups (800 g) granulated sugar
- 8 large eggs, room temperature
- 2 tbsp pure vanilla extract
- 2 1/2 cups (600 ml) whole milk, room temperature
- Gel food coloring: red, orange, yellow, green, blue, purple
- 2 1/2 cups (5 sticks / 565 g) unsalted butter, room temperature (for frosting)
- 10 cups (1.2 kg) powdered sugar
- 1/2–3/4 cup (120–180 ml) heavy cream or whole milk
- 1–2 tsp vanilla extract + pinch fine salt
- Rainbow sprinkles, for decorating (optional)
Do This
- 1. Preheat oven to 350°F (175°C). Grease and line six 8-inch round pans (or bake in batches).
- 2. Make vanilla cake batter: cream butter and sugar, beat in eggs and vanilla, then alternate adding dry ingredients with milk.
- 3. Divide batter evenly into 6 bowls; tint each bowl red, orange, yellow, green, blue, and purple with gel food coloring.
- 4. Bake layers at 350°F (175°C) for about 18 minutes, until a toothpick comes out clean. Cool completely.
- 5. Beat butter for frosting, then gradually add powdered sugar, vanilla, salt, and enough cream for a smooth, fluffy buttercream.
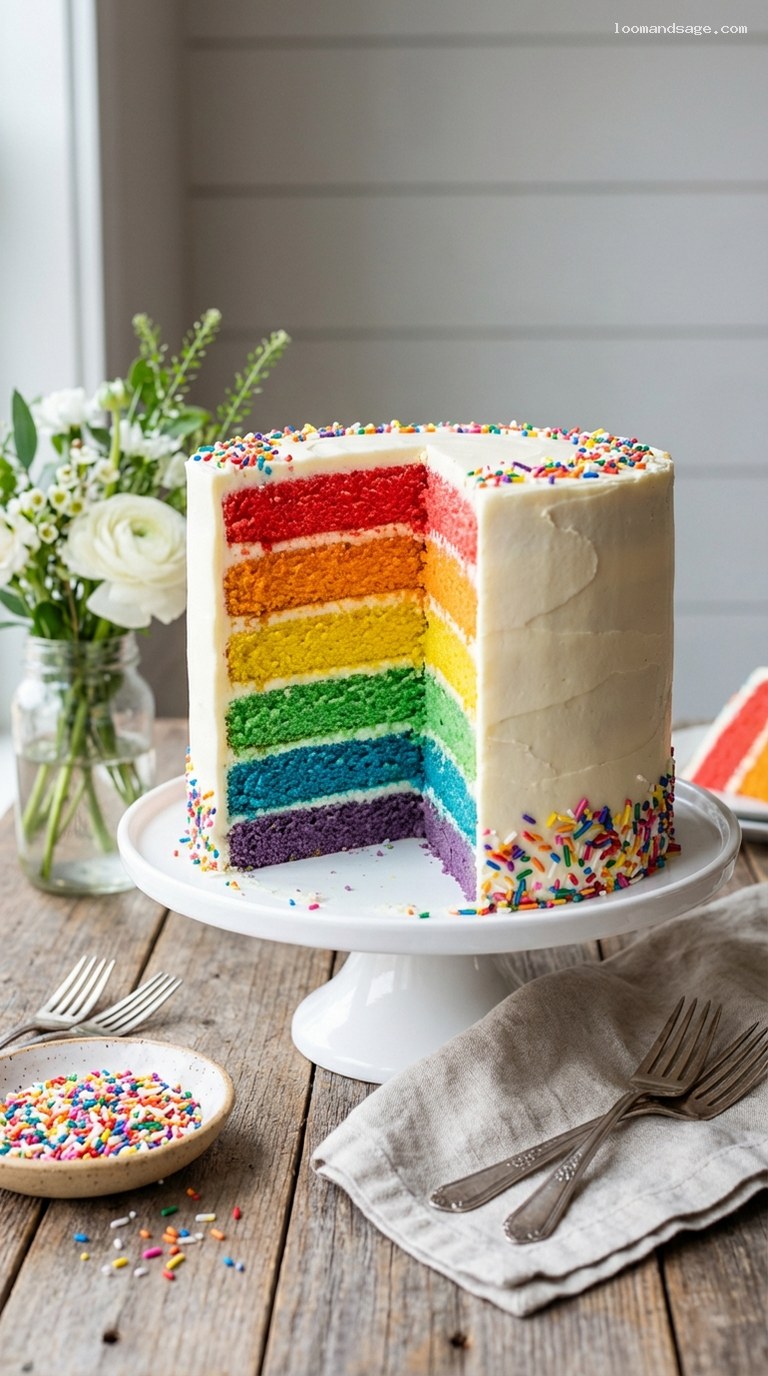
- 6. Level cooled layers, then stack in rainbow order with buttercream between each, crumb coat, chill, then frost smoothly in white and decorate with rainbow sprinkles.
Why You’ll Love This Recipe
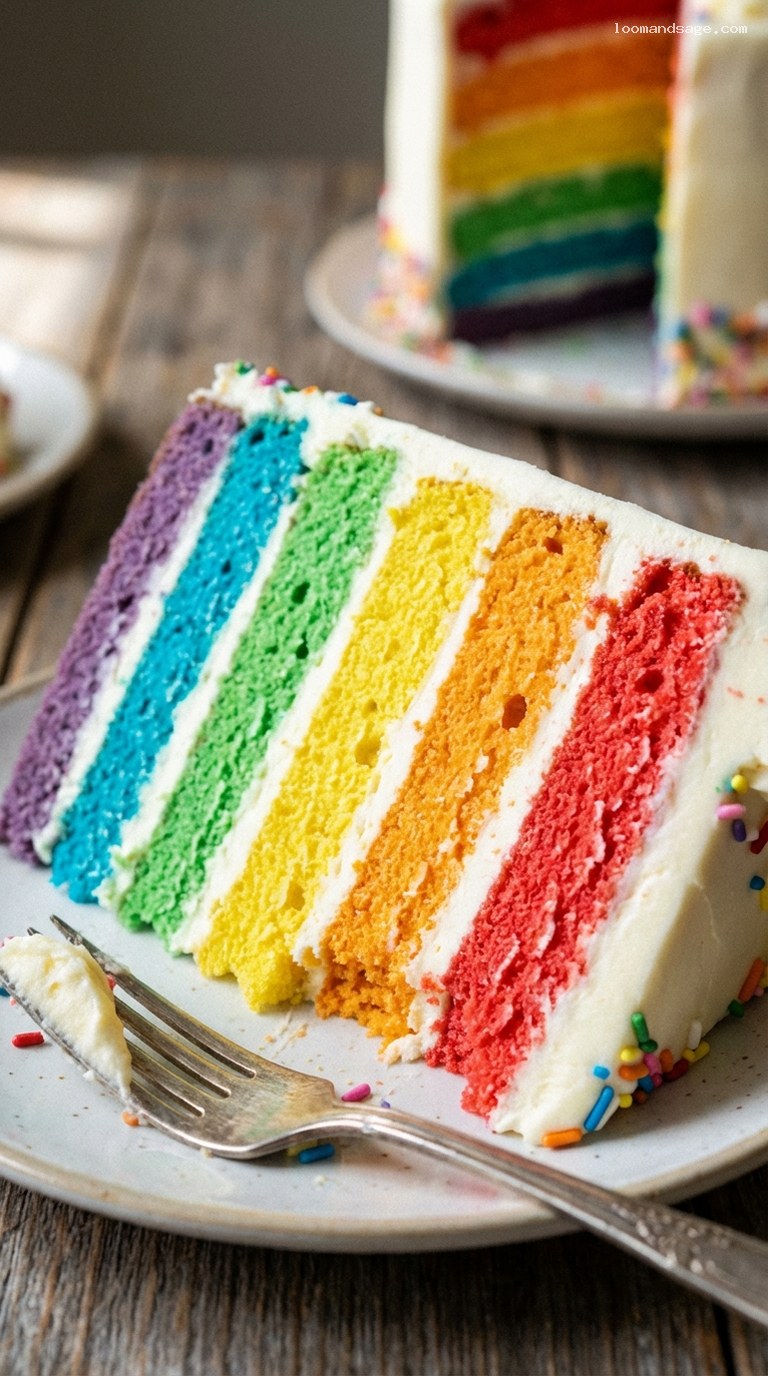
- Show-stopping, tall rainbow layers that look incredible in every slice.
- Soft, moist vanilla cake with classic, fluffy vanilla buttercream.
- Surprisingly doable at home with simple tools and clear, structured steps.
- Perfect for birthdays, graduations, and any celebration that needs a little magic.
Grocery List
- Produce: None required.
- Dairy: Unsalted butter (about 7 sticks / 790 g), whole milk, heavy cream (or extra milk), 8 large eggs.
- Pantry: All-purpose flour, granulated sugar, powdered sugar, baking powder, fine salt, pure vanilla extract, gel food coloring (red, orange, yellow, green, blue, purple), rainbow sprinkles (optional), nonstick baking spray or extra butter and flour for pans, parchment paper.
Full Ingredients
For the Rainbow Vanilla Cake Layers
- 5 cups (600 g) all-purpose flour, spooned and leveled
- 5 tsp baking powder
- 1 tsp fine sea salt
- 2 cups (4 sticks / 454 g) unsalted butter, softened to room temperature
- 4 cups (800 g) granulated sugar
- 8 large eggs, at room temperature
- 2 tbsp pure vanilla extract
- 2 1/2 cups (600 ml) whole milk, at room temperature
- Gel food coloring in red, orange, yellow, green, blue, and purple (about 1/4–1/2 tsp of each, depending on brand)
For the Vanilla Buttercream Frosting
- 2 1/2 cups (5 sticks / 565 g) unsalted butter, softened to room temperature
- 10 cups (1.2 kg) powdered sugar, sifted if lumpy
- 1/2–3/4 cup (120–180 ml) heavy cream or whole milk, at room temperature
- 1–2 tsp pure vanilla extract, to taste
- 1/4 tsp fine sea salt, or to taste
For Decorating (Optional)
- 1/2–1 cup rainbow sprinkles, for the sides and/or top
- Extra gel food coloring if you want colored frosting accents or piping
Step-by-Step Instructions
Step 1: Prepare your pans and preheat the oven
Preheat your oven to 350°F (175°C) with the rack in the center. Grease six 8-inch (20 cm) round cake pans with nonstick spray or butter, then line the bottoms with parchment rounds and lightly grease the parchment as well. This helps the thin, delicate layers release cleanly.
If you do not have six pans, prepare as many as you have (2 or 3). You will bake the layers in batches, reusing the pans once they cool slightly and are re-greased and re-lined. Set the prepared pans aside while you make the batter.
Step 2: Make the vanilla cake batter
In a medium bowl, whisk together the flour, baking powder, and salt until well combined. Set aside.
In a large mixing bowl (or the bowl of a stand mixer fitted with the paddle attachment), beat the softened butter on medium speed for about 1 minute until creamy. Add the granulated sugar and beat on medium-high speed for 3–4 minutes, scraping down the bowl as needed, until the mixture is very light and fluffy.
Beat in the eggs one at a time, mixing well after each addition, then add the vanilla extract. The batter may look slightly curdled at this stage; it will smooth out when you add the dry ingredients.
With the mixer on low speed, add the dry ingredients in three additions, alternating with the milk in two additions (start and end with the dry). Mix just until combined after each addition. When everything is added, stop the mixer and gently fold the batter with a spatula to make sure there are no pockets of unmixed flour. Do not overmix.
Step 3: Divide and color the batter
Weigh or measure your finished batter so you can divide it evenly. You should have approximately 12 cups of batter; divide into 6 equal portions of about 2 cups each. Transfer each portion into its own bowl.
Color each bowl with a different gel food color: red, orange, yellow, green, blue, and purple. Start with a small amount (about 1/8 teaspoon), stir thoroughly, then add more drop by drop until you reach a vivid but not overly dark shade. Remember, colors will lighten slightly as the cake bakes. Using gel rather than liquid coloring keeps the batter the right consistency and gives brighter colors.
Step 4: Bake the rainbow layers
Pour each colored batter into a prepared pan, smoothing the tops with an offset spatula so they are even and reach all the way to the edges. If your oven and pans do not allow you to bake all six at once, bake 2–3 layers at a time, keeping the remaining colored batter covered at room temperature until it is their turn.
Bake at 350°F (175°C) for about 18 minutes, or until the tops spring back lightly when touched and a toothpick inserted in the center comes out clean or with a few moist crumbs. Rotate pans halfway through baking if your oven has hot spots.
Let the cakes cool in their pans on a wire rack for 10 minutes, then run a thin knife around the edges and carefully turn them out onto the racks. Peel off the parchment and cool completely until no warmth remains, at least 45–60 minutes. Repeat with any remaining batter and pans.
Step 5: Make the vanilla buttercream frosting
Once the cake layers are completely cool, make the buttercream. In a large bowl or stand mixer fitted with the paddle attachment, beat the softened butter on medium speed for 2–3 minutes, until very creamy and slightly lightened in color.
With the mixer on low speed, gradually add the powdered sugar, about 1 cup at a time, mixing until mostly incorporated before adding more. Scrape down the bowl as needed. The mixture will be very thick.
Add 1/2 cup (120 ml) of the cream or milk, the vanilla extract, and the salt. Beat on medium-high speed for 3–4 minutes, until the frosting is fluffy, smooth, and light. If it is too thick, add more cream 1 tablespoon at a time; if it is too soft, add a bit more powdered sugar. You want a medium consistency that spreads easily but holds its shape on the cake.
Step 6: Level and stack the layers
If any cake layers are domed, use a long serrated knife to carefully trim off the rounded tops so they are flat. This helps the tall cake stack straight and stable.
Decide your color order. A classic order from bottom to top is purple, blue, green, yellow, orange, then red. Place a small dollop of buttercream in the center of your cake board or serving plate and set the purple layer on top, cut side down to minimize crumbs.
Spread about 1/2–2/3 cup of buttercream evenly over the first layer, pushing it just to the edges. Top with the blue layer, again cut side down, aligning it so the edges are even. Repeat with green, yellow, orange, and finally the red layer on top. As you stack, check from all angles that the cake is straight; gently nudge layers into place as needed.
Step 7: Crumb coat, chill, and decorate
Once all layers are stacked, spread a thin layer of buttercream over the top and around the sides of the cake, using an offset spatula to smooth it and trap any loose crumbs. This is your crumb coat. Refrigerate the cake for 20–30 minutes until the frosting is firm to the touch.
After chilling, apply a thicker, final coat of buttercream over the top and sides. Use a bench scraper or long offset spatula to smooth the frosting for a clean, white finish, or swirl it for a softer, rustic look.
If using rainbow sprinkles, gently press them around the bottom edge of the cake to form a sprinkle border, and scatter some on top. For an extra polished look, you can pipe a decorative border around the top edge with any remaining frosting. Chill the finished cake for at least 20 minutes before slicing to help it hold its shape when cut.
Pro Tips
- Use gel food coloring, not liquid, for bright, vivid layers without watering down the batter.
- Bring butter, eggs, and milk to room temperature before you start; this helps the batter emulsify properly and gives a finer, more tender crumb.
- For perfectly even layers, weigh the batter into each pan with a kitchen scale instead of eyeballing.
- If your cakes dome a lot, bake with reusable cake strips or lower the oven temperature slightly to 340°F (170°C) and bake a few minutes longer.
- Chill the assembled but unfrosted cake for 20–30 minutes before applying the final coat; a firm cake is much easier to frost smoothly.
Variations
- Pastel Rainbow Cake: Use just a tiny amount of gel coloring for each layer so the colors are soft and pastel. Tint the buttercream very lightly to match for a dreamy, cloudlike look.
- Sprinkle Funfetti Rainbow: Gently fold 1/2 cup rainbow sprinkles into the finished, uncolored batter before dividing and tinting. You will have rainbow layers with confetti flecks inside plus bright colors.
- Rainbow Ombre Layers: Choose one color (such as pink or blue) and tint each layer slightly darker than the last for a six-shade ombre effect instead of multiple hues.
Storage & Make-Ahead
The fully frosted cake can be kept, covered, at cool room temperature for up to 8 hours before serving. For longer storage, refrigerate it, well covered, for up to 3 days. Let chilled cake sit at room temperature for 45–60 minutes before slicing so the buttercream softens.
To make ahead, bake the cake layers up to 2 months in advance. Once completely cool, wrap each layer tightly in plastic wrap, then in foil, and freeze. Thaw in the refrigerator overnight, still wrapped, before assembling. The buttercream can be made up to 3 days ahead and stored in an airtight container in the refrigerator; bring it to room temperature and re-whip briefly before frosting the cake.
Leftover slices can be wrapped and refrigerated for 3–4 days, or frozen for up to 2 months. For best texture, let them come to room temperature before eating.
Nutrition (per serving)
Approximate values for 1 slice (1/16 of the cake): about 650–700 calories, 30–36 g fat, 90–100 g carbohydrates, 1–1.5 g fiber, 65–75 g sugar, and 5–6 g protein. These numbers will vary based on exact brands used and how thickly you frost the cake.
