
Quick Recipe Version (TL;DR)
Quick Ingredients
- 1 ½ cups (360 ml) warm water, 105–110°F / 40–43°C
- ½ cup (120 ml) warm whole milk, 105–110°F / 40–43°C
- 2 ¼ tsp (7 g) active dry or instant yeast
- ⅓ cup (65 g) granulated sugar
- ¼ cup (55 g) unsalted butter, melted and cooled slightly (plus more for brushing)
- 1 large egg, room temperature
- 2 tsp fine sea salt
- 5 ½–6 cups (715–780 g) bread flour or unbleached all-purpose flour
- 1–2 tbsp neutral oil or softened butter for greasing
- 1 egg + 1 tbsp milk for optional egg wash
Do This
- 1. Combine warm water, warm milk, sugar, and yeast. Let sit 5–10 minutes until foamy.
- 2. Whisk in melted butter, egg, and salt. Stir in 4 cups flour, then add remaining flour until a soft, slightly tacky dough forms.
- 3. Knead 8–10 minutes (by hand or mixer) until smooth, elastic, and only lightly sticky.
- 4. Place in a greased bowl, cover, and let rise in a warm spot until doubled, 60–90 minutes.
- 5. Gently deflate, divide in two, shape into tight logs, and place in greased 9×5-inch loaf pans.
- 6. Cover and let rise until the dough crowns 1–1 ½ inches above the pan rims, 35–50 minutes. Brush with egg wash if using.
- 7. Bake at 350°F / 175°C for 25–30 minutes until deep golden and 195–200°F / 90–93°C inside. Brush with butter, cool completely, then slice.
Why You’ll Love This Recipe
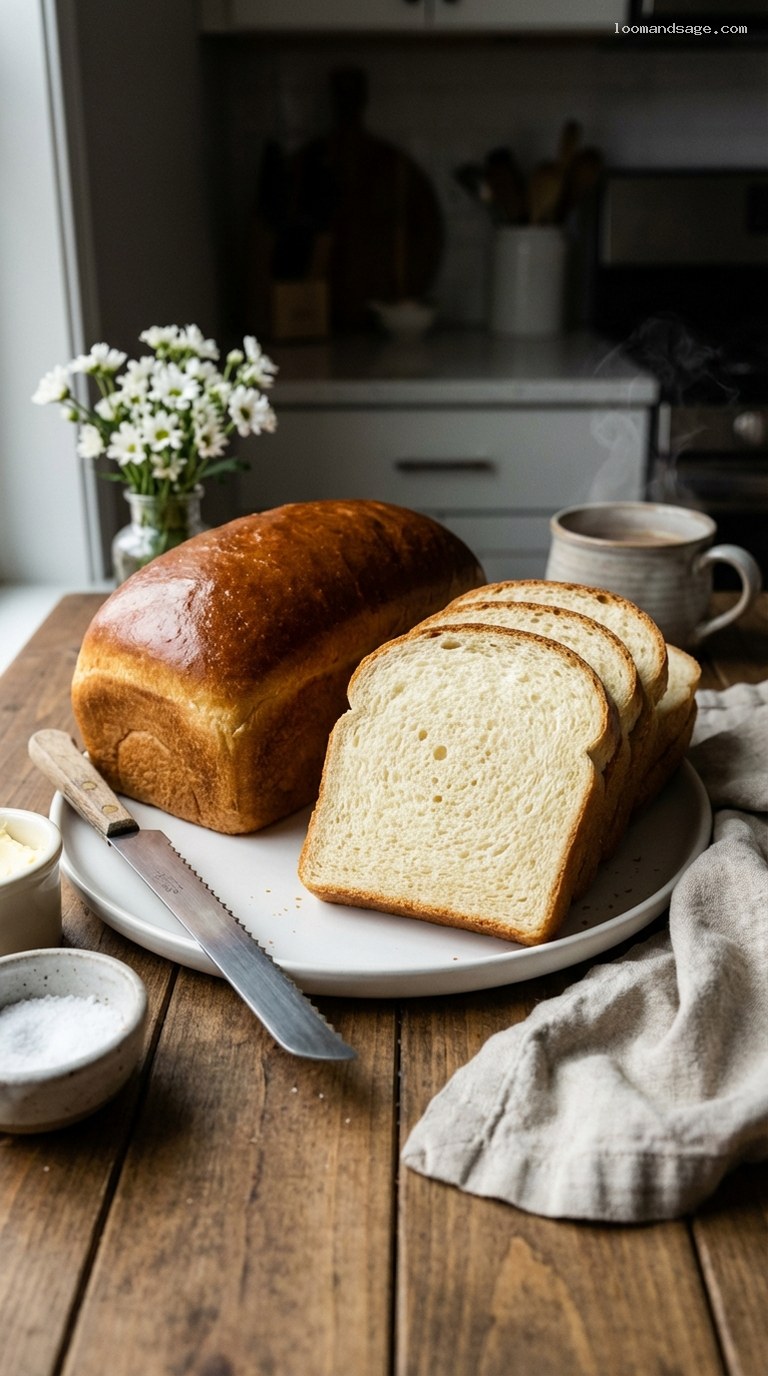
- Soft, pillowy crumb and a tender golden crust that slices beautifully for sandwiches and toast.
- Classic Amish-style flavor: lightly sweet, buttery, and comforting without being overly rich.
- Simple, pantry-friendly ingredients and straightforward techniques for reliable results.
- Versatile dough that can also be shaped into dinner rolls, buns, or cinnamon swirl bread.
Grocery List
- Produce: None needed.
- Dairy: Whole milk, unsalted butter, 2 large eggs.
- Pantry: Bread flour or unbleached all-purpose flour, granulated sugar, active dry or instant yeast, fine sea salt, neutral oil (or extra butter) for greasing.
Full Ingredients
For the Amish White Sandwich Bread Dough
- 1 ½ cups (360 ml) warm water, 105–110°F / 40–43°C
- ½ cup (120 ml) warm whole milk, 105–110°F / 40–43°C
- 2 ¼ tsp (7 g) active dry or instant yeast (one standard packet)
- ⅓ cup (65 g) granulated sugar
- ¼ cup (55 g) unsalted butter, melted and cooled until just warm
- 1 large egg, at room temperature
- 2 tsp fine sea salt (or 1 ¾ tsp table salt)
- 5 ½–6 cups (715–780 g) bread flour or unbleached all-purpose flour, plus extra for dusting
For Shaping and Baking
- 1–2 tbsp neutral oil or softened butter, for greasing bowl and pans
- 2 standard 9×5-inch (23×13 cm) loaf pans
For the Finish (Optional but Recommended)
- 1 large egg
- 1 tbsp (15 ml) milk (for egg wash)
- 1–2 tbsp (14–28 g) unsalted butter, melted, for brushing hot loaves

Step-by-Step Instructions
Step 1: Warm the liquids and proof the yeast
In a large mixing bowl (or the bowl of a stand mixer), combine the warm water, warm milk, and granulated sugar. Stir to dissolve the sugar. Sprinkle the yeast over the surface. If using active dry yeast, let the mixture sit for 5–10 minutes until it looks foamy and creamy on top. If using instant yeast, you can proceed almost immediately, though a 5-minute rest helps confirm the yeast is active.
If the mixture does not foam after 10 minutes, the yeast may be inactive or the liquids too hot or too cool; start again with fresh yeast and accurately warmed liquids (between 105–110°F / 40–43°C).
Step 2: Mix in the enrichments and initial flour
Whisk the melted (but not hot) butter, room-temperature egg, and salt into the foamy yeast mixture until well combined. Add 4 cups (about 520 g) of the flour and stir with a sturdy spoon or the paddle attachment on low speed until a thick batter forms. It will be quite sticky at this stage.
Begin adding the remaining flour, ½ cup (about 65 g) at a time, stirring after each addition. When the dough becomes too thick to stir easily, switch to the dough hook (if using a mixer) or turn it out onto a lightly floured work surface to continue working in the flour by hand. You are aiming for a soft, slightly tacky dough that just pulls away from the sides of the bowl and clings lightly to your fingers without coating them heavily.
Step 3: Knead until soft, smooth, and elastic
Knead the dough for 8–10 minutes by hand or 6–8 minutes on medium-low speed with a dough hook. If the dough is very sticky, dust sparingly with more flour, a tablespoon at a time, only as needed to keep it from sticking badly to your hands or the bowl. Avoid adding more flour than necessary; a slightly soft dough makes a much more tender loaf.
The dough is ready when it feels smooth, supple, and elastic. It should stretch without tearing easily when you gently pull a small piece (this is similar to the “windowpane” test). Shape the dough into a smooth ball by tucking the edges underneath.
Step 4: First rise (bulk fermentation)
Lightly grease a large, clean bowl with neutral oil or softened butter. Place the dough ball in the bowl, turn it once to lightly coat all sides with oil, and cover tightly with plastic wrap or a clean, damp kitchen towel. Let the dough rise in a warm, draft-free spot until doubled in size, 60–90 minutes depending on room temperature.
To check that it has risen enough, gently press two fingertips about ½ inch into the dough. If the indentation remains and does not spring back quickly, the dough is properly risen. If it springs back immediately, give it more time.
Step 5: Shape the loaves
Grease two 9×5-inch (23×13 cm) loaf pans thoroughly with oil or softened butter. Gently turn the risen dough out onto a lightly floured surface. Avoid punching it down aggressively; instead, gently press it into a rough rectangle to release large air pockets.
Use a bench scraper or sharp knife to divide the dough evenly into two pieces (you can weigh them for precision if you like). Working with one piece at a time, pat it into a rectangle about 8×12 inches (20×30 cm), with a short side facing you. Tightly roll the dough up from the short end, like a jelly roll, pressing out any large air bubbles as you go. Pinch the seam closed and tuck the ends under to form a neat, snug log.
Place the shaped log seam-side down into one of the prepared pans. Repeat with the second piece of dough and pan, making sure both loaves look similar in size and shape for even baking.
Step 6: Second rise (proofing in the pans)
Cover the pans loosely with lightly greased plastic wrap or a clean kitchen towel. Let the loaves rise in a warm place until the dough crowns about 1–1 ½ inches (2.5–4 cm) above the rim of each pan. This usually takes 35–50 minutes, depending on room temperature and dough warmth.
Towards the end of this rise, preheat your oven to 350°F (175°C) with a rack in the middle or slightly lower-middle position. If you want a glossy, deep golden crust, whisk 1 egg with 1 tablespoon milk to make an egg wash. When the loaves are nearly at the desired height, gently brush the tops with a thin, even layer of egg wash, taking care not to deflate the dough.
Step 7: Bake to a golden, tender perfection
Place the risen loaves in the preheated 350°F (175°C) oven. Bake for 25–30 minutes, rotating the pans front-to-back halfway through for even browning. The bread is done when the tops are a rich, deep golden brown and the loaves sound hollow when tapped on the bottom. For the most reliable result, use an instant-read thermometer inserted into the center of a loaf; it should read 195–200°F (90–93°C).
As soon as the loaves come out of the oven, brush the tops generously with melted butter. This softens the crust slightly and gives that classic Amish-style sheen and flavor. Let the loaves cool in the pans for about 10 minutes, then carefully turn them out onto a wire rack. Cool completely, at least 1–2 hours, before slicing to allow the crumb to set and stay pillowy rather than gummy.
Pro Tips
- Watch the dough, not the clock. Rising times are guidelines; temperature and yeast activity vary. Use the “doubled in size” and “crown above the pan” cues more than the minutes.
- Keep the dough soft. Add flour gradually and stop as soon as the dough is manageable. A slightly tacky dough bakes into a much softer, more tender loaf.
- Use the right pan size. Standard 9×5-inch loaf pans give tall, sandwich-friendly slices. Smaller pans may cause overflow; larger ones will yield shorter loaves.
- Check internal temperature. A quick thermometer check (195–200°F / 90–93°C) prevents underbaked centers and ensures a fluffy, fully cooked crumb.
- Cool completely before slicing. It is tempting to cut while warm, but waiting helps the crumb set so you get neat, bakery-style slices.
Variations
- Half-whole-wheat Amish bread: Replace 2 cups (about 260 g) of the white flour with whole wheat flour. You may need an extra 1–2 tablespoons water to keep the dough soft. The result is slightly heartier but still tender and kid-friendly.
- Cinnamon-sugar swirl: After the first rise, roll each dough half into a rectangle. Brush lightly with melted butter and sprinkle with a mixture of ⅓ cup (65 g) sugar and 1 ½ tsp ground cinnamon divided between the loaves. Roll up tightly, pinch the seams, and proof and bake as directed.
- Soft dinner rolls: Instead of shaping into loaves, divide the dough into 18–24 pieces, shape into balls, and place in a greased 9×13-inch pan. Proof until puffy and bake at 350°F (175°C) for 18–22 minutes.
Storage & Make-Ahead
Once completely cool, store the Amish white sandwich bread at room temperature in an airtight bag or bread box for 3–4 days. Avoid refrigerating, as it tends to dry out the crumb more quickly. For longer storage, wrap the loaves (whole or sliced) tightly in plastic wrap, then in foil, and freeze for up to 3 months. Thaw at room temperature in the wrapping to prevent condensation on the crust.
To refresh slightly stale slices, toast them lightly or warm in a 300°F (150°C) oven for 5–8 minutes. You can also make the dough ahead: complete the first rise, shape into loaves, then cover tightly and refrigerate overnight. The next day, let the chilled loaves sit at room temperature until fully puffed above the pan rims (this may take 60–90 minutes) before baking as directed.
Nutrition (per serving)
Approximate values per slice (1 of 24 slices, without extra butter on top): about 160 calories, 5 g protein, 28 g carbohydrates, 3 g fat, 1.5 g saturated fat, 1 g fiber, 5 g sugar, and 260 mg sodium. Actual values will vary based on exact ingredients, slice thickness, and any added toppings.
