
Quick Recipe Version (TL;DR)
Quick Ingredients
- 2 lb small fresh okra pods, whole
- 4 pint jars with lids and rings
- 1 lemon, scrubbed and thinly sliced
- 8 cloves garlic, peeled
- 8 fresh dill sprigs (or 2 tsp dill seed)
- 2 tsp mustard seeds
- 2 tsp black peppercorns
- 1–2 tsp red pepper flakes or 4 small dried chiles (optional)
- 3 cups distilled white vinegar (5% acidity)
- 3 cups water
- 3 Tbsp pickling or kosher salt (non-iodized)
- 1 Tbsp sugar (optional, for balance)
Do This
- 1. Wash jars, lids, and okra. Trim stems so caps remain intact and pods are uncut.
- 2. Add to each hot, clean pint jar: 2 garlic cloves, 2 lemon slices, 2 dill sprigs, 1/2 tsp mustard seeds, 1/2 tsp peppercorns, and pepper flakes or 1 dried chile (if using).
- 3. Pack okra snugly into jars, tips pointing up, leaving about 1/2 inch headspace.
- 4. In a saucepan, bring vinegar, water, salt, and sugar to a full simmer; stir to dissolve, then turn off heat.
- 5. Carefully ladle hot brine into jars, covering okra and lemon, leaving 1/2 inch headspace. Tap jars to release air bubbles and top off with more brine if needed.
- 6. For refrigerator pickles: seal jars, cool, then chill at least 3 days. For shelf-stable: water-bath can pints for 10 minutes, cool, and store in a cool, dark place.
Why You’ll Love This Recipe
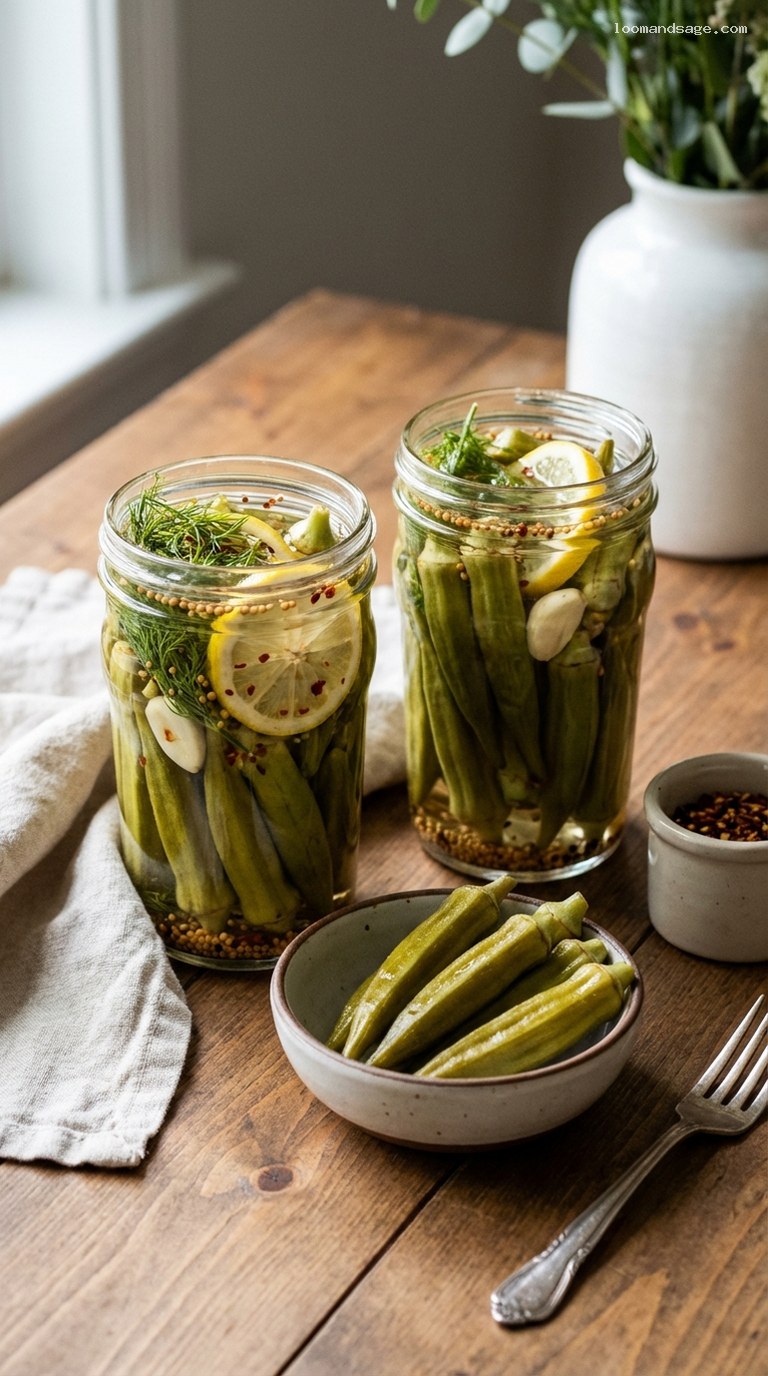
- Classic Southern crunch with a bright twist from fresh lemon and garlic.
- No slimy okra here: the brine and quick prep keep the pods crisp and snappy.
- Flexible method: make easy refrigerator pickles or process for pantry storage.
- Perfect for snacking, charcuterie boards, Bloody Mary garnishes, or Southern-style sides.
Grocery List
- Produce: 2 lb small okra pods, 1 lemon, 1 small head of garlic, fresh dill (or use dried dill seed)
- Dairy: None
- Pantry: Distilled white vinegar (5% acidity), pickling or kosher salt (non-iodized), granulated sugar, mustard seeds, whole black peppercorns, red pepper flakes or dried chiles
Full Ingredients
Okra & Aromatics
- 2 lb small, fresh okra pods (3–4 inches long, firm, and unblemished)
- 1 medium lemon, scrubbed well and sliced into 1/8-inch rounds (seeds removed)
- 8 cloves garlic, peeled and lightly smashed (2 per jar)
- 8 fresh dill sprigs (about 3 inches long each)
- or 2 tsp dill seed total (1/2 tsp per jar) if fresh dill is unavailable
- 2 tsp mustard seeds (1/2 tsp per jar)
- 2 tsp whole black peppercorns (1/2 tsp per jar)
- 1–2 tsp red pepper flakes, to taste
- or 4 small dried red chiles, 1 per jar (optional, for heat)
Bright Lemon-Garlic Brine
- 3 cups distilled white vinegar (5% acidity)
- 3 cups water
- 3 Tbsp pickling salt or kosher salt (non-iodized, finely granulated)
- 1 Tbsp granulated sugar (optional, but recommended for flavor balance)
Equipment
- 4 clean pint jars with 2-piece lids (lids and rings)
- Large pot or canning kettle (for water-bath canning, if using)
- Jar lifter or tongs (heat-safe)
- Small saucepan for the brine
- Ladle and canning funnel (helpful but optional)
- Clean kitchen towel
Step-by-Step Instructions
Step 1: Prep the jars and okra
Wash the jars, lids, and rings in hot, soapy water. Rinse well. If you plan to water-bath can, keep the jars hot by placing them in a pot of barely simmering water until you are ready to fill them. If making refrigerator pickles only, you can simply keep the jars warm by filling them with very hot tap water while you prepare the brine, then draining before packing.
Rinse the okra under cool running water and gently pat dry. Trim just the very tip of the stem ends so they look neat, but be careful not to cut into the pod itself; cutting into the pod can release mucilage and make the texture less crisp. Leave the pointy tips of the pods intact.
Step 2: Layer lemon, garlic, and spices into jars
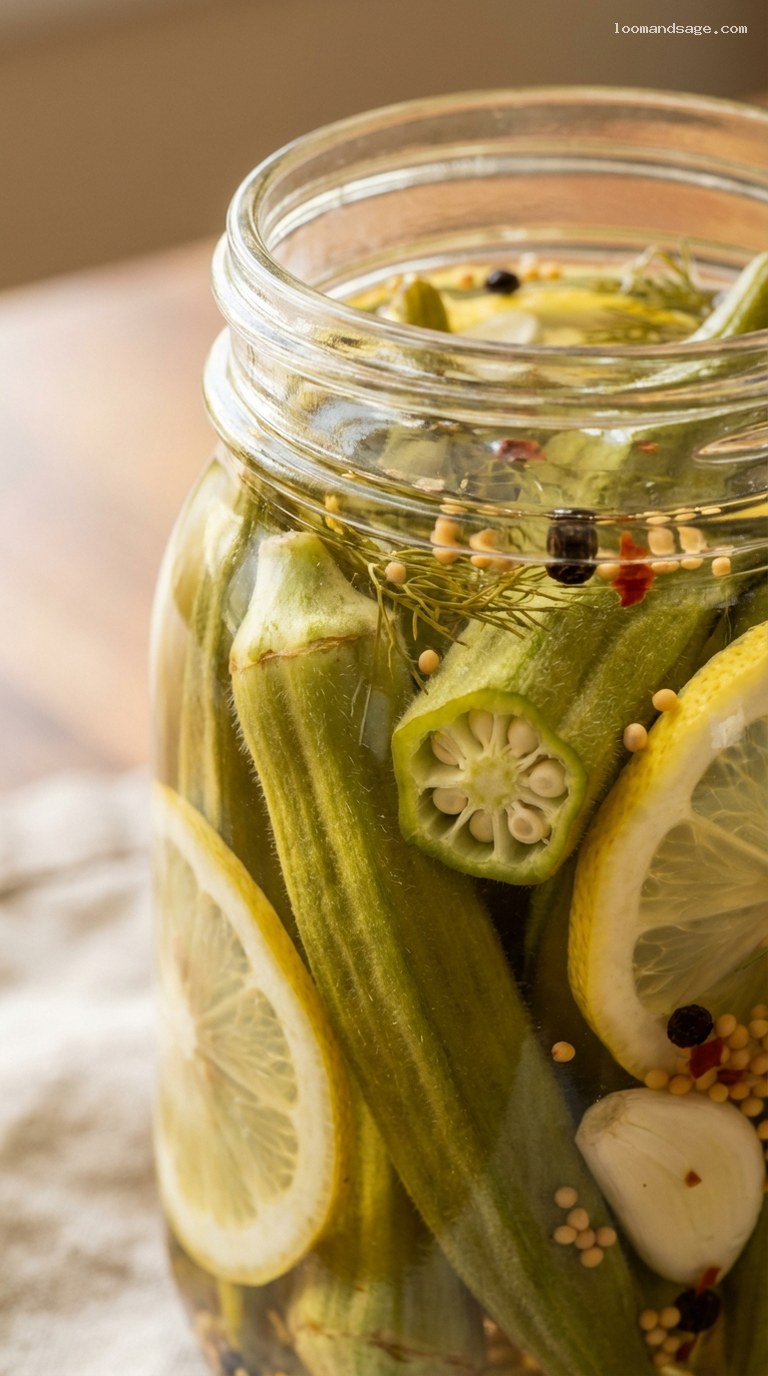
Place the warm, empty jars on a folded kitchen towel. To each pint jar, add 2 garlic cloves, 2 thin lemon slices (fold in half if needed to fit), and 2 fresh dill sprigs (or 1/2 teaspoon dill seed). Add 1/2 teaspoon mustard seeds and 1/2 teaspoon black peppercorns to each jar. If you like heat, add 1/4 to 1/2 teaspoon red pepper flakes or 1 small dried chile to each jar. These aromatics will flavor the brine and look beautiful pressed up against the glass.
Step 3: Pack the okra tightly
Stand the okra pods upright in each jar, tips pointing up. Pack them in as snugly as you can without crushing them; tightly packed okra will stay more submerged and help prevent floating. Leave about 1/2 inch of headspace between the tops of the pods and the rim of the jar. Tuck an extra lemon slice or dill sprig along the sides of the jar if there is room, making sure the pods can still be fully covered by brine.
Step 4: Simmer the lemon-garlic brine
In a medium saucepan, combine the vinegar, water, salt, and sugar (if using). Bring to a gentle boil over medium-high heat, stirring until the salt and sugar are completely dissolved. Once the brine reaches a full simmer and everything is dissolved, turn the heat down to low to keep it hot while you fill the jars. Hot brine helps draw the flavors into the okra and improves the texture.
Step 5: Fill jars with hot brine and remove air bubbles
Working carefully, ladle the hot brine into each jar, pouring slowly and using a canning funnel if you have one. Cover the okra and aromatics completely, leaving about 1/2 inch of headspace at the top of each jar. Use a clean butter knife or a non-metallic spatula to gently slide down the inside walls of the jar to release any trapped air bubbles. Add a bit more brine if needed to maintain that 1/2 inch headspace. Wipe the rims of the jars with a clean, damp cloth to remove any brine or bits of spice.
Step 6: Seal for refrigerator pickles or process for shelf stability
Place the lids on the jars and screw on the rings just until fingertip-tight.
For refrigerator pickled okra (easiest method): Let the jars cool to room temperature on a towel, away from drafts, for about 1–2 hours. Once cooled, transfer to the refrigerator. The jars do not need to seal for this method; just make sure the lids are on snugly.
For water-bath canning (shelf-stable): Place the sealed jars upright in a large pot fitted with a rack, and cover with at least 1–2 inches of water. Bring to a rolling boil, then process pint jars for 10 minutes (adjusting time for altitude if needed according to reliable canning guidelines). Turn off the heat, let the jars rest in the hot water for 5 minutes, then remove and cool on a towel, undisturbed, for 12–24 hours. Check that the lids have sealed (the centers should be concave and not flex when pressed).
Step 7: Let the flavors develop before snacking
Whether refrigerated or canned, the pickled okra needs time to absorb the lemon, garlic, and dill flavors. For best taste and crunch, wait at least 3 days before opening a jar, and 5–7 days is even better. Once opened, always use a clean fork to remove okra from the jar and keep the pods submerged in brine to maintain freshness and texture. Serve the pickled okra well chilled for maximum crunch and tang.
Pro Tips
- Choose small, firm okra: Look for pods about 3–4 inches long, bright green, and free of blemishes. Larger pods can be tough and fibrous.
- Do not cut into the pods: Keeping the pods whole prevents the interior from becoming slimy and helps them stay crisp in the brine.
- Pack jars tightly: Snug packing keeps the okra from floating and ensures more even pickling. Just avoid squashing them.
- Vinegar strength matters: Use 5% acidity distilled white vinegar for safe, well-balanced pickles and bright, clear brine.
- Let them cure: The flavor dramatically improves after a few days. If your first taste seems mild, give the jar another day or two.
Variations
- Extra-Spicy Southern Okra: Double the red pepper flakes or use 2 dried chiles per jar. You can also add a slice or two of fresh jalapeño or serrano to each jar for fresh heat.
- Smoky Pickled Okra: Add 1/4 teaspoon smoked paprika and 1–2 lightly crushed coriander seeds per jar. The smoky note pairs beautifully with charcuterie and grilled meats.
- Bread-and-Butter Style Okra: Increase sugar to 1/4 cup in the brine, add 1/4 teaspoon celery seed per jar, and use a mix of white and apple cider vinegar for a sweet-tangy flavor reminiscent of classic bread-and-butter pickles.
Storage & Make-Ahead
For refrigerator pickles, let the jars cool completely, then refrigerate. They will taste best after at least 3 days and keep well for 4–6 weeks. Always keep the okra submerged in brine and use a clean utensil when removing pieces.
For water-bath canned pickled okra, store the sealed jars in a cool, dark place (such as a pantry or cupboard) for up to 1 year. Once opened, refrigerate and enjoy within 3–4 weeks. If you ever notice off smells, mold, cloudiness that develops suddenly, or gas bubbles that do not settle, discard the contents for safety.
This recipe is perfect for make-ahead entertaining: prepare the jars a week before a gathering, so the flavors fully develop and your pickled okra is ready to serve straight from the fridge.
Nutrition (per serving)
Approximate values per serving (about 4 pods plus a small amount of brine): 15 calories; 0 g fat; 3 g carbohydrates; 1 g fiber; 1 g protein; 1–2 g sugar; approximately 450 mg sodium (varies with exact brine uptake). These values are estimates and will vary based on pod size and how much brine is consumed.
